Advertisement
Model No. 831.29633.1
Serial No.
Serial Number
Decal
• Assembly
• Operation
• Maintenance
• Part List and Drawing
CAUTION
Read all precautions and instruc-
tions in this manual before using
this equipment. Save this manual
for future reference.
TREADMILL EXERCISER
Sears, Roebuck and Co., Hoffman Estates, IL 60179
User's Manual
Advertisement
Table of Contents

Related Manuals for Pro-Form 400E CrossWalk


Summary of Contents for Pro-Form 400E CrossWalk
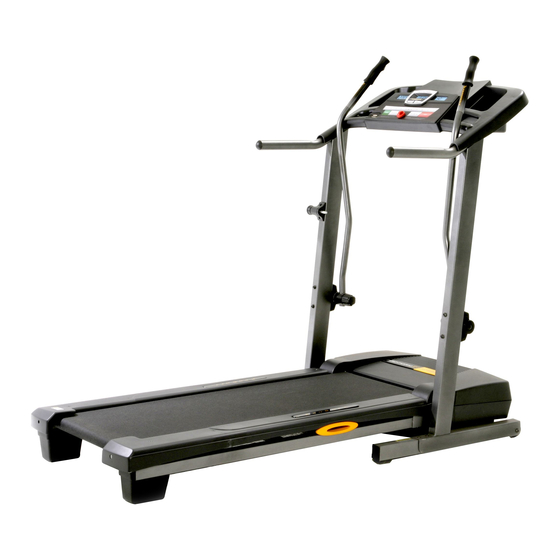
- Page 1 Model No. 831.29633.1 TREADMILL EXERCISER Serial No. User’s Manual Serial Number Decal • Assembly • Operation • Maintenance • Part List and Drawing CAUTION Read all precautions and instruc- tions in this manual before using this equipment. Save this manual Sears, Roebuck and Co., Hoffman Estates, IL 60179 for future reference.
-
Page 2: Table Of Contents
TABLE OF CONTENTS IMPORTANT PRECAUTIONS ..............3 BEFORE YOU BEGIN . -
Page 3: Important Precautions
IMPORTANT PRECAUTIONS WARNING: To reduce the risk of burns, fire, electric shock, or injury to persons, read the following important precautions and information before operating the treadmill. 1. It is the responsibility of the owner to ensure 12. Failure to use a properly functioning surge that all users of this treadmill are adequately suppressor could result in damage to the con- informed of all warnings and precautions. - Page 4 21. When folding or moving the treadmill, make tenance and adjustment procedures de- sure that the storage latch is fully closed. scribed in this manual. Never remove the motor hood unless instructed to do so by an 22. Inspect and properly tighten all parts of the authorized service representative.
-
Page 5: Before You Begin
And when you’re not exer- number of the treadmill is 831.29633.1. The serial num- cising, the CROSSWALK 400e treadmill can be folded ber can be found on a decal attached to the treadmill up, requiring less than half the floor space of other (see the front cover of this manual for the location). -
Page 6: Assembly
ASSEMBLY Assembly requires two persons. Set the treadmill in a cleared area and remove all packing materials; do not dispose of the packing materials until assembly is completed. Note: The underside of the treadmill walking belt is coated with high-performance lubricant. During shipping, a small amount of lubricant may be transferred to the top of the walking belt or the shipping carton. - Page 7 2. Attach a Wheel (66) to the base of the Uprights (69) with a Wheel Bolt (64) and a Nut (13) as shown. Do not overtighten the Bolt; the Wheel should turn freely. With the help of a second person, carefully tip the tread- mill onto its other side.
- Page 8 5. Touch the Right Handrail (72) to discharge any static. Slide the sleeve off the connector on the Upright Wire (42) as shown in the inset drawing. Next, press the end of the Upright Wire into the socket in the bottom of the Console Base (47).
- Page 9 8. Attach the Left Upper Body Arm (24) to the left Upright (69) with two 3 1/2” Bolts (45), two Washers (38), and two Star Washers (106) as shown. Make sure that the Left Upper Body Arm is on the indicated side of the Console Base (47).
-
Page 10: Operation And Adjustment
OPERATION AND ADJUSTMENT THE PRE-LUBRICATED WALKING BELT an equipment-grounding conductor and a grounding plug. Plug the power cord into a surge suppressor, and plug the surge suppressor into an appropriate Your treadmill features a walking belt coated with high- performance lubricant. IMPORTANT: Never apply sil- outlet that is properly installed and grounded in icone spray or other substances to the walking accordance with all local codes and ordinances. - Page 11 CONSOLE DIAGRAM Pulse Sensor Clip FEATURES OF THE CONSOLE HOW TO TURN ON THE POWER The treadmill console offers a selection of features Plug in the power cord (see designed to make your workouts more effective. page 10). Next, locate the Reset During each workout, you can change the speed and reset/off circuit breaker on...
- Page 12 CONSOLE OPERATION Change the incline of the treadmill as desired. To change the incline of the treadmill, press the Insert the key into the console. Incline increase or decrease button until the de- sired incline level is reached. See HOW TO TURN ON THE POWER on page Follow your progress with the three displays.
- Page 13 The right display— cure place. Note: If the displays remain lit after The right display will the key is removed, the console is in the “demo” mode. See THE INFORMATION show the speed of the MODE/DEMO MODE on this page and turn off walking belt.
- Page 14 HOW TO USE THE UPPER BODY ARMS As you walk on the treadmill, you can hold the handrails or use the upper body arms. To exercise your arms, shoulders, and back for a total body work- out, move the upper body arms forward and back as you walk on the treadmill.
-
Page 15: How To Fold And Move The Treadmill
HOW TO FOLD AND MOVE THE TREADMILL HOW TO FOLD THE TREADMILL FOR STORAGE Before folding the treadmill, adjust the incline to the lowest position. If this is not done, the treadmill may be- come permanently damaged. Next, unplug the power cord. CAUTION: You must be able to safely lift 45 pounds (20 kg) to raise, lower, or move the treadmill. - Page 16 HOW TO LOWER THE TREADMILL FOR USE 1. Hold the treadmill with your right hand as shown. Pull the latch knob to the left and hold it. Pivot the frame down until it is past the latch pin. Latch Knob Frame 2.
-
Page 17: Troubleshooting
TROUBLESHOOTING Most treadmill problems can be solved by following the simple steps below. Find the symptom that applies, and follow the steps listed. If further assistance is needed, call toll-free 1-800-4-MY-HOME ® (1-800-469-4663). PROBLEM: The power does not turn on SOLUTION: a. -
Page 18: Belt Is Off-Center/Slips When Walked On
PROBLEM: The walking belt slows when walked on SOLUTION: a. Use only a single-outlet surge suppressor that meets all of the specifications described on page 10. b. If the walking belt is overtightened, treadmill perfor- mance may decrease and the walking belt may be- come damaged. -
Page 19: Conditioning Guidelines
CONDITIONING GUIDELINES begin to use stored fat calories for energy. If your goal WARNING: is to burn fat, adjust the speed and incline of the tread- Before beginning this mill until your heart rate is near the lowest number in or any exercise program, consult your physi- your training zone. - Page 20 PART LIST—Model No. 831.29633.1 R0406A No. Qty. Description No. Qty. Description No. Qty. Description Hood Console Console Warning 3/4” Screw Rear Roller Plate Decal Motor Belt 3 1/2” Bolt Cable Tie Clamp Motor Tension Bolt Extension Leg Nut Front Roller 3/8”...
-
Page 22: Full 90 Day Warranty
FULL 90 DAY WARRANTY For 90 days from the date of purchase, if failure occurs due to defect in material or workmanship in this Sears Treadmill Exerciser, contact the nearest Sears Service Center throughout the United States and Sears will repair or replace the Treadmill Exerciser, free of charge. The drive motor is warranted for three (3) years from the date of purchase.