Advertisement
Quick Links
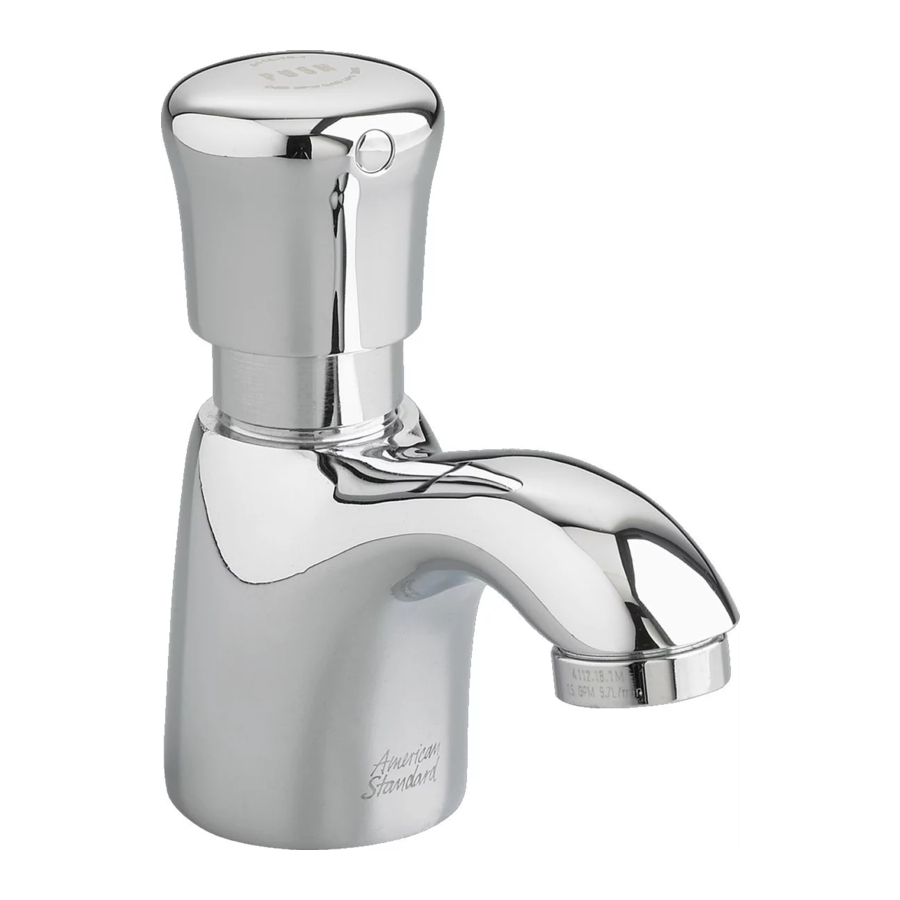
METERING
PILLAR TAP FAUCET
Thank you for selecting American-Standard...the
benchmark of fine quality for over 100 years.
To ensure that your installation proceeds smoothly--please
read these instructions carefully before you begin.
TOOLS REQUIRED
Tubing Cutter
1
FAUCET INSTALLATION (With optional 4" Deck Plate)
Turn off hot and cold water
CAUTION
supplies before beginning.
Install SEAL (1) into base of FAUCET (2). Assemble Optional DECK PLATE (3), and PUTTY PLATE (4) to FAUCET BODY (2) with
SCREW (5). Apply a bead of putty to underside of PUTTY PLATE (3). Fig. 1a.
Insert FLEX HOSE (6) and SPOUT SHANK (7) through center hole of mounting surface. Fig. 1a.
Assemble "C" WASHER (8) and LOCKNUT (9) onto threads of SPOUT SHANK (7) from underside of mounting surface. Fig. 1b.
Align FAUCET (2) and tighten LOCKNUT (9). If installing DECK PLATE (3) hand tighten DECK PLATE SPIN NUTS (10) to secure
FAUCET (2) to mounting surface. Fig. 1b.
Fig. 1a
SPOUT
RECESS
5
2
CONNECT WATER SUPPLY
Connect 3/8" compression coupling nut on fitting supply hose to
cold water supply or tempered water supply.
Note: Hose connection will not mate with Mechanical Mixing
Valve number 021943-0070A.
Channel Locks
2
1
3
4
APPLY PUTTY
MOUNTING
SURFACE
Installation
Instructions
1340.105
Adjustable Wrench
Plumbers' Putty or Caulking
Note: Faucet can be installed as single hole installation or
with (OPTIONAL) 4" or 8" DECK PLATES. 4" No. 605P400
& 8" No. 605P800 Deck Plates must be ordered separately.
Fig. 1b
3
10
Certified to comply with ANSI A112.18.1M
M 9 6 8 4 9 7 A
Phillips Screwdriver
7
8
9
6
3/8" COMPRESSION
COLD WATER
OR TEMPERED
WATER SUPPLY
Advertisement

Related Manuals for American Standard Metering 1340.105


Summary of Contents for American Standard Metering 1340.105
- Page 1 METERING PILLAR TAP FAUCET Thank you for selecting American-Standard...the benchmark of fine quality for over 100 years. To ensure that your installation proceeds smoothly--please read these instructions carefully before you begin. TOOLS REQUIRED Channel Locks Tubing Cutter FAUCET INSTALLATION (With optional 4" Deck Plate) Turn off hot and cold water CAUTION supplies before beginning.
- Page 2 TEST INSTALLED FITTING Turn on water supplies and check connections for leaks. Remove AERATOR (1) with KEY (2) supplied. Operate FAUCET by pressing down on HANDLE (3). Handle is set for approximately 8 second operating cycle. Replace AERATOR (1). TO ADJUST CYCLE TIME Remove HANDLE (1) by removing INDEX BUTTON (2) and SET SCREW (3) with a 2.5mm hex wrench.