Table of Contents
Advertisement
TABLE OF CONTENTS
VT-M171A / VT-M270A
HITACHI
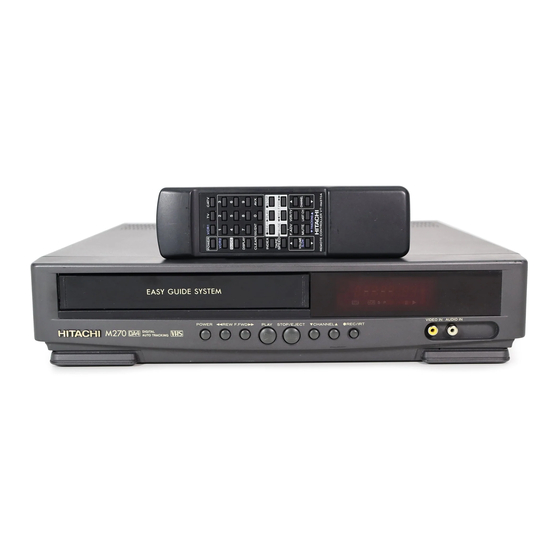
VHS Video Deck
VT-M171A / VT-M270A
Owner's Manual
Your Complete Guide
to Videocassette Viewing
and Recording
Using these quality features:
• Up to 8 delayed recording programs
• Auto tracking for improved picture in playback
• Cable-compatible frequency synthesizer quartz tuner
• Remote control for use with your VCR, TV and cable converter
• All basic playback functions on the VCR
• On-screen graphic programming guide
• Front Audio and Video Jacks
HITACHI HOME
ELECTRONICS
(AMERICA), INC.
3890 Steve Reynolds Blvd.,
Claire, Quebec
Norcross, GA 30093
Tel. 404-279-5600
E72118
P4708561 © Hitachi, Ltd. 1993
Printed in Malaysia
HITACHI SALES
CORPORATION
OF HAWAII, INC.
3219 Koapaka Street
Honolulu, HI 96819
Tel. 808-836-3621
HITACHI (HSC)
CANADA INC.
3300 Trans Canada Hwy.
Pointe
H9R1B1, CANADA
Tel. 514-697-9150
1
Advertisement
Table of Contents

Related Manuals for Hitachi VT-M171A


Summary of Contents for Hitachi VT-M171A
- Page 1 HITACHI HOME ELECTRONICS (AMERICA), INC. 3890 Steve Reynolds Blvd., Claire, Quebec Norcross, GA 30093 Tel. 404-279-5600 E72118 P4708561 © Hitachi, Ltd. 1993 Printed in Malaysia HITACHI SALES HITACHI (HSC) CORPORATION CANADA INC. OF HAWAII, INC. 3300 Trans Canada Hwy. 3219 Koapaka Street Honolulu, HI 96819 Tel.
-
Page 2: Table Of Contents
TABLE OF CONTENTS TABLE OF CONTENTS TABLE OF CONTENTS ... 2 FOR YOUR SAFETY... 5 READ THIS FIRST ... 6 • Table of Contents... 8 Getting Started... 10 • IMPORTANT SAFEGUARDS ... 10 • Simple Hookups ... 13 1 Decide Where to Put Your VCR ... 13 2 Decide Which Hookup Method to Use... - Page 3 TABLE OF CONTENTS • Recording a Program ... 34 Before you Record ... 34 Basic Recording Steps ... 35 Recording Tips... 35 Using the Instant Recording Timer (IRT)... 36 Setting the VCR to Record Later ... 37 Reviewing What You Have Programmed ... 39 Programming Priorities ...
- Page 4 Have video heads cleaned by a qualified service technician..51 No picture during playback..51 TV set to the correct video viewing channel? ... 51 Set TV to channel 3 or 4... 51 Hitachi Service Hotline... 52 Specification... 53 • Technical Specifications ... 53...
-
Page 5: For Your Safety
FOR YOUR SAFETY FOR YOUR SAFETY POWER SUPPLY: AC 120V, 60 Hz ONLY. The POWER switch turns the VCR on and off, leaving the clock/timer unaffected. If the unit is to be left unattended for a long period, it is recommended that the unit be completely switched off and unplugged. -
Page 6: Read This First
READ THIS FIRST Thank you for buying a Hitachi product. You've chosen the best VCR for you, and we want to help you make the most of your purchase. Please take time to become familiar with this manual and how it is set up. - Page 7 READ THIS FIRST To play a tape...25 To record a program...30 Problem chart...46 Instructions in Spanish...49...
-
Page 8: Table Of Contents
• Table of Contents • Table of Contents • = "Must Read" Sections for First Time Operation Getting Started, 6 Important Safeguards, 6 Simple Hookups, 8 • 1 Decide Where to Put Your VCR, 8 • 2 Decide Which Hookup Method to Use, 8 •... - Page 9 Copying Tapes from a Camcorder, 44 VCR Care and Servicing, 45 Routine Cleaning, 45 Periodic Maintenance, 45 If the VCR Doesn't Work Right, 45 Don't Attempt Repairs Yourself, 45 Often Encountered Problems, 46 Hitachi Service Hotline, 47 Technical Specifications, 48 Spanish Quick Use Guide, 49...
-
Page 10: Getting Started
Getting Started Getting Started This section explains safety rules, how to hookup, quick tour of the controls, set up for first-time operation using on-screens menus, Videocassette tapes. Let's get started. • IMPORTANT SAFEGUARDS In addition to the careful attention devoted to quality standards in the manufacture of your video product, safety is a major factor in the design of every instrument. - Page 11 Getting Started instructions. 6 Overloading -- Do not overload wall outlets and extension cords as this can result in a risk of fire or electric shock. Overloaded AC outlets and extension cords are dangerous, and so are frayed power cords, damaged or cracked wire insulation and broken plugs.
- Page 12 Getting Started 11 Accessories -- Do not place this video product on an unstable card, stand, tripod, bracket or table. The video product may fall, causing serious injury to a child or adult, and serious damage to the appliance. Use only with a cart, stand, tripod, bracket or table recommended by the manufacturer, or sold with the video product.
-
Page 13: Simple Hookups
Getting Started outlet and disconnect the antenna or cable-system. This will prevent damage to the video product due to lightning and power-line surges. SERVICE 17 Servicing -- Do not attempt to service this video product yourself as opening or removing covers may expose you to dangerous voltage or other hazards. Refer all servicing to qualified service personnel. -
Page 14: Decide Which Hookup Method To Use
Getting Started connector. • If you plan to route your VCR audio through your stereo speakers for better sound reproduction, place the VCR near the stereo receiver, or have enough long audio cables to make the connections. (But keep in mind that the electronic signal weakens the further it has to travel.) 2 Decide Which Hookup Method to Use To make your VCR function, you'll deal with two basic hookups:... -
Page 15: Hook Up The Rf Signal
Getting Started • Connect the yellow VIDEO OUT jack on the VCR (bottom row of jacks) to the VIDEO IN jack on the TV. This direct video input will give you the best picture. It will also let you play videos in a "picture in picture"... - Page 16 Getting Started 1. If still hooked up to your TV, unscrew the round wire from the 75 ohm connector on your television. Otherwise, take the wire that comes in from the wall. 2. Screw this round wire into the IN FROM ANT lower jack on the back of your VCR. 3.
- Page 17 Getting Started Separate UHF and VHF antenna antenna wires, both 300 ohm flat wire 300 ohm flat UHF and 75 ohm round VHF If you have "rabbit ears" (an antenna on top of your TV), you will need an additional adapter and 75 ohm extension to make your leads reach from the antenna to the VCR.
-
Page 18: Attach The Tv And Vcr To The Power Supply
Getting Started 5 Attach the TV and VCR to the Power Supply Plug in the TV and VCR power cords to the wall outlet or an appropriate extension cord or surge protector. See Important Safeguards for further precautions (page 6). 6 Install Batteries in the Remote Control The remote control requires two fresh "AA"... -
Page 19: Getting Started (Controls)
Getting Started (Controls) Getting Started (Controls) • Quick Tour of the Controls Study these pictures carefully to learn about the buttons and controls that you'll need for everyday operation. Various controls are explained throughout this manual as they are needed, but now is a good time to get familiar with their locations. Most of the time, you'll be directing the VCR from the remote control, but there are some controls on the VCR that will come in handy too. -
Page 20: Remote Control Buttons
Getting Started (Controls) Remote Control Buttons Picture of Remote Control POWER Turns the VCR on and off. VCR1, TV, CATV, VCR2 Device buttons let you set the remote to control one of four devices. MUTE (TO CONTROL TV) Turns off the audio until you press Mute again. VOLUME/SLOW Increase or decrease the audio volume and plays back in adjustable slow motion. -
Page 21: When The Remote Doesn't Work Right
Getting Started (Controls) VCR/TV Switches between viewing through the VCR and not viewing through the VCR. When the Remote Doesn't Work Right Check out these possibilities: Low Battery If the remote is not working even at close range, try putting in two fresh AA batteries. Objects in the Way There may be objects between the remote and the VCR - for instance, a stack of books on the coffee table, your 2-year-old child or the dog. -
Page 22: Display Indicators
Meet Your On-Screen Guide Your Hitachi VCR has as a special feature called the Easy Guide Menu. This feature guides you through simple setup and programming tasks right on the TV screen. With the TV and VCR turned on, press GUIDE on the remote control. You will see this... - Page 23 Getting Started (Controls) 1 INITAL SETUP 2 CLOCK SET 3 ONE TIME RECORDING 4 DAILY 5 WEEKLY 6 PROGRAM REVIEW 7 PROBLEM GUIDE *TO END PRESS GUIDE You will do most of your programming and setup by pressing numbers on the remote control which correspond to options presented in this and other on-screen menus.
-
Page 24: Getting Started (Initial Setup)
Getting Started (Initial Setup) Getting Started (Initial Setup) • Setup for First-Time Operation Before you use your VCR to watch or record from your TV, you need to "tell" the VCR whether your TV uses cable or antenna input and let it program itself to receive your TV's channels. -
Page 25: Setting The Clock
Getting Started (Initial Setup) You need to set items 1 and 2 the first time you set up your VCR and any time you have a lengthy power interruption. The rest of the items can be set later as needed. Here are what the options mean: 1 ANTENNA/CABLE Press 1 to select the type of receiving setup you have:... -
Page 26: More About Channel Selections
Getting Started (Initial Setup) *TO END PRESS GUIDE Press the number buttons on the remote control to set the current time - two digits for the hour and two for the minutes. Then press 1 or 2 for AM or PM, respectively. For example, if it is now 2:15 PM, press 0, 2, 1, and 5 for hours and minutes, and press 2 for PM. - Page 27 Getting Started (Initial Setup) Adding Channels Occasionally the auto-programming may skip an active channel because the antenna was pointed in the wrong direction or the channel had a weak signal or was "off the air" at the time of programming. Or you may change your mind about a channel you removed from memory.
-
Page 28: Getting Started (Videotapes)
T-160 160 min. You may have noticed that there is also an LP speed. You Hitachi VCR does not record at this speed, but it can play cassettes that were recorded in LP mode. No special setting is required for playback. -
Page 29: Loading And Ejecting
Getting Started (Videotapes) Loading and Ejecting When you load a videocassette into the VCR, there is only one right way! Most tapes show you the way with a little arrow on the top side which should go in first. Push the videocassette gently into the slot on the front of the VCR. You will feel the VCR take it in. -
Page 30: Basic Operations
Basic Operations Basic Operations Practice starting and stopping a video you've rented - play it through, see how it automatically rewinds. Get a blank tape and try recording a TV show. Then you'll know how to use the VCR when you need to - or where in the manual to find the instructions you forgot. -
Page 31: Rewinding The Tape
Basic Operations Manual Tracking Scratched tapes or poorly recorded tapes may require additional picture adjustment. You can do this with the remote control. Press VCR1 or VCR2 on respective mode, then press either of the TRACKING buttons (down or up arrows) until picture clears up. After operating the tracking manually, eject the tape and re-insert it to reactivate auto tracking. -
Page 32: To Find Specific Sections On A Tape
Basic Operations Frame Advance While in PAUSE mode during playback, press F.ADV to view the video one frame at a time. Press PAUSE to resume play. Skip Playback While playing back your tape you can skip forward by pressing the F.ADV button. The tape will search ahead for about a minute and then resume playing. - Page 33 Basic Operations Pressing DISPLAY will cycle you through the three options. • Press DISPLAY just once to see the counter, mode, time, and date on the screen for 5 seconds. • Before the 5 seconds are up, press DISPLAY a second time to see just the counter. It will stay on the screen.
-
Page 34: Basic Operations (Recording)
Basic Operations (Recording) Select minutes by pressing buttons 0 to 9 - one digit for hours, then two digits for minutes. Then press F.FWD if you want to move that many minutes ahead, or REW if you want to move that many minutes backward. For example, say you want to review a scene that began about 2 minutes earlier in a video, press 0, 0, and 2 to display 0:02 on the screen. -
Page 35: Basic Recording Steps
Basic Operations (Recording) • The VCR must be hooked up properly for recording. See the Simple Hookups at the beginning of this manual. • Make sure you are familiar with the Easy Guide System for on-screen programming (page 18) and the basics about videocassettes and VCR safety. Copyright Infringement Warning Most television programs and films are copyrighted. -
Page 36: Using The Instant Recording Timer (Irt)
Basic Operations (Recording) while you are watching the TV, you'll hear the cassette as it clicks on and see the recording indicator light up on the VCR display. You can check on the recording by pressing he VCR/TV button again. This will switch you back to viewing through the VCR, you'll see the program you are recording. -
Page 37: Setting The Vcr To Record Later
Basic Operations (Recording) automatically stop and the VCR will turn itself off. To stop recording while in the IRT mode, press the POWER button and then press the STOP (STOP/EJECT) button (this can be done either on the VCR or with the remote control) within 10 seconds. - Page 38 Let's say you were interviewed today by a local TV reporter. You're eager to see yourself on the evening news tonight. The news comes on channel 8 at 6 0'clock - but you've got a meeting scheduled during that time. Luckily you just purchased this Hitachi VCR.
-
Page 39: Reviewing What You Have Programmed
Basic Operations (Recording) Now fill in the blanks: • Select channel 8 by pressing 0 and 8 on the remote control. • Enter the start time by pressing 0, 6, 0, and 0 for 6 o'clock. Then press 2 for PM •... - Page 40 Basic Operations (Recording) starting time. To avoid recording only bits and pieces of different overlapping shows, review your programming and delete those shows that are not essential.
-
Page 41: Advanced Operations (Remote Control Of Tv)
Once you have programmed the remote, you won't have to do it again until you change the batteries. This Hitachi remote control can be used with your TV as well as the VCR, as long as your TV comes with a remote control. This feature comes in handy - you don't have to juggle two remotes. -
Page 42: Controlling The Tv
Advanced Operations (Remote Control of TV) TV Brands Press TV and This Number Hitachi Zenith Sony Magnavox Sanyo Gold Star 1 Toshiba Gold Star 2 Panasonic CHANNEL (up arrow) Mitsubishi CHANNEL (down arrow) Sharp Controlling the TV Once programmed, the VCR's remote control is ready to control the TV. -
Page 43: Advanced Operations (Cable Box Hookups)
Advanced Operations (Cable Box Hookups) Advanced Operations (Cable Box Hookups) • Hooking Up to a Cable Box The cable box brings all the advantages of pay cable, but finding a satisfactory hookup can be challenging. To sort out what to do, we suggest a step-by-step approach to installation. - Page 44 Advanced Operations (Cable Box Hookups) removed the cable line. Check all the TV and VCR functions. If you don't get all the functions you want, proceed with Option 2. Option 2--All Channels Unscrambled 1. Remove the cable company's line from the back of the cable box that goes to your TV.
-
Page 45: Remote Control Of The Cable Converter
Advanced Operations (Cable Box Hookups) 3. Using a second coaxial jumper, connect the other splitter output to the A of the A-or-B switch. 4. Using the cable box output line, connect the cable box receptacle to the B of the A-or- B switch. - Page 46 Advanced Operations (Cable Box Hookups) Zenith Scientific Atlanta Pioneer Philips To operate the cable box once the remote is programmed for it: • Press CATV and then the button of the function you want. • Press VCR1 to operate your VCR with the remote again.
-
Page 47: Advanced Operations (Second Vcr)
Illustration of Hookup To Control Both VCRs with the Remote Control If the second VCR that you've hooked up is also a Hitachi, you can set your remote to operate both VCRs. • Press GUIDE twice, then press 1 to bring up the Initial Setup screen. -
Page 48: Copying Tapes From A Camcorder
Advanced Operations (Second VCR) Copying Tapes From A Camcorder If you would like to copy a video tape shot in your camcorder onto your VCR here's how to do it. • Connect the camcorder's AV output cable to your VCR. (See diagram below) Copying Tapes From A Camcorder Hookup Illustration •... -
Page 49: Vcr Care And Servicing
IS TAPE REWOUND IS PROGRAMMING CORRECT IS VCR POWER TURNED OFF AFTER PROGRAMMING IS CLOCK SET CORRECTLY *TO NEXT PRESS GUIDE If none of these troubleshooting aids help you solve the problem, then see your Hitachi service center. Don't Attempt Repairs Yourself... - Page 50 VCR Care and Servicing Do not remove the cover or the back of the VCR - this will void the warranty and endanger your safety. The exposed uninsulated voltage in this unit may be high enough to cause electrical shock. It is dangerous to make contact with any inside part, and none of these parts are intended to be serviced by an untrained user.
-
Page 51: Care And Servicing (Problems)
Care and Servicing (Problems) Care and Servicing (Problems) OFTEN ENCOUNTERED PROBLEMS PROBLEM No Power Delayed recording does not work. Does not record when you press REC and PLAY at the same time/ TV program cannot be viewed or recorded. Poor picture quality (“noise”) during playback. -
Page 52: Hitachi Service Hotline
Mechanical sounds during the STOP Hitachi Service Hotline Authorized Hitachi service facilities are available throughout the US and Canada. For the location nearest you, call the Hitachi Service Hotline at one of these numbers: In the continental U.S.A. In Canada QUEBEC... -
Page 53: Specification
1 remote control unit (Part No. 5616491), 2 AA batteries Accessory part numbers shown are for USA only. For information about how to obtain these accessories, please call TOLL FREE 1-800-448-2244 for your nearest Hitachi Authorized Parts Distributor in the continental United States. - Page 54 Specification This sentence appears only in the VT-M171A. This sentence appears only in the VT-M171A. This sentence appears only in the VT-M171A. The number of video heads is the difference between the two models. ons subject to change without notice.