
Related Manuals for Chauvet XPress-100


Summary of Contents for Chauvet XPress-100
-
Page 1: User Manual
Software Version 6.22 beta1 Rev. 02f User Manual 3000 N 29 Ct, Hollywood, FL 33020 U.S.A. (800) 762-1084 – (954) 929-1115 FAX (954) 929-5560 www.chauvetlighting.com... -
Page 2: Table Of Contents
Scene Area ................................20 Options Area ................................20 ................................. 21 IMELINE Show Control Section ..............................21 Current Time Location ..............................21 Zoom Control ................................21 Timelines ..................................21 -DMX ................................... 22 ATCH Chauvet® ShowXpress™ V6.22... - Page 3 Using the “STOP” tool ....................................... 50 Operation for “Move To” in Live-Timeline ..............................51 File Properties in Live-Timeline ..................................51 8. UPLOAD SCREEN ................................52 ........................52 PLOADING CENES TO THE NTERFACES Xpress 512 ................................. 52 Chauvet® ShowXpress™ V6.22...
- Page 4 -DIN T ..............................56 RIGGERING IR (W ............................57 IRELESS RIGGERING Proprietary CHAUVET® Remote ..........................57 Operation........................................... 57 Generic Remote ................................. 57 12. UPDATING THE INTERFACE FIRMWARE ......................... 58 13. APPENDIX ..................................59 ...
-
Page 5: Before You Begin
Manual Conventions CHAUVET® manuals use the following conventions to differentiate certain types of information from the regular text. EANING... -
Page 6: Introduction
Import custom images to use as the ceiling, floor or walls Timeline • Synchronize playback of the audio, video, and photographic files with the light show • Easy layout options with the visual drag-n-drop interface. 2. I Chauvet® ShowXpress™ V6.22 NTRODUCTION... -
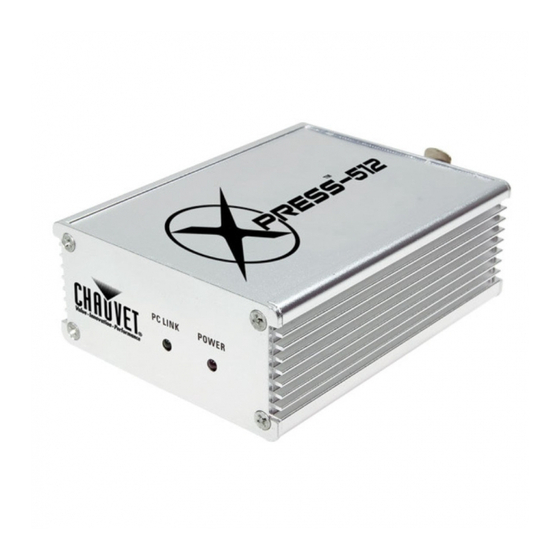
Page 7: Product Overview (Xpress™ 100)
Product Overview (Xpress™ 100) DMX Out Protective Cover USB Connection PC Link LED Indicator Product Overview (Xpress™-512) PC Link LED Indicator USB Connection DMX Out Power Indicator 2. I Chauvet® ShowXpress™ V6.22 NTRODUCTION... -
Page 8: Product Overview (Xpress™-512 Plus)
Product Overview (Xpress™-512 Plus) DMX Out IR Receiver External IR Receiver IR Data Mini-DIN Scene Trigger Indicator USB Connection PC Link LED Indicator Security Location Power Power: EXT/USB Indicator External Power 2. I Chauvet® ShowXpress™ V6.22 NTRODUCTION... -
Page 9: Interfaces
USB connection. When operating this in standalone mode, it is necessary to use a power supply to provide power. This adapter output must not exceed 12 VDC, 300 mA. This power supply is sold separately. 3. Interfaces Chauvet® ShowXpress™ V6.22... -
Page 10: Setting Up The Hardware/Software
There are two options for obtaining the installation file. The file ships on the CD that arrives in the box when purchasing an interface from Chauvet®. Or, the file may be downloaded from the internet. This is recommended to be sure that you are using the latest version of the software. - Page 11 Check the box titled “Create a desktop icon” if you want a folder to be created on your desktop. This action cannot be undone so it may be better to create the folder and delete it later if desired. 4. Setup Chauvet® ShowXpress™ V6.22...
- Page 12 10. Click <NEXT> to continue. 11. Confirm the settings and then click <INSTALL> to continue. 12. After the installation completes, click <FINISH> to confirm. You must be logged in as Administrator to install the software. 4. Setup Chauvet® ShowXpress™ V6.22...
-
Page 13: Hardware Driver Installation (Windows® Vista & 7)
Plug the USB cable into the back of the interface and the other end into an available USB port on the computer. The “Found New Hardware Wizard” must be completed in order for the computer to communicate with the interface. 4. Setup Chauvet® ShowXpress™ V6.22... - Page 14 When the following window appears prompting that the driver did not pass the Windows® Logo testing compatibility, simply click <CONTINUE ANYWAY> to continue the installation. When it’s complete, click <FINISH> and the window will disappear and a popup window will indicate that the driver installation was successful. 4. Setup Chauvet® ShowXpress™ V6.22...
-
Page 15: Driver Installation (Mac Osx)
XFACTOR: “Stand-alone” LED OFF • Xpress™ Plus: “PC Link” LED Flashing • Xpress™ 100: “PC Link” LED Flashing The software will display the following upon starting up: • Interface found” • The appropriate interface name(s) 4. Setup Chauvet® ShowXpress™ V6.22... - Page 16 Repeat the same steps from “Hardware Installation (Windows® XP)” to install the driver again. A popup balloon in the lower, right side of the monitor will indicate that the driver installation was successful and the device is ready to use. 4. Setup Chauvet® ShowXpress™ V6.22...
-
Page 17: Overview
The Channel Levels displays the selected fixture’s channel levels. When a fixture is selected, the channels may be modified (cut, insert, and add). Addressed Fixtures The Addressed Fixtures displays the current DMX patch. When a fixture is selected, they may be modified (DMX address, name, reverse pan/tilt, universe) 5. Overview Chauvet® ShowXpress™ V6.22... -
Page 18: Setup (Continued)
Fixture 3D View Fixture Channels Channel Values Settings Personal Fixtures Addressed Fixtures The Channel Values displays the selected fixture’s channel levels. When a channel is selected, the levels may be modified (cut, insert, and add). 5. Overview Chauvet® ShowXpress™ V6.22... -
Page 19: Editor
Group assignment and callback for more convenient programming Generator DMX On/Off Undo, Redo 3D On/Off Toolbar Area: New, Insert, Step Area 2D View Save, Save as Play Scene Pan/Tilt, RGB Area Channel Transition Area Fixture Fader Area 5. Overview Chauvet® ShowXpress™ V6.22... -
Page 20: Live-Buttons
DMX On/Off (double as a blackout function) • 3D View On/Off (enables playback in the 3D View screen) Board Selection Bar Options Area Play/Pause Current BPM BPM Visual Indicator Tap Sync Freeze DMX On/Off 3D View On/Off Scene Area 5. Overview Chauvet® ShowXpress™ V6.22... -
Page 21: Live-Timeline
The Timelines displays the following attributes: • Layout of each individual timeline, including the Video/Picture, Audio, and 2~10 LightScene timelines • Location of STOP and OFF markers • Location of red marker • Location of green marker 5. Overview Chauvet® ShowXpress™ V6.22... -
Page 22: Patch-Dmx
The Input Creation Area is where new DMX input assignments may be created. The following attributes may be altered in this area. • DMX input address • Priority type (DMX input, software, HTP) • Output assignment(s) The DMX input is currently only available for the first universe. 5. Overview Chauvet® ShowXpress™ V6.22... -
Page 23: Patch-Midi
Patch-MIDI DMX/MIDI Selection Device Selection Selected Device Live Transmission 5. Overview Chauvet® ShowXpress™ V6.22... -
Page 24: Programming
ShowXpress™ is designed with the capability to create fixture profiles directly through the software. This profile is going to be created for the Chauvet® LED PAR 64-Tri. This fixture has two operating modes. We will be using the 3-channel operating mode. -
Page 25: 3D View Area
Press <Save>. The fixture is now added to the DMX Patch. Repeat this process to add more fixtures. If there is a fixture that is not already in the “fixtures setting” page tab, then you may add more by using the “import fixture” function. 6. Programming Chauvet® ShowXpress™ V6.22... -
Page 26: Dip Switch Calculator
This shows that DIP switches 3, 6, and 7 must be turned to the ON position to achieve an address of 100. DMX Addressing Setting DMX Address DIP Switch Calculator Fixture Name 3D Fixture Clone Reverse Pan Reverse Tilt 6. Programming Chauvet® ShowXpress™ V6.22... -
Page 27: Creating A Scene
It is also possible to program using the 3D View screen. Turn on the Transition Transition 3D View button for this operation. This may be useful for creating scenes while the Live screen is playing back other scenes. This is referred to as “Blind Programming”. 6. Programming Chauvet® ShowXpress™ V6.22... -
Page 28: 2D View
The format for the images must meet the following parameters: PNG file 128*128 pixels with alpha- channel transparent background. Hiding Fixtures In the 2D_View section of the Editor Screen, it is possible to hide select fixtures. This is useful when wanting to turn select fixture images ON/OFF. 7. Playback Chauvet® ShowXpress™ V6.22... -
Page 29: Generator
Delete Current Scene Generate Scene into the Editor Screen Save Scene DMX ON/OFF button Create New Project Pause Current Scene Open Saved Project 3D_View Playback ON/OFF Save Project As… Stop Current Scene Play Current Scene 7. Playback Chauvet® ShowXpress™ V6.22... -
Page 30: Creating A Scene Using Generator
The total duration may be modified, in seconds. • There are 3 types of “transitions”: points, lines, curves Shows the name of the current loaded curve (if any) “New Curve”, “Load Curve”, “Save Curve”, “Delete Curve” 7. Playback Chauvet® ShowXpress™ V6.22... - Page 31 If you want a single channel to remain at a constant level, with no variations (such as the dimmer channel), then simply select the dimmer channel, and leave both of the 2 points at the same level. Do NOT add a third point. See below for example. 7. Playback Chauvet® ShowXpress™ V6.22...
-
Page 32: Working With "Curves
100% (DMX value of 255) Dimming Points (DMX value of 000) Working with “Lines” The waveform will be gradual, and appear as below. Working with “Points” The waveform will be square, and appear as below. 7. Playback Chauvet® ShowXpress™ V6.22... -
Page 33: Fixture Groups (Editor Screen)
It will highlight in red color to signify that it has been selected. Continue to highlight more fixtures in the same fashion as above. Hold down the CTRL/APPLE key on the keyboard to allow you to select multiple fixtures. Then, press the Groups tab. 7. Playback Chauvet® ShowXpress™ V6.22... - Page 34 A sub-window will appear. Type a name for the group here. Press OK. Another sub-window will appear. Type in a single character and this is the group selection shortcut. The available keyboard shortcuts are: a~z, A~Z. It is possible to make 52 total groups. 7. Playback Chauvet® ShowXpress™ V6.22...
-
Page 35: Playback
Trigger button sub-menu. Multiple scene may be selected and imported simultaneously, provided that they atre located in the same folder. Keyboard Scene Trigger Name fig. L.c 7. Playback Chauvet® ShowXpress™ V6.22... -
Page 36: Scene Playback Modifications
Editor Screen. Only the selected step will play. Trigger the button now in the desired method (keyboard, time, and/or mouse). These 2 features (Preset button and Flash button) may be combined. 7. Playback Chauvet® ShowXpress™ V6.22... -
Page 37: No Loop Button
Normally with the Live-Buttons screen, stacking scenes is standard. However, using this function, each page may only play one scene at a time. Triggering a 2 will disable the 1 This only works on a single page in the Live-Buttons Screen. 7. Playback Chauvet® ShowXpress™ V6.22... -
Page 38: Live-Button Screen Playback
See fig. Pp.b. Press <Play/Pause> a second time. This is the execution. This function may be used on an unlimited quantity of scenes Play/Pause button fig. Pp.a Preparation Prepared button fig. Pp.b 7. Playback Chauvet® ShowXpress™ V6.22... -
Page 39: Speed Button
The buttons in Live-buttons may function on different speeds. Auto BPM, Manual BPM, and Manual Speed. To access the Speed button window, follow the steps below. Open Live-buttons from the Control Board. Right-click on any light scene. A sub-menu will appear. Select Speed button. 7. Playback Chauvet® ShowXpress™ V6.22... -
Page 40: Sound Triggering (Auto Bpm)
16. If the source is sending signal at sound levels, then the indicator window should appear as the image below demonstrates. The purpose of this function is to synchronize the changing of the steps to the music. The sensitivity may be adjusted between 1/1 and 1/8. 7. Playback Chauvet® ShowXpress™ V6.22... -
Page 41: Manual Bpm
Open Live-buttons from the Control Board. Right-click on the scene button and select “Speed button”. In the window that appears, select “Manual Speed”. Using the slide-bar, press & hold to drag to the desired speed value. 10. Press <Validate>. 7. Playback Chauvet® ShowXpress™ V6.22... -
Page 42: Freeze
The normal window resizing options are removed, including the main, top bar Automatically turn the DMX ON when opening the Live Screen Disable right-click options within the Live Screen Password-protect the Options sub-window in Live Screen 7. Playback Chauvet® ShowXpress™ V6.22... -
Page 43: 3D View
3D view, there is a button in both of these screens. It must be activated, with the button indicator showing green in order to have any playback in this screen. 7. Playback Chauvet® ShowXpress™ V6.22... -
Page 44: Stage Setting Sub-Screen
3D View screen will immediately display the texture on the applicable wall. Custom textures must adhere to the following parameters in the file formatting: PNG, BMP, and JPG. Stage Settings Total stage Ambient size Lighting Level Texture resolution Texture ON/OFF 7. Playback Chauvet® ShowXpress™ V6.22... -
Page 45: Fixture Settings Sub-Screen
10. Use the “Value Setting Area” to adjust the setting(s). This may be done by entering the value in directly with the keyboard or by using the mouse to manipulate the scroll tool. Scroll tool Enter Values Directly Attribute Selection Fixture Area selection area Value Setting Undo Area button 7. Playback Chauvet® ShowXpress™ V6.22... -
Page 46: Live-Timeline Screen
Select “Open”. The right-click sub-menu options for Timeline buttons are limited in the Live Screen. Timeline buttons in the Live Screen will appear with a unique background, as displayed below. Timeline Title location Background 7. Playback Chauvet® ShowXpress™ V6.22... -
Page 47: Adding Video/Picture Files To Live-Timeline
Force Position: Disables the manual window positioning and assigns a default X and Y position Screen Mode: Select which display to appear on (this is a full screen mode) 7. Playback Chauvet® ShowXpress™ V6.22... -
Page 48: Output Size
Right-click in the files area in the Live-Timeline Screen to bring up the sun- menu. Left-click “Add multimedia file”. A sub-window will appear. Use this window to select the appropriate audio file. Press “Open” to add the file to the timeline. 7. Playback Chauvet® ShowXpress™ V6.22... -
Page 49: Live-Timeline Overview
Move the mouse over any of the timelines. This includes Video/Picture, Audio, and LightScene rows. Right-click to bring up the sub-menu. This will cause the sub-window “Timeline name” to open. Enter a new name, using the keyboard. Press OK to complete the process. 7. Playback Chauvet® ShowXpress™ V6.22... -
Page 50: Creating A New Timeline
Select “Add STOP tool”. After the tool has been added, it may be repositioned by left-clicking, holding, and dragging with the mouse. Then, remove the mouse button to release the tool. STOP tool This will stop all rows. 7. Playback Chauvet® ShowXpress™ V6.22... -
Page 51: Operation For "Move To" In Live-Timeline
Manual beats per minute (manual speed ONLY!) (using Live Screen BPM global setting) Manual Speed Press to close (using the playback fader to the right) window and save setting(s) Continuous Loop (excluding STOP tool) (activated by default) 7. Playback Chauvet® ShowXpress™ V6.22... -
Page 52: Upload Screen
This clock may be updated in this screen. By pressing the “Interface Clock Update Button”, the interface’s internal clock will be reset to the computer’s current time. 8. U Chauvet® ShowXpress™ V6.22 PLOAD CREEN... - Page 53 Universe Selection Screen fig Us.a Button Setting Area Xpress 512-Plus Upload Screen Interface Clock Update Button Button Setting Delete Button Area Upload to Interface Button 8. U Chauvet® ShowXpress™ V6.22 PLOAD CREEN...
-
Page 54: Backup/Restore
This screen allows the user to restore 1 show at a time. Therefore, select the show to restore in the Saved Shows Area Press the Import button. A screen will appear confirming a successful restoration of the show. 9. B Chauvet® ShowXpress™ V6.22 ACKUP ESTORE... -
Page 55: Keyboard Shortcuts
CRTL/APPLE + F: Switches between full screen mode and windowed playback mode This manual makes references to “right-click” in the instructions of several sections. If using Mac OSX, please refer to the specific machine operating manual for instructions on this procedure 10. K Chauvet® ShowXpress™ V6.22 EYBOARD HORTCUTS... -
Page 56: Xpress™ 512-Plus Standalone Triggering
Pin-4: Scene 4 Pin-5: Not Used Pin-6: Ground All buttons are push-button type, normal open. This method will only trigger the first 4 scenes that are loaded into the interface. 11. X ™ 512-P Chauvet® ShowXpress™ V6.22 PRESS TANDALONE RIGGERING... -
Page 57: Ir (Wireless) Triggering
Generic Remote An alternative to using the CHAUVET® proprietary remote shown above, the interface will respond to a standard Philips® universal remote code. This will work with up to 10 scenes. Please see the buttons below that the interface will respond to. -
Page 58: Updating The Interface Firmware
The Xpress™ 512 and the Xpress™ 512-Plus interfaces feature the capability to update the internal firmware via a USB connection. If for any reason CHAUVET® advices that this process is required for your interface, in writing, then please follow the steps below. -
Page 59: Appendix
1, while pin 2 is Data Negative (S-) and pin 3 is Data positive (S+). Data Cabling To link fixtures together you must obtain data cables. You can purchase CHAUVET® certified DMX cables directly from a dealer/distributor or construct your own cable. If you choose to create your own cable please use data-grade cables that can carry a high quality signal and are less prone to electromagnetic interference. -
Page 60: Cable Connectors
32 fixtures on one serial data link without the use of a DMX optically-isolated splitter may result in deterioration of the digital DMX signal. Maximum recommended serial data link distance: 500 m (1640 ft) Maximum recommended number of fixtures on a serial data link: 32 13. A Chauvet® ShowXpress™ V6.22 PPENDIX... -
Page 61: 3-Pin To 5-Pin Conversion Chart
3000 North 29 Court Hollywood, FL 33020 voice: 954.929.1115 fax: 954.929.5560 toll free: 800.762.1084 Technical Support CHAUVET® 3000 North 29 Court Hollywood, FL 33020 voice: 954.929.1115 (Press 4) fax: 954.929.5560 (Attention: Service) World Wide Web www.chauvetlighting.com 13. A Chauvet® ShowXpress™ V6.22 PPENDIX... -
Page 62: Returns Procedure
Package must be clearly labeled with a Return Merchandize Authorization Number (RMA #). Products returned without the RMA # will be refused. Call CHAUVET® and request an RMA # prior to shipping the fixture. Be prepared to provide the model number, serial number and a brief description of the cause for the return. -
Page 63: Glossary
17. Layering – playing back multiple light scenes without affecting the ones prior to it; also known as “stacking.” 18. MIDI (Musical Instrument Digital Interface) – a standard protocol for communication between electronic devices (such as keyboards) to activate or trigger a controller. 13. A Chauvet® ShowXpress™ V6.22 PPENDIX... - Page 64 40. X & Y – movement of a scanning mirror, barrel or moving head. The “X” is the horizontal movement (pan) and the “Y” is the vertical movement (tilt). 13. A Chauvet® ShowXpress™ V6.22 PPENDIX...
-
Page 65: Technical Specifications
Xpress™ 100 ........................... (N/A) Xpress™ 512 ......................600 steps, 1 scenes Xpress™ 512-Plus ................600 steps per scene, 18 scenes THERMAL Maximum ambient temperature ..................104° F (40° C) WARRANTY INFORMATION Warranty ......................2-year limited warranty 14. T Chauvet® ShowXpress™ V6.22 ECHNICAL PECIFICATIONS...