
Related Manuals for Jensen VM9214BT


Summary of Contents for Jensen VM9214BT
-
Page 1: Operating Instructions
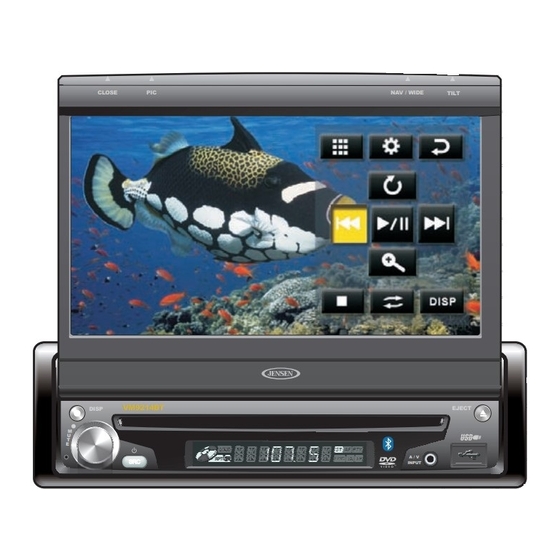
VM9214BT Operating Instructions CLOSE NAV / WIDE TILT VM9214BT DISP EJECT A / V INPUT watts peak 40W x 4... -
Page 3: Table Of Contents
VM9214BT CONTENTS Thank you for choosing a Jensen product. We hope you will find the instructions in this owner’s manual clear and easy to follow. If you take a few minutes to look through it, you’ll learn how to use all the features of your new Jensen VM9214BT Mobile Multimedia Receiver for maximum enjoyment. - Page 4 VM9214BT...
-
Page 5: Features
Congratulations on your purchase of the Jensen VM9214BT Mobile Multimedia Receiver. It’s a good idea to read all of the instructions before beginning the installation. We recommend having your Jensen VM9214BT installed by a reputable installation shop. • Fast Forward/Reverse - 2X, 4X, 8X and 20X •... -
Page 6: Optional Equipment
See “Bluetooth Operation” on page 42. • Rear Camera The VM9214BT is "camera ready." Before accessing any camera features, you must purchase and install a rear video camera. Once the rear camera is connected and operating properly, the CAMERA source mode will become active. - Page 7 VM9214BT WARNING! To reduce the risk of a traffic accident (except when using for rear view video camera) never use the video display function while driving the vehicle. This is a violation of federal law. WARNING! Never disassemble or adjust the unit.
-
Page 8: Controls And Indicators
3. DISC SLOT 4. NAV/WIDE/ | With the monitor closed, press to seek backward. When the NAV102 is connected to the VM9214BT, press to display the navigation user interface. The TFT screen must be open for this function to operate. - Page 9 VM9214BT 12. RESET Press to reset system settings to factory default (except the password and parental lock setting). 13. A/V Input Attach a compatible A/V device. 14. USB Interface Connector Connect a USB device for playback of music/video files. NAV / WIDE...
-
Page 10: Using The Tft Monitor
VM9214BT USING THE TFT MONITOR Open/Close TFT Monitor Open TFT Monitor Press the OPEN button (1) on the front panel to activate the mechanism that moves the display panel into the viewing position. Close TFT Monitor Press the OPEN button (1) on the front panel to load the display panel back into the compartment. -
Page 11: Aspect Ratio
VM9214BT Aspect Ratio Press and hold the WIDE button (4) on the monitor to adjust the aspect ratio as follows: FULL The entire screen is extended horizontally to the aspect ratio of 16 to 9. The extension ratio is the same at any point. -
Page 12: Parking Brake Inhibit
VM9214BT Parking Brake Inhibit When the pink "Parking" wire is connected to the vehicle Parking Brake circuit, the front TFT monitor will display video when the Parking Brake is engaged. (When the pink wire is grounded via the Parking Brake circuit, video will be displayed.) -
Page 13: Operating Instructions
VM9214BT OPERATING INSTRUCTIONS Power On / Off Press the /SRC button (10) on the unit to turn the unit on. The buttons on the front of the unit light up and the current mode status appears in the LCD (7). - Page 14 VM9214BT Source Menu You can also use the touch screen to change the source through the SOURCE MENU. To access the SOURCE MENU, touch the top left corner of the screen or press the SRC button on the front panel (10).
-
Page 15: Volume Adjustment
VM9214BT information regarding the use of USB devices, see “Inserting a USB Device” on page 34. Volume Adjustment Volume Increase/Decrease To increase or decrease the volume level, turn the rotary encoder (11) on the front panel. When the volume level reaches “0” or “40”, a beep sounds, indicating that the adjustment limit has been reached. -
Page 16: System Reset
Steering Wheel Control (SWC) The VM9214BT is compatible with the PAC (Pacific Accessory Corporation) steering wheel control adapter SWI-PS and the Metra ASWC steering wheel control adapter. A 3.5mm female connector (labeled “SWC Interface”) on the back of the head unit allows connectivity to the PAC adapter. - Page 17 VM9214BT ** If additional steering wheel control buttons are available on the vehicle, function 7 / 8 may be assigned the "Select" feature. This feature / function may not be available on some vehicles. Select Operation If "Select" (function 7 or 8) is held down and function 4 is pressed momentarily, Preset Up will be selected.
-
Page 18: Setup Menu
VM9214BT SETUP MENU To access system settings, touch the button on the screen to enter the “SETUP” menu. The “GENERAL” sub-menu appears highlighted in blue. 05:33 AM RADIO SETUP MENU Audio Back General Language Bluetooth Clock Mode 12Hr Rating Clock... - Page 19 VM9214BT Setting Options Function Tuner Region • AM Frequency Spacing - 10kHz • AM Frequency Band - 530kHz~1720kHz • FM Frequency Spacing - 200kHz • FM Frequency Band - 87.5MHz~107.9MHz S.Amer1 • AM Frequency Spacing - 10kHz • AM Frequency Band - 530kHz~1720kHz •...
- Page 20 VM9214BT Setting Options Function English DVD menu (if applicable) is displayed in English. Menu Audio Sub-menu Features Setting Options Function Employ the Dynamic Range Control for better playback for low volumes. Loudness Turn bass boost on/off Sub- Turn the subwoofer on/off.
- Page 21 VM9214BT Bluetooth Sub-menu Features Setting Options Function Bluetooth Disable Bluetooth function. Enable Bluetooth function. Connect Manual Connect the last active mobile phone by touching the CON- NECT icon when disconnected. Auto Automatically connect when your paired phone is in range.
- Page 22 VM9214BT NOTE: Record the password and keep it in a safe place for future reference. The rating for each disc is marked on the disc, disc packing, or documentation. If the rating is not available on the disc, the parental lock feature is unavailable.
-
Page 23: Exiting The System Setup Menu
VM9214BT P.VOL Sub-menu Features Setting Options Function Source RADIO Choose a source for which you would like to increase the rel- ative volume (LEVEL). DISC USB1 USB2 CAMERA Level Increase relative volume for specified source up to 6 deci- bels. -
Page 24: Tuner Operation
VM9214BT TUNER OPERATION Tuner TFT Display 01:02 PM FM-1 P1 87.5 MHz RADIO P1 87.5 MHz P2 90.1 MHz P3 98.1 MHz P4 106.1MHz P5 107.9MHz P6 102.9MHz BAND 1. Current radio band indicator 2. Radio frequency indicator 3. Clock 4. -
Page 25: Seek Tuning
VM9214BT 16. 1/2: Touch to view a second screen of menu choices 17. Touch to view the SOURCE MENU and select a new playback source 18. MEM: View screen used to enter current channel into preset memory : Touch to view the SETUP menu 20. -
Page 26: Direct Tuning
VM9214BT Direct Tuning To enter a radio station directly, touch the button to display the direct entry menu. FM: _ _ _ . _ MHz Exit Enter Clear Enter the desired radio station using the on-screen number pad. Press the Enter button to tune to the selected station. - Page 27 VM9214BT 2. Touch an on-screen preset button (6) to select the corresponding stored station. P1 87.5 MHz P2 90.1 MHz P3 98.1 MHz P4 106.1MHz P5 107.9MHz P6 102.9MHz Auto Store/Preview Scan (AS/PS) Auto Store (AS) To select six strong stations and store them in the current band: 1.
-
Page 28: Dvd/Vcd Video Operation
VM9214BT DVD/VCD VIDEO OPERATION NOTE: When properly installed, DVD video cannot be displayed on the main TFT screen unless the parking brake is applied. If you attempt to play a DVD while the vehicle is moving, the TFT screen display a parking brake notice. -
Page 29: Controlling Playback
VM9214BT Controlling Playback To access the on-screen controls, touch the bottom 1/3 of the screen while a DVD is playing. Touch the 1/2 button to view a second page of controls AUDIO SUB- TITLE MENU TITLE DISP Stopping Playback Touch the stop button ( ) on the screen to stop DVD play. -
Page 30: Accessing The Dvd Menu
VM9214BT NOTE: For VCD play, the repeat function is not available if PBC is on. Sectional Repeat Function (A-B) Use the A-B function to define a specific area of a disc to repeat. • Touch the A-B button on the second page of DVD on-screen controls to set the start point (A) of the repeated section. -
Page 31: Playback Information
VM9214BT Viewing an Alternate Picture Angle (DVD Only) Some DVDs contain scenes that have been shot simultaneously from different angles. For discs recorded with multiple angles, touch the button on the second page of DVD on-screen controls to toggle available angles of the on- screen image. -
Page 32: General Disc Information
VM9214BT • Chapter 2/16 – Indicates that the second of 16 chapters on the DVD is currently playing. VCD Playback Information • VCD2.0 – Format of current disc. • Time 00:01:30/00:36:10 – Indicates the playback time of the current track. - Page 33 VM9214BT Table 5: Disc Symbols Symbol Meaning Indicates the region code where the disc can be played. • Region 1: USA, Canada, East Pacific Ocean Islands • Region 2: Japan, Western Europe, Northern Europe, Egypt, South Africa, Middle East • Region 3: Taiwan, Hong Kong, South Korea, Thailand, Indonesia, South-East Asia •...
-
Page 34: Dvd/Cd Audio Operation
Instructions for TFT control and Insert/Eject are the same for DVD and CD operation. Please see the DVD/Disc Video Operation section for information about these topics. The VM9214BT will play music or other audio files from the following disc media: •... - Page 35 VM9214BT : Touch to fast forward current track : Touch to rewind current track : Touch to activate/deactivate Repeat play mode : Touch to activate/deactivate Random mode : Touch to access the direct entry screen : Touch to view the SETUP menu 16.
-
Page 36: Direct Track Entry
VM9214BT Direct Track Entry To select a track directly, touch the on-screen button to display the direct entry menu. Chapter: _ _ Exit Enter Clear Enter the desired track using the on-screen number pad. Press the Enter button to tune to the selected station. To exit the screen without changing the... -
Page 37: Mp3/Wma Operation
VM9214BT MP3/WMA OPERATION Instructions for TFT control and Insert/Eject are the same for DVD and MP3 operation. Please see the DVD/Disc Video Operation section for information about these topics. Media and File Requirements This player allows you to play back MP3 and WMA files recorded onto CD-R/ RWs, DVD+R/RWs, and DVD-R/RWs. - Page 38 For example, a medium with the following folder/file hierarchy is subject to Folder Search, File Search or Folder Select, as shown below. The VM9214BT player will only recognize three folder levels and does not display folders containing only other folders. In the example above, the unit will display folders 3, 4, 6, and 8, but not 2 and 7 since they do not contain any tracks directly.
- Page 39 VM9214BT To remove the USB device, press the SRC button (10) or use the SOURCE MENU to switch to another mode, and then remove the USB device from the connector. MP3 User Interface The on-screen indicators and touch key areas for MP3 playback are outlined below.
- Page 40 VM9214BT : Touch to Fast Backward x2, x4, x8, x20 12. DIR -: Touch to view the previous folder 13. DIR +: Touch to view the next folder : Touch to access the direct entry screen : Touch to view the SETUP menu 16.
- Page 41 VM9214BT Direct Track Entry Touch the button to access files directly (see “Direct Track Entry” on page 32).
-
Page 42: Ipod ® Operation
VM9214BT ® iPod OPERATION NOTE: Be sure your iPod has the latest Apple firmware installed to avoid connectivity issues. Accessing iPod Mode ® ® This unit is Made for iPod and iPhone . You can control your iPod via touch screen to access Playlist, Artist, Album, Songs, etc. -
Page 43: Controlling Your Ipod
VM9214BT The on-screen indicators and touch key areas for iPod playback are outlined below. 01:02 PM Age of Consent iPod2 00:00:23 4/412 1 Acrobat 2 Afterlife MENU 3 Age of Consent 4 Alive 5 All Because of You 6 All the Pretty Faces Artist: New Order 1. - Page 44 VM9214BT File Playback To access files, touch the on-screen MENU button until you return to the main iPod menu and then select “MUSIC,” “VIDEO” or “PHOTO.” • Touch the /|| button to play/pause. • Touch the | button to move to the next item on the menu.
- Page 45 VM9214BT NOTE: To transmit the video from your iPod to the VM9214BT screen, you must set the following options through the iPod video settings menu: TV Out = On, TV Signal = NTSC, and Widescreen = On. NOTE: After disconnecting your iPod, the VM9214BT will always return...
-
Page 46: Bluetooth Operation
• Before using Bluetooth functions, you must pair your mobile phone to the VM9214BT head unit (see “Pairing the Bluetooth System with Your Mobile Phone and Head Unit”). To ensure the best reception for pairing and re- connection, please make sure the phone battery is fully charged before you begin. - Page 47 VM9214BT • To “disconnect” the mobile phone from the head unit, turn the Bluetooth connectivity off on the mobile phone or touch the button. • Phone Book direct searching through the head unit is only available if the mobile phone supports Phone Book Download. If the feature is not supported, the head unit will display “Phone book not provided by this...
- Page 48 VM9214BT 8. Exit call listing display : Connect/disconnect Bluetooth device (phone, PDA, personal music player, etc.) with hand-free function : Mute/un-mute microphone during active call : Answer incoming call/make call : Reject incoming call/end call/quit pairing process/quit reading phone book or call listing : Touch to view the SETUP menu 14.
-
Page 49: Managing Incoming Calls
VM9214BT is “1234”. See “Bluetooth Sub-menu Features” on page 17 for instructions on entering the pairing code. 3. Select “VM9214BT” from the pairing list on the mobile phone. • If pairing is successful, the TFT will display the paired mobile phone model number or name (as specified in your phone’s Bluetooth Setup... -
Page 50: Making An Outgoing Call
VM9214BT Volume Control To increase or decrease the volume level, turn the rotary encoder (7) on the front panel. Microphone Mute To mute the microphone, touch the button (10). Touch again to resume microphone functionality. Making an Outgoing Call NOTE: Touch the button from the main Bluetooth screen to automatically dial the last call received. - Page 51 3. Touch to highlight the number you want to dial and then touch the button. NOTE: Some mobile phones do not support Phone Book upload through Bluetooth. This is a limitation of the phone, not the VM9214BT.
-
Page 52: Bluetooth Setup
3. Touch the area to the right of “Connect” to select “Auto”. Advanced Audio Distribution Profile (A2DP) The VM9214BT allows you to play back audio files from your phone, PDA or personal music player using a Bluetooth connection. Before using an audio player, it may be necessary to enter a PIN code into the unit. -
Page 53: Troubleshooting
VM9214BT TROUBLESHOOTING Table 6: Troubleshooting Problem Cause Corrective Action GENERAL Unit will not Radio Fuse blown Install new fuse with correct rating power on Car battery fuse blown Install new fuse with correct rating Illegal operation Press the RESET button located in the... - Page 54 VM9214BT Table 6: Troubleshooting Problem Cause Corrective Action Prolonged Improper aspect ratio Use correct aspect ratio setting image or setup improper height/width ratio display Monitor stops Moving path is blocked Press OPEN key to restart monitor at incorrect movement position...
-
Page 55: Error Messages
VM9214BT Table 6: Troubleshooting Problem Cause Corrective Action Interruption Disc is dirty or scratched Clean disc or replace occurred dur- File is damaged/bad Recreate disc with good files ing playback recording Incorrect play- Message is longer than back message LCD can display... - Page 56 VM9214BT 5. Do not attempt to use a 3” (8 cm) CD-Single disc in this unit, either with or without an adaptor, as damage to the player and/or disc may occur. Such damage is not covered by the Warranty on this product.
-
Page 57: Specifications
VM9214BT SPECIFICATIONS DVD/CD Player Compatible Disc Media: DVD + R / RW (Single and Dual Layer) and CD-R / Compatible Media Formats: CD-DA, MP3, WMA, VCD, SVCD, Xvid, AVI, MPEG1 / 2 Signal to Noise Ratio: >95dBA Dynamic Range: >95dB Frequency Response: 20Hz to 20 kHz, -3dB Channel Separation: >... - Page 58 VM9214BT Operating Temperature: -20C ~ 65C Fuse: 15-amp, mini ATM type DIN chassis dimensions: 7" X 7" X 2" (178mm x 178mm x 50mm) CEA Power Ratings Power Output: 13 Watts RMS x 4 channels into 4-Ohms @ < 1% THD+N...
- Page 59 Audiovox Electronics Corporation Hauppauge, NY 11788 Technical Assistance: 1-800-323-4815 www.jensen.com © 2011 Audiovox Ver. 022811 Printed in China...