
Related Manuals for EdgeStar AP8000W


Summary of Contents for EdgeStar AP8000W
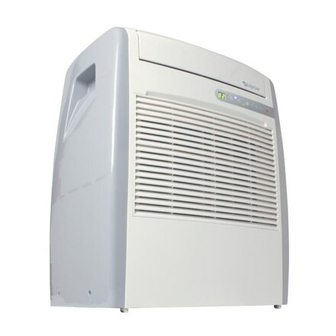
- Page 1 Portable Air Conditioner AP8000W Owner’s Manual For more information on other great EdgeStar products on the web, go to http://www.edgestar.com...
-
Page 2: Important Safety Information
2. Press the TEST button on the LCDI plug. This should trip the plug and cut the power to the air conditioner. If the plug does not trip and you are able to turn on the unit, please contact EdgeStar support. -
Page 3: Table Of Contents
Table of Contents IMPORTANT SAFETY INFORMATION ..............I INTRODUCTION ..................... 1 PARTS IDENTIFICATION ..................2 ......................2 RONT ......................2 INSTALLING THE CARBON FILTER ................. 3 WINDOW KIT INSTALLATION INSTRUCTIONS ............4 REPARATIONS FOR INSTALLING THE WINDOW KIT ............4 NSTALLING THE GRATED ADAPTER ................ -
Page 4: Introduction
Introduction Thank you for purchasing this EdgeStar portable air conditioner. We are glad you chose us. We believe that your purchase of this product opens a relationship between you and EdgeStar. We will provide the customer support needed to nurture that relationship. -
Page 5: Parts Identification
Parts Identification Front View Front Air Vent Handle Front Control Panel Front Grille / Air Intake Note: You must open the front air vent when operating the unit. The unit is designed to blow air mostly from the right side. Back View Exhaust Power Cord... -
Page 6: Installing The Carbon Filter
Installing the Carbon Filter Your portable air conditioner ships with a pre-filter and an activated carbon filter. The carbon filter will help remove contaminates and odors from the air. It is recommended you replace the carbon filter every two to three months, or as needed. -
Page 7: Window Kit Installation Instructions
Window Kit Installation Instructions Preparations for installing You must vent your portable air conditioner when running in it cooling mode. Your unit includes a window exhaust kit that can be used to vent the window kit the unit out a window. Before you begin, make sure you have all the parts necessary for installation. -
Page 8: Installing The Grated Adapter
Installing the grated adapter 1. Insert the round grated adapter through the back grooved side of the window kit plate with hole. 2. Secure the grated adapter by fastening the screws from flat side of the window kit plate to the holes on the grated adapter. -
Page 9: Installing The Window Plates
Installing the window plates 3. Open your window and place the window kit with grooved side facing outward on the window sill. Then, slide the window kit plate to fit the width of the window. You can use screws to ... -
Page 10: Attaching The Duct Connectors To The Exhaust Hose
Attaching the duct connectors to the exhaust hose 5. Attach the connectors to the hose: A. Extend the ends of the exhaust hose B. Thread the duct connector on by turning it clockwise until it stops. 6. Roll the unit towards the window kit. Leave a space that is at least 20 inches to the wall. -
Page 11: Connecting The Duct Connector To The Unit
Connecting the duct connector to the unit 7. Align the slots on the duct connector to the tabs and snap into the back of the unit. Connecting the duct connector to the grated adapter 8. Align the slots on the duct connector to the tabs on the grated adapter and snap in place. -
Page 12: Notes About The Exhaust Hose
After you have installed the exhaust hose and window kit, you can plug in your portable air conditioner and start using it. Notes about the Exhaust Your portable air conditioner is designed to exhaust condensate hose water that is collected from the air. This water, in either gaseous or droplet form, will be expelled out the exhaust port of the unit. -
Page 13: Control Panel Overview
Control Panel Overview LED Display Warning Light Fan Speed Button Remote Sensor Timer Button Mode Lights Timer/Temperature Set Buttons Power Button Mode Button Fan Speed Lights Function The LED can display the ambient LED Display temperature, set temperature, and the number of hours when setting the timer. -
Page 14: Using The Control Panel
Using the Control Panel The LCD Display will show the ambient temperature by default. Pressing LCD Display the Up and Down buttons on the remote control will show the set temperature for 15 seconds, and then revert to the room temperature. You can switch between Fahrenheit and Celsius by pressing the C/F button on the remote control. -
Page 15: Remote Control Overview
Remote Control Overview The remote control is used to operate all of your portable air conditioner’s functions. Power Button Mode Button POWER Speed Button Up and Down NOTE: Be careful not drop Buttons Timer Button the remote control. Do Celsius / Cancel Button not place the remote Fahrenheit Button... -
Page 16: Operating The Remote Control
Operating the Remote Control Use the Power button to turn the portable air conditioner on and off. Power By default when you first use the power button, the unit will begin to operate in cooling mode. The unit will remember the last used mode/settings if you shut down and restart. -
Page 17: Fan Only Mode
Operating the Remote continued Fan Only mode is used to circulate the air in your room. No temperature Fan Only Mode setting is needed. To operate the unit in Fan Only mode: 1) Make sure the power cord is plugged into a power outlet. NOTE: Fan Only mode does 2) Press the Power button on the remote. -
Page 18: Energy Saving Guide
Energy Saving Guide Read and follow the guide below to get the best performance and efficiency from your portable air conditioner: Do not cover the air outlet (exhaust) while in use. Do not place the unit in front of curtains or drapes- to ensure they do not obstruct the air intake. -
Page 19: Maintenance
2-3 months or as needed. Clean the pre-filter periodically. If the unit is used in a dusty environment Contact EdgeStar retailers for you may need to clean it on a weekly basis. replacement filters. Warning: Never operate the unit without the pre-filter. -
Page 20: Troubleshooting
Troubleshooting Follow the troubleshooting guide below to resolve common issues. Issue Possible Cause Solution My air conditioner is Unit is not receiving Make sure the unit is not functioning at all. power. plugged in to a grounded outlet. LCDI power cord is Press the Reset button tripped. -
Page 21: Troubleshooting Continued
Troubleshooting continued Issue Possible Cause Solution My air conditioner is Unit is not operating in Set the unit to be in not cooling at all. cooling mode. cooling mode, and lower the set temperature (pg. 13). The compressor is not The compressor may take up to 3 minutes to turn on, or longer if it is... -
Page 22: Specifications
Specifications Description of product Portable Air Conditioner Model AP8000W Voltage/Frequency AC 115V~60Hz Input Power 840W Current 7.9A Color White Dehumidifying capacity 71 Pints/Day Coolant R-410A Timer 24 Hour Dimensions 19 1/4” 24 3/4” x13 1/4” WxHxD Weight 56 lbs... -
Page 23: Product Warranty
Once an EdgeStar authorized representative has confirmed that your product is defective and eligible for warranty service, the product must be returned to an EdgeStar authorized re- pair facility. EdgeStar is not responsible for damage resulting from shipper mishandling or improper packaging. Do not return a defective product to the place of purchase. - Page 24 Web: http://www.edgestar.com E-mail: service@edgestar.com Register your product, download owner’s manuals, access additional troubleshooting resources, and obtain more information on other great EdgeStar products on the web at: http://www.edgestar.com Product contents and specifications may change without notice. Copyright © 2014 Living Direct, Inc. All rights reserved.