
Related Manuals for Frigidaire CLCG900FW3


Summary of Contents for Frigidaire CLCG900FW3
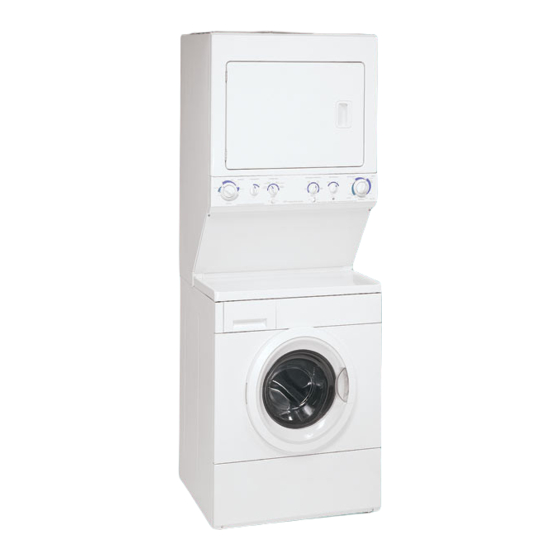
- Page 1 Installation Instructions Full Size Laundry Center Gas & Electric instrucciones para la instalaci6n Centro de lavanderia a gas y electrica www.frigidaire.com P/N134889400A (0804)
-
Page 2: Table Of Contents
CONTENTS SUBJECT PAGE Pre-lnstallation Requirements ............................Electrical Requirements ..............................Water Supply Requirements ............................Drain Requirements ..............................Exhaust System Requirements ........................... Gas Supply Requirements .............................. Location ..................................Rough-In Dimensions ..............................Mobile Home Installation ............................. Unpacking .................................. Electrical Installation ..............................Grounding Requirements .............................. 3 &... -
Page 3: Pre-Lnstallation Requirements
PRE-INSTALLATION REQUIREMENTS GAS Laundry Center Tools and Materials Required for Installation: 1. Phillips head screwdriver CIRCUIT-Individual 15 amp branch circuit fused with a 15 2. Channel-lock adjustable pliers amp maximum time delay fuse or circuit breaker. 3. Carpenter's level POWER SUPPLY - 3 wire, 120 volt single phase, 60 Hz, 4. -
Page 4: Exhaust System Requirements
EXHAUST SYSTEM REQUIREMENTS Do not allow combustible materials (for Useonly4 inch(10.16cm)diameter(minimum) example: clothing,draperies/curtains paper) to come in contact flexible metal duct and approved vent hood which has a with the exhaust system. The dryer MUST NOT be exhausted swing-out damper(s) that opens when the dryer is in into a chimney, a wall, a ceiling, or any concealed space of a operation. -
Page 5: Gas Supply Requirements
The laundry center may be exhausted four (4) ways with rear To exhaust up, add an 11 inch (27.94 cm) length of standard 4 flush installation: inch (10.16 cm) diameter duct and a 90 ° elbow. The unit will 1. Straight back be positioned about 41/2inches (11.43 cm) away from the wall 2. -
Page 6: Rough-In Dimensions
ROUGH-IN DIMENSIONS 16 1AIN, (41,27 CM) GAS SUPPLY ]2Y21N,J._ 9S/81N, PIPE (REAR) (3] ,75 CM} I (23,_ VENT--/1-"_ 1 7/8 IN, 5 1AIN, (4,76 CM) l& _--(] 3,33 CM) 75_ IN. (191.14 CM.) 42_ IN. 36 IN. (107.32 CM.) 53 IN. --/r:- (91.44 CM.) (134.62 CM.) -
Page 7: Mobile Home Installation
UNPACKING MOBILE HOME INSTALLATION 1. Using the four shipping carton corner posts (two on each side), carefully 1. Dryer MUST be exhausted outside (outdoors, lay the laundry center on its left side and remove the foam shipping beneath the mobile home) using metal base. -
Page 8: Electrical Installation
ELECTRICAL INSTALLATION For a permanently connected laundry center: The laundry center MUSTbe connected to a grounded metal, permanent wiring system; or an equipment grounding con-ductor ALL ELECTRIC Laundry Centers MUSTbe run with the circuit conductors and connected to the The following are spedfic requirements equipment-grounding terminal or lead on the appliance. - Page 9 INSTALLATION 5. Attach the remaining two power cord outer conductors to the outer brass colored terminals on the terminal block. Leve/ing the Laundry Center Tighten both screw securely. Excessive noise and vibration can be prevented by properly 6. Tighten the screws securing the cord restraint against the leveling the washer.
-
Page 10: Replacementparts
3. Open theshutoffvalve inthegassupply line. 3. Turn on the power at a circuit breaker/fuse box. 4. Test a llconnections bybrushing o na soapy w atersolution. Before operating the dryer, make sure the NEVER TEST FOR GAS LEAKS WITH AN OPEN FLAME. dryer area isclear and free from combustible materials, gasoline, and other flammable vapors. -
Page 11: Espahol
/ndice MA TERIA PA GINA Requerimientos de instalaciOn preliminares ........................Requerimientos el_ctricos ..............................Requerimientos del suministro de agua ........................... Requerimientos de desag0e ............................Requerimientos del sistema de escape ......................... 13-14 Requerimientos del suministro de gas ..........................Ubicaci0n ..................................Dimensiones para la instalaciOn ............................InstalaciOn en casas mOviles............................. -
Page 12: Requerimientos Del Suministro De Agua
REQ UERIMIENTOS DE INSTA LA CION Centre de/avanderia a GAS PREMMINARES CIRCUITO - Circuito individual derivado de 15 amp, con fusibles Herramientas y materiales necesarios para la instalacion: de 15 amp. de retardo m_iximo o disyuntor. 1. Destornillador Phillips 2. Alicates universales ALIMENTACION EL_-CTRICA - Corriente alterna,... -
Page 13: Requerimientos Del Sistema De Escape
REQUERIMIENTOS DEL SISTEMA DE ESCAPE No permita que los materiales combustibles (per ejemplo: la Utilice solamente ductos met_ilicos rigidos o flexibles de 4" ropa cortinas/cortinajes, papel) tengan contacto con los ductos. (10,2 cm) de di_imetro (minimo) y una caperuza de salida de use El escape de la secadora NO DEBE dirigirse hacia el interior de aprobado, con registrosque giren haciaafuera que seabren cuando una chimenea, hacia una pared, hacia el cielo rasoo haciacualquier... -
Page 14: Requerimientos Del Suministro De Gas
Se puede colocar el ducto de escape de cuatro (4) maneras puede set instalada directamente a trav_s de la pared exterior. distintas cuando el artefacto est_ instalado con el fondo paralele Para colocar el ducto de escape hacia arriba, ahada un ducto 11 con la pared. -
Page 15: Dimensiones Para La Instalacion
DIMENSIONS PARA LA INSTALACION 25 1AIN, (64,13 CM) 2 1/2IN, (6.35 CM) < 47" 16 1/4IN, (41,27 CM) LINEA DE ALIMENTA- 12 T/2IN,m}_ 9 3/8 IN, rY-T/ON DE GAS (ATRAS) (31,75 CM)" --------_1 (23,_C_). VENT-_,,1-'_ 1 7/8 IN, 5 1AIN, (4,76 CM) (13,33 CM) 421/4IN. -
Page 16: Instalacion En Casas Moviles
DESEMBALAJE INSTALA CION EN CASAS MO VILES Utilizando las cuatro esquineras de embarque de la caja de carton (dos a cada 1. Eltubo de escape de la secadora DEBEseF lado), coloque cuidadosamente la secadora sobre el costado izquierdo y saque la instalado hacia el exterior (El escape debe base de espuma de embarque. -
Page 17: Instalaci6N El_Ctrica
INSTALA CION ELL'CTRICA Centro de/avanderia ELECTRICAScanadienses TODAS/os centro /avandoria ELECTR/CA5 conexi6n indebida del conductor de puesta a tierra Los siguientes requerimientos del equipo puede ocasionar un riesgo de choque el@ctrico. C onsulte especificos para el funcionamien to correcto y seguro de su con un electricista profesional si tiene alguna duda respecto a la secadora. -
Page 18: D:onexi6Nes El_Ctricas - Trifilares Y Tetrafilares
Centre de/avanderia ELECTRICASNo canadienses Centre de lavanderia EZECTR/CASNo canadienses CONEXIONES ELECTRICASPARA UN SISTEMA TRIFILAR CONEXIONES ELECTRICASPARA UN SISTEMA TETRAFILAR 1. Saque Iostornillos que sujetan la cubierta de Saque los tornillos que sujetan la cubierta de acceso del tablero de homes y el soporte de acceso del tablero de homes y el soporte de montaje del anclaje del cord6n, situado en montaje del anclaje de cable situado en la... -
Page 19: Instalaci6N
INSTALACION Con cuidado, mueve el centro de lavanderia hasta su ubicaci6n definitiva para instalaci6n final. Losrodillos en la parte posterior La nivelaci6n del ruido y de la vibraci6n excesivos de la de la base de la lavadora permiten el movimiento f_icil en lavadora puede set prevenida correctamente nivelando la instalaciones del armario o del alcove. -
Page 20: Repuestos
g. Saque los dos (2) tornillos que sujen el panel de acceso delantero de la secadora al gabinete de la secadora. Lev- 15.Si su lavanderia no funciona, consulte la secci6n "Lista de ante el panel hasta que las lengOetas se desenganchen del Control de Averias"...