Table of Contents
Advertisement
Model No. HREX2076.0
Serial No.
QUESTIONS?
As a manufacturer, we are com-
mitted to providing complete
customer satisfaction. If you
have questions, or if parts are
damaged or missing, PLEASE
CONTACT OUR CUSTOMER
SERVICE DEPARTMENT
DIRECTLY.
CALL TOLL-FREE:
1-888-922-4222
Mon.–Fri., 6 a.m.–6 p.m. MST
ON THE WEB:
www.healthriderservice.com
CAUTION
Read all precautions and instruc-
tions in this manual before using
this equipment. Keep this manual
for future reference.
Serial
Number
Decal
USER'S MANUAL
Visit our website at
www.healthrider.com
new products, prizes,
fitness tips, and much more!
Advertisement
Table of Contents

Related Manuals for Healthrider N35 HREX2076.0


Summary of Contents for Healthrider N35 HREX2076.0
- Page 1 Mon.–Fri., 6 a.m.–6 p.m. MST ON THE WEB: www.healthriderservice.com CAUTION Read all precautions and instruc- tions in this manual before using this equipment. Keep this manual for future reference. USER’S MANUAL Visit our website at www.healthrider.com new products, prizes, fitness tips, and much more!
-
Page 2: Table Of Contents
IMPORTANT PRECAUTIONS ..............2 BEFORE YOU BEGIN . -
Page 3: Before You Begin
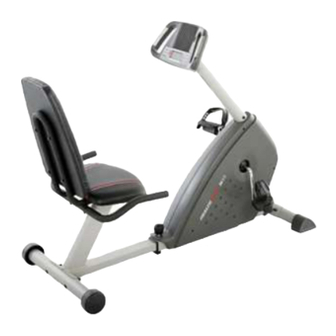
Thank you for selecting the new HEALTHRIDER exercise cycle. Cycling is one of the most effective exercises for increasing cardiovascular fitness, building endurance, and toning the body. The N35 exercise cycle offers a selection of features designed to let you enjoy this healthful exercise in the convenience and privacy of your home. -
Page 4: Assembly
To hire an authorized service technician to assemble the exercise cycle, call toll-free 1-800-445-2480. Assembly requires two persons. Place all parts of the exercise cycle in a cleared area and remove the pack- ing materials. Do not dispose of the packing materials until assembly is completed. In addition to the included hex keys, assembly requires a phillips screwdriver As you assemble the exercise cycle, use the drawings below to identify small parts. - Page 5 To make assembly easier, read the information on page 4 before you begin assembling the exercise cycle. While another person lifts the front of the Frame (1), attach the Front Stabilizer (3) to the Frame with two M10 x 75mm Carriage Bolts (51) and two M10 Nylon Locknuts (63).
- Page 6 5. Have another person hold the Seat Frames (7) under the Rear Frame (2) as shown. Attach the Seat Frames and the Seat (12) to the Rear Frame with four M6 x 42mm Button Screws (49) and four M6 Washers (55). See step 3.
- Page 7 Wire Harness (65). Attach the Upright (13) to the Frame (1) with three M8 x 25mm Button Screws (33) and three M8 Split Washers (59). Be careful to avoid pinching the Wire Harnesses. 9. Identify the Left Pedal (24), which is marked with a “Left”...
-
Page 8: How To Operate The Exercise Cycle
HOW TO OPERATE THE EXERCISE CYCLE HOW TO ADJUST THE SEAT After the exercise cycle is assembled, adjust the Seat (12) to the proper position. As you pedal, there should be a slight bend in your knees when the pedals are in the far- thest forward position. - Page 9 DIAGRAM OF THE CONSOLE Program Button Profiles Program Button FEATURES OF THE CONSOLE This advanced console offers a selection of features designed to make your workouts more effective. When you use the manual mode of the console, you can change the resistance of the pedals with the touch of a button.
- Page 10 Follow your progress with the display. The upper half of the display will show the elapsed time, the distance you have pedaled, and the resistance level of the pedals. The display will change modes every few sec- onds. Note: When a preset program is selected, the display will show the time remaining in the program instead of the elapsed time.
- Page 11 HOW TO USE A PRESET PROGRAM Turn on the console. See step 1 on page 9. Select a preset program. To select a preset program, press the Program button repeatedly until the number 1, 2, 3, 4, or 5 appears along the left side of the display.
-
Page 12: Maintenance And Troubleshooting
Inspect and properly tighten all parts of the exercise cycle regularly. Replace any worn parts immediately. To clean the exercise cycle, use a damp cloth and a small amount of liquid dish soap. Important: To avoid damaging the console, keep liquids away from the console and keep the console out of direct sunlight. -
Page 13: Conditioning Guidelines
The following guidelines will help you to plan your exercise program. Remember that proper nutrition and adequate rest are essential for successful results. WARNING: Before beginning this or any exercise program, consult your physician. This is especially important for persons over the age of 35 or persons with pre-existing health problems. -
Page 14: Part List
Key No. Qty. Description Frame Rear Frame Front Stabilizer Rear Stabilizer Backrest Handlebar Seat Frame Seat Frame Top Left Side Shield Right Side Shield Stabilizer Endcap Seat Upright Front Bushing Rear Bushing Console Adjustment Knob Wheel Wheel Cap Frame Pad Frame Stop Reed Switch Clamp C-magnet Bracket... -
Page 15: Exploded Drawing
R0706A... -
Page 16: Ordering Replacement Parts
• the MODEL NUMBER of the product (HREX2076.0) • the NAME of the product (HEALTHRIDER N35 exercise cycle) • the SERIAL NUMBER of the product (see the front cover of this manual) • the KEY NUMBER and DESCRIPTION of the part(s) (see page 14) HEALTHRIDER is a registered trademark of ICON IP, Inc.