Table of Contents
Advertisement
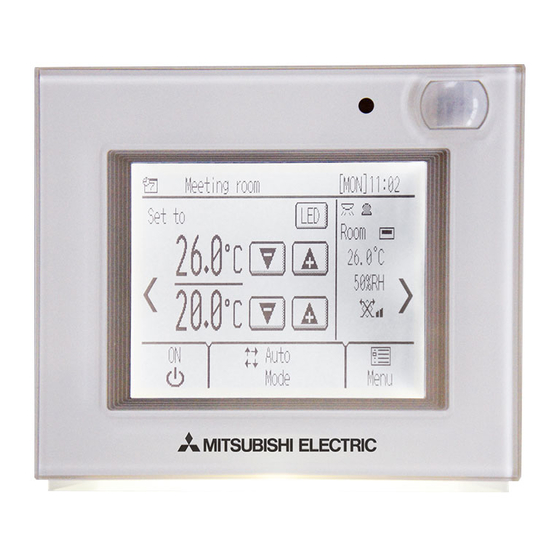
CITY MULTI Control System
Smart ME Controller PAR-U02MEDA
Instruction Book
Prior to use, thoroughly read the instructions in this manual to use the product correctly.
Retain this manual for future reference.
Make sure that the CD-ROM, Installation Manual, and Simple Operation Manual are passed
on to any future users.
To ensure safety and proper operation of the remote controller, the remote controller should
only be installed by qualified personnel.
English
Deutsch
Français
Español
Italiano
Nederlands
Português
Ελληνικά
Русский
Türkçe
Český
Slovenský
Magyar
Polski
Slovenščina
Svenska
Hrvatski
Български
Română
Dansk
Advertisement
Table of Contents

Related Manuals for Mitsubishi Electric PAR-U02MEDA


Summary of Contents for Mitsubishi Electric PAR-U02MEDA
- Page 1 English Deutsch CITY MULTI Control System Français Smart ME Controller PAR-U02MEDA Instruction Book Español Italiano Nederlands Português Ελληνικά Русский Türkçe Český Slovenský Magyar Polski Slovenščina Svenska Hrvatski Български Prior to use, thoroughly read the instructions in this manual to use the product correctly.
-
Page 2: Product Features
Product features Smart ME Controller is a remote controller designed to control Mitsubishi Electric’s air conditioning units and also allows for the control of other manufacturer’s products connected via Mitsubishi Electric’s AHC. It can control up to sixteen indoor units and one AHC. - Page 3 ▌ Energy-save control with the use of the built-in occupancy sensor Occupancy sensor Brightness sensor • Energy-save control will be performed when the occupancy sensor detects vacancy. • When the occupancy sensor detects no human movement for a certain period of time, this will be regarded as the vacancy.
-
Page 4: Led Indicator
▌ LED Indicator LED Indicator • The LED indicator indicates the operation status by lighting and blinking with different colors and brightness (High/Low), or by turning off. • Indicator colors: Blue, Light blue, Purple, Red, Pink, Orange, Yellow, Green, Lime, and White Operation status LED indicator Lights up in different colors according to the operation mode or the room... -
Page 5: Table Of Contents
Contents Product features ··························································· 2 Controller interface ············································································ 2 Safety precautions ························································ 6 Screen display ··························································· 10 Screen configuration ·········································································10 Display ···························································································12 Menu structure ················································································16 Icon explanations ·············································································18 Basic operations ························································· 19 Power ON/OFF ···············································································19 Operation mode and Set temperature settings ·······································20 Fan speed and Air direction settings ·····················································24 Louver setting ··················································································26 LOSSNAY setting ·············································································27... -
Page 6: Safety Precautions
Safety precautions • Thoroughly read the following safety precautions before using the unit. • Observe these precautions carefully to ensure safety. Indicates a risk of death or serious injury. WARNING Indicates a risk of serious injury or structural damage. CAUTION •... - Page 7 Properly dispose of the packing materials. Plastic This controller is designed for exclusive use with bags pose suffocation hazard to children. the Building Management System by Mitsubishi To avoid damage to the controller, do not Electric. The use of this controller for with other overtighten the screws.
- Page 8 Safety precautions The CD-ROM that is supplied with Smart ME Controller The CD-ROM can only be played on a CD-drive or a DVD-drive. Do not attempt to play the CD-ROM on an audio CD player as this may damage your ears and/ WARNING or speakers.
- Page 9 Safety precautions...
-
Page 10: Screen Display
Screen display Screen configuration General equipment screen Home screen This screen will not appear if no Advanced HVAC CONTROLLERs (AHC) are connected. Menu (User) screen... - Page 11 Screen display Indoor unit setting screen Humidity setting screen The setting items that are not available This screen will not appear if no for the connected indoor unit will not Advanced HVAC CONTROLLERs appear on the display. (AHC) are connected. Menu (Service) screen A password is required to access the Menu (Service) screen.
-
Page 12: Display
Screen display Display ▌ Home screen Basic * All icons are displayed for explanation. Advanced... - Page 13 Screen display ▌ ▌ 1 [ON/OFF] button Touch to turn ON/OFF the indoor unit. Appears during the energy-save control (depending on the indoor unit model). ▌ 2 [Operation mode] button ▌ Touch to change the operation mode. Appears when the filter needs maintenance. ▌...
- Page 14 Screen display ▌ Indoor unit setting screen ▌ General equipment screen ▌ Humidity setting screen...
-
Page 15: Air Direction
Screen display ▌ p Fan speed Touch to change the fan speed. ▌ q Louver Touch to turn ON/OFF the louver. ▌ r Air direction Touch to change the air direction. ▌ s LOSSNAY Touch to change the fan speed of the LOSSNAY unit. ▌... -
Page 16: Menu Structure
Screen display Menu structure Menu (User) Date and time ··· Page 35 Enter date and time ··· Page 35 Date and time format ··· Page 36 Daylight saving time ··· Page 37 Schedule ··· Page 38 Timer ··· Page 41 ON/OFF timer ···... - Page 17 Screen display Menu (Service) ··· Refer to the Installation Manual for details. Setup Group setting Interlock setting Search connection information Cool/Heat display Temperature sensor offset Humidity sensor offset Room name Telephone number IC Function settings LED color adjustment Reset RC AHC port name screen Error menu Self check...
-
Page 18: Icon Explanations
Screen display Icon explanations Function settings The table below Timer summarizes the square icons used in this manual. The user password must be entered on the [Login page] to change settings. There is no settings that can skip this process. : Touch to move the cursor left. -
Page 19: Basic Operations
Basic operations Power ON/OFF Button operation ON/OFF Touch the [ON/OFF] button to turn on or off the indoor unit. * The LED indicator will light up when the indoor unit is turned on. * The LED indicator display depends on the settings for the function settings. -
Page 20: Operation Mode And Set Temperature Settings
Basic operations Operation mode and Set temperature settings Button operation Operation mode Touch the [Operation mode] button to go through the operation modes in the following order. Select the desired operation mode. Cool Heat Auto *1*2 Cool Auto Heat Auto_Cool Auto_Heat *1 Operation modes that are not available for the connected indoor unit will not appear on the display. - Page 21 Basic operations Auto (dual set point) mode: When the operation mode is set to the Auto (dual set point) mode, two set temperatures (one each for cooling and heating) can be set. Depending on the room temperature, indoor unit will automatically operate in either the cooling or heating mode and keep the room temperature within the preset range.
- Page 22 Basic operations Button operation Set temperature Touch to decrease or increase the set temperature. • Depending on the Temperature unit setting, temperatures will decrease or increase by 0.5ºC, 1ºC, 1ºF, or 2ºF increments. (See page 47.) • Refer to the table on page 23 for the settable temperature range for different operation modes.
- Page 23 Basic operations ▌ Set temperature range Operation mode Set temperature range Cool/Dry *1*5 19ºC–35ºC/67ºF–95ºF Heat *1*5 4.5ºC–28ºC/40ºF–83ºF Auto (single set point) *1*2*5 19ºC–28ºC/67ºF–83ºF Auto (dual set points) Cool: Same as the set temperature range for Cool mode *2*3*4*5 Heat: Same as the set temperature range for Heat mode Not settable *1 The settable temperature ranges vary, depending on the indoor unit model.
-
Page 24: Fan Speed And Air Direction Settings
Basic operations Fan speed and Air direction settings Button operation Fan speed Touch to go through the fan speeds in the following order. Select the desired setting. Auto • The number of available fan speeds depends on the indoor unit model. <Note>... - Page 25 Basic operations Button operation Air direction Touch to go through the airflow directions in the following order. Select the desired setting. Auto Swing Select “Swing” to automatically swing the airflow direction. • The settable air directions depend on the indoor unit model.
-
Page 26: Louver Setting
Basic operations Louver setting Button operation Louver Touch to turn on or off the louver swing. • The louver setting will not appear if the indoor unit does not feature the louver function. -
Page 27: Lossnay Setting
Basic operations LOSSNAY setting Button operation LOSSNAY Touch to go through the fan speeds of the LOSSNAY unit in the following order. * Settable only when LOSSNAY unit is connected. High * Indoor unit fan may operate even when the LOSSNAY unit is operated individually, depending on the models of the indoor unit and the LOSSNAY unit. -
Page 28: Humidity Setting
Basic operations Humidity setting Button operation Humidity Touch to decrease or increase the humidity by 1%RH. • The settable range is between 20% and 80% (RH). • The Humidity setting screen will appear only when a humidifier is connected to AHC. -
Page 29: Navigating Through The Menu
Navigating through the Menu Menu list Reference Menu items Setting items and details page Sets the current date and time. Date and time Selects the date and time format. Sets the daylight saving time. Schedules the operation ON/OFF times, operation modes, and set Schedule temperatures for a week. -
Page 30: About Passwords
Navigating through the Menu Reference Menu items Setting items and details page Temporarily makes the touch panel unresponsive to touch to allow Screen cleaning for cleaning. Displays and resets the filter signs on the indoor and LOSSNAY Filter information units. Error information Displays the error status when an error occurs. -
Page 31: Navigating Through The Menu
Navigating through the Menu Navigating through the Menu Button operation Accessing the Menu Touch the [Menu] button. The Menu screen will appear. - Page 32 Navigating through the Menu Button operation Navigating through the pages Touch to switch between the pages. To access the Menu (Service) screen, touch the [Service] tab. A maintenance access password will be required to access the Menu (Service) screen.
- Page 33 Navigating through the Menu Button operation Item selection Touch the desired item on the Menu screen. When an attempt is made to access a password- protected screen, a [Login page] will appear. Enter a user password (default: 0000). The settings screen for the selected item will appear. Navigating through the screens •...
- Page 34 Navigating through the Menu Button operation Exiting the Menu screen Touch the [Home] button to exit the Menu screen and return to the Home screen. If no buttons are touched for 10 minutes, the screen will automatically return to the Home screen.
-
Page 35: Function Settings
Function settings Date and time ▌ Enter date and time Button operation Select [Date and time] from the Menu. Then, touch [Enter date and time] in the list. Date and time setting is required before making the following settings. • Schedule •... -
Page 36: Date And Time Format
Function settings ▌ Date and time format Button operation Select [Date and time] from the Menu. Then, touch [Date and time format] in the list. Touch the buttons to select date and time display formats. Touch [Done] to save the settings. Navigating through the screens •... -
Page 37: Daylight Saving Time
Function settings ▌ Daylight saving time Button operation Select [Date and time] from the Menu. Then, touch [Daylight saving time] in the list. The default setting is “Disabled.” To activate the daylight saving time, touch the [Disabled] button to change it to [Enabled]. Set the following items with the buttons. -
Page 38: Schedule
Function settings Schedule Operation ON/OFF times, operation modes, and set temperatures for a week can be scheduled. Up to eight operation patterns can be scheduled for each day. <Setting the schedules> Select [Schedule] from the Menu. The Schedule function will not work in the following cases: when the ON/OFF timer is enabled, during an error, during test run, when the clock is not set, when the ON/OFF operation,... - Page 39 Function settings The current settings for the selected day will appear. Set the following items. • Time * The time is settable in 5-minute increments. * Touch and hold to rapidly advance the numbers. • ON/OFF • Mode • Temperature * The settable operation modes and temperature ranges vary, depending on the indoor unit model.
- Page 40 Function settings <Copying a schedule> To copy the schedule settings of a day to the schedule settings for another day of the week, touch [Copy]. Touch the day whose schedule settings are to be copied and the day(s) to which the copied schedule settings are to be pasted.
-
Page 41: Timer
Function settings Timer ▌ ON/OFF timer ON/OFF timer allows the user to set a timer to turn on or off the indoor unit at the specified times. Button operation Select [Timer] from the Menu. Then, touch [ON/OFF timer] in the list. The ON/OFF timer will not work in the following cases: when ON/OFF timer is disabled, during an error, during test run, when the clock is not set,... - Page 42 Function settings will appear on the Home screen when the ON/ OFF timer is enabled. The timer will not be executed when the timer execution is prohibited from the centralized controller. will disappear.
-
Page 43: Auto-Off Timer
Function settings ▌ Auto-OFF timer Auto-OFF timer allows the user to set a timer to turn off the indoor unit after the specified time has elapsed. Button operation Select [Timer] from the Menu. Then, touch [Auto-OFF timer] in the list. The Auto-OFF timer will not work in the following cases: when Auto-OFF timer is disabled, during an error, during test run, when the ON/OFF operation... - Page 44 Function settings “Auto-OFF” will appear on the Home screen when the Auto-OFF timer is enabled. When the timer execution is prohibited from the centralized controller, “Auto-OFF” will disappear.
-
Page 45: Night Setback
Function settings Night setback The Night setback function starts heating operation when a given group is stopped and the room temperature drops below the specified lower limit temperature. Also, this function starts cooling operation when a given group is stopped and the room temperature rises above the specified upper limit temperature. - Page 46 Function settings The current settings will appear. Set the following items. • Temperature range * Set the upper limit temperature for cooling operation and the lower limit temperature for heating operation. * The difference between the lower and upper limit temperatures must be 4ºC (8ºF) or more.
-
Page 47: Display Format
Function settings Display format ▌ Language ▌ Temperature unit ▌ Room temperature display ▌ Backlight timeout Button operation Touch [Settings] from the Menu. Then, touch [Display format] in the list. Language Touch the button to select the display language of your choice. - Page 48 Function settings Room temperature display Touch the button to select the desired room temperature display option to be used on the Home screen. • Show: Room temperature appears on the Home screen. • Hide: Room temperature does not appear on the Home screen.
-
Page 49: Sound And Contrast
Function settings Sound and contrast ▌ Sound level ▌ Contrast Button operation Touch [Settings] from the Menu. Then, touch [Sound and contrast] in the list. Sound level Set the volume of the buzzer that sounds when the screen is touched. •... -
Page 50: Energy Saving (Assist Function)
Function settings Energy saving (Assist function) The energy-save control assist function can be set to activate when vacancy is detected while the air conditioning units are operated. (The default setting for this function is set to deactivate.) ▌ Selecting an energy-save control mode Button operation Touch [Settings] from the Menu. - Page 51 Function settings Touch the [Mode] button to select one of the following energy-save control modes that reduces energy-consumption during vacancy. The default setting is “Non-use.” • Non-use: Deactivates the energy-save control assist function. • Thermo-off : Puts the unit into the Thermo-off state.
- Page 52 Function settings Set the following items with the buttons. • Offset value (Effective only when “Set temperature offset” mode is selected) * Set the temperature value to be offset by from the set temperature during vacancy. The settable value range is between 1ºC (2ºF) and 4ºC (8ºF).
- Page 53 Function settings ▌ Invalid item setting (option settings) Button operation The energy-save control assist function can be set to deactivate during vacancy at the specified time periods on the specified days or when the brightness sensor detects “Light” or “Dark.” To specify time periods and days, touch [Day and time] from the list.
- Page 54 Function settings Day and time Specify the days and the time periods when the energy-save control assist function will be deactivated. The settings of a day can be copied to the settings for another day of the week. The setting details are the same as those for the schedule settings.
- Page 55 Function settings Example of the energy-save control assist function settings Setting item Setting example Day and time 1 7:00 → 17:00 Invalid item setting (option settings) With Brightness sensor 2 Light 3 Set temperature offset Energy-save control mode (Offset value: 2ºC) Auto-away time 4 0:10 (10 minutes) 7:00...
-
Page 56: Led Indicator
Function settings LED Indicator Button operation Touch [Settings] from the Menu. Then, touch [LED Indicator] in the list. Touch [LED Indicator setting] in the list. - Page 57 Function settings The default setting for [Basic display mode] is “Mode.” Touch the button to select the Basic display mode from “Mode,” “Room temp.,” or “Non-use.” Setting items common to “Mode” and “Room temp.” • Brightness * Select “High” or “Low.” * This setting is effective only when the “With Brightness Sensor”...
- Page 58 Function settings To select the brightness level of the LED indicator to be used when the brightness sensor detects “Light” or “Dark,” touch the [With Brightness sensor] in the list. To use the brightness sensor for switching the brightness of the LED indicator, touch the [Disabled] button to change it to [Enabled].
-
Page 59: Touch Panel Calibration
Function settings Touch panel calibration Button operation Touch [Settings] from the Menu. Then, touch [Touch panel calibration] in the list. A confirmation screen will appear. Touch [OK]. Touch the black dots in the order they appear, starting from the top left corner. After all nine squares are touched, the screen will return to the previous screen. -
Page 60: Lock Operations
Function settings Lock operations Button operation Touch [Settings] from the Menu. Then, touch [Lock operations] in the list. To lock the following operation items, touch the [Unlocked] button to change it to [Locked]. • ON/OFF • Operation mode • Set temperature •... -
Page 61: Sensor Threshold Setting
Function settings Sensor threshold setting ▌ Occupancy sensor Button operation Touch [Settings] from the Menu. Then, touch [Sensor threshold setting] in the list. To set the detection sensitivity level of the occupancy sensor, touch [Occupancy sensor] in the list. - Page 62 Function settings Set the detection sensitivity level with the buttons. • Level: -2, -1, 0 (default), 1, 2 * The detection level setting made here will also be reflected on the detection level setting on the “Energy saving” screen. The larger the value, the more sensitive the sensor will be to light.
- Page 63 Function settings Performing sensor detection sensitivity tests Test 1: Vacancy test Test 2: Occupancy test To start Test 1, touch [Test 1]. To start Test 2, touch [Test 2]. Ten seconds later, the vacancy detection When movements are detected, the LED indicator will light up in blue.
- Page 64 Function settings ▌ Brightness sensor Button operation Touch [Settings] from the Menu. Then, touch [Sensor threshold setting] in the list. To set the threshold value of the brightness sensor, touch [Brightness sensor] in the list. The lux values to be used to determine the "Dark" state and "Light"...
- Page 65 Function settings Performing a test When [Test] is touched, the current lux level in a given space will appear next to “Monitor” on the screen. The LED indicator will indicate the brightness status of a given space in colors. Light Green Dark Blue...
-
Page 66: Set Temperature Range Limit
Function settings Set temperature range limit Button operation Touch [Settings] from the Menu. Then, touch [Set temp. range limit] in the list. - Page 67 Function settings The default setting is “Disabled.” To limit the settable temperature ranges for the Auto, Cool (Dry), and Heat modes, touch the [Disabled] button to change it to [Enabled]. Set the upper and lower limit temperatures for the following operation modes in the table below with the buttons.
- Page 68 Function settings When done making the settings, touch [Done] to save the settings. Navigating through the screens • To return to the Menu screen: [Menu] button • To return to the previous screen: [Back] button will appear on the Home screen when the temperature range is limited.
-
Page 69: Auto Return
Function settings Auto return The Auto-return function allows the user to operate the unit at the specified temperature after the specified period of time. Button operation Touch [Settings] from the Menu. Then, touch [Auto return] in the list. - Page 70 Function settings The default setting is “Disabled.” To activate the Auto-return function, touch the [Disabled] button to change it to [Enabled]. Set the following items with the buttons. The temperatures will decrease or increase by 1ºC or 1ºF increments. • Cool * Specify the time to elapse before the set temperature automatically changes to the set temperature specified below during cooling operation.
- Page 71 Function settings <Sample screens when the Auto-return function is enabled> Example: Lower the set temperature to 24ºC (75ºF). Sixty minutes later, the set temperature will automatically change to 28ºC (83ºF). 60 minutes later The set temperature is Sixty minutes later, the set manually changed from 28ºC temperature automatically (83ºF) to 24ºC (75ºF).
-
Page 72: Maintenance
Maintenance Screen cleaning Button operation Touch [Screen cleaning] from the Menu. A confirmation screen will appear. Touch [OK]. Clean the touch panel within 30 seconds. The touch panel is deactivated for 30 seconds and then returns to the Menu screen. * The buzzer will sound while the touch panel is being touched. -
Page 73: Filter Information
Maintenance Filter information will appear on the Home screen when it is time to clean the filters. Wash, clean, or replace the filters when this sign appears. Refer to the indoor unit Instructions Manual for how to clean the filters. Button operation Touch [Filter information] from the Menu. - Page 74 Maintenance A message indicating that the filter information has been reset will appear. Navigating through the screens • To return to the Menu screen: [Menu] button • To return to the previous screen: [Back] button When this screen appears, the system is centrally controlled and the filter sign cannot be reset.
-
Page 75: Troubleshooting
Troubleshooting Error information When an error occurs, the [Error information] screen will appear. Check the error status, stop the operation, and consult your dealer. Button operation Error code, error unit, and address will appear. Dealer’s phone number will appear if the information has been registered in the settings screen under the Menu (Service). - Page 76 Troubleshooting If a type of error occurs that allows the units to continue their operation, only an error code will appear in the schedule display area (enclosed in dotted line) on the Home screen. When this type of error occurs, the LED indicator will not blink.
-
Page 77: Specifications
Specifications Controller specifications Specifications Receives power from outdoor units via 17–32 VDC the M-NET transmission cable. The Power Source (for connection to M-NET only) power consumption coefficient of the Smart ME Controller is “0.5”. Operating temperature range 0ºC – +40ºC (+32ºF – +104ºF) Temperature Operating Storage temperature range... -
Page 78: List Of Functions That Can/Cannot Be Used In Combination
Specifications List of functions that can/cannot be used in combination Schedule ON/OFF timer Auto-OFF timer Auto return Set temp. range limit Lock operations Night setback Centrally controlled Energy saving (Assist function) : The functions can be used in combination. : Restricted : The functions cannot be used in combination. - Page 79 Note: This equipment has been tested and found to comply with the limits for a Class B digital device, pursuant to Part 15 of the FCC Rules. These limits are designed to provide reasonable protection against harmful interference in a residential installation. This equipment generates, uses and can radiate radio frequency energy and, if not installed and used in accordance with the instructions, may cause harmful interference to radio communications.
- Page 80 • Electromagnetic Compatibility Directive 2004/108/EC • Restriction of Hazardous Substances 2011/65/EU HEAD OFFICE: TOKYO BLDG. , 2-7-3, MARUNOUCHI, CHIYODA-KU, TOKYO 100-8310, JAPAN Authorized representative in EU: MITSUBISHI ELECTRIC EUROPE B.V. HARMAN HOUSE, 1 GEORGE STREET, UXBRIDGE, MIDDLESEX UB8 1QQ, U.K.