Table of Contents
Advertisement
Quick Links
Advertisement
Table of Contents

Related Manuals for Olympus FL-50


Summary of Contents for Olympus FL-50
- Page 2 ■ This electronic flash has been designed exclusively for use with Olympus digital cameras. Do not connect the electronic flash to a camera not manufactured by Olympus, as this may result in a malfunction or damage to the camera and/or flash.
-
Page 3: Table Of Contents
○ Olympus will not assume any liability for the damages and loss of profit related to the loss of image data due to a failure of this product, servicing by a third party not designated by Olympus or any other reason. -
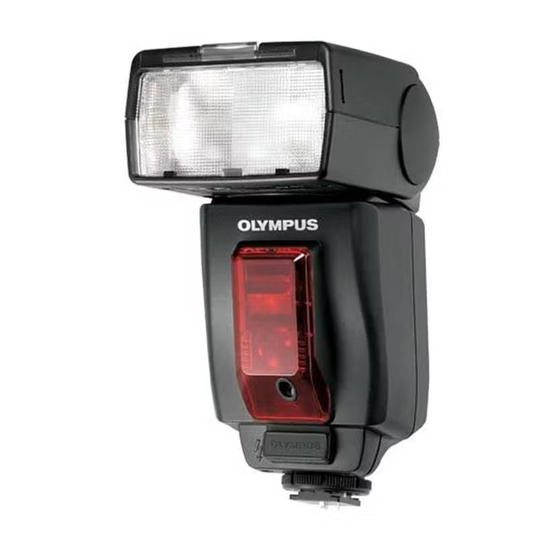
Page 4: Nomenclature
The AF illuminator can also be Close-up flash defeated. (Page 61) shooting (Page 57) • The AF illuminator only works FOUR THIRDS with the Olympus Four Thirds (Page 61) System digital SLR camera. It does not work with other cam- Zoom mode (Page 57) eras. -
Page 5: Loading Batteries
AA (R6) Ni-Cd batteries, 1000 mAh Approx. 4 sec. AA (R6) Ni-Mh batteries, 1900 mAh Approx. 4 sec. • The flash emission interval and count data were obtained from in-house tests at Olympus. 30 sec. Flash count Approx. 150 times Approx. -
Page 6: Attaching To The Camera/Removing From The Camera
ATTACHING TO THE CAMERA/REMOVING FROM THE CAMERA Confirm that both the camera and electronic flash are off. Attaching or removing the electronic flash while either the flash or the camera is on may result in malfunction. How to attach Place the light-emitting section in the standard position (horizontal, front). - Page 7 If the camera’s flash adjustment mode is selected, the actual flash light intensity will be the total of the light intensity adjustment value set on the FL-50 and that set on the camera. The light intensity adjustment value displayed is that of the FL-50 only.
-
Page 8: Manual
If the camera’s flash adjustment mode is selected, the actual flash light intensity will be the total of the light intensity adjustment value set on the FL-50 and that set on the camera. The light intensity adjustment value displayed is that of the FL-50 only. -
Page 9: Fp Ttl Auto
If the camera’s flash adjustment mode is selected, the actual flash light intensity will be the total of the light intensity adjustment value set on the FL-50 and that set on the camera. The light intensity adjustment value displayed is that of the FL-50 only. -
Page 10: Fp Manual
0, in which case the display does not show the guide number (GN) or optimum shooting distance. Even if the camera’s flash adjustment mode is selected, only the FL-50’s adjustment setting will work. The camera’s setting will not work. [Example]... - Page 11 When the shooting distance and lens iris are already determined: Determine the guide number (GN) with the following formula and set the GN on the FL-50. Lens iris (F) x Shooting distance (m) Guide number (GN) = ISO speed coefficient...
-
Page 12: Auto
OTHER OPERATIONS Bounce Shooting Bounce shooting refers to a method in which the light from the flash is bounced off the ceiling or walls. This allows the light to go all around the subject, resulting in a soft picture without harsh contrast or shadow. -
Page 13: Using The Wide Panel
Using the Wide Panel Use the built-in wide panel in flash shooting when the lens focal length is set to a wider position than 12 mm. When the lens focal length is shorter than 12 mm (24 mm with the 135 type), the wide panel warming indicator lights in the control panel. -
Page 14: Optional Accessories
BN-1 battery BN-1 • The flash emission interval and count data were obtained from in-house tests at Olympus. ■Note Up to 10 successive full flashes are permitted. To allow the light-emitting surface to cool, the flash should not be used for at least 10 minutes after 10 m flashes have been fired. See page 28 for details. -
Page 15: All Reset
Flash Power Grip FP-1 (C/R14 alkaline batteries/ C/R14 Ni-Cd batteries) Limit count High Voltage Pack HV-1 (Ni-Mh battery pack BN-1) Light intensity ratio Batteries in FL-50 1/16 1/32 1/64 1/128 AA (R6) alkaline batteries AA (R6) lithium batteries AA (R6) Ni-Mn batteries... -
Page 16: Guide Number (Gn) List
GUIDE NUMBER (GN) LIST • TTL AUTO/AUTO FOUR THIRDS ZOOM (mm) With 135 TTL AUTO/AUTO Full emission • MANUAL FOUR THIRDS ZOOM (mm) With 135 MANUAL 1/16 1/32 1/64 1/128 • FP TTL AUTO FOUR THIRDS ZOOM (mm) With 135 1/125 1/160 1/200... -
Page 17: Warning Display List
Does the FL-50 also turn off when the Olympus E-1 digital camera is turned off? When the E-1 is turned off, the FL-50 enters the sleep mode. When the E-1 is turned on again, the FL-50 also turns on. When you want to turn off the FL-50, turn off the FL-50 before turning off the E-1. -
Page 18: Main Specifications
: AA (R6) alkaline dry cell batteries (LR6) x 4, AA (R6) Ni-Cd batteries x 4, AA (R6) Ni-Mh batteries x 4, AA (R6) Ni-Mn batteries (ZR6) x 4, AA (R6) lithium batteries (FR6) x 4 or 3 V lithium battery pack (Olympus LB-01) x 2 External power supply : Flash Power Grip FP-1 and Flash High Voltage Set SHV-1. - Page 35 MEMO...