Brady BBP 33 User Manual
Sign & label printer
Hide thumbs
Also See for BBP 33:
- User manual (145 pages) ,
- Quick start manual (50 pages) ,
- Quick start manual (2 pages)
Table of Contents
Advertisement
Advertisement
Table of Contents
Troubleshooting

Related Manuals for Brady BBP 33


Summary of Contents for Brady BBP 33
- Page 1 User’s Manual...
- Page 2 This page is intentionally left blank.
-
Page 3: Copyright And Trademarks
This manual is copyrighted with all rights reserved. No portion of this manual may be copied or reproduced by any means without the prior written consent of Brady. While every precaution has been taken in the preparation of this document, Brady... -
Page 4: Brady Warranty
Brady warrants to the buyer that its products are free from defects in material and workmanship, but limits its obligation under this warranty to replacement of the product shown to Brady’s satisfaction to have been defective at the time Brady... -
Page 5: Bbp ® 33 Agency Compliance And Approvals
Operation of this equipment in a residential area is likely to cause interference, in which case required corrective measures will be at the owner’s expense. The user is cautioned that any changes or modifications not expressly approved by Brady Worldwide, Inc. could void the user’s authority to use the equipment. Canada... -
Page 6: Safety And Environment
Safety and Environment Precautions Safety and Environment ® Please read and understand this manual before using the BBP 33 Sign & Label Printer for the first time. This manual describes all of the main functions of the printer. Precautions Before using the printer, please note the following precautions: •... -
Page 7: Technical Support And Registration
Technical Support and Registration Repair and Return Technical Support and Registration Contact Information For repair or technical assistance, locate your regional Brady Technical Support office by going to: • United States: www.bradyid.com • Europe: www.bradyeurope.com • Asia Pacific: www.bradycorp.com •... -
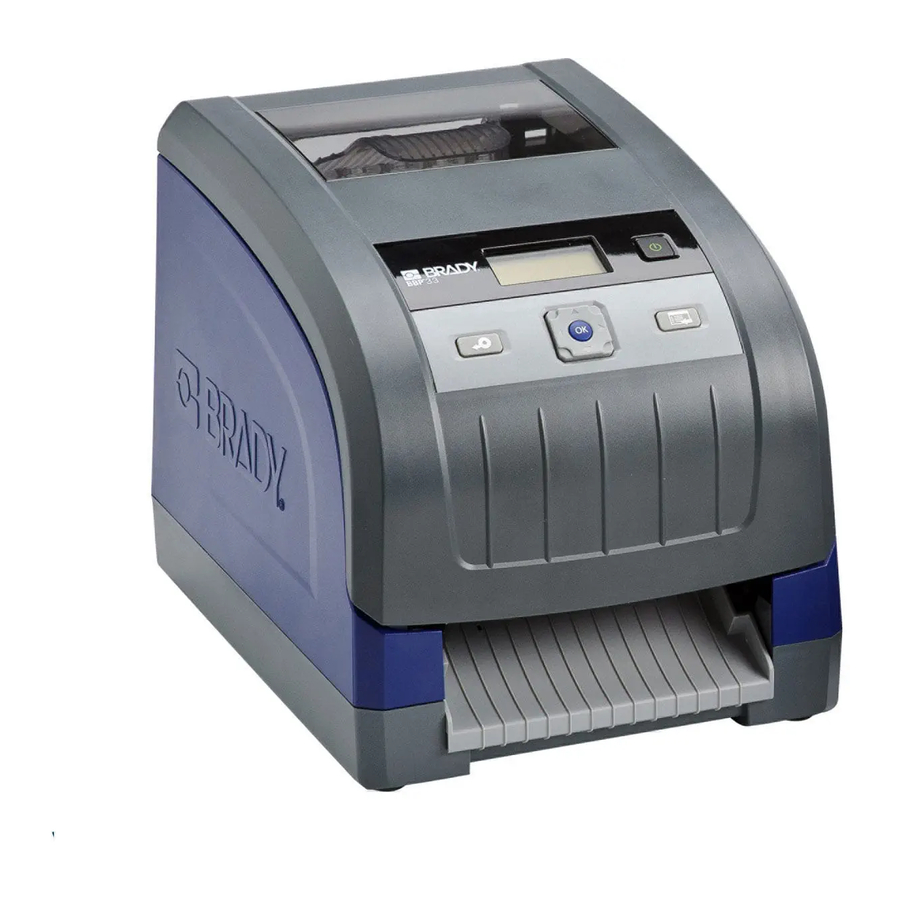
Page 8: Overview
Overview Keypad and Button Actions Overview About this Document The purpose of this guide is to provide information and instructions on using the ® 33 Sign & Label Printer. Conventions When using this document, it is important that you understand the conventions used throughout the manual. -
Page 9: Table Of Contents
Contents Copyright and Trademarks ..................iii Brady Warranty ......................iv ® 33 Agency Compliance and Approvals............v Safety and Environment....................vi Technical Support and Registration ...............vii Overview ........................viii 1 - Introduction Features and Functions ..................1-1 Compatible Applications..................1-2 System Specifications.................... 1-2 Keypad and Menu Functions ................. 1-3 User Interface .................... - Page 10 Supported Networks ..................2-13 Installing a Brady Network Card ..............2-14 Install Ethernet (first time)................2-15 Install Additional PC’s using Brady Network Card Utility ......2-24 Install USB Driver (only) ................2-29 Troubleshooting Brady Network Card ............. 2-34 Ethernet Connection Failed ............... 2-34 USB Connection Failed ................
- Page 11 Diagnostics......................3-17 Enter Diagnostic Mode ..................3-17 Sensors ......................3-17 Print Engine Base (PEB) Settings ............. 3-17 Sensor Conditions ..................3-18 Analog Readings ..................3-19 Copy Error Logs ....................3-20 Printer Error Log..................3-20 Script Error Log ..................3-20 USB Test ......................3-21 USB Flash Drive Test................
-
Page 12: Introduction
This compact, easy-to-operate thermal transfer printer is a stand-alone that easily connects to your computer for printing labels that you produce using LABELMARK™, labeling software. Media and ribbons from Brady Corporation are programmed to work specifically with the printer. -
Page 13: Compatible Applications
Compatible Applications Compatible Applications ® The BBP 33 Sign & Label Printer is compatible with the following software applications: • LABELMARK™ Label Design Software • MARKWARE™ Tape and Label Software When used with one of these software packages, the printer will automatically recognize all enabled and compatible media. -
Page 14: Keypad And Menu Functions
Keypad and Menu Functions User Interface Keypad and Menu Functions The following describes the keys, buttons and display screen that are used to ® navigate through and use the BBP 33 Sign & Label Printer system. User Interface The user interface (UI) contains the keypad and buttons for using the printer. The main functions are as follows: Item # Icon... -
Page 15: Display Screen
Keypad and Menu Functions Display Screen Display Screen The display screen has two modes: • Ready Mode: Indicates printer status and displays estimated remaining media and estimated remaining ribbon. Also indicates the media and ribbon installed. • Menu Selection Mode: Lets you configure system defaults, view and set printer information, perform input and output operations and perform diagnostics. -
Page 16: Menu Selection Mode
Keypad and Menu Functions Display Screen Menu Selection Mode The table describes the main options of the display screen when in menu selection mode. See “User Interface Menu Structure” on page 1-6 for a list of all the menu options. Menu Item Description Used to automatically cut the media. -
Page 17: User Interface Menu Structure
Keypad and Menu Functions Display Screen User Interface Menu Structure ® 33 Sign & Label Printer User’s Manual... -
Page 18: Printer Set Up
Printer Set Up Unpack and Set up Printer Carefully unpack and inspect the printer surfaces (interior and exterior) and the labeling system for possible damage during shipping. Note: Be sure to remove any transportation protection from around the printhead and inside the enclosure cover. -
Page 19: System Components
Enclosure Cover Label Exit/Auto Cutter* Media Guides Media Ribbon Cartridge Ribbon Cover Ribbon Cartridge Latch Brady Network Card Expansion Ports 10 Media Wiper 11 Power Button 12 Media Bridge* 13 Ribbon Cover Latch *See User’s Manual for component descriptions. ®... -
Page 20: Set Up The Printer
Unpack and Set up Printer Set up the Printer Set up the Printer Connect Printer Power To setup the printer: 1. Plug the power cord [1] into the printer at the location shown. 2. Plug the other end of the power cord into an AC power outlet. The printer automatically turns on and displays the printer status and the size and color of the currently installed media. -
Page 21: Install Or Change Supplies
Unpack and Set up Printer Set up the Printer Install or Change Supplies The media and ribbon supply cartridges use a “smart cell” to define and track the supply information. The system automatically recognizes the supply information for the installed media and ribbon. Note: The printer can be either on or off when changing supplies. - Page 22 Unpack and Set up Printer Set up the Printer 4. Place ribbon cartridge with ribbon over print head [4] and the product label toward machine, then snap into place. 5. Close and latch the ribbon cover. 6. Close the enclosure cover. 7.
- Page 23 Unpack and Set up Printer Set up the Printer To install or change media: 1. Open the enclosure cover. 2. Release the latch on the ribbon cover [2] and swing open. ® 33 Sign & Label Printer User’s Manual...
- Page 24 Unpack and Set up Printer Set up the Printer 3. If engaged, swing yellow media wiper [3] to the back. 4. Slide yellow media guides [4] to full-open. 5. Remove existing media, if installed, by pulling cartridge from printer. 6. Insert media cartridge until spindle ends rest in slots of media holder [6]. Media unwinds from the top of the roll and the smart cell should be on the left side of the spindle.
-
Page 25: Feeding And Cutting Label Stock
Unpack and Set up Printer Feeding and Cutting Label Stock Feeding and Cutting Label Stock Use this procedure to advance the media to the cut position, and (optionally) cut the media. Note: For die-cut media, the media is advanced to the cut position which is the next die-cut label. -
Page 26: Print Two-Sided Sleeve Material
Print Two-sided Sleeve Material Feeding and Cutting Label Stock Print Two-sided Sleeve Material When printing two-sided sleeve material, side one is loaded and printed directly from the roll. To print side two, the material is cut at the end of the job, then loaded from the back of the printer. - Page 27 Print Two-sided Sleeve Material Feeding and Cutting Label Stock Note: Make sure you place the edge for the starting (1st) label into the printer first. 7. From the back of the printer, feed the edge of the marker through the slot between the enclosure cover and the printer as follows: •...
-
Page 28: System Power
System Power Rebooting the Printer System Power These procedures describe how to power-up the printer when starting from a non- powered state (i.e., printer has been unplugged) and how to remove power from the printer. Note: With power removed (i.e., printer disconnected from power source), the system clock retains its settings for about 30 days. -
Page 29: Connect Printer To A Pc Via Usb
Connect Printer to a PC via USB Rebooting the Printer Connect Printer to a PC via USB ® To use your PC with the BBP 33 Sign & Label Printer, you must have the USB device driver installed on your PC. Note: See “Compatible Applications”... -
Page 30: Brady Network Cards
Brady Network Cards Supported Networks Brady Network Cards Supported LED Light Networks LED Light The changing colors of the LED light on the Brady Network Card signifies the following: Color Status Solid Green Card is functioning normally, status is OK. Blinking Orange The firmware is corrupted and it needs to be upgraded. -
Page 31: Installing A Brady Network Card
Installing a Brady Network Card Installing a Brady Network Card If your Brady printer is equipped with a Brady Network Card (Ethernet), you can configure the printer to run as a local printer (physically attached to your PC via a USB cable) and as a network (shared) printer through Ethernet. -
Page 32: Install Ethernet (First Time)
To activate the Ethernet connection: 1. Make sure your printer and your PC are not connected with a USB cable. 2. Insert the Brady Printer Drivers CD into your computer CD drive. The installation wizard launches automatically. 3. Turn the printer on. - Page 33 Brady Network Cards Installing a Brady Network Card 5. If your printer and PC are still connected with a USB cable, disconnect it now, then click Next. 6. Click First time install for network driver (default), then click Next. ®...
- Page 34 Brady Network Cards Installing a Brady Network Card 7. Verify that your printer printer is powered on and the Brady Network Card LED is solid green. 8. Connect the printer to your PC with a USB cable. 9. If the Found New Hardware Wizard displays, continue with the next step, otherwise skip to Step 16.
- Page 35 Brady Network Cards Installing a Brady Network Card 11. Click the radio button Install software automatically (Recommended), then click Next. 12. When the installation is complete, click Finish to close the wizard, then click Next. ® 33 Sign & Label Printer User’s Manual...
- Page 36 Brady Network Cards Installing a Brady Network Card 13. Click the radio button for Ethernet, then click Next. 14. In the Printer Description field, enter an easy-to-identify name/description for this network connection. You can use any alphanumeric characters. 15. In the Network Address Type field, choose the default DHCP protocol.
- Page 37 Brady Network Cards Installing a Brady Network Card 17. Verify that your printer and PC are connected to the same network, then click Next. Note: To verify that your printer and PC are on the same network, see the connection guidelines shown below.
- Page 38 Click Next. Note: The Bonjour program is designed to establish and monitor network printers. The Bonjour Printer Wizard establishes your Brady printer as a network printer. 19. Read the Apple End User License Agreement, then click I accept the terms in the license agreement and click Next to continue.
- Page 39 Note: For easier identification, the name or description you assigned in Step 14. displays in the lower left corner of the screen. 21. In the Manufacturer field, click Brady (the manufacturers are listed in alphabetical order). 22. In the Model field, click the printer to install, then click Next.
- Page 40 Brady Network Cards Installing a Brady Network Card 23. When the Bonjour Printer wizard completes, click Finish. 24. When the Brady Printer Installation is completed click Finish to exit the wizard. ® 33 Sign & Label Printer User’s Manual...
-
Page 41: Install Additional Pc's Using Brady Network Card Utility
Once the Brady Network Card has been configured for Ethernet, you can install those network drivers on additional PC’s. 1. Insert the Brady Universal Printer Driver CD into your computer CD drive. The installation wizard launches automatically. 2. Click the printer model you are installing, then click Next. - Page 42 Brady Network Cards Installing a Brady Network Card 4. Verify that the printer is powered on and the Brady Network Card is functioning properly (green light is on), then click Next. The Bonjour wizard lauches automatically. Note: The Bonjour program is designed to establish and monitor network printers.
- Page 43 Brady Network Cards Installing a Brady Network Card 6. Read the Apple End User License Agreement, then click I accept the terms in the license agreement. 7. Click Next to continue. 8. Click the assigned network printer name. Note: For easier identification, the name or description you assigned previously displays in the lower left corner of the screen.
- Page 44 10. In the Manufacturer field, click Brady (the manufacturers are listed in alphabetical order). 11. In the Model field, click the printer to install, then click Next. 12. If Brady cannot be found in the Manufacturer field, click Have Disk. ® 33 Sign & Label Printer User’s Manual...
- Page 45 .inf file for installing a BBP33 printer. Example 14. When the Bonjour Printer wizard completes, click Finish. 15. When the Brady Printer Installation is completed, click Finish to exit the wizard. ® 33 Sign & Label Printer User’s Manual...
-
Page 46: Install Usb Driver (Only)
Use this installation process if you intend to send print jobs to the printer from a PC using USB cable only. This procedure installs the printer driver for your Brady printer and installs the Brady Network Card (BNC) configuration utility. - Page 47 Brady Network Cards Installing a Brady Network Card 5. If your printer and PC are still connected with a USB cable, disconnect it now, then click Next. 6. Click the radio button to Install USB Driver Only, then click Next.
- Page 48 Brady Network Cards Installing a Brady Network Card 7. Connect the printer to your PC with a USB cable. 8. If the Found New Hardware Wizard displays, continue with the next step, otherwise skip to Step 10. 9. Click the radio button Yes, now and every time I connect a device, then click Next.
- Page 49 Brady Network Cards Installing a Brady Network Card 10. Click the radio button Install software automatically (Recommended), then click Next. 11. When the install is complete, click Finish to close the wizard, then click Next. ® 33 Sign & Label Printer User’s Manual...
- Page 50 Brady Network Cards Installing a Brady Network Card 12. When the Brady Network Card Configuration Utility and USB Driver are successfully installed, click Finish. ® 33 Sign & Label Printer User’s Manual...
-
Page 51: Troubleshooting Brady Network Card
Brady Network Cards Troubleshooting Brady Network Card Troubleshooting Brady Network Card Ethernet Connection Failed If Ethernet connection fails, an error message displays. The Ethernet connection can fail if the PC and printer are not on the same network. 1. Click Back. -
Page 52: Usb Connection Failed
Brady Network Cards Troubleshooting Brady Network Card USB Connection Failed The USB connection could fail for two reasons: • The printer is powered OFF. • The USB cable is not connected. If the connection fails: 1. Click Back. 2. Power ON the printer and connect the USB cable. -
Page 53: Using Brady Network Card Configuration Utility
Card Configuration Utility. One dialog box iswith multiple tabs is displayed. General Settings On the General Settings tab, the model number of the Brady Network Card is identified and the previously defined connections listed. To change the status of each supported configuration: 1. -
Page 54: Network Settings
Brady Network Cards Using Brady Network Card Configuration Utility Network Settings The Network Settings tab displays the unique name you gave to the printer and the Address Type used by it. DHCP is the recommended setting. Note: If Static is selected, you must enter the IP Address, Subnet Mask, and Default Gateway. -
Page 55: Firmware Upgrade/Factory Reset
1. Access the Brady website at www.bradyid.com. 2. Click Customer & Tech Support 3. Under Product & Software Downloads, click the the Brady Network Card firmware upgrade. 4. In the list presented, select the upgrade you want to download, then click BEGIN DOWNLOAD. - Page 56 Brady Network Cards Using Brady Network Card Configuration Utility 5. On the File Download screen, click Save. 6. Using standard Windows procedures, determine the directory where you want to save the download data. ® 33 Sign & Label Printer User’s Manual...
- Page 57 Brady Network Cards Using Brady Network Card Configuration Utility 7. On the Firmware Upgrade tab of the Configuration Utility screen, click Browse. 8. Find the directory in which you saved the download ZIP file, then click Open. 9. On the Firmware Upgrade/Factory Reset tab, click Upgrade. The upgrade program information is automatically installed on your system.
-
Page 58: Factory Reset
Brady Network Cards Using Brady Network Card Configuration Utility Factory Reset To return all settings to the original Factory settings (defaults): 1. On the Firmware Upgrade/Factory Reset tab of the Configuration Utility, click Reset to Factory Defaults. A warning message displays indicating all previous defined settings will be removed. -
Page 59: User Interface Menu
User Interface Menu The User Interface (UI) menu provides feedback and also allows you to access and change printer settings, printer status and tools. A 5-way navigation keypad lets you navigate through the menu structure to choose the option(s) you want. In Ready mode, the UI menu indicates printer status and displays estimated remaining material and ribbon. - Page 60 Status Info Status Info Status Info includes information about the printer configuration and fonts. From this menu, you can also print a configuration label, font list or graphics list. To view system information: Note: Press to exit a menu at any time. 1.
-
Page 61: Print Energy
Output Settings Print Energy Output Settings Output Settings let you set the print energy and print speed. You can also set when you want to cut the label, set mirror printing on or off and change the horizontal and vertical offset. Note: If password protection has been implemented, you will need to enter the password to have access to these functions. -
Page 62: Print Speed
Output Settings Cut Settings Print Speed Print speed lets you adjust the speed setting from 1 to 4 inches per second (ips). Optimal print speed settings are set automatically by the smart cell for the installed media and should only be changed if you are experiencing problems. For example, you can change print speed if you want to print graphics or other densely populated labels more slowly to ensure complete coverage. -
Page 63: Mirror Print Settings
Output Settings Offset Mirror Print Settings Use this procedure to print labels suitable for reading in a mirror or through the back of the label. To set the mirror-image option: Note: Mirror print settings are in effect only during the current print job. When the print job is complete, the printer returns to the default setting. -
Page 64: Language
Printer Settings Units Printer Settings The Printer Settings menu lets you set the default values for the printer. Defaults are common settings that are pre-assigned to make the system usable as soon as power is applied (e.g., set date and time to your local date and time). By changing the defaults, you can set the printer to your specific requirements. -
Page 65: Contrast
Printer Settings Standby Interval Contrast To set the contrast: 1. Press to go to the navigation menu. 2. Press to scroll to Printer Settings, then press 3. Press to scroll to Contrast, then press 4. Press to increase or decrease the contrast setting. Contrast values are between 1 and 20. -
Page 66: Date & Time
Connection The printer has three ready modes: • Initializing: The printer is ready, but the connection to the Brady Network Card (BNC) module has not yet been established. • Ready: The printer is fully functional, the BNC module has responded and the printer is ready to print. -
Page 67: Restore Defaults
Printer Settings Restore Defaults Restore Defaults Restore Defaults resets the printer to its factory settings. Once selected, it may take a few moments to restore the defaults. 1. Press to go to the navigation menu. 2. Press to scroll to Printer Settings, then press 3. -
Page 68: Import
Tools Import Tools Import Import lets you add your own graphics or fonts for use on the printer. Graphics Use this procedure to add your own graphics for use in labels that you create on the printer. Imported graphics must be in one of the following supported format(s) and imported from a USB flash drive. -
Page 69: Fonts
Tools Import Fonts Use this procedure to add your own fonts for use in your labels. Only True-Type fonts can be imported. The following True-Type fonts are resident on the printer: • Arial (Normal, Bold, Italic) • Courier New (Normal, Bold, Italic) •... -
Page 70: Delete
Tools Delete Delete Use these procedures to delete any of your own graphics or fonts that you previously imported. Note: You cannot delete any of the fonts that come with the printer. Delete Graphics To delete a graphic: 1. Press to go to the navigation menu. -
Page 71: Password Protection
Tools Password Protection Password Protection Use this procedure to enable password protection or to change a password. Passwords can be enabled for the Output Settings or Printer Settings menus. Enable Protection To enable password protection: 1. Press to go to the navigation menu. 2. -
Page 72: Change Password
Tools Password Protection Change Password When changing the password, be sure to write down the new key combination so that you don’t forget it. To change the password: 1. Press to go to the navigation menu. 2. Press to scroll to Tools, then press 3. -
Page 73: Upgrade From Pc
Do not interrupt power on either the printer or PC during the upgrade process. To upgrade: 1. Before installing, verify the following: • Upgrade Utility is available on your PC or via the Brady website (see Technical Support and Registration in this manual for more information). ® •... -
Page 74: Upgrade From Usb Flash Drive
Tools Upgrade from USB Flash Drive Upgrade from USB Flash Drive Use this procedure to upgrade the firmware or software from a USB flash drive that contains the upgrade. The system will support only one USB device at a time. To upgrade software from a USB flash drive: CAUTION! Do not interrupt power during an upgrade from a USB flash drive. -
Page 75: Diagnostics
Diagnostics Diagnostics Some diagnostics are not available for users. Advanced diagnostics are password protected and to be used only with Brady Technical Support. The password is assigned by Brady. Enter Diagnostic Mode Use this procedure to access any of the diagnostics menus. -
Page 76: Sensor Conditions
Tools Diagnostics Sensor Conditions This diagnostic detects the sensor conditions for ribbon motion, door, cutter, leading (edge), diecut, tapeout, wiper, and center. Conditions are: • BL (blocked) • Clos (closed) or Open • Hom (home position) • Eng (engaged) • UnB (unblocked) To view the PEB settings: 1. -
Page 77: Analog Readings
Tools Diagnostics Analog Readings This diagnostic detects the analog readings for the diecut analog/digital converter, head voltage and thermistor temperature. To view the analog readings: 1. Access Diagnostic mode (see “Enter Diagnostic Mode” on page 3-17). 2. Press to scroll to Analog Readings, then press . -
Page 78: Copy Error Logs
Tools Diagnostics Copy Error Logs Printer Error Log 1. Insert a USB drive into any available port on the printer. 2. Access Diagnostic mode (see “Enter Diagnostic Mode” on page 3-17). 3. Press to go to Copy Error Logs, then press 4. -
Page 79: Usb Test
Tools Diagnostics USB Test The USB test verifies that the USB ports are active. The tests can be performed with a flash drive or a type-B cable. USB Flash Drive Test To perform a USB test: 1. Access Diagnostic mode (see “Enter Diagnostic Mode” on page 3-17). 2. -
Page 80: Keyboard Setup
4. Press repeatedly to exit to the main menu. Advanced Diagnostics A password is required to enter the advanced diagnostic procedures. Contact your Brady Technical Support contact for help with these diagnostics. ® 33 Sign & Label Printer User’s Manual... -
Page 81: Usb Flash Drive
USB Flash Drive Advanced Diagnostics USB Flash Drive Use this procedure to download and print label scripts from a USB device. Label scripts can be created in any of the following programming languages: • BPL (xml) • • jScript • To download a label script: 1. -
Page 82: Maintenance
Maintenance Printer Maintenance Removing Power and Media from Printer Before performing any maintenance procedure that involves opening the enclosure cover, you should remove the power and media from the printer. To remove printer power and media: 1. Remove the power plug [1] from the printer. 2. - Page 83 Printer Maintenance Removing Power and Media from Printer 3. Release the latch on the ribbon cover [3] and swing open. 4. Release the ribbon cartridge latch [4] and lift the ribbon cartridge up and out. 5. Move yellow media wiper [5] to the back. 6.
-
Page 84: Cleaning The Printer
Printer Maintenance Cleaning the Printer Cleaning the Printer Remove Dust Dust generated by media cuts can accumulate in the unit. If a significant amount of dust is built up, clean the unit using this procedure. Materials Required • Isopropyl Alcohol •... -
Page 85: Clean Printer And Keypad Residue
Printer Maintenance Cleaning the Printer Clean Printer and Keypad Residue Whenever performing any maintenance on the printer, you should also clean any residue caused by the media. Materials Required • Compressed Air Bottle, purchased locally (e.g., HOSA AIR-464 Gear Duster) •... -
Page 86: Clean Auto-Cutter Blade
Printer Maintenance Cleaning the Printer Clean Auto-Cutter Blade Note: When cleaning the cutter, you should also clean the media and cutter sensors (see “Clean Sensors” on page 4-7). Materials Required • Isopropyl Alcohol • Cleaning Kit (Cat # B31-CCT), includes foam swabs, adhesive scraping tool, plastic bottle (not available in all regions) To clean the cutter: 1. - Page 87 Printer Maintenance Cleaning the Printer 4. Clean metal cutting blade [4]: a. If the cutting blade shows significant residue, use the adhesive scraping tool from the cleaning kit, or other flat-edged tool, to gently scrape the reside off the cutting blade. b.
-
Page 88: Clean Sensors
Printer Maintenance Cleaning the Printer Clean Sensors The sensors are located inside the printer and may be covered with dust that results from cutting the media. The media sensor is located under the yellow media guide. Materials Required • Cleaning Kit (Cat # B31-CCT), includes foam swabs, adhesive scraping tool, plastic bottle (not available in all regions) •... -
Page 89: Clean Tape Entrance
Printer Maintenance Cleaning the Printer Clean Tape Entrance This procedure cleans the tape entrance, exit area and exit chute. The tape entrance can become sticky because of adhesive buildup Note: Clean the exit area after cleaning the sensors (see “Clean Sensors” on page 4-7). -
Page 90: Cleaning The Cutter Blade Exit Area
Printer Maintenance Cleaning the Printer Clean the Cutter Blade Exit Area This procedure cleans the cutter blade exit area and the exit chute. Note: You should clean the exit area after cleaning the cutter blade and sensors. The cleaning swab may be damaged when cleaning the exit area. Materials Required •... -
Page 91: Clean Printhead
Printer Maintenance Cleaning the Printer Clean Printhead Materials Required • Cleaning Kit (Cat # B31-CCT), includes foam swabs, adhesive scraping tool, plastic bottle (not available in all regions) • Isopropyl Alcohol CAUTION! Use only the materials supplied in the cleaning kit. Using other materials may permanently damage the printhead. -
Page 92: Replacing The Media Wiper
Printer Maintenance Replacing the Media Wiper Replacing the Media Wiper Materials Required • Media Wiper (5 pack) Kit, Cat #B31-WIPER (sold separately) To replace the media wiper: 1. Remove power and media from the printer (see “Removing Power and Media from Printer”... -
Page 93: Clearing Jams
Printer Maintenance Replacing/Adjust Media End Caps Clearing Jams To clear jams from the printer: 1. Remove all damaged ribbon and/or media from the printer. 2. Check that there is no damage to the print head, sensors, or any other parts. 3. -
Page 94: Troubleshooting
Troubleshooting Messages ® The BBP 33 Sign & Label Printer contains error messages that describe what action you should take to resolve any messages or errors. Messages indicate the problem for the task being performed and also provide a possible corrective action. -
Page 95: Hardware Errors
Messages Hardware Errors Hardware Errors Problem Cause Corrective Action Printer too warm. Print job The printhead is too hot. The printhead has reached maximum canceled. operating temperature. Allow printer to cool down approximately 10 minutes, Error: 18 then re-initiate the print job. Printer too cold. -
Page 96: Media Errors
Messages Ribbon Errors Media Errors Problem Cause Corrective Action Error reading media memory Printer cannot read the media Replace media. If problem persists, cell. Reload or replace media. memory cell: media validation failed contact Technical support. [48]; cannot read media cell [49]; Errors: 48, 49, 50, 51, 52 cannot read memory CRC [50];... -
Page 97: A - Supported Scripting Languages
The following tables describe the ZPL, jScript and DPL commands that are supported by ® the BBP 33 Sign & Label Printer. Note: For Brady Print Language (BPL) commands, see the BPL Programmer’s Guide that is included on your Product CD. ZPL Supported Commands Job Control ®... - Page 98 ZPL Supported Commands Objects Objects Drawing Objects ® Drawing Objects Descriptions Command Rectangle Circle Diagonal Line Ellipse Download graphic file to printer Text Commands ® Text Description Command Set Text Font (A-Z, 0-9) Set Default Font Assign Character Identifier to Built-in Font ®...
- Page 99 ZPL Supported Commands Objects Barcodes ® Barcode Descriptions Command ANSI Codabar Aztec 1 Aztec 2 Codablock Code 11 Code 39 Code 49 Code 93 Code 128 Data Matrix EAN/JAN-8 EAN/JAN-13 EAN/UPC Extension Field Default Industrial 2 of 5 Interleaved 2 of 5 Logmars Micro-PDF417 PDF417...
- Page 100 ZPL Supported Commands Field Data Field Data ® Field Data Descriptions Command Field Data Origin (set upper left corner relative to label home) Field Parameter (set vertical/reverse for font field) Field Reverse Print (white over black or black over white) Field Separator (end of field definition) Field Typeset (sets field position, relative to home) Set field orientation...
-
Page 101: Jscript Supported Commands
jScript Supported Commands Objects jScript Supported Commands Job Control Job Control Descriptions jScript Start Job End Job (see Number of Labels) Set Label Size (width and length) Measuring Unit (mm, inches, dots) Printer Orientation (degrees) [Label Rotation] Reverse Print Mirror Image Number of Labels / End Job Objects Drawing Objects... -
Page 102: Printer Status
jScript Supported Commands Printer Status Barcodes Barcode Descriptions jScript Bar Code Aztec AZTEC Codabar A / F CODABAR Codablock F CODEABLOCKF Code 128 A / B / C CODE128 Code 39 CODE39 Code 93 CODE93 Data Matrix DATAMATRIX EAN-8 EAN8 EAN-13 EAN13 EAN-128... -
Page 103: Dpl Supported Commands
DPL Supported Commands Commands DPL Supported Commands Note: These commands conform Revision D, 2001 Datamax Programmer’s Manual Commands Commands Descriptions Set Cut Amount By (Command must be issued and a cut will not occur until job is done.) Set Continuous paper Length <STX>c Input Image Data <STX>I... - Page 104 DPL Supported Commands Barcodes Barcodes Barcode Descriptions Barcode Command Structure b [bb] c d eee ffff gggg jj...j where: a = Rotation (1, 2, 3, 4) b [bb] = Barcode c = Wide Bar, (always fixed value of 1)* d = Narrow Bar (1-9)* eee = Symbol Height (001 - 999) ffff = Row (0000 - 9999) gggg = Column...
- Page 105 DPL Supported Commands Objects Objects Object Descriptions Draw Box 1X1100000970013b0093004200020002 (Parameters bbbb and ssss indicate line thickness of where: box and must be the same.) 1 = Fixed Value 1 = Fixed Value eee = Fixed Value ffff = Row gggg = Column b = Box hhhh = Box Horizontal Width...
- Page 106 DPL Supported Commands Objects Object Descriptions Draw Line 1X1100000970013L093042 where: 1 = Fixed Value 1 = Fixed Value eee = Fixed Value ffff = Row gggg = Column L = Line Drawing hhhh = Horizontal Width of Line vvvv = Vertical Height of Line Text (font) Only some True Type fonts are supported.
- Page 107 DPL Supported Commands Objects Object Descriptions Polygon 1 X 11 ppp rrrr cccc P ppp bbbb rrrr cccc rrrr cccc ... <CR> Polygons are created by defining the positions of where corners, specifying a number of data points that 1 = Rotation (must be 1) represent the vertices of the object, which can range 001 = Fixed Value from a simple line (two points), or a triangle (three...
- Page 108 © 2012 Brady Worldwide, Inc. All Rights Reserved.