Epson EB-1776W User Manual
Multimedia projector
Hide thumbs
Also See for EB-1776W:
- Specifications (2 pages) ,
- Datasheet (2 pages) ,
- User manual (2 pages)
Table of Contents
Advertisement
Advertisement
Table of Contents

Related Manuals for Epson EB-1776W


Summary of Contents for Epson EB-1776W
- Page 1 User’s Guide...
-
Page 2: Notations Used In This Guide
Notations Used in This Guide • Safety indications The documentation and the projector use graphical symbols to show how to use the projector safely. Please understand and respect these caution symbols in order to avoid injury to persons or property. Warning This symbol indicates information that, if ignored, could possibly result in personal injury or even death due to incorrect handling. -
Page 3: Table Of Contents
Fit - (EB-1776W only) ........ - Page 4 Slideshow examples ......... 53 Network Menu (EB-1776W/EB-1771W/EB-1761W Only) ....86 Slideshow operating methods .
- Page 5 The image is truncated (large) or small, the aspect is not suitable, or the image has EasyMP Monitor(EB-1776W/EB-1771W/EB-1761W only) ....120 been reversed ..........106 Image colors are not right .
- Page 6 Screen Size and Projection Distance ......130 Projection Distance (For EB-1776W/EB-1771W/EB-1761W) ....130 Projection Distance (For EB-1751) .
-
Page 7: Introduction
Introduction This chapter explains the projector's features and the part names. -
Page 8: Projector Features
Network Menu Adjusting the projected image to automatically fit into the screen Slideshow frame - Screen Fit - (EB-1776W only) By pressing the [Screen Fit] button, you can automatically adjust the *1 The Wireless LAN unit is available as an option. -
Page 9: Detecting Projector Movements And Automatically Correcting Image Distortion
For EB-1776W Automatically corrects vertical and horizontal keystone distortion as well as the focus. Increasing projection content in wide (WXGA) screen (EB-1776W/ "Correcting automatically - Auto H/V-Keystone - (EB-1776W only)" EB-1771W/EB-1761W only) p.37 With a computer that has a 16:10 WXGA wide... -
Page 10: Connecting To A Wireless Lan And Projecting Images From The Computer's Screen (Eb-1776W/Eb-1771W/Eb-1761W Only)
Projector Features You can download "Epson iProjection" for free from the App Store. Any Connecting to a wireless LAN and projecting images from the fees incurred when communicating with the App Store are the computer's screen (EB-1776W/EB-1771W/EB-1761W only) responsibility of the customer. -
Page 11: Part Names And Functions
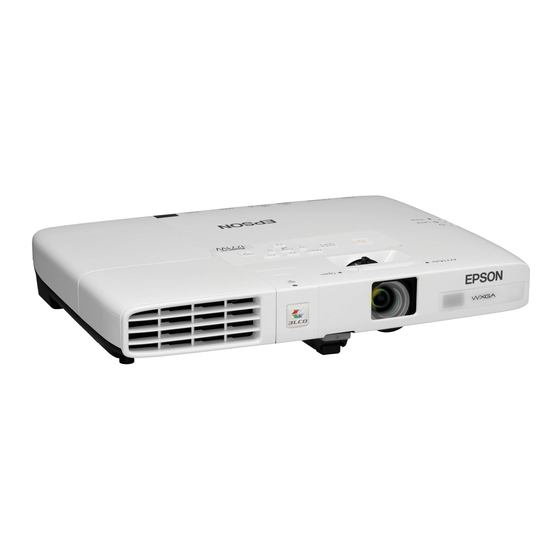
Part Names and Functions All of the features in this guide are explained using illustrations of Name Function EB-1776W unless otherwise mentioned. Wireless LAN indicator Indicates the access status of the supplied or optional (EB-1776W/EB-1771W/ Wireless LAN unit. EB-1761W only) -
Page 12: Rear
Part Names and Functions Name Function Rear Focus ring Adjusts the image focus. (EB-1771W/EB-1761W/ s "Correcting the Focus" p.42 EB-1751 only) Operates the projector. Control panel s "Control Panel" p.14 Open when replacing the projector's lamp. Lamp cover s "Replacing the Lamp" p.114 Name Function... -
Page 13: Base
Part Names and Functions Name Function Base Remote receiver Receives signals from the remote control. s "Remote control operating range" p.19 Screw to fix the lamp cover in place. Lamp Cover Fixing Screw Security slot The security slot is compatible with the Microsaver Security System manufactured by Kensington. -
Page 14: Control Panel
Adjusts the projected image so that it fits the screen frame. [Screen Fit] button (EB-1776W only) s "Automatically Adjust to Fit into the Screen Frame - Screen Fit - (EB-1776W only)" p.35 This button is disabled when the projector is suspended from a ceiling. -
Page 15: Remote Control
"Using the Configuration Menu" p.76 s "Using the Help" p.97 [Menu] button Displays and closes the Configuration menu. s "Using the Configuration Menu" p.76 [Focus] button Adjusts the image focus. (EB-1776W only) s "Correcting the Focus" p.42... - Page 16 • Acts as a mouse's left button when using the Wireless using EB-1771W/EB-1761W/EB-1751, this does not Mouse function. function even if the button is pressed. s "Using the Remote Control to Operate the Adjusts the image focus. (EB-1776W only) [Focus] buttons Mouse Pointer (Wireless Mouse)" p.64 [l][r]...
- Page 17 "Projecting Two Images Simultaneously (Split Screen) • Use this button to enter numbers in Network settings (EB-1776W/EB-1771W/EB-1761W Only)" p.49 from the Configuration menu. (EB-1776W/EB-1771W/ [Help] button Displays and closes the Help screen which shows you how EB-1761W only) to deal with problems if they occur.
-
Page 18: Replacing The Remote Control Batteries
Part Names and Functions Replacing the remote control batteries If delays in the responsiveness of the remote control occur or if it does not operate after it has been used for some time, it probably means that the batteries are becoming flat. When this happens, replace them with new batteries. -
Page 19: Remote Control Operating Range
Part Names and Functions Remote control operating range... -
Page 20: Preparing The Projector
Preparing the Projector This chapter explains how to install the projector and connect projection sources. -
Page 21: Installing The Projector
Installing the Projector Installation Methods Warning • A special method of installation is required when suspending the projector The projector supports the following four different projection methods. from a ceiling (ceiling mount). If it is not installed correctly, it could fall Install the projector according to the conditions of the installation location. -
Page 22: Screen Size And Approximate Projection Distance
When you correct keystone distortion, the projected image may be reduced. • Place the projector on a level surface. If the projector is tilted the projected image is also tilted. For EB-1776W/EB-1771W/EB-1761W 16:10 Screen Size 150” (320×200cm) 100” (220×130cm) 80”... - Page 23 Installing the Projector For EB-1751 4:3 Screen Size 150” 100” 80” 50”...
-
Page 24: Connecting Equipment
Connecting Equipment This section gives examples of how to connect the projector and the projection source. The port name, location, and connector orientation differ depending on the source being connected. Connecting a Computer To project images from a computer, connect the computer using one of the following methods. When using the supplied computer cable Connect the computer's display output port to the projector's Computer port. -
Page 25: Connecting Image Sources
Connecting Equipment Connecting Image Sources To project images from DVD players or VHS video and so on, connect to the projector using one of the following methods. When using a commercially available video cable Connect the video output port on the image source to the projector's Video port. You can output audio from the projector's speaker by connecting the audio output port on the video equipment to the projector's Audio port using a commercially available audio cable. -
Page 26: Connecting Usb Devices
Connecting Equipment Connecting USB Devices You can connect devices such as USB memory, the optional Document Camera, and USB compatible hard disks and digital cameras. Using the USB cable supplied with the USB device, connect the USB device to the USB (TypeA) port on the projector. When the USB device is connected, you can project files on the USB memory or digital camera using Slideshow. -
Page 27: Installing The Wireless Lan Unit
Connecting Equipment Installing the Wireless LAN Unit Remove the wireless LAN unit cover. Secure the wireless LAN unit cover with the screw supplied. Install the wireless LAN unit. Attach the wireless LAN unit cover, and then turn over the projector. -
Page 28: Basic Usage
Basic Usage This chapter explains how to project and adjust images. -
Page 29: Projecting Images
"Switching to the Target Image by Remote Control" p.31 After projecting the image, adjust the image if necessary. s "Automatically Adjust to Fit into the Screen Frame - Screen Fit - (EB-1776W only)" p.35 s "Correcting Keystone Distortion" p.37 Connect the projector to an electrical outlet with the power cord. -
Page 30: Automatically Detect Input Signals And Change The Projected Image (Source Search)
Using the control panel HDMI USB Display * LAN is only available for EB-1776W/EB-1771W/EB-1761W When two or more image sources are connected, press the [Source Search] button until the target image is projected. When your video equipment is connected, start playback before beginning... -
Page 31: Switching To The Target Image By Remote Control
• USB Display Business 32 bit • Images from the device connected to the USB (TypeA) port Home Premium 32 bit Switches to the image from the network connected device. (EB-1776W/ Home Basic 32 bit EB-1771W/EB-1761W only) Windows 7 Ultimate 32/64 bit... -
Page 32: Connecting For The First Time
20 MB or more Hard Disk Space For Windows 2000 Display Resolution of no less than 640x480 and no higher than Double-click Computer, EPSON PJ_UD, and then 1680x1200. EMP_UDSE.EXE. Display color in 16-bit color or greater For Windows XP Driver installation starts automatically. -
Page 33: Uninstalling
• If the USB Display setup folder is not displayed automatically - EPSON_PJ_UD - EMP_UDSE.EXE on your computer. in the Finder, double-click EPSON PJ_UD - USB Display • If nothing is projected for some reason, click All Programs - Installer on your computer. - Page 34 Projecting Images For Windows Vista/Windows 7 Click Start, and then click Control Panel. Click Uninstall a program under Programs. Select Epson USB Display and click Uninstall. For Mac OS X Open the Applications folder, double-click USB Display, and then double-click Tool.
-
Page 35: Adjusting Projected Images
• The projected image cannot be adjusted correctly if this range is Automatically Adjust to Fit into the Screen Frame exceeded. Correct the projected image manually. - Screen Fit - (EB-1776W only) • Screen Fit is unavailable when the projector is suspended from a ceiling. Correct the projected image manually. - Page 36 Adjusting Projected Images Adjust the zoom ring so that the yellow frame is bigger than the Once the adjustment screen appears, do not move the projector screen frame as shown below. Position the black message box in or block the image. The projected image will not be corrected the center of the screen.
-
Page 37: Correcting Keystone Distortion
When you correct keystone distortion, the projected image may be reduced. Correcting automatically - Auto H/V-Keystone - (EB-1776W only) When the projector detects any movement, for example when it is moved or tilted, it automatically corrects vertical and horizontal keystone distortion... -
Page 38: Correcting Automatically - Auto V-Keystone - (Eb-1771W/Eb-1761W/Eb-1751 Only)
Adjusting Projected Images • Correction angle: approx 30˚ right and left/approx. 45˚ up and down When the projector is moved, it displays a screen for adjustment and then automatically corrects the projected image. You can use Auto H/V-Keystone to correct the projected image under the Correcting keystone distortion in vertical directions following conditions. -
Page 39: Correcting Manually - Quick Corner
Adjusting Projected Images You can set manual H/V-Keystone from the Configuration menu. s Settings - Keystone - H/V-Keystone p.82 Correcting manually - Quick Corner - This allows you to manually correct each of the four corners of the projected image separately. Press the [Menu] button while projecting. - Page 40 Adjusting Projected Images Repeat procedures 4 and 5 as needed to adjust any remaining corners. Using the [ ], [ ], [ ], and [ ] buttons on the When you are done, press the [Esc] button to exit the correction remote control, or the [ ], [ ], [...
-
Page 41: Adjusting The Image Size
• When Auto H/V-Keystone is set to On, the message "Do you want to perform Auto H/V-Keystone correction?" is displayed when the projector is moved. (EB-1776W only) After you perform this function, the Keystone setting changes from Quick Corner to H/V-Keystone, after which pressing... -
Page 42: Adjusting The Horizontal Tilt
You can correct the focus using one of the following methods. [b] Increases the volume. • Press the [Focus] button on the control panel or the remote control to adjust the focus. (EB-1776W only) • Turn the focus ring to adjust the focus. (EB-1771W/EB-1761W/EB-1751 only) -
Page 43: Selecting The Projection Quality (Selecting Color Mode)
Adjusting Projected Images • Adjust the volume from the Configuration menu. Mode Application Settings - Volume p.82 Blackboard Even if you are projecting onto a blackboard (greenboard), this setting gives your images a natural tint, just like when projecting onto a screen. Caution Ideal for making presentations using a whiteboard. -
Page 44: Setting Auto Iris
Adjusting Projected Images Setting Auto Iris You can set Color Mode from the Configuration menu. s Image - Color Mode p.80 By automatically setting the luminance according to the brightness of the displayed image, it lets you enjoy deep and rich images. Press the [Menu] button. -
Page 45: Changing The Aspect Ratio Of The Projected Image
HDMI port Auto Iris can be set only when the Color Mode is Dynamic, Theatre, or Customized. For EB-1776W/EB-1771W/EB-1761W Each time the button is pressed, the aspect ratio changes in the order of Normal or Auto, 16:9, Full, Zoom, and Native. -
Page 46: Changing The Aspect Ratio For Computer Images
(the image is cut off on the right and left sides). Native Changing the aspect ratio for computer images For EB-1776W/EB-1771W/EB-1761W Each time the button is pressed, the aspect ratio changes in the order of For EB-1751 Normal, 16:9, Full, Zoom, and Native. - Page 47 Adjusting Projected Images Aspect mode Input Signal XGA 1024X768(4:3) WXGA 1280X800(16:10) 16:9 If parts of the image are missing, set the Resolution setting to Wide or Normal from the Configuration menu, according to the size of the computer panel. s Signal - Resolution p.81...
-
Page 48: Useful Functions
Useful Functions This chapter explains useful tips for giving presentations, and the Security functions. -
Page 49: Projection Functions
Right Screen Projecting Two Images Simultaneously (Split Comput‐ Video HDMI USB Dis‐ Screen) (EB-1776W/EB-1771W/EB-1761W Only) play USB Display You can simultaneously project images from two sources on the right and left of the screen. Operating procedures Projecting on a split screen Press the [Split] button while projecting. - Page 50 Projection Functions Press the [Menu] button. The Source screen is also displayed when the following buttons The Split Screen Setup screen is displayed. are pressed during split screen projection. • Source Search button • Computer button • Video button • USB button •...
-
Page 51: Restrictions During Split Screen Projection
Projection Functions Select Screen Size, and then press the [ ] button. • You cannot enlarge both the left screen and right screen images at the same time. • When one image is enlarged, the other image is reduced. Select the screen size you want to display, and then press the [ •... -
Page 52: Projecting Without A Computer (Slideshow)
PDF con‐ .pdf • You may not be able to use USB storage devices that incorporate • Cannot project encrypted PDFs. tents (EB-1776W/ security functions. EB-1771W/ • You cannot correct keystone distortion while projecting a Slideshow, EB-1761W only) even if you press the [... -
Page 53: Slideshow Examples
Projection Functions Slideshow examples Slideshow operating methods Projecting images stored on USB storage Although the following steps are explained based on the remote control, you can perform the same operations from the control panel. Starting Slideshow Change the projected image to USB. "Switching to the Target Image by Remote Control"... - Page 54 Projection Functions • The following files are displayed as thumbnails (file contents are • When AutoRun is set for a scenario, it is automatically played back displayed as small images). with the highest priority over other input sources. To stop playback, - JPEG files press the [Esc] button on the remote control.
-
Page 55: Projecting Images Or Movies
Projection Functions While projecting, press the [ ] or [ ] button. If not all of the files and folders are displayed on the current screen, press the []] button on the remote control, or position the cursor on Next Page at the bottom of the screen and press the [ ] button. -
Page 56: Projecting Pdf Files (Eb-1776W/Eb-1771W/Eb-1761W Only)
When projection is finished, you are returned to the file list screen. Projecting PDF files (EB-1776W/EB-1771W/EB-1761W only) You can project PDF files using slideshow. In PDF files, you can move pages up or down, enlarge, or rotate. - Page 57 Projection Functions • Selecting a page Press the [ ] button. Press the [Esc] button to display the select page menu. The first page in the PDF file is displayed at full screen size. You can perform the following operations while a PDF file is displayed. Select the page you want to project using the [ ] or [ ] button, and...
-
Page 58: Projecting Image Files In A Folder In Sequence (Slideshow)
Projection Functions • Rotating a page To change files automatically when you run Slideshow, set Screen Switching Time from Option in Slideshow to anything other than No. While a page is displayed at full screen size, press the [ ] or [ ] button The default setting is 3 seconds. -
Page 59: Playing A Scenario
Projection Functions Previous slide or animation If Screen Switching Time on the Option screen is set to No, files do (animation effects are not played.) not change automatically when you select Play Slideshow. Press the ] button, the [ ] button, or the []] button to display the next To stop playback When you press the [Esc] button, the message file. -
Page 60: Hiding The Image And Sound Temporarily (A/V Mute)
Projection Functions the [Esc] button. Select Option from the submenu displayed, then When you have finished making settings, press the [ press the [ ] button. ], [ ], or [ ] button to position the cursor over OK, and When the following Option screen is displayed, set each of the then press the [ ] button. -
Page 61: Freezing The Image (Freeze)
Projection Functions Each time you press the [A/V Mute] button or open/close the lens cover, between files during presentations from a computer without projecting any A/V Mute turns on or off. images if the Freeze function is activated beforehand. Each time you press the [Freeze] button, Freeze turns on or off. Remote control Projector Remote control... - Page 62 Projection Functions Move the Pointer icon ( Remote control Display the Pointer. Each time you press the [Pointer] button, the pointer appears or disappears. Remote control When any pair of adjacent [ ], [ ], [ ], or [ buttons are pressed at the same time, the pointer can be moved diagonally.
-
Page 63: Enlarging Part Of The Image (E-Zoom)
Projection Functions Move the Cross ( ) to the area of the image that you want to Enlarging Part of the Image (E-Zoom) enlarge. This is useful when you want to expand images to see them in greater Remote control detail, such as graphs and tables. -
Page 64: Using The Remote Control To Operate The Mouse Pointer (Wireless Mouse)
Projection Functions Connect the projector to the computer with a commercially • The enlargement ratio appears on the screen. The selected available USB cable. area can be enlarged to between 1 to 4 times in 25 "Connecting a Computer" p.24 incremental steps. -
Page 65: Correcting The Color Difference When Projecting From Multiple Projectors
Projection Functions Summary of correction procedure Page Up/Down [[] button: Moves to the previous page. When multiple projectors are set up and you need to make corrections, use []] button: Moves to the next page. the following procedure to correct one projector at a time. 1. - Page 66 Projection Functions Setting the Projector ID Opera‐ Combinations Descriptions tion Press the [Menu] button while projecting. ID selected with remote control: 1 "Using the Configuration Menu" p.76 Control panel Possible Projector ID: Off When the Projector ID is set to Off, you can operate the projector regardless of the ID selected with the remote ID selected with remote...
-
Page 67: Correcting
Projection Functions Point the remote control at the remote receiver of the target Choose the ID you want to set and press the [ ] button. projector and press the [ID] button on the remote control. When you press the [ID] button, the current Projector ID is displayed on the projection screen. - Page 68 Projection Functions • When you select Level 5, adjust the brightness to match the Correcting color differences darkest image. Operate using the remote control with the ID set according to the projector • When you select Level 1, adjust the brightness to match the being used.
-
Page 69: Saving A User's Logo
Projection Functions • When User's Logo Protect from Password Protect is set to Saving a User's Logo On, a message is displayed and the User's Logo cannot be changed. You can make changes after setting User's Logo You can save the image that is currently being projected as a User's Logo. Protect to Off. - Page 70 Projection Functions Select the zoom factor from the zoom setting screen. Remote control You can save at 400x300 dots in size. When the message "Save this image as the User's Logo?" is When you press the [ ] button and the message "Select this displayed, select Yes.
-
Page 71: Security Functions
"Restricting Operation (Control Panel Lock)" p.73 Extended - Display p.84 • Anti-Theft Lock • Network Protect (EB-1776W/EB-1771W/EB-1761W only) The projector is equipped with the following anti-theft security device. When Network Protect is set to On, changing the settings for Network is "Anti-Theft Lock" p.74 prohibited. -
Page 72: Entering The Password
Security Functions While holding down the [Num] button, enter a four digit number using • If Password Protect is already activated, you must enter the the numeric buttons. The number entered is displayed as "* * * *". When password. you enter the fourth digit, the confirmation screen is displayed. -
Page 73: Restricting Operation (Control Panel Lock)
"The projector's Select Control Panel Lock from Settings. operation will be locked." "Contact Epson as described in your documentation." Epson Projector Contact List... -
Page 74: Anti-Theft Lock
Security Functions Anti-Theft Lock As an anti-theft measure, the projector is equipped with a security slot compatible with the Microsaver Security System manufactured by Kensington. See the following for more details on the Microsaver Security System. http://www.kensington.com/ Select Yes when the confirmation message is displayed. The control panel buttons are locked according to the setting you chose. -
Page 75: Configuration Menu
Configuration Menu This chapter explains how to use the Configuration menu and its functions. -
Page 76: Using The Configuration Menu
Using the Configuration Menu This section explains how to use the Configuration menu. Select a submenu item. Although steps are explained using the remote control as an example, you can perform the same operations from the control panel. Check the guide under the menu for the available buttons and their operations. -
Page 77: List Of Functions
List of Functions Top Menu Name Submenu Name Items or Setting Values Configuration Menu Table Video Signal Auto, NTSC, NTSC4.43, PAL, Settable items vary depending on the model being used and the image M-PAL, N-PAL, PAL60, and SECAM signal and source being projected. Aspect Normal, 4:3, 16:9, Full, Zoom, Top Menu Name... -
Page 78: Network Menu (Eb-1776W/Eb-1771W/Eb-1761W Only)
*1 The number of supported languages differs depending on the region where the projector is used. Passphrase Mail menu Mail Notification On and Off p.91 Network menu (EB-1776W/EB-1771W/EB-1761W only) SMTP Server Port Number Top Menu Name Submenu Name Setting Values Address 1 Setting, Ad‐... - Page 79 List of Functions Top Menu Name Submenu Name Setting Values AMX Device Discovery On and Off Bonjour On and Off Message Broadcasting On and Off...
-
Page 80: Image Menu
List of Functions Submenu Function Image Menu Sharpness You can adjust the image sharpness. Settable items vary depending on the image signal and source currently (This item cannot be selected if Color Mode is set to sRGB Abs. Color Temp. being projected. -
Page 81: Signal Menu
List of Functions Submenu Function Signal Menu Sync. You can adjust computer images when flickering, fuzziness, or Settable items vary depending on the image signal and source currently interference appear in the images. being projected. Setting details are saved for each image signal. You can adjust the display position up, down, left, and right when Position a part of the image is missing so that the whole image is projected. -
Page 82: Settings Menu
• Correcting automatically Set Auto H/V-Keystone to On. s "Correcting automatically - Auto H/V-Keystone - (EB-1776W only)" p.37 * When using EB-1771W/EB-1761W/EB-1751 Auto V- Keystone is set to On. • When Quick Corner is selected: Select and correct the four corners of the projected image. - Page 83 "Projecting Two Images Simultaneously (Split Screen) settings/adjustments. You can assign one of the following items (EB-1776W/EB-1771W/EB-1761W Only)" p.49 to the [User] button. You can use this to restrict operation of the projector's control...
-
Page 84: Extended Menu
List of Functions Submenu Function Extended Menu Projection Select from one of the following projection methods depending on how the projector is installed. Front, Front/Ceiling, Rear, and Rear/Ceiling You can change the setting as follows by pressing down the [A/V Mute] button on the remote control for about five seconds. - Page 85 You can reset the adjustment values for Display while the projector is in standby mode when this is set to Operation from the Extended menu to their default Communication On. (EB-1776W/EB-1771W/EB-1761W settings. only) See the following to return all menu items to their default You can monitor and control the status of the projector settings.
-
Page 86: Network Menu (Eb-1776W/Eb-1771W/Eb-1761W Only)
For more details, contact your local dealer or the nearest address provided in "Setting Password Protect" p.71 the Epson Projector Contact List. Epson Projector Contact List • By using a Web browser of a computer connected to the projector on a network, you can set functions and control the projector. This function is called Web Control. -
Page 87: Soft Keyboard Operations
List of Functions Yes: Saves the settings and exits the Network menu. • Each time the CAPS key is selected and the [ No: Does not save the settings and exits the Network menu. ] button is pressed, it sets and changes between upper case and lower case letters. Cancel: Continues displaying the Network menu. -
Page 88: Basic Menu
List of Functions Basic menu Submenu Function Projector Key‐ When set to On, you have to enter the keyword when you try to word connect the projector to a computer via a network. As a result, you can prevent presentations from being interrupted by connections from other computers. -
Page 89: Wireless Lan Menu
List of Functions Wireless LAN menu Submenu Function Channel (This can only be set if Connection Mode is set to Quick.) Select the frequency band used by the wireless LAN from 1ch, 6ch, or 11ch. The default value is 11ch. Set the Wireless LAN system to either 802.11b/g or Wireless LAN 802.11b/g/n. -
Page 90: Security Menu
List of Functions Security menu Submenu Function IP Settings (This item can only be set if Connection Mode is set to Only available when the supplied or optional Wireless LAN unit is installed. Advanced.) You can make network settings. DHCP: Set to On to make network settings using DHCP . -
Page 91: Mail Menu
List of Functions When the supplied or optional wireless LAN unit is installed and being Submenu Function used in Advanced connection mode, it is strongly recommended that you Encryption Key You can enter the key used for WEP encryption. Enter the key in set security. -
Page 92: Others Menu
List of Functions "Using the Mail Notification Function to Report Problems" p.125 Submenu Function Address 1 Set‐ You can input the email address of the destination to send the ting/Address 2 notification email to. You can register up to three destinations. Setting/Address You can enter up to 32 single-byte alphanumeric characters for the email addresses. -
Page 93: Reset Menu
Set this to On when connecting to the network using Bonjour. Bonjour See Apple's Web site for more information on the Bonjour service. http://www.apple.com/ You can switch the EPSON Message Broadcasting function to Message Broad‐ casting enable or disable. Submenu Function To reset all of the Network settings, select Yes. -
Page 94: Info Menu (Display Only)
Displays the projector's serial number. Serial Number Displays the application error log. Event ID (EB-1776W/ s "About Event ID (EB-1776W/EB-1771W/EB-1761W EB-1771W/ Only)" p.128 EB-1761W only) The cumulative use time is displayed as "0H" for the first 10 hours. 10 hours and above is displayed as "10H", "11H", and so on. - Page 95 The following items are not reset to their defaults: Input Signal, User's Logo, all items for Network menus , Lamp Hours, Language, Password, User Button, and Multi- screen. Reset Lamp Clears the cumulative lamp hours use time. Reset when you replace the lamp. Hours * (EB-1776W/EB-1771W/EB-1761W only)
-
Page 96: Troubleshooting
Troubleshooting This chapter explains how to identify problems and what to do if a problem is found. -
Page 97: Using The Help
Using the Help If a problem occurs with the projector, the Help screen is displayed to assist Confirm the selection. you by pressing the Help button. You can solve problems by answering the Using the remote control Using the control panel questions. -
Page 98: Problem Solving
Problem Solving If you are having a problem with the projector, first check the projector's indicators and refer to "Reading the Indicators" below. See the following if the indicators do not show clearly what the problem might be. "When the Indicators Provide No Help" p.101 Reading the Indicators The projector is provided with the following three indicators that indicate the operating status of the projector. - Page 99 If the error continues after checking the points above, stop using the projector, remove the power plug from the electrical outlet, and contact your local dealer or the nearest address provided in the Epson Projector Contact List. Epson Projector Contact List When using at an altitude of 1500 m or more, set High Altitude Mode to Mode1 or Mode2.
- Page 100 Epson Projector Contact List. Epson Projector Contact List If the lamp is cracked: Contact your local dealer or the nearest address provided in the Epson Projector Contact List. (Images cannot be projected until the lamp is replaced.) Epson Projector Contact List When using at an altitude of 1500 m or more, set High Altitude Mode to Mode1 or Mode2.
-
Page 101: When The Indicators Provide No Help
• Email is not received even if a problem occurs in the projector sp.110 If any of the following problems occur and the indicators do not offer a (EB-1776W/EB-1771W/EB-1761W only) solution, refer to the pages given for each problem. Problems Relating to Images •... -
Page 102: Problems Relating To Images
Problem Solving Problems Relating to Images No images appear Check Remedy Did you press the [t] button? Press the [t] button to turn the power on. Are the indicators switched off? The power cord is not connected correctly or power is not being supplied. Connect the projector's power cord correctly. -
Page 103: Moving Images Are Not Displayed
Problem Solving Moving images are not displayed Check Remedy Is the computer's image signal being output to the LCD and the Change the image signal from the computer to external output only. Check your computer's documentation, or contact monitor? the computer's manufacturer. (Only when projecting images from a laptop computer or a computer with a built-in LCD screen) Are the contents of the moving image you are trying to project... -
Page 104: Images Are Fuzzy, Out Of Focus, Or Distorted
If you are using the projector with this setting off, manually adjust the projected image. s "Correcting manually - manual H/V-Keystone -" p.38 Is the focus adjusted correctly? Adjust the focus using the [Focus] buttons (EB-1776W only) or Focus ring (EB-1771W/EB-1761W/EB-1751 only). s "Correcting the Focus" p.42 Is the projector at the correct distance? Is it projecting outside of the recommended projection distance range? Setup within the recommended range. -
Page 105: Interference Or Distortion Appear In Images
Signal - Tracking, Sync. p.81 Is Transfer layered window selected? Click All Programs - EPSON Projector - Epson USB Display - Epson USB Display Vx.xx Settings, and then clear the Transfer layered window checkbox. (Only when projecting USB Display) The mouse cursor flickers (only when projecting USB Display) Is Make the movement of the mouse pointer smooth. -
Page 106: The Image Is Truncated (Large) Or Small, The Aspect Is Not Suitable, Or The Image Has Been Reversed
Problem Solving The image is truncated (large) or small, the aspect is not suitable, or the image has been reversed Check Remedy Is a wide panel computer image being projected? Change the setting according to the signal for the connected equipment. (Only when projecting computer images) s Signal - Resolution p.81... -
Page 107: Images Appear Dark
Problem Solving Check Remedy Is the image brightness adjusted correctly? Adjust the Brightness setting from the Configuration menu. s Image - Brightness p.80 Are the cables connected correctly? Check that all the cables required for projection are securely connected. Check that no cables are disconnected and that there are no poor contacts in the cables. s "Connecting Equipment"... -
Page 108: Problems When Projection Starts
Do the indicators turn on and off when the power cord is touched? There is probably a poor contact in the power cord, or the power cord may be defective. Reinsert the power cord. If this does not solve the problem, stop using the projector, disconnect the power cord from the electrical outlet, and contact your local dealer or the nearest address provided in the Epson Projector Contact List. Epson Projector Contact List Is the Control Panel Lock set to Full Lock? Press the [t] button on the remote control. -
Page 109: The Remote Control Does Not Work
If no audio is output when connecting via an HDMI cable, set the connected equipment to PCM output. Is Output audio from the projector selected? Click All Programs - EPSON Projector - Epson USB Display - Epson USB Display Vx.xx Settings, and then select Output audio from the projector. -
Page 110: Email Is Not Received Even If A Problem Occurs In The Projector (Eb-1776W/Eb-1771W/Eb-1761W Only)
Extended - Standby Mode p.84 Did a fatal abnormality occur and the projector come to a sudden If the abnormal state continues, contact your local dealer or the nearest address provided in the Epson Projector Contact stop? List. Epson Projector Contact List Is power being supplied to the projector? Check that your electrical outlet or power source is functioning correctly. -
Page 111: Maintenance
Maintenance This chapter provides information on maintenance procedures to ensure the best level of performance from the projector for a long time to come. -
Page 112: Cleaning
Cleaning You should clean the projector if it becomes dirty or if the quality of Attention projected images starts to deteriorate. Do not rub the lens with harsh materials or subject the lens to shocks, as it can easily become damaged. Caution Turn off the projector's power before cleaning. - Page 113 Cleaning • If a message is frequently displayed, even after cleaning, it is time to replace the air filter. Replace it with a new air filter. s "Replacing the Air Filter" p.117 • It is recommended that you clean these parts at least once every three months.
-
Page 114: Replacing Consumables
It is time to replace the lamp when: • The following message is displayed. "It is time to replace your lamp. Please contact your Epson projector reseller or visit www.epson.com to purchase." • The projected image gets darker or starts to deteriorate. -
Page 115: How To Replace The Lamp
Replacing Consumables How to replace the lamp The lamp can be replaced even when the projector is suspended from a ceiling. Warning • When replacing the lamp because it has stopped illuminating, there is a possibility that the lamp may be broken. If replacing the lamp of a projector which has been installed on the ceiling, you should always assume that the lamp is cracked, and you should stand to the side of the lamp cover, not Then slide the lamp cover straight forward and lift it to remove. - Page 116 Replacing Consumables Raise the handle and take out the old lamp. If the lamp is cracked, contact your local dealer or the nearest address provided in the Epson Projector Contact List. Epson Projector Contact List Install the new lamp. Insert the new lamp along the guide rails in the correct direction so that it fits, and push it firmly into place.
-
Page 117: Resetting The Lamp Hours
Replacing Consumables Replace the lamp cover. Replacing the Air Filter Insert the hook as shown in the illustration below, and attach the cover. Tighten the lamp cover fixing screw. Air filter replacement period If the message is displayed frequently even though the air filter has been cleaned, replace the air filter. - Page 118 Replacing Consumables Install the new air filter. Push in the air filter until it clicks into place. Dispose of used air filters properly in accordance with your local regulations. Material of the frame part: Polyphenylene ether and polystyrene resin Material of the filter part: Polyurethane foam...
-
Page 119: Appendix
Appendix... -
Page 120: Useful Software
EasyMP Monitor (EB-1776W/EB-1771W/EB-1761W only) By using EasyMP Monitor, you can check the status of multiple Epson projectors on the network, and you can control them from your computer. You can download EasyMP Monitor from the following Web site. http://www.epson.com See the following for more details. -
Page 121: Optional Accessories And Consumables
This is the same as the computer cable supplied with the projector. Special expertise is required to suspend the projector from a ceiling. Contact your local dealer or the nearest address provided in the Epson Projector Contact List. Epson Projector Contact List... -
Page 122: Consumables
Optional Accessories and Consumables Consumables Lamp unit ELPLP65 Use as a replacement for used lamps. Air filter ELPAF31 Use as a replacement for used air filters. -
Page 123: Monitoring And Controlling
Monitoring and Controlling (EB-1776W/EB-1771W/EB-1761W Only) The settings for items on each menu are the same as the projector's Changing Settings Using a Web Browser (Web Configuration menu. Control) "Configuration Menu" p.75 By using the Web browser of a computer connected to the projector on a Items that can only be set with a Web browser network, you can make settings and control the projector. -
Page 124: Displaying The Web Remote Screen
Monitoring and Controlling (EB-1776W/EB-1771W/EB-1761W Only) • Enter the user ID even if the password setting is disabled. You cannot change the user ID. • You can change the password in Network menu from the Configuration menu. s Network - Basic - Web Control Password p.88... -
Page 125: Using The Mail Notification Function To Report Problems
• When using USB Display locations away from the projectors. s "Projecting with USB Display" p.31 • During a network connection (EB-1776W/EB-1771W/ Network - Mail - Mail Notification p.91 EB-1761W only) • Up to a maximum of three notification destinations (addresses) can When projecting images or scenarios using Slideshow, pressing these buttons displays the previous/next screen. -
Page 126: Management Using Snmp
• Power Err. (Ballast) See the following to deal with problems or warnings. Install the USB communication driver (EPSON USB-COM Driver) to your computer. For information about the EPSON USB-COM Driver, "Reading the Indicators"... -
Page 127: Command List
Monitoring and Controlling (EB-1776W/EB-1771W/EB-1761W Only) Command list Communications protocol • Default baud rate setting: 9600 bps When the power ON command is transmitted to the projector, the power • Data length: 8 bit turns on and it enters warm-up mode. When the projector's power has turned on, a colon ":"... -
Page 128: About Event Id (Eb-1776W/Eb-1771W/Eb-1761W Only)
Wireless LAN - IP Settings p.89 0899 Other communication errors If restarting the projector or EasyMP Network Projection does not solve the problem, contact your local dealer or the nearest address provided in the Epson Projector Contact List. Epson Projector Contact List... -
Page 129: About Pjlink (Eb-1776W/Eb-1771W/Eb-1761W Only)
About PJLink (EB-1776W/EB-1771W/EB-1761W Only) • Model name displayed for "Product name information query" PJLink Class1 was established by the JBMIA (Japan Business Machine and Information System Industries Association) as a standard protocol for EB-1776W/EB-C301MS/PowerLite 1776W controlling network-compatible projector's as part of their efforts to EB-1771W/EB-C301MN/EB-C3011WN/PowerLite 1771W standardize projector control protocols. -
Page 130: Screen Size And Projection Distance
Screen Size and Projection Distance Projection Distance (For EB-1776W/EB-1771W/ 4:3 Screen Size Minimum (Wide) to Maximum EB-1761W) (Tele) 40" 81x61 102 - 122 50" 100x76 127 - 153 60" 120x91 153 - 184 80" 160x120 205 - 246 100" 200x150 256 - 308 150"... -
Page 131: Projection Distance (For Eb-1751)
Screen Size and Projection Distance Unit: cm Projection Distance (For EB-1751) 16:10 Screen Size Minimum (Wide) to Maximum (Tele) 30" 64x40 67 - 80 40" 86x54 89 - 108 50" 110x67 112 - 135 60" 130x81 135 - 162 80" 170x110 181 - 217 100"... - Page 132 Screen Size and Projection Distance Unit: cm 4:3 Screen Size Minimum (Wide) to Maximum (Tele) 16:10 Screen Size Minimum (Wide) to Maximum (Tele) 60" 120x91 145 - 174 29" 62x39 73 - 88 80" 160x120 194 - 233 30" 64x40 76 - 92 100"...
-
Page 133: Supported Monitor Displays
Supported Monitor Displays Signal Refresh Rate (Hz) Resolution (dots) Supported Resolutions MAC21" 1152x870 *1 (EB-1776W/EB-1771W/EB-1761W only) Computer signals (analog RGB) *2 Only compatible when Wide is selected as the Resolution from the Signal Refresh Rate (Hz) Resolution (dots) Configuration menu. -
Page 134: Input Signal From The Hdmi Port
Supported Monitor Displays Input signal from the HDMI port Signal Refresh Rate (Hz) Resolution (dots) 640x480 SVGA 800x600 1024x768 WXGA 1280x800 WXGA++ 1600x900 1280x960 SXGA 1280x1024 SXGA+ 1400x1050 UXGA 1600x1200 SDTV (480i/480p) 720x480 SDTV (576i/576p) 720x576 HDTV (720p) 50/60 1280x720 HDTV (1080i) 50/60 1920x1080... -
Page 135: Specifications
Specifications Projector General Specifications EB-1776W EB-1771W EB-1761W EB-1751 Product name Dimensions 292 (W) x 44 (H) x 210 (D) mm (not including raised section) 0.59" Wide 0.55" LCD panel size Display method Polysilicon TFT active matrix 1,024,000 pixels 786,432 pixels... - Page 136 Specifications Approx. 1.7 kg Mass Product name EB-1776W EB-1771W EB-1761W EB-1751 Connectors Computer port Mini D-Sub15-pin (female) Video port RCA pin jack Stereo mini jack (3.5Ф) Audio port HDMI port HDMI (Audio is only supported by PCM) USB connector (Type A)
- Page 137 Specifications This product is also designed for IT power distribution system with phase-to-phase voltage 230V. Angle of tilt If you use the projector tilted at an angle of more than 30˚ it could be damaged and cause an accident.
- Page 138 CPU Boards and Power Supplies used with Class B Personal Computers Class B digital device, pursuant to Part 15 of the FCC Rules. These limits are designed to provide reasonable protection against harmful interference Epson America, Inc. in a residential installation. This equipment generates, uses, and can radiate Located at:...
-
Page 139: Appearance
Appearance Center of lens Distance from center of lens to suspension bracket fixing point Units: mm... -
Page 140: Glossary
AMX Device Discovery is a technology developed by AMX to facilitate AMX control systems for easy operation of the target equipment. AMX Device Discovery Epson have implemented this protocol technology, and have provided a setting to enable the protocol function (ON). See the AMX Web site for more details. - Page 141 Glossary An abbreviation for Standard Definition Television that refers to standard television systems which do not satisfy the conditions for HDTV SDTV High-Definition Television. An abbreviation for Simple Network Management Protocol, which is the protocol for monitoring and controlling devices such as routers and SNMP computers connected to a TCP/IP network.
-
Page 142: General Notes
In this guide, the operating systems above are referred to as "Windows Neither Seiko Epson Corporation nor its affiliates shall be liable to the purchaser of this product or third parties for damages, losses, costs, or expenses incurred by the 2000", "Windows XP", "Windows Vista", and "Windows 7". -
Page 143: Trademarks And Copyrights
Foxit PDF SDK Copyright ©2011, Foxit Software Company www.foxitsoftware.com, All rights reserved. Other product names used herein are also for identification purposes only and may be trademarks of their respective owners. Epson disclaims any and all rights in those marks. ©SEIKO EPSON CORPORATION 2012. All rights reserved. -
Page 144: Index
Index Control panel ..........14 Control Panel Lock ....... 73, 83 A/V Mute ............60 Gateway Address ......... 90 Cross .............. 63 Abs. Color Temp......... 80 Customized ........... 43 Air exhaust vent ........... 11 Air filter replacement period ....117 HDMI port ........... - Page 145 Index Power indicator ..........98 Screen Size ............ 51 Power inlet ............ 12 Screen size ........... 130 Mail menu ............. 91 Power On Protect ........71 Screen switching time ......... 60 Mail Notification ......... 92, 125 Presentation ........... 43, 52 Security menu ..........
- Page 146 Index Test Pattern ..........83 Theatre ............43 Zoom ring ............. 11 Tint ..............80 Tracking ............81 USB (TypeA) port ........12 USB (TypeB) port ........12 USB Type B ........... 85 User Button ..........83 User's Logo ........... 69 User's Logo Protect ........