TRENDnet TV-IP252P User Manual
Poe dome internet camera
Hide thumbs
Also See for TV-IP252P:
- User manual (109 pages) ,
- Quick installation manual (15 pages) ,
- Specifications (3 pages)
Table of Contents
Advertisement
Quick Links
Download this manual
See also:
User Manual
Advertisement
Table of Contents

Related Manuals for TRENDnet TV-IP252P


Summary of Contents for TRENDnet TV-IP252P
- Page 1 Cover Page TRENDnet User’s Guide...
-
Page 2: Table Of Contents
Event Server ......................20 Motion Detect ......................23 Event Config ......................23 Tools ........................26 Device Info ......................27 How to setup/access the camera behind a Router ........ 28 Technical Specifications ................. 31 Troubleshooting..................32 © Copyright 2012 TRENDnet. All Rights Reserved. -
Page 3: Product Overview
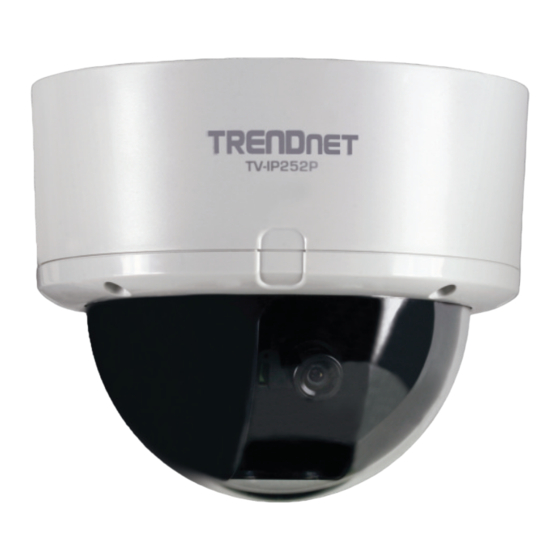
TRENDnet User’s Guide Product Overview Features The PoE Dome Internet Camera (model TV-IP252P) is designed for indoor enterprise class security surveillance applications. View and manage the tamper resistant dome IP camera from any Internet connection. Manually pan the camera side-to-side 350 degrees and tilt it up-and-down 160 degrees to fix its final viewing angle. -
Page 4: Product Hardware Features
The two switches allow you to manually turn of the LED indicators. BNC connector: Connect the external monitor to BNC connector Mic In: Connect an external microphone. Speaker Out: Connects an external speaker. © Copyright 2012 TRENDnet. All Rights Reserved. -
Page 5: Application Diagram
1. Remove the Dome cover by unscrewing the four screws. 2. Use the included drill template to drill three mounting holes on the desire location and hammer the plastic anchors into the holes. © Copyright 2012 TRENDnet. All Rights Reserved. -
Page 6: Camera Installation
If the image quality is poor, you have to disassemble the Dome cover to adjust the lens focus until the desired image appears clearly. 5. Put the Dome cover back and secure with four screws. © Copyright 2012 TRENDnet. All Rights Reserved. - Page 7 To power up the camera, plug in and connected the power adapter to the camera. You can verify the power connection by checking the amber LED on the camera. 6. Wait while the utility is searching the cameras. © Copyright 2012 TRENDnet. All Rights Reserved.
- Page 8 10. Click Finish to exit the program or click Home return to the main screen. 8. Type in the Password. The password is “admin” by default. We strongly suggested changing the camera’s password. The Change Password option is enable by default. © Copyright 2012 TRENDnet. All Rights Reserved.
-
Page 9: Starting Camera Finder (Ipsetup)
1. Insert the Installation CD-ROM into your computer’s CD-ROM drive to initiate the Auto-Run program. 4. When the Completing the IPSetup Setup Wizard appears, click Finish. 2. Click the Camera Finder (IPSetup) from the Auto-Run menu screen. © Copyright 2012 TRENDnet. All Rights Reserved. - Page 10 5. After installing the IPSetup utility, the application is automatically installed to Camera Display Area: By default, the IP setting on the Camera is set to DHCP. your computer, and creates a folder in Start\Program\TRENDnet\IPSetup. If you have DHCP server, the camera will automatic get the IP address from DHCP server.
-
Page 11: Configuration
Function Buttons: Use these buttons to control the audio, video, and trigger for the camera. Permission request depends on the Internet security settings of functions. your computer. Click Yes to proceed. Manual Record allows you manually record and save a video clip*. © Copyright 2012 TRENDnet. All Rights Reserved. -
Page 12: Configuring The Camera Setting
1. Open IE Browser then select Tools Internet Options Wizard, Basic, Network, Video/Audio, Event Server, Motion detect, Event Config, Tools, and Device Info. 2. Select Security 3. Uncheck the ”Enable Protected Mode” then press OK © Copyright 2012 TRENDnet. All Rights Reserved. -
Page 13: Smart Wizard
Enter the required information to be able to send email with image. For example, myserver.com. If you are using a free mail service (e.g. Google Gmail®, Yahoo®, Hotmail®), please enter the SMTP server address and the corresponding information from the service provider. © Copyright 2012 TRENDnet. All Rights Reserved. -
Page 14: Basic
Prev to go back to the previous step(s) and change the settings; or click Cancel to end the wizard and discard the changes. Basic >> System Basic: This item allows you to assign the camera name and location information. © Copyright 2012 TRENDnet. All Rights Reserved. - Page 15 - Manual: Select this option to set the Date and Time manually. - Password: Enter the password for the new guest. - UserList: Display the existing guests of the camera. To delete a user, select the one you want to delete and click Delete. © Copyright 2012 TRENDnet. All Rights Reserved.
-
Page 16: Network
Examples of the direct link to video: MPEG4 Mode http://camera_ip_address:port number/mpgview.htm MJPEG Mode http://camera_ip_address:port number/jpgview.htm NOTE This feature is enabled by default, and for security reason, it is recommended to have the feature enabled at all time. © Copyright 2012 TRENDnet. All Rights Reserved. - Page 17 NAT router or firewall. camera starts up, it will be assigned an IP address from the DHCP server automatically. This is the default IP setting on the camera. Select the Enable option to enable this feature. © Copyright 2012 TRENDnet. All Rights Reserved.
- Page 18 IP addresses to access the camera. To disable this feature, select the Disable option; otherwise, select the Accept option to assign the range of IP addresses that are allowed to access the camera, or © Copyright 2012 TRENDnet. All Rights Reserved.
-
Page 19: Video & Audio
- Video Quality: Select the desired image quality from five levels: Lowest, Low, Medium, High, and Highest. - Frame Rate: Select a proper setting depending on your network status. © Copyright 2012 TRENDnet. All Rights Reserved. - Page 20 You can set the speaker’s volume by entering the proper value in the Volume option. The default setting is 90. © Copyright 2012 TRENDnet. All Rights Reserved.
-
Page 21: Event Server
When you complete the required settings for HTTP Notify for Motion Trigger, FTP, Email, or Network Storage, click Test to test the related configuration is correct or not. Once the camera connects to the server successfully, click Apply. © Copyright 2012 TRENDnet. All Rights Reserved. - Page 22 SSL: If the mail server requires an encrypted connection, you should select the SSL option. STARTTLS is an extension to plain text communication protocols. It offers a way to upgrade a plain text connection to an encrypted connection. © Copyright 2012 TRENDnet. All Rights Reserved.
- Page 23 Event Server Setting >> Network Storage Network Storage - Samba Server Address: Enter the IP address of the Network Storage server. - Share: Assign the folder on the Network Storage server to share the files to users. © Copyright 2012 TRENDnet. All Rights Reserved.
-
Page 24: Motion Detect
Threshold: Move the slide bar to adjust the level of motion detection on recording video. NOTE: Sliding the Threshold bar to the right will decrease the sensitivity of motion detection; sliding the Threshold bar to the left will increase the sensitivity of motion detection. © Copyright 2012 TRENDnet. All Rights Reserved. - Page 25 After entering the profile name, click OK and the profile is added to the Schedule Profiles list. To delete the profile, select the profile in the list and click Delete. © Copyright 2012 TRENDnet. All Rights Reserved.
- Page 26 Time Per Event as 10 seconds and the Interval as 5 seconds, recorded file becomes a non-stop video clip because the camera will record a 10-second video clip every 5 seconds. © Copyright 2012 TRENDnet. All Rights Reserved.
-
Page 27: Tools
- Backup: Click Get the backup file to save the current configuration of the camera. - Restore: Click Browse to locate the backup file and then click Restore. © Copyright 2012 TRENDnet. All Rights Reserved. -
Page 28: Device Info
Device Info The Information menu displays the current configuration and events log of the camera. Device Info >> System Log The Logs table displays the events log recorded by the system. © Copyright 2012 TRENDnet. All Rights Reserved. -
Page 29: How To Setup/Access The Camera Behind A Router
4. Open another web browser and go to your Router’s Web Configuration page. How to setup/access the camera behind a Router (In the example, TRENDnet’s TEW-651BR Wireless N router is used) You can either setup the Dynamic DNS connection via camera itself or your home router. - Page 30 * Please refer to your router’s user’s manual for detail Virtual Server setting. Some router might use Port Forwarding or Special applications for this function. The setup steps should be very similar. 2. Login to your router’s web configuration page. © Copyright 2012 TRENDnet. All Rights Reserved.
- Page 31 Some router might use Port Forwarding or Special applications for this function. The setup steps should be very similar. 6. Open another web browser and enter your DDNS domain and camera’s port number. http://yourDomainName:PortNumber 7. The camera login page will appear. © Copyright 2012 TRENDnet. All Rights Reserved.
-
Page 32: Technical Specifications
Brightness, saturation, sharpness, and mirror Power, Link/Act (can turn off LEDs) (horizontal/vertical) Reset Button Reboot or restore to factory default Video Encoding type: MPEG-4, MJPEG Power 8 watts max. Compression: 5 levels Consumption © Copyright 2012 TRENDnet. All Rights Reserved. -
Page 33: Troubleshooting
Internet Security. If you are using Windows 7, Vista or XP, disable the built in firewall. Click on Search in IPSetup. d. Reset the IP Camera by remove the top cover and press the reset button © Copyright 2012 TRENDnet. All Rights Reserved. - Page 34 4. The image is blurry. How can I adjust the focus on the IP camera? Remove the cover on the top of the TV-IP252P. You can adjust the Internet Camera’s focus by rotating the Lens (Please refer to Cameo Focus on page 6 for more detail).
- Page 35 TRENDnet products. Products that are sent to TRENDnet for RMA service must Governing Law: This Limited Warranty shall be governed by the laws of the state of have the RMA number marked on the outside of return packages and sent to TRENDnet California.
-
Page 36: Limited Warranty
Download section and look for the desired TRENDnet product to access to the GPL Code or LGPL Code. These codes are distributed WITHOUT WARRANTY and are subject to the copyrights of the developers. TRENDnet does not provide technical support for these codes. Please go http://www.gnu.org/licenses/gpl.txt...