Table of Contents

Related Manuals for Radio Shack 6300333


Summary of Contents for Radio Shack 6300333
- Page 1 User’s Guide 6300333 Indoor/Outdoor Wireless Weather Forecaster Thank you for purchasing your Wireless Weather Forecaster from RadioShack. Please read this user’s guide before installing, setting up, and using your new weather forecaster.
-
Page 2: Package Contents
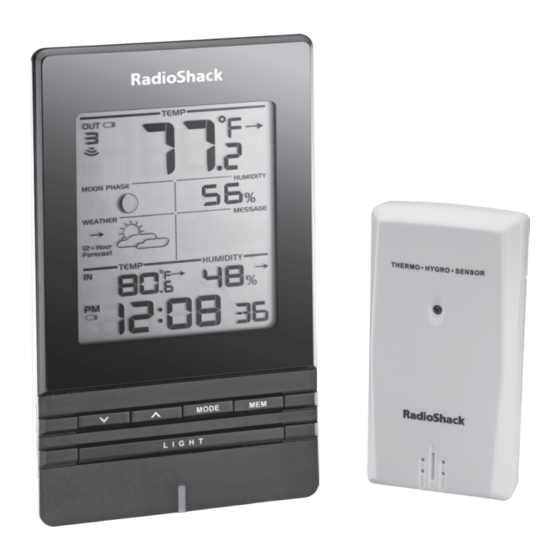
Package Contents • Weather Forecaster • Remote Sensor • User’s Guide • Quick Start Features • Water-resistant, extreme-temperature remote sensor • Transmits wirelessly up to 98 feet (30 meters) away • Predicts local weather patterns and trends and displays a corresponding weather icon (sunny, cloudy, partly cloudy, rainy, snowy) • Provides an advisory message for heat, wind, storm, fog or frost • Indicates temperature and humidity trends • Stores minimum and maximum indoor/outdoor temperature and indoor/outdoor humidity readings • Blinking light warns if the outdoor temperature is cold enough for possible ice... -
Page 3: Set Up The Sensor
Set up the Sensor Install a Battery 1. Insert one AA battery RESET (not included), matching Channel the polarity symbols (+ 1 2 3 and –) marked inside the compartment. 2. First slide Channel 1 2 3 to choose a channel. Then use a pointed object to press RESET. If you are using more than one sensor, choose a different channel for each sensor. Notes: • When the low battery icon appears in Outdoor Temperature Display, replace the battery. • Use alkaline batteries for longer usage, or use consumer grade lithium batteries in temperatures below –4˚F (–20˚C). -
Page 4: Set Up The Forecaster
sunlight and moisture, and away from metallic and electronic objects. 1. Drill a hole 5 feet (1.5 m) above the ground. 2. Thread a screw (not included) into the hole and let it extend about 0.2 in (6 mm) from wall. 3. Fit the head of the screw into the keyhole slot of the sensor. Set up the Forecaster 1. Insert 3 AA batteries °C/°F RESET (not included), matching the polarity symbols (+ and –) marked inside the compartment. 2. Use a pointed object to press RESET, and press °C/°F to choose Celsius or Fahrenheit scale. Notes: • Reset your forecaster after battery replacement or if the system malfunctions. When you press RESET, all settings return to default value and all recorded data is lost. - Page 5 Outdoor Temperature Display (with temperature trend) Moon Phase Display Weather Forecast Display (with pressure trend) Indoor Temperature/Humidity Display (with temperature and humidity trend) > and < • Increase or decrease settings. • Toggle between outdoor channels with < .
- Page 6 Outdoor Humidity Display (with humidity trend) Weather Warning Message Display Clock Display MODE Backlight • Toggle between View current, button different display maximum modes/settings. and minimum Ice Alert temperature/ • Set clock. humidity. • Search for sensors Indicator (MODE + < ).
-
Page 7: Search For A Sensor
Search for a Sensor 1. Place the forecaster indoors on a flat surface. 2. Press and hold MODE and < simultaneously to search for a sensor. The sensor reception icon in Outdoor Temperature Display shows the searching status. • : Searching for a sensor. • : Found Channel 1 sensor. • : No sensor found. Note: The transmission range may vary depending on many factors. Experiment with various locations to get the best results. Clock Display Set the Clock 1. Press and hold MODE for 2 seconds. The time zone blinks. - Page 8 3. Press MODE to toggle between Clock with Seconds, Clock with Day of Week, Calendar, and Moon Phase display. Clock with Day of Week Calendar 5 26 View Moon Phase The calendar must be set for this feature to work. See “Set the Clock” section. 1. Press MODE repeatedly until the moon phase icon blinks. 2. Press > or < to view the moon phase for the next or previous day; press and hold to quickly go through the moon phase between year 2001 and 2099. Stars around the moon phase appear from 6 pm to 6 am. New Moon Full Moon Waxing Crescent Waning Gibbous First quarter Third quarter Waxing Gibbous Waning Crescent...
- Page 9 Temperature and Humidity Displays The Weather Forecaster displays the current, maximum, and minimum temperature and humidity readings collected by the sensor and main unit. • Press < repeatedly to toggle between the sensor channels. • Press and hold MEM and > simultaneously to auto-scan the sensor channels. Each channel’s data is displayed in sequence automatically. Press < to stop scanning. • Press MEM repeatedly to toggle between the current, maximum, and minimum temperature and humidity. • Press and hold MEM to clear recorded data. Outdoor Temperature and Humidity Sensor Channel Trend Indicator Indoor Temperature and Humidity Reading the Trend Rising Steady Falling...
-
Page 10: Weather Forecast Display
Weather Forecast Display This product forecasts the next 12 hours of weather with pressure trend within a 19 to 31 mile (30 to 50 km) radius. Sunny Partly Cloudy Cloudy Rainy Snowy Weather Warning Message Display The weather warning messages (for Sensor Channel 1 only) indicate probable circumstances that may arise based on the forecaster’s calculations. Warning Message Meaning Risk of high temperatures Risk of fast wind speeds WIND Risk of a storm STORM Risk of foggy conditions Risk of icy conditions Note: If Sensor Channel 1 detects temperatures between 37 to 28°F (3 to –2°C), the Ice Alert LED indicator blinks. -
Page 11: Battery Notes
Hints and Tips • Wireless ranges can be impacted by a variety of factors, such as extremely cold temperatures. • If the forecaster’s performance is affected by extremely low temperatures, proper functioning will resume as the temperature rises to within the normal temperature range. • If the temperature on your remote sensor does not match the one on your forecaster, press and hold MODE and < simultaneously to retrieve the signal again. If you still do not receive a signal, check the batteries and obstructions. Also try resetting both the forecaster and the sensor. • Signals from household devices such as electronic garage doors and home security systems may cause temporary interference. Battery Notes • Dispose of batteries promptly and properly. Do not burn or bury them. Do not puncture or crush. Do not disassemble. • Use only fresh batteries of the required size and type. • Do not mix old and new batteries, different types of batteries (standard, alkaline, or rechargeable), or rechargeable batteries of different capacities. • If you do not plan to use the forecaster for an extended time, remove the batteries. Batteries can leak chemicals that can damage electronic parts. Lithium Batteries • Do not dispose of lithium batteries in the trash. Recycle at your local RadioShack store. -
Page 12: Care And Maintenance
• Never allow loose cells to short circuit against battery tabs or other conductive items. Keep loose cells and battery packs out of reach of children. • If the electrolyte in the cells should get on your skin, thoroughly wash with soap and water. If in the eyes, rinse thoroughly with cool water. Immediately seek medical attention. Care and Maintenance • Keep the forecaster dry. If it gets wet, wipe it dry immediately. • Use and store the forecaster only in temperature environments above 23°F (–5°C). • Never submerge the product in water. This can cause electrical shock and damage the product. • Do not subject the forecaster to extreme force, shock, or fluctuations in temperature or humidity. • Do not tamper with internal components. Specifications Indoor Temperature Range ......23~122°F (–5~50°C) Outdoor Temperature Range ....–40~140°F (–40~60°C) Temperature Resolution ..........0.2°F (0.1°C) Humidity Range ............... 25%~95% Humidity Resolution ..............1% Sensor RF Frequency . -
Page 13: Fcc Information
• Reorient or relocate the receiving antenna. • Increase the separation between the equipment and receiver. • Connect the equipment into an outlet on a circuit different from that to which the receiver is connected. • Consult your local RadioShack store or an experienced radio/TV technician for help. If you cannot eliminate the interference, the FCC requires that you stop using your equipment. Changes or modifications not expressly approved by RadioShack may cause interference and void the user’s authority to operate the equipment. This device complies with Part 15 of the FCC rules. Operation is subject to the following two conditions: (1) This device may not cause harmful interference, and (2) This device must accept any interference received, including interference that may cause undesired operation. Product Indoor/Outdoor Wireless Weather Forecaster Model 6300333 RadioShack Responsible 300 RadioShack Circle, Party Fort Worth, TX 76102 Phone 817-415-3200 Limited Warranty RadioShack warrants this product against defects in materials and workmanship under normal use by the original purchaser for one (1) year after the date of purchase from a RadioShack-owned store or an authorized RadioShack franchisee or dealer. RADIOSHACK MAKES NO OTHER EXPRESS WARRANTIES. This warranty does not cover: (a) damage or failure caused by or attributable to abuse, misuse, failure to follow instructions, improper installation or maintenance, alteration, accident, Acts of God (such as floods or lightning), or excess voltage or current; (b) improper or incorrectly performed repairs by persons who are not a RadioShack Authorized Service Facility; (c) consumables such as fuses or... - Page 14 RADIOSHACK EXPRESSLY DISCLAIMS ALL WARRANTIES AND CONDITIONS NOT STATED IN THIS LIMITED WARRANTY. ANY IMPLIED WARRANTIES THAT MAY BE IMPOSED BY LAW, INCLUDING THE IMPLIED WARRANTY OF MERCHANTABILITY AND, IF APPLICABLE, THE IMPLIED WARRANTY OF FITNESS FOR A PARTICULAR PURPOSE, SHALL EXPIRE ON THE EXPIRATION OF THE STATED WARRANTY PERIOD. EXCEPT AS DESCRIBED ABOVE, RADIOSHACK SHALL HAVE NO LIABILITY OR RESPONSIBILITY TO THE PURCHASER OF THE PRODUCT OR ANY OTHER PERSON OR ENTITY WITH RESPECT TO ANY LIABILITY, LOSS OR DAMAGE CAUSED DIRECTLY OR INDIRECTLY BY USE OR PERFORMANCE OF THE PRODUCT OR ARISING OUT OF ANY BREACH OF THIS WARRANTY, INCLUDING, BUT NOT LIMITED TO, ANY DAMAGES RESULTING FROM INCONVENIENCE AND ANY LOSS OF TIME, DATA, PROPERTY, REVENUE, OR PROFIT AND ANY INDIRECT, SPECIAL, INCIDENTAL, OR CONSEQUENTIAL DAMAGES, EVEN IF RADIOSHACK HAS BEEN ADVISED OF THE POSSIBILITY OF SUCH DAMAGES. Some states do not allow limitations on how long an implied warranty lasts or the exclusion or limitation of incidental or consequential damages, so the above limitations or exclusions may not apply to you. This warranty gives you specific legal rights, and you may also have other rights which vary from state to state. You may contact RadioShack at: RadioShack Customer Relations, 300 RadioShack Circle, Fort Worth, TX 76102 04/08 www.RadioShack.com Protect the environment by recycling used electronics. Go to E-CyclingCentral.com to find an electronic recycling center near you. ©2010. RadioShack Corporation. All rights reserved. RadioShack and RadioShack.com Printed 10A10 are trademarks used by RadioShack Corporation. in China 6300333...