Honda GX620 Owner's Manual
Lpg/natural gas-fueled engine
Hide thumbs
Also See for GX620:
- Applications manual (84 pages) ,
- Owner's manual (69 pages) ,
- Owner's manual (20 pages)
Table of Contents
Advertisement
Advertisement
Table of Contents

Related Manuals for Honda GX620


Summary of Contents for Honda GX620
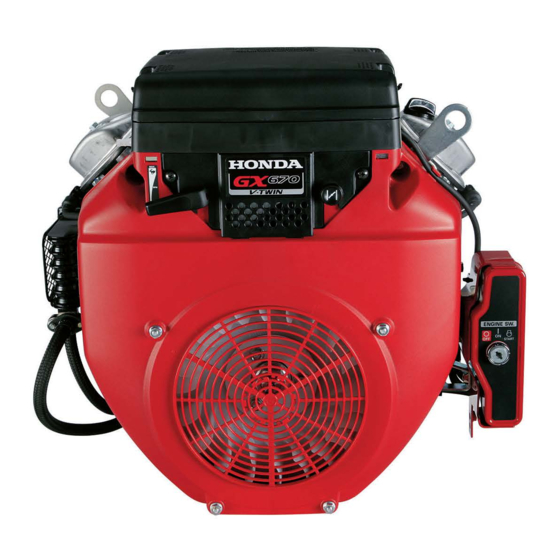
- Page 2 The information and specifications included in this publication were in effect at the time of approval for printing. Illustrations are based on the GX670 VXC2 type. Honda Motor Co., Ltd. reserves the right, however, to discontinue or change specifications or design at any time without notice and without incurring any obligation what so ever.
- Page 3 INTRODUCTION Congratulations on your selection of a Honda engine. We are certain you will be pleased with your purchase of one of the finest engines on the market. We want to help you get the best results from your new engine and to operate it safely.
- Page 4 INTRODUCTION A FEW WORDS ABOUT SAFETY Your safety and the safety of others are very important. Using this engine safely is an important responsibility. To help you make informed decisions about safety, we have provided operating procedures and other information on labels and in this manual.
-
Page 5: Table Of Contents
CONTENTS ENGINE SAFETY ..................IMPORTANT SAFETY INFORMATION ..........CONTROLS & FEATURES ................ COMPONENT & CONTROL LOCATIONS ..........FEATURES ..................... Oil Alert System (applicable types) ..........Oil Cooler ................... Governor .................... Fuel System ..................BEFORE OPERATION ................10 IS YOUR ENGINE READY TO GO? ............. - Page 6 . 38 Specifications .................. . 39 Wiring Diagrams ................41 CONSUMER INFORMATION .............. . 43 DEALER LOCATOR INFORMATION ..........43 Honda PUBLICATIONS ..............43 CUSTOMER SERVICE INFORMATION .......... . 44 QUICK REFERENCE INFORMATION ......Inside back cover...
-
Page 7: Engine Safety
Owner Responsibilities Honda engines are designed to give safe and dependable service if operated according to instructions. Read and understand this owner’s manual before operating the engine. Failure to do so could result in personal injury or equipment damage. - Page 8 ENGINE SAFETY Carbon Monoxide Hazard Exhaust gas contains poisonous carbon monoxide. Avoid inhalation of exhaust gas. Never run the engine in a closed garage or confined area. Other Equipment Review the instructions provided with the equipment powered by this engine for any additional safety precautions that should be observed in conjunction with engine startup, shutdown, operation, or protective apparel that may be needed to operate the equipment.
-
Page 9: Controls & Features
CONTROLS & FEATURES COMPONENT & CONTROL LOCATIONS GX620K1/GX670 AIR CLEANER SPARK PLUG OIL COOLER (EQUIPPED TYPE) OIL FILTER FAN COVER... - Page 10 CONTROLS & FEATURES GX620K1/GX670 OIL FILLER CAP HIGH-MOUNT MUFFLER (OPTIONAL EQUIPMENT) SPARK PLUG OIL LEVEL DIPSTICK OIL DRAIN BOLT ELECTRIC STARTER...
-
Page 11: Features
Engine RPM is set by the governor when the engine is running. Fuel System The engine uses LPG or NATURAL GAS as the fuel with Honda specified fuel regulator and relational parts equipped on it. The proper installation and the maintenance require a high knowledge... -
Page 12: Before Operation
BEFORE OPERATION IS YOUR ENGINE READY TO GO? For your safety, and to maximize the service life of your equipment, it is very important to take a few moments before you operate the engine to check its condition. Be sure to take care of any problem you find, or have your servicing dealer correct it, before you operate the engine. -
Page 13: Check The Engine
BEFORE OPERATION Check the Engine Check the engine oil level (see page ). Running the engine with a low oil level can cause engine damage. The Oil Alert system (applicable types) will automatically stop the engine before the oil level falls below safe limits. However, to avoid the inconvenience of an unexpected shutdown, always check the engine oil level before startup. -
Page 14: Operation
OPERATION SAFE OPERATING PRECAUTIONS Before operating the engine for the first time, please review the IMPORTANT SAFETY INFORMATION on page and the chapter titled BEFORE OPERATION . For your safety, do not operate the engine in an enclosed area such as a garage. -
Page 15: Stopping The Engine
OPERATION Turn the engine switch to the ON position. Operate the starter switch. Turn the starter switch to the START position, and hold it there until the engine starts. If the engine fails to start within 5 seconds, release the starter switch, and wait at least 10 seconds before operating the starter again. -
Page 16: Servicing Your Engine
Other service tasks that are more difficult, or require special tools, are best handled by professionals and are normally performed by a Honda technician or other qualified mechanic. The maintenance schedule applies to normal operating conditions. If... -
Page 17: Maintenance Safety
Remember that your servicing dealer knows your engine best and is fully equipped to maintain and repair it. To ensure the best quality and reliability, use only new, Honda genuine parts or their equivalents for repair and replacement. -
Page 18: Maintenance Schedule
Replace the paper element type only. Service more frequently when used in dusty areas. These items should be serviced by your Honda servicing dealer, unless you have the proper tools and are mechanically proficient. Refer to the Honda shop manual for service procedures. -
Page 19: Fuel Recommendations
(metallic rapping noise) while operating under heavy loads. This is no cause for concern. If spark knock or pinging occurs at a steady engine speed, under normal load, see an authorized Honda servicing dealer. Running the engine with persistent spark knock or pinging can cause engine damage. -
Page 20: Engine Oil Level Check
SERVICING YOUR ENGINE ENGINE OIL LEVEL CHECK Check the engine oil level with the engine stopped and in a level position. Place the engine horizontally on a level surface. Start the engine and let it idle for 1 or 2 minutes. Stop the engine and wait for 2 or 3 minutes. -
Page 21: Engine Oil Change
SERVICING YOUR ENGINE ENGINE OIL CHANGE Drain the used oil while the engine is warm. Warm oil drains quickly and completely. Place a suitable container below the engine to catch the used oil, then remove the oil filler cap, drain bolt and sealing washer. Allow the used oil to drain completely, then reinstall the drain bolt and new sealing washer, and tighten it securely. -
Page 22: Oil Filter Change
Clean the filter mounting base, and coat the seal of the new oil filter with clean engine oil. Use only a Honda Genuine oil filter or a filter of equivalent quality specified for your model. Using the wrong filter, or a non-Honda... -
Page 23: Engine Oil Recommendations
SERVICING YOUR ENGINE Screw on the new oil filter by hand until the seal contacts the filter mounting base, then use an oil filter socket tool to tighten the filter an additional 7/8 turn. Oil filter tightening torque: 16 lbf·ft (22 N·m , 2.2 kgf·m) Refill the crankcase with the specified amount of the recommended oil. -
Page 24: Air Filter Inspection
SERVICING YOUR ENGINE AIR FILTER INSPECTION Remove the air cleaner cover and inspect the filter elements. Clean or replace dirty filter elements. Always replace damaged filter elements. Refer to page for instructions that apply to the air cleaner and filter service. -
Page 25: Air Cleaner Service
SERVICING YOUR ENGINE AIR CLEANER SERVICE A dirty air filter will restrict air flow to the carburetor, reducing engine performance. If you operate the engine in very dusty areas, clean the air filter more often than specified in the MAINTENANCE SCHEDULE. Operating the engine without an air filter, or with a damaged air filter, will allow dirt to enter the engine, causing rapid engine wear. - Page 26 SERVICING YOUR ENGINE Paper air filter element: Tap the filter element several times on a hard surface to remove dirt, or blow compressed air [not exceeding 30 psi (207 kPa, 2.1 kgf/cm )] through the filter element from the air cleaner case side.
-
Page 27: Spark Plug Service
SERVICING YOUR ENGINE SPARK PLUG SERVICE Recommended spark plugs: ZGR5A-4 (NGK) Incorrect spark plugs can cause engine damage. Disconnect the spark plug caps, and remove any dirt from around the spark plug area. Remove the spark plugs with a 13/16-inch spark plug wrench. SPARK PLUG WRENCH SPARK PLUG CAP... - Page 28 SERVICING YOUR ENGINE After the spark plug seats, tighten with a 13/16-inch spark plug wrench to compress the washer. If reinstalling the used spark plugs, tighten 1/8 1/4 turn after the spark plug seats. If installing a new spark plugs, tighten 1/2 turn after the spark plug seats.
-
Page 29: Spark Arrester Service (Optional Equipment)
Check local laws and regulations. A spark arrester is available from authorized Honda servicing dealers. The spark arrester must be serviced every 6 month or 100 hours to keep it functioning as designed. - Page 30 SERVICING YOUR ENGINE Use a brush to remove carbon deposits from the spark arrester screen. Be careful to avoid damaging the screen. The spark arrester must be free of breaks and holes. Replace the spark arrester if it is damaged. SPARK ARRESTER SCREEN Reinstall the spark arrester and muffler protector in the reverse order of disassembly.
-
Page 31: Helpful Tips & Suggestions
HELPFUL TIPS & SUGGESTIONS STORING YOUR ENGINE Storage Preparation Proper storage preparation is essential for keeping your engine trouble-free and looking good. The following steps will help to keep rust and corrosion from impairing your engine’s function and appearance, and will make the engine easier to start after storage. Cleaning If the engine has been running, allow it to cool for at least half an hour before cleaning. -
Page 32: Storage Precautions
HELPFUL TIPS & SUGGESTIONS Engine Oil Change the engine oil (see page 19). Engine Cylinder Remove the spark plugs (see page 25). Pour a tablespoon (5 10 cc) of clean engine oil into the cylinders. Turn the crank shaft several times to distribute the oil in the cylinders. -
Page 33: Removal From Storage
HELPFUL TIPS & SUGGESTIONS Position the equipment so the engine is level. Tilting can cause oil leakage. With the engine and exhaust system cool, cover the engine to keep out dust. A hot engine and exhaust system can ignite or melt some materials. -
Page 34: Taking Care Of Unexpected Problems
Low oil level caused Oil Add oil (p. 18). Alert to stop engine. (if equipped) Take engine to an Carburetor malfunction, Replace or repair authorized Honda ignition malfunction, faulty components servicing dealer, or valves stuck, etc. as necessary. refer to shop manual. -
Page 35: Technical & Consumer Information Technical Information
TECHNICAL & CONSUMER INFORMATION TECHNICAL INFORMATION Serial Number Location SERIAL NUMBER & ENGINE TYPE Record the engine serial number, engine type and purchase date in the space below. You will need this information when ordering parts and when making technical or warranty inquires (see page Engine serial number: Engine type: Date of purchase:... -
Page 36: Battery Connections For Electric Starter
TECHNICAL & CONSUMER INFORMATION Battery Connections for Electric Starter Use a 12-volt battery with an ampere-hour rating of at least 45 Ah. Be careful not to connect the battery in reverse polarity, as this will short circuit the battery charging system. Always connect the positive ( ) battery cable to the battery terminal before connecting the negative ( ) battery cable, so your tools cannot cause a short circuit if they touch a grounded part while tightening the positive ( ) battery... -
Page 37: Carburetor Modification For High Altitude Operation
Honda certified system (see below). If you choose not to use the Honda fuel system, you must use a system that has been certified by the fuel system manufacturer to be used on this Honda engine. -
Page 38: Emission Control System Information
The following instructions and procedures must be followed in order to keep the emissions from your Honda engine within the emission standards. Tampering and Altering Tampering with or altering the emission control system may increase emissions beyond the legal limit. - Page 39 Afterburning (backfiring). Black exhaust smoke or high fuel consumption. Replacement Parts The emission control systems on your Honda engine were designed, built, and certified to conform with EPA and California emission regulations. We recommend the use of specified Honda parts whenever you have maintenance done.
-
Page 40: Air Index
TECHNICAL & CONSUMER INFORMATION Air Index (Models certified for sale in California) An Air Index Information label is applied to engines certified to an emission durability time period in accordance with the requirements of the California Air Resources Board. The bar graph is intended to provide you, our customer, the ability to compare the emissions performance of available engines. -
Page 41: Specifications
TECHNICAL & CONSUMER INFORMATION Specifications GX620K1-VXC2 Type Length Width Height 16.1 18.5 18.0 in (408 457 mm) Dry mass [weight] 93.7 lbs (42.5 kg) Engine type 4-stroke, overhead valve, 2 cylinders (90° V-Twin) Displacement 37.5 cu-in (614 cm ) [Bore Stroke] 3.03 2.60 in (77.0... - Page 42 GX620K1/670 Tuneup ITEM SPECIFICATION MAINTENANCE Spark plug gap 0.012 0.016 in Refer to page 25 (0.3 0.4 mm) Valve clearance (cold) 0.15 0.02 mm See your authorized 0.20 0.02 mm Honda dealer Other specifications No other adjustments needed.
-
Page 43: Wiring Diagrams
TECHNICAL & CONSUMER INFORMATION Wiring Diagrams Recommended wiring for engines equipped with Charge Coil and Oil Alert system. - Page 44 TECHNICAL & CONSUMER INFORMATION Wiring Diagrams Recommended wiring for engines not equipped with Oil Alert system.
-
Page 45: Consumer Information
Shop Manual This manual covers complete maintenance and overhaul procedures. It is intended to be used by a skilled technician. Available through your Honda dealer or through Helm lnc. at 1 888- 292-5395 or visit www.hondapowerequipment.com Parts Catalog This manual provides complete, illustrated parts lists. Available... -
Page 46: Customer Service Information
General Manager can help. Almost all problems are solved in this way. If you are dissatisfied with the decision made by the dealership’s management, contact the Honda Power Equipment Customer Relations Office. You can write to: American Honda Motor Co., Inc. -
Page 47: Quick Reference Information
QUICK REFERENCE INFORMATION Fuel Type LPG: Propane content of 95% or higher (page 17). NATURAL GAS: Methane content of 90% or equivalent (page 17). Engine Oil Type SAE 10W-30, API SJ or later (or equivalent), for general use (page 21) Capacity Without oil filter replacement: approximately...