Table of Contents
Advertisement
P61-2 Pellet Stove Owners Manual
Safety Testing by
ASTM E1509
Mobile Home Approved
PLEASE READ THIS ENTIRE MANUAL BEFORE YOU INSTALL AND USE YOUR NEW ROOM HEATER. FAILURE TO
FOLLOW INSTRUCTIONS MAY RESULT IN PROPERTY DAMAGE, BODILY INJURY, OR EVEN DEATH.
FOR USE IN THE U.S. AND CANADA. SUITABLE FOR INSTALLATION IN MOBILE HOMES
IF THIS HARMAN STOVE IS NOT PROPERLY INSTALLED, A HOUSEFIRE MAY RESULT. FOR YOUR SAFETY, FOLLOW
INSTALLATION DIRECTIONS.
CONTACT LOCAL BUILDING OR FIRE OFFICIALS ABOUT RESTRICTIONSAND INSTALLATION INSPECTION
REQUIREMENTS IN YOUR AREA.
CONTACT YOUR LOCAL AUTHORITY (SUCH AS MUNICIPAL BUILDING DEPARTMENT, FIRE DEPARTMENT, FIRE
PREVENTION BUREAU, ETC.) TO DETERMINE THE NEED FOR A PERMIT.
CETTE GUIDE D'UTILISATION EST DISPONIBLE EN FRANCAIS. CHEZ VOTRE CONCESSIONNAIRE DE HARMAN STOVE
COMPANY.
Installation & Operating Manual
ìCe manuel est disponible en FranÁais sur demandeî
SAFETY NOTICE
SAVE THESE INSTRUCTIONS.
R5
Advertisement
Table of Contents

Related Manuals for Harman Stove Company P61-2


Summary of Contents for Harman Stove Company P61-2
- Page 1 Installation & Operating Manual P61-2 Pellet Stove Owners Manual Safety Testing by ASTM E1509 Mobile Home Approved ìCe manuel est disponible en FranÁais sur demandeî PLEASE READ THIS ENTIRE MANUAL BEFORE YOU INSTALL AND USE YOUR NEW ROOM HEATER. FAILURE TO FOLLOW INSTRUCTIONS MAY RESULT IN PROPERTY DAMAGE, BODILY INJURY, OR EVEN DEATH. FOR USE IN THE U.S. AND CANADA. SUITABLE FOR INSTALLATION IN MOBILE HOMES IF THIS HARMAN STOVE IS NOT PROPERLY INSTALLED, A HOUSEFIRE MAY RESULT. FOR YOUR SAFETY, FOLLOW INSTALLATION DIRECTIONS. CONTACT LOCAL BUILDING OR FIRE OFFICIALS ABOUT RESTRICTIONSAND INSTALLATION INSPECTION REQUIREMENTS IN YOUR AREA. CONTACT YOUR LOCAL AUTHORITY (SUCH AS MUNICIPAL BUILDING DEPARTMENT, FIRE DEPARTMENT, FIRE PREVENTION BUREAU, ETC.) TO DETERMINE THE NEED FOR A PERMIT. CETTE GUIDE D'UTILISATION EST DISPONIBLE EN FRANCAIS. CHEZ VOTRE CONCESSIONNAIRE DE HARMAN STOVE COMPANY. SAFETY NOTICE SAVE THESE INSTRUCTIONS.
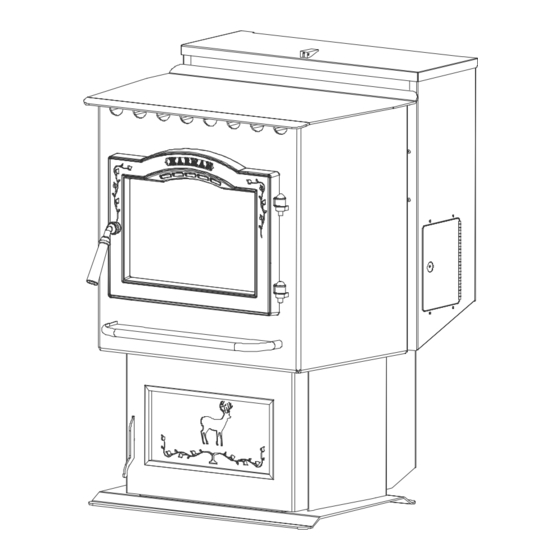
- Page 2 Fig. 1 2...
-
Page 3: Table Of Contents
Table of Contents Testing Label Assembly & Installation Venting Operation ESP Control Maintenance Trouble Shooting Feeder Parts Specifications Wiring Diagram Options Parts List Warranty Please read this entire manual before you install and use your new room heater. Failure to follow instructions may result in property damage, bodily injury, or even death. SUITABLE FOR MOBILE HOME INSTALLATIONS. SAVE THESE INSTRUCTIONS Harman Stove Company 352 Mountain House Road Halifax, PA 17032 3... -
Page 4: Assembly & Installation
Rear Cover Home Installation Panels Fig. 2 Unpacking The P61 is bolted to the skid to prevent move- ment during shipping. To free the stove from the skid you must re- move the hold-down bolts in the rear of the pedestal base. Removing or Installing rear cover panels To remove the rear cover panels, loosen the screws slightly and slide the covers outward as shown in the illustration. To reinstall, simply slide back into place and retighten the screws. Firebrick Install the firebrick vertically on the angle above... - Page 5 Installing Place the stove on a noncombustible floor or UL approved floor protector that extends 6 inches to the front, 6 inches to the sides and 1 inch to the rear of the stove. Place the stove away from combustible walls at least as far as shown in figures 3,4 and 5. Please note the difference in side wall clearance with and without side shields. Note that the clearances shown are minimum for safety but do not leave much room for access when cleaning or servicing. Please take this into account when placing the stove. Connect the power cord to a 120 V.A.C. 60Hz grounded receptacle.
-
Page 6: Venting
Requirements for Terminating the Venting WARNING: Venting terminals must not be re- cessed into a wall or siding. NOTE: Only PL vent pipe wall pass-throughs and fire stops should be used when venting through combustible materials. NOTE: Always take into consideration the ef- fect the prevailing wind direction or other wind cur- rents will cause with flyash and /or smoke when plac- ing the termination. In addition, the following must be observed: A. The clearance above grade must be a mini- mum of 18". B. The clearance to a window or door that may be opened must be a minimum of 48". ( with outside air installed, 18î ) C. A 12" clearance to a permanently closed window is recommended to prevent condensation on the window. D. The vertical clearance to a ventilated soffit located above the terminal within a horizontal dis- tance of 2 feet (60 cm) from the center-line of the terminal must be a minimum of 18". E. The clearance to an unventilated soffit must be a minimum of 12". F. The clearance to an outside corner is 11" from center of pipe. - Page 7 15 feet of pipe is needed, the diameter should be increased from 3" to 4" because a larger pipe causes less flow resistance. Be sure to use approved pellet vent pipe wall and ceiling pass through fittings to go through combustible walls and ceilings. Be sure to use a starting collar to attach the venting systen to the stove. The starting collar must be sealed to the stove with high temp sili- cone caulking. Vent Pipe Pellet venting pipe ( also known as PL vent ) is constructed of two layers with air space between the layers. This air space acts as an insulator and...
- Page 8 Venting Venting Fig. 8 3 ft. to combustibles 3 ft. to combustibles Fig. 9 #1 Preferred method This method provides excellent venting for nor- mal operation and allows the stove to be installed closest to the wall. Two inches from the wall is safe; however, four inches allows better access to remove the rear panel. The vertical portion of the vent should be three to five feet high. This vertical section will provide natural draft in the event of a power failure. #2 Preferred method This method also provides excellent venting for normal operation but requires the stove to be installed farther from the wall. The vertical portion of the vent should be three to five feet high and at least three inches from a combustible wall. This vertical sec- tion will provide natural draft in the event of a power failure. 8...
- Page 9 Venting Venting Fig. 10 Fig. 11 9 #4 Installing into an existing chimney ( US only ) This method provides excellent venting for nor- mal operation. This method also provides natural draft in the event of a power failure. If the chimney condition is questionable you may want to install a liner as in method #7. #5 Installing into an existing fireplace chimney ( US only ) This method provides excellent venting for nor- mal operation. This method also provides natural draft in the event of a power failure. The damper area must be sealed with a steel plate or fiberglass. A cap should be installed on the chimney to keep out rain. If the chimney condition is questionable you may want to install a liner all the way to the top as in method #6.
- Page 10 Venting Venting Fig. 12 Fig. 13 10 #6 Installing into an existing fireplace chimney ( US and Canada ) This method provides excellent venting for nor- mal operation. This method also provides natural draft in the event of a power failure. In Canada and some places in the US it is re- quired that the vent pipe extend all the way to the top of the chimney. In this method a cap should also be installed on the chimney to keep out rain. Be sure to use ap- proved pellet vent pipe fittings. Seal pipe joints with silicone in addition to the sealing system used by the manufacturer. Pipe size should be increased to 4" using this method. #7 Installing into an existing chimney ( US and Canada ) This method provides excellent venting for nor- mal operation. This method also provides natural draft in the event of a power failure. In Canada and some places in the US it is re- quired that the vent pipe extend all the way to the top of the chimney. The pipe or liner inside the chimney should be 4"diameter. In this method a cap should also be installed on the chimney to keep out rain. One disadvantage of this method is that it is harder to clean the vent pipe, therefore, there is a tendancy not to do it as often as needed.
- Page 11 EXHAUST VENTING SYSTEM OF THIS UNIT. DO NOT CONNECT THIS UNIT TO A CHIMNEY FLUE SERVING ANOTHER APPLIANCE. INSTALL VENT AT CLEARANCES SPECIFIED BY THE MANUFACTURER DO NOT INSTALL IN SLEEPING ROOM THE STRUCTURAL INTEGRITY OF THE MOBILE HOME FLOOR, WALL, AND CEILING/ ROOF MUST BE MAINTAINED. THE STOVE IS HOT WHILE IN OPERATION. KEEP CHILDREN, CLOTHING AND FURNITURE AWAY. CONTACT MAY CAUSE SKIN BURNS. 11 It is recommended that Fig. 15 WARNING CAUTION...
-
Page 12: Operation
P61-2 MANUAL START UP Fig. 17 Fig. 18 Fig. 20 Operation Starting First Fire Be sure the power cord is plugged into a 120 volt receptacle. This can be verified by the red power light on the control panel. Fill the hopper with pellets. Fill the burn pot with pellets to a level just short of overflowing, fig. 17. Adjust feed rate. If this is your first fire or you are trying different pellets, set the feed adjuster to "3", fig. 18. This is a conservative number and will prob- ably need to be increased. After you know a feed rate setting that works well, use that setting. Re- member, too high a feed rate will waste fuel. Turn Mode selector to "OFF" and then to "Stove Temp". This will turn the combustion blower to high. When starting a fire always turn the mode selector to "OFF" before selecting the desired mode. This resets the control for start- Turn Temp Dial to 7. This will allow the stove to... -
Page 13: Manual Ignition/Operation
P61-2 MANUAL IGNITION/OPERATION Fig. 21 This setting will produce medium heat with the distribution blower on "low". This setting will produce a room temperature of 70 degrees with the distribution blower at medium speed. This setting will produce continuous maximum heat output with the distribution blower at full speed. When to use "Stove Temp Mode" In "Stove Temp Mode" the Stove Temp Dial de- termines the temperature of the stove. Heat output and fuel consumption will remain constant. This makes it possible to tell how long a hopper full of pellets will last. The distribution blower speed will vary according to the position of the mode selector, fig. 21. When to use "Room Temp Mode"... -
Page 14: Esp Control
1 Blink: Indicates control board self diagnostic fail- ure. This requires a manual reset*. 2 Blinks:Indicates that the jumper (J2) on the rear of the control board is not connected. Without this jumper the unit will only burn at minimum rate. 3 Blinks: Indicates ESP (Exhaust Sensing Probe) failure. This requires a manual reset*. 4 Blinks: Can occur only in Room Temp Mode and indicates Room Sensing Probe failed or not installed. If a Room Sensing Probe is then installed the status light will automatically reset. (Note) only after unit has warmed up. 6 Blinks : Indicates that the control has calculated P61-2 ESP CONTROL Mode Selector Allows you to choose between Room Temp Mode, Stove Temp Mode, or OFF. Also allows you to vary the distribution blower speed by turning the knob to the high or low side of each mode. poor or incomplete combustion occurring for more than 50 minutes. See Troubleshooting section for more details. * Manual reset, disconnect power cord for a few seconds and reconnect. If error still occurs call your Dealer. - Page 15 Room Sensor and Rear Shield Installation Room Sensor Installation Fig. 22 The room sensor is a small temperature sen- sor on the end of a 60" gray wire. This sensor is installed much like a standard wall thermostat. Be- cause it is so small, it can be hidden along the trim of a doorway or even up the leg of a coffee table. There is a remote room sensor port on the rear of the unit for easy external connection. Use standard 18-2 thermostat wire to extend the distance to the desired location (100' maximum). The room sen- sor should be installed in the location where you want to control the temperature. NOTE: Distances of more than 25 feet from the unit or in another room are not recommended. The room sensor is essential for the P61's excel- lent efficiency. NOTE: It is recommended that the room sensor be installed, even if only installed on the rear of the unit as a return air sensor.
-
Page 16: Removing Ashes
Ashes should be placed in a metal con- tainer with a tight fitting lid. The closed con- tainer of ashes should be placed on a non- combustible floor or on the ground, well away from all combustible materials, pending final disposal. If ashes are disposed of by burial in soil or otherwise locally dispersed, they should be retained in the closed container until all cinders have thoroughly cooled. It is recommended that the stove is cold and shut down when removing ash pan. 1. Pull on latch handles and remove ash pan as Blower Cover shown at left. Use ash pan handle to carry Latch and dispose of ashes. 2. Slide the ash pan back into the stove and latch by pushing in on both latches simulta- neously. Cleaning: The stove will need to be cleaned for approxi-... - Page 17 Burn pot clean-out is removed. Burn pot closed. clean-out is open. probe Fig. 28 Exposed blower wheel and flue opening, NOTE: ESP probe is visible. Fig. 29 Maintenance 7. Open burn pot slide as shown, clean with vacuum and close. 8. Clean heat exchanger with scraper as shown at left. 9. Brush or scrape the inside of the stove to remove fly ash. 10. Scrape burnpot with flat end of scraper pro- vided with the stove. Fig.31. Fig. 27 11.Slide ash pan into stove and latch into place. Brush not supplied. Can be found in hardware stores. Soot and Fly Ash The products of combustion will contain small particles of fly ash. The fly ash will Blower cover collect in the exhaust venting system and removed. restrict the flow of the flue gases. Incom- plete combustion, such as occurs during startup, shutdown, or incorrect operation...
-
Page 18: Trouble-Shooting
2. Draft too low. (Check burn pot clean- out slide and door gasket). 3. Burn pot or heat exchanger tubes may need to be cleaned. 4. Combination of all the above. Cleaning Burn Pot Whenever your stove is not burning, take the opportunity to scrape the burn pot to remove carbon buildup. A vacuum cleaner is handy to remove the residue. Be sure the stove is cold if you use a vacuum. Carbon buildup can be scraped loose with the fire burning using the special tool provided with your stove. Scrape the floor and sides of the burn pot. The carbon will be pushed out by the incoming fuel. Always wear gloves to do this. Pellet fuels are put into 3 categories in terms of ash content. Premium at 1% or less, Standard at 3% or less and all others at 3% or more. The P61 is capable of burning all 3 categories of pellets due to a patented feeder and burn pot system. -
Page 19: Specifications
P61-2 Feeder and Specifications 9" 5.250" Weight Blower Feed Rate Hopper Capacity Fuel Flue Size Outside Air Size Fuse Rating Specifications 249 lbs. 135 cfm .75 to 7.5 lbs. per hr. 72 lbs. Wood Pellets 3 inch 2 3/8 I.D. inch 5 amp 19 23.5"... - Page 20 P61-2 Wiring Diagram 20...
- Page 21 To install, lay the frame face down on a soft surface. Fasten door frame by inserting the 4 threaded posts on the frame through the door. The posts should line up with the 4 holes located at the corners of the door. Once the posts are through the door, fasten frame with 4 nuts and tighten until the frame is snug. To install ash lip trim, simply slide the trim over the ash lip and into the groove on the trim. Door Options Decorative Tile Decorative tile is available in several designs. The tile installs behind the trim on the ash door. Cleaning Plated Trim Gold or nickel plated hardware should never be buffed or polished. Abrasive cleansers and metal polishes will remove the plating and therefore should never be used. If the plating needs to be cleaned, wait until the stove is completely cool, then use a sponge, soap and water to gently remove dirt and stains. Before relighting the stove, remove all soap residue and wipe dry. 21...
- Page 22 Side Heat Shields Side heat shields are available to reduce the clearance to combustible materials. OPTIONS Hopper Extension The hopper extension allows you to put more pellet fuel in the hopper and extends burn time on one load of pellets. The hopper extension adds 60 pounds to the existing 72 pound hopper capacity, allowing you to load 132 pounds of pellets at one time. 22...
-
Page 23: Wiring Diagram
P61 Parts List Description Hopper Gasket(6 ft.) Ash Pan Assembly Burn Pot Weldment Right Rear Shield Left Rear Shield Arrow Scraper Flame Guide Wiring Harness Assembly Thermister Probe Room Sensor Circuit Board Differential Switch 5" Double Fan Blade Combustion Blower Distribution Blower Hopper Lid Latch 3/16" Rubber Washer (for Hopper Lid) Power Cord Manual Ignite Label (Control Panel Door) 3-90-05802 Fire Brick (3) White/Black Control Knob(3) Control Knob Shaft(3) Front Glass Burn Pot Gasket(2) Tailpipe Gasket Wiring Diagram Control Panel Sticker Owner's Manual Hopper Lid Label Cleanout ... -
Page 24: Warranty
HARMAN GOLD WARRANTY 6 YEAR TRANSFERABLE LIMITED WARRANTY (Residential) 1 YEAR LIMITED WARRANTY (Commercial) Harman Stove Company warrants its products to be free from defects in material or workmanship, in normal use and service, for a period of 6 years from the date of sales invoice and for mechanical and electrical failures, in normal use and service, for a period of 3 years from the date of sales invoice. If defective in material or workmanship, during the warranty period, Harman Stove Company will, at its option, repair or replace the product as described below. The warranty above constitutes the entire warranty with respect to Harman Stove Company products. HARMAN STOVE COMPANY MAKES NO OTHER WARRANTY, EXPRESSED OR IMPLIED, INCLUDING ìANYî WAR- RANTY OF MERCHANTABILITY, OR WARRANTY OF FITNESS FOR A PARTICULAR PURPOSE. No employee, agent, dealer, or other person is authorized to give any warranty on behalf of Harman Stove Company. This warranty does not apply if the product has been altered in any way after leaving the factory. Harman Stove Company and its agents assume no liability for ìresultant damages of any kindî arising from the use of its products. In addition, the manufacturer and its warranty administrator shall be held free and harmless from liability from damage to property related to the operation, proper or improper, of the equipment. THERE ARE NO WARRANTIES WHICH EXTEND BEYOND THE DESCRIPTION ON THE FACE HEREOF. THESE WARRANTIES APPLY only if the device is installed and operated as recommended in the userís manual. THESE WARRANTIES WILL NOT APPLY if abuse, accident, improper installation, negligence, or use beyond rated capacity causes damage. HOW TO MAKE A CLAIM - Any claim under this warranty should be made to the dealer from whom this appliance was purchased. Then contact is made with manufacturer, giving the model and serial numbers, the date of purchase, your dealerís name and address, plus a simple explanation of the nature of the defect. Extra costs such as mileage and overtime are not covered. Nuisance calls are not covered by these warranties. THIS WARRANTY IS LIMITED TO DEFECTIVE PARTS - REPAIR AND/OR REPLACEMENT AT HARMAN STOVE COMPANYíS OPTION AND EXCLUDES ANY INCIDENTAL AND CONSEQUENTIAL DAMAGES CONNECTED THEREWITH. WARRANTY EXCLUSIONS: Failure due, but not limited to, fire, lightning, acts of God, power failures and/or surges, rust, corrosion and venting problems are not covered. Damage and/or repairs including but not limited to; remote controls, filters, fuses, knobs, glass, ceramic brick panels, ceramic fiber afterburners, door packing, tile, ce- ramic log sets, paint, batteries or battery back-up and related duct work are not covered. Also excluded from this warranty are consumable or normal wear items including but not limited to; flame guides, grates, coal bars, afterburner hoods, fire brick, gaskets. Additional exclusions for corn stoves are burnpot housing weldment, burnpot grate weldment (pellet or corn), burnpot front plate (pellet or corn), burnpot front plate lock, corn auger extension, ceramic insert, and ceramic insert plate. Additional or unusual utility bills incurred due to any malfunction or defect in equipment and the labor cost of gaining access to or removal of a unit that requires special tools or equipment are not covered. Mainte- nance needed to keep the stove in ìgood operating conditionî is not covered. This includes, but is not limited to, cleaning, adjustment of customer controls and customer education. Labor, materials, expenses and/or equipment needed to comply with law and/or regulations set forth by any governmental agencies are not covered.