Table of Contents
Advertisement
Advertisement
Table of Contents

Related Manuals for Tecnik HB1TI2T0


Summary of Contents for Tecnik HB1TI2T0
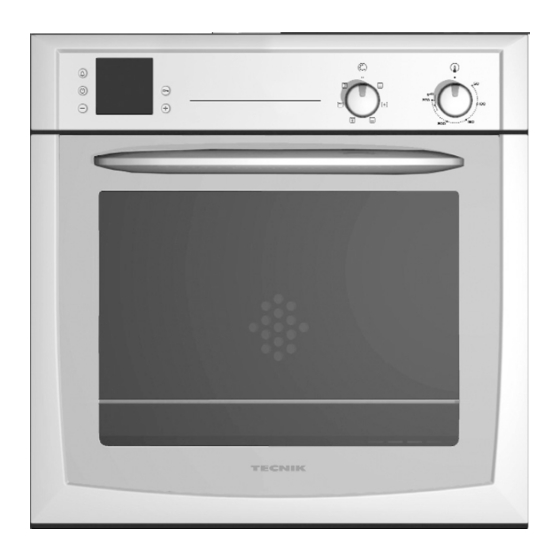
- Page 1 HB1TI2T0 HB2TI2T0 HB2TI5T0 HB2TI5T1 User Manual PLEASE READ THESE INSTRUCTIONS THOROUGHLY This appliance must be operated in accordance with the instructions given in this manual. it is for domestic use only in the preparation and cooking of food and should be built into a...
-
Page 2: Table Of Contents
Index Important information ..... . . Before installation ......Safety information . - Page 3 Index Childproof lock (according to models) ..Basic settings ......Changing the basic settings .
-
Page 4: Important Information
Important information Read this instruction manual carefully. Only then will you be able to operate your cooker safely and correctly.The manufacturer does not accept any re sponsibility if the instruction manual is not followed. Please keep the instruction and installation manual in a safe place. -
Page 5: Safety Information
Safety information This appliance is intended for domestic use only. Only use the cooker for food preparation. Open the oven door carefully. Hot steam may escape. Hot oven Never touch the internal surfaces of the oven or the heating elements. There is a risk of burning. Children must be kept at a safe distance from the appliance. -
Page 6: Your New Cooker
Cooling with the oven door Only leave the oven to cool with the door closed. Do open not allow anything to become trapped in the oven door. Even if you only leave the oven door open slightly, the fronts of adjacent units may become damaged over time. -
Page 7: Function Selector (According To Models)
Temperature Function Timer selector selector Display panel and Function Temperature control buttons selector selector Function selector (according to Use the function selector.to select the type of heating models) for the oven. Settings Conventional heat Hot air Bottom heating Hot air grilling Radiant grill small area Radiant grill large area... -
Page 8: Temperature Selector (According To Models)
The oven light switches on when you select a function. Temperature selector (according Use the temperature selector to set the temperature to models) or grill setting. Temperature 50 270 Temperature range in ºC Grill Level Low grill Medium grill High grill The indicator light above the temperature selector comes on while the oven is heating up. -
Page 9: Control Buttons And Display Panel (According To Models)
Setting procedure Turn the timer clockwise to the desired time. There is a stop after 120. Please do not turn the switch past this point. A signal sounds when the time expires. Turn the switch back to the Ò position. Control buttons and display panel (according to... - Page 10 Hot air A fan in the rear panel distributes the heat evenly inside the oven. Using hot air, it is possible to bake cakes and pizza on two shelves. The required oven temperatures are lower than those for top and bottom heating. Additional baking trays may be purchased at a later date from the after sales service.
-
Page 11: Oven And Shelving Accessories
Radiant grill large area The entire area under the grill element becomes hot. This is ideal if you wish to cook several steaks, sausages, fish or slices of toast. Oven and shelving accessories The shelf can be inserted at 5 different heights in the oven. -
Page 12: Cooling Fan
Cooling fan Before using for the first time If the j symbol and three zeros are flashing in the display Heating up the oven Method Pre cleaning the accessories... -
Page 13: Setting The Oven
Setting the oven You can easily set the oven using the function selector and the temperature selector. The correct type of heating and temperature for many dishes can be found in the Tables and tips" section. Setting procedure Example: r, 190 ºC Select the desired type of heating using the function selector. -
Page 14: (According To Models)
The oven is automatically disconnected Programme it as described in points 1 and 2. Now (according to enter the cooking time (duration) for your dish. models) Example: 45 minute duration Turn the alarm to the desired time. The oven starts working. -
Page 15: If The Oven Is To Switch On And Off Automatically (According To Models)
Set the cooking time using the + or - button. + button default value = 30 minutes. - button default value = 10 minutes. The oven switches on after a few seconds. The ? symbol lights up in the display. The cooking time has A signal sounds. -
Page 16: Time (According To Models)
Use the + button to set a later end time. The setting is adopted after a few seconds. The display will show the end time until the oven switches The cooking time has A signal sounds. The oven switches off. elapsed Press the j button twice and switch off the function selector. -
Page 17: Timer (According To Models)
Set the time using the + or - button. The time selected is adopted after a few seconds. Changing the time e.g. Press the j clock button twice and change the time from summer to winter with the + or - button. time You can hide the time. -
Page 18: Setting Procedure
Setting procedure Example: 20 minutes Press the a timer button. The a symbol will flash. Set the timer period using the + or - button. + button default value = 10 minutes. - button default value = 5 minutes. The timer starts after a few seconds. The a symbol lights up in the display. -
Page 19: Childproof Lock (According To Models)
Childproof lock (according to models) The oven has a childproof lock to prevent children from switching it on accidentally. Locking the oven Press the p key button until the p symbol appears in the display. This will take approximately 4 seconds. Press the p key button until the p goes out. -
Page 20: Changing The Basic Settings
Changing the basic settings There must be no program set. Example: Hiding the time Press the j clock button and the + button at the same time until a 1 appears in the display. This is the basic setting for the time in the foreground. Change the basic setting using the + or - button. -
Page 21: Care And Cleaning
Care and cleaning Do not use high pressure cleaners or steam jets. Oven exterior Wipe the oven with water and a little washing up liquid. Dry it with a soft cloth. Caustic or abrasive substances are not suitable. If any such substances come into contact with the frontage, wipe it off immediately with water. - Page 22 Open the oven door fully. Move the two locking levers on the left and right hand sides. Half close the oven door. With both hands, grip the bottom of the door on the left and right hand sides. Close the door a little more and pull it out. After cleaning, re install the oven door, following the instructions in reverse order.
-
Page 23: Cleaning The Rails (According To Models)
Cleaning the rails (according to The rails can be removed for cleaning. models) To unhook the rails: Lift the rails at the front in an upwards direction and unhook them, then pull the rails forward and remove Clean the rails using either washing up liquid and a sponge or a brush. -
Page 24: Troubleshooting
Troubleshooting Should a malfunction occur, it is often only due to a minor fault. Please read the following instructions before calling the after-sales service: Problem Possible cause Comments/remedy The oven does not work. Blown fuse. Look in the fuse box and check that the fuse is in working order. -
Page 25: After Sales Service
Replacing the glass cover The glass cover on the oven light must be replaced if it is damaged. Replacement glass covers may be obtained from the after sales service. To this end, please specify the E number and FD number of your appliance. -
Page 26: Tables And Tips
Old appliances are not worthless rubbish. Environmentally conscious recycling can reclaim valuable raw materials. Before disposing of your old appliance, please make sure that it is unusable, or label it with a sticker stating Caution, scrap". Up to date information on how to dispose of your old appliance and the packaging from the new one can be obtained from your retailer or local authority. - Page 27 temperature setting to start with, since this allows more even browning. If necessary, use a higher temperature setting the next time. More information can be found in the Baking tips" section which follows the tables. Cakes in tins Tin on the wire grill Level Type of Tempera...
-
Page 28: Baking Tips
Cakes on the tray Level Type of Temperat Baking time heating ure in ºC in minutes Baking tips You wish to cook to your own recipe. How to check that a sponge cake is cooked properly. The cake collapses. The cake has risen in the centre but is lower at the edges. -
Page 29: Meat, Poultry, Fish
The bread or cake Next time you should add a little less liquid and cook for a little (e.g. cheesecake) looks fine, but longer at a lower temperature. Cakes with fruit topping: Precook is soggy on the inside (soft, with the base first of all. - Page 30 Advice on grilling Always close the oven door when grilling. If possible, use pieces of meat which are of the same thickness. They should be at least 2 to 3 cm thick. Such pieces will be browned evenly and stay juicy and soft in the middle.
- Page 31 Meat Weight Ovenware Level Type of Tempera Cooking heating ture in ºC, time in grill minutes Poultry The table applies to dishes placed in a cold oven. The weights indicated in the table refer to oven ready poultry (without stuffing). If you are grilling directly on the wire rack, you should also insert the enamelled pan at level 1.
-
Page 32: Tips For Roasting And Grilling
Poultry Weight Ovenware Level Type of Temperature Cooking heating in ºC time in minutes Fish The table applies to dishes placed in a cold oven. Fish Weight Ovenware Level Type of Temperature Cooking heating in ºC, grill time in minutes Tips for roasting and grilling The table does not contain... -
Page 33: Bakes, Gratins, Toast
The roast looks good, but the juices are burnt. The roast looks good, but the juices are too clear and watery. Steam rises from the roast when the juice is basted. Bakes, gratins, toast The table applies to dishes placed in a cold oven. Meal Ovenware Level Type of... -
Page 34: Acrylamide In Food
If you have several cakes to bake it is best to bake them one after the other. The oven is still warm. This shortens the baking time for the second cake. You can also put two baking tins in one after the other. For long cooking times, the oven can be switched off 10 minutes before the end of the cooking time and the remaining heat can be used to finish the cooking. -
Page 35: What Can You Do
What can you do? In general Baking... -
Page 36: Test Dishes
Test dishes In accordance with DIN 44547 and EN 60350 Baking The values in the table apply to dishes placed in a cold oven. Meal Accessories and notes Level Type of Tempera Baking heating ture in ºC time in minutes Ø... - Page 37 9000042307(1W025U) 00-8411...