Table of Contents
Advertisement
Quick Links
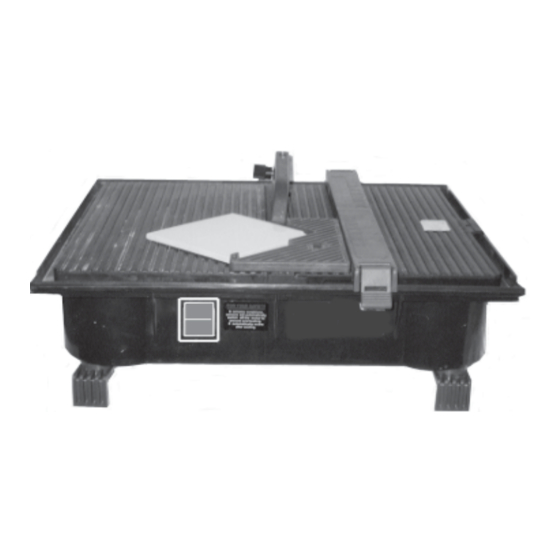
4" TILE SAW
WITH PVC TRAY
Model 03733
ASSEMBLY AND
OPERATING INSTRUCTIONS
®
3491 Mission Oaks Blvd., Camarillo, CA 93011
Visit our Web site at: http://www.harborfreight.com
®
Copyright 2003 by Harbor Freight Tools
. All rights reserved. No portion of this
manual or any artwork contained herein may be reproduced in any shape or form
without the express written consent of Harbor Freight Tools.
For technical questions, please call 1-800-444-3353.
Advertisement
Table of Contents

Related Manuals for Chicago Electric 3733


Summary of Contents for Chicago Electric 3733
-
Page 1: Operating Instructions
Copyright 2003 by Harbor Freight Tools . All rights reserved. No portion of this manual or any artwork contained herein may be reproduced in any shape or form without the express written consent of Harbor Freight Tools. For technical questions, please call 1-800-444-3353. -
Page 2: Product Specifications
STORE IDLE EQUIPMENT. When not in use, tools and equipment should be stored in a dry location to inhibit rust. Always lock up tools and equipment, and keep out of reach of children. SKU 03733 PRODUCT SPECIFICATIONS 120 Volt / 60 Hz 456 Watts / 4,480 RPM 12”... - Page 3 REPLACEMENT PARTS AND ACCESSORIES: When servicing, use only identi- cal replacement parts. Only use accessories intended for use with this product. Approved accessories are available from Harbor Freight Tools. MAINTAIN THIS PRODUCT WITH CARE. Keep this product clean and dry for better and safer performance.
-
Page 4: Specific Product Warnings And Precautions
Saw in excessively damp or wet areas or in areas near flammable chemicals, dusts, and vapors. PROPER TILE SAW LOCATION: Make sure the Tile Saw is located on a flat, level, sturdy, surface capable of supporting the weight of the Tile Saw, the workpieces, and all additional tools and accessories. - Page 5 ALLOW THE TILE SAW BLADE (part #36) TO SPIN UP TO FULL SPEED BEFORE FEEDING A WORKPIECE INTO THE BLADE. When turning off the Tile Saw, allow the Tile Saw Blade to spin down and stop on its own. Do not press against the Tile Saw Blade to stop it.
- Page 6 When unpacking, check to make sure all the parts shown on the Parts List on page 12 are included. If any parts are missing or broken, please call Harbor Freight Tools at the number shown on the cover of this manual as soon as possible.
-
Page 7: Product Description
The Tile Saw features a built-in water supply that keeps its Tile Saw Blade cool, reduces dust and debris, and is easy to clean. Its efficient design returns water directly to the reservoir and is accurate enough for most ceramic tile, quarry tile, marble, terra cotta, and slate jobs. - Page 8 Remove the old Tile Saw Blade (part #36), and replace it with a new Tile Saw Blade. NOTE: Make sure to install the new Tile Saw Blade with the arrow pointing toward the front of the machine. (See Figure C.) Replace the Outer Flange (part #37), and retighten the Nut (part #38) to secure the Tile Saw Blade in place.
- Page 9 Plug the Power Cord (part #11) into a grounded, 120 Volt electrical outlet. Turn the Power Switch (part #4) to its “ON” position, and allow the Tile Saw Blade (part #36) to spin up to full speed. NOTE: Make sure the Tile Saw Blade is picking up water from the Body (part #19) of the unit.
- Page 10 Fill the Body (part #19) with water. CAUTION: Make sure the water level is high enough to cover the lower edge of the Tile Saw Blade (part #36), but not above the maximum water level as indicated by the arrow.
-
Page 11: Inspection, Maintenance, And Cleaning
TO CLEAN: Clean with a soft brush, cloth, or vacuum to remove dust and debris from the Tile Saw. If necessary, use a mild detergent or mild solvent. Do not use solvents to clean the plastic parts of the Tile Saw, as these may dam- age and crack plastic parts. -
Page 12: Parts List
W asher B ody P lastic S tand NOTE: Some parts are listed and shown for illustration purposes only, and are not available individually as replacement parts. SKU 03733 PARTS LIST Q ty. P art # A ngle G auge...