JVC KD-A305 Instructions Manual
Cd receiver
Hide thumbs
Also See for KD-A305:
- Quick reference (2 pages) ,
- Brochure (2 pages) ,
- Instruction manual (198 pages)
Table of Contents
Advertisement
CD RECEIVER
RECEPTOR CON CD
RÉCEPTEUR CD
For canceling the display demonstration, see page 7.
Para cancelar la demostración en pantalla, consulte la página 7.
Pour annuler la démonstration des affichages, référez-vous à la page 7.
For installation and connections, refer to the separate manual.
Para la instalación y las conexiones, refiérase al manual separado.
Pour l'installation et les raccordements, se référer au manuel séparé.
INSTRUCTIONS
MANUAL DE INSTRUCCIONES
MANUEL D'INSTRUCTIONS
KD-A305/KD-R300
KD-A305/KD-R300
KD-A305/KD-R300
For customer Use:
Enter below the Model
No. and Serial No. which
are located on the top or
bottom of the cabinet. Retain
this information for future
reference.
Model No.
Serial No.
GET0570-001A
[J]
Advertisement
Table of Contents

Related Manuals for JVC KD-A305


Summary of Contents for JVC KD-A305
- Page 1 CD RECEIVER KD-A305/KD-R300 RECEPTOR CON CD KD-A305/KD-R300 RÉCEPTEUR CD KD-A305/KD-R300 For canceling the display demonstration, see page 7. Para cancelar la demostración en pantalla, consulte la página 7. Pour annuler la démonstration des affichages, référez-vous à la page 7. For installation and connections, refer to the separate manual.
- Page 2 – Connect the equipment into an outlet on a circuit different from that to which the receiver is connected. – Consult the dealer or an experienced radio/TV technician for help. Caution: Changes or modifications not approved by JVC could void the user’s authority to operate the equipment. IMPORTANT FOR LASER PRODUCTS 1. CLASS 1 LASER PRODUCT 2.
-
Page 3: Table Of Contents
CONTENTS How to reset your unit OPERATIONS Basic operations ........... 4 • Using the control panel ....... • Using the remote controller (RM-RK50) ..Preparation ..........7 • Your preset adjustments will also be erased (except the Listening to the radio ........8 registered Bluetooth device, see page 10). -
Page 4: Basic Operations
Basic operations Using the control panel FM/AM HD RADIO SIRIUS/XM CD/CD-CH IPOD FM/AM/HD RADIO/SIRIUS/XM BT-PHONE/BT-AUDIO CD/CD-CH IPOD BT-PHONE/BT-AUDIO FM/HD RADIO FM * AM/HD RADIO AM * SIRIUS * /XM * CD * CD-CH * IPOD * BT-PHONE * EXT INPUT AUDIO * AUX IN * When the HD Radio tuner box is connected, the... -
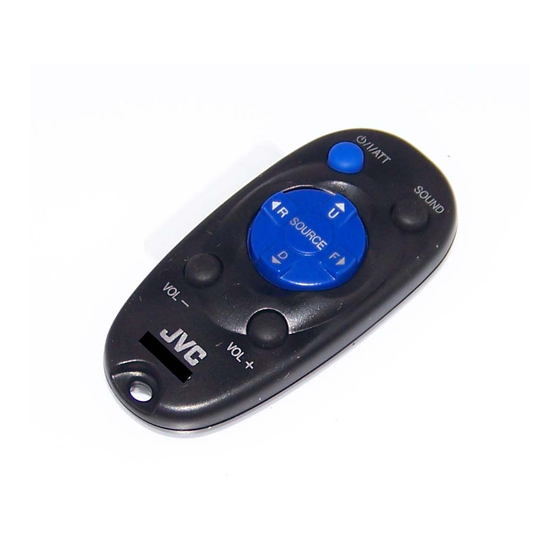
Page 5: Using The Remote Controller (Rm-Rk50)
Display window Bluetooth indicator HD (HD Radio) indicator Tr (track) indicator EQ (equalizer) indicator Status of Bluetooth device LOUD (loudness) indicator (Device number, [P: 1 – 5]; signal strength, Disc information indicators— : 0 – 3]*; battery reminder, [ : 0 – 3]*) TAG (Tag information), (track/file), (folder) - Page 6 U : Returns to the previous menu. throwing away or saving it. ∞ : Confirms the selection. Adjusts the volume level. KD-A305 is equipped with the steering wheel Selects the sound mode. remote control function. Selects the source. • See the Installation/Connection Manual (separate For Bluetooth cellular phone: volume) for connection.
-
Page 7: Preparation
Preparation Cancel the display demonstration and set the clock • See also page 23. Turn on the power. Cancel the display demonstrations Select “DEMO,” then “DEMO OFF.” Set the clock “CLOCK SET.” Select “CLOCK” Adjust the hour, then press control dial once to proceed to adjust the minute. -
Page 8: Listening To The Radio
Listening to the radio Select “FM” or “AM.” Search for a station to listen—Auto Search. Manual Search: Hold either one of the buttons until “M” flashes on the display, then press it repeatedly. • When receiving an FM stereo broadcast with sufficient signal strength, “ST” lights up on the display. -
Page 9: Disc Operations
Manual presetting (FM/AM) Selecting preset station Select preset number “04.” Disc operations Turn on the power. Insert a disc. Stop playing and ejecting the disc Selecting a track/folder Prohibiting disc ejection To cancel the prohibition, Continued on the next page OPERATIONS... -
Page 10: Using The Bluetooth ® Devices
Pressing (or holding) the following buttons allows you Using the Bluetooth ® to... devices MP3/WMA: Select folder For Bluetooth operations, it is required to connect the Bluetooth adapter (KS-BTA200) (separately [Press] Select track purchased) to the CD changer jack on the rear of this [Hold] Reverse/fast-forward track unit. - Page 11 Registering using “OPEN” Use the Bluetooth device to search and connect. Preparation: Operate the device to turn on its On the device to be connected, enter the same Bluetooth function. PIN code you have just entered for this unit. Select “BT-PHONE” or “BT-AUDIO.” “CONNECTED”...
-
Page 12: Using The Bluetooth Cellular Phone
If the cellular phone is compatible with text message • The display will flash in blue (see “RING COLOR” (notified through JVC Bluetooth adapter) and “MSG on page 24 for setting.) INFO” (message info) is set to “AUTO” (see page 22), the unit rings to inform you of the message arrival. -
Page 13: Using The Bluetooth Audio Player
Bluetooth Information: * Displays only when your cellular phone is equipped If you wish to receive more information about with these functions and is compatible with this unit. Bluetooth, visit the following JVC web site: <http://www.jvc.co.jp/english/car/> (English Voice dialing: website only) Select “VOICE DIAL.”... -
Page 14: Listening To The Hd Radio ™ Broadcast
Listening to the HD Radio ™ Broadcast Before operating, connect HD Radio tuner box, Searching for HD Radio stations KT-HD300 (separately purchased) to the CD changer only jack on the rear of the unit. What is HD Radio Technology? HD Radio Technology can deliver high-quality digital sound—AM digital will have FM-like quality (in stereo) and FM digital will have CD-like quality—with static- Changing HD Radio reception... -
Page 15: Listening To The Cd Changer
Listening to the CD changer It is recommended to use a JVC MP3-compatible CD changer (separately purchased) with your unit. You can connect a CD changer to the CD changer jack on the rear of the unit. • You can only play conventional CDs (including CD Text) and MP3 discs. -
Page 16: Listening To The Satellite Radio
Before operating, connect either one of the following (separately purchased) to the CD changer jack on the rear of this unit. • JVC SIRIUS satellite radio System, SC-C1 and KS-SRA100, PnP, SC-VDOC1 and KS-SRA100, for listening to the SIRIUS Satellite radio. - Page 17 Select “SIRIUS” or “XM.” Select a category. Select a channel to listen. Checking the XM Satellite radio ID Storing channels in memory While selecting “XM,” select “Channel 0.” Tune in to a channel you want to store (see steps 1 – 3 above). Select preset number “04.”...
-
Page 18: Listening To The Ipod
Listening to the iPod Before operating, connect the Interface adapter for iPod, KS-PD100 (separately purchased) to the CD changer jack on the rear of the unit. Preparation: Make sure “CH / IPOD” is selected in the “SRC SELECT” “EXT IN” setting, see page 26. Select “IPOD.”... -
Page 19: Listening To The Other External Components
Listening to the other external components You can connect an external component to: • CD changer jack on the rear of this unit using the following adapters: – Line Input Adapter, KS-U57 (separately purchsed) – AUX Input Adapter, KS-U58 (separately purchsed) Preparation: Make sure “EXT INPUT”... -
Page 20: Selecting A Preset Sound Mode
Selecting a preset sound mode You can select a preset sound mode suitable to the music genre. • See also page 23 (“EQ”). Selecting from Menu. [Turn] [Press] Select “EQ” Preset value setting for each sound mode Preset value Sound BASS MIDDLE TREBLE... -
Page 21: Title Assignment
Select a tone. Title assignment You can assign titles to 30 station frequencies (FM and [Turn] [Press] AM) using 8 characters (maximum) for each title. • When HD Radio tuner box is connected, this feature will be disable. Select “FM” or “AM.” Adjust the sound elements of the selected tone. -
Page 22: Bluetooth Settings
The unit does not inform you of the connected and it is compatible with text message arrival of a message. (notified through JVC Bluetooth adapter). Bluetooth Audio: Shows only “Version.” MIC SETTING (microphone setting) Only for the device being connected for “BT-PHONE.”... -
Page 23: Menu Operations
Menu operations Repeat step 2 if necessary. • To return to the previous menu, [Turn] [Press] press BACK. Initial: Underlined Category Menu items Selectable settings, [reference page] DEMO • DEMO ON : Display demonstration will be activated automatically if no Display operation is done for about 20 seconds, [7]. - Page 24 Category Menu items Selectable settings, [reference page] TAG DISPLAY • TAG ON : Shows the Tag information while playing MP3/WMA tracks. Tag display • TAG OFF : Cancels. AREA • AREA US : When using in North/Central/South America. AM/FM intervals Tuner channel are set to 10 kHz/200 kHz.
- Page 25 Category Menu items Selectable settings, [reference page] FADER* R06 – F06 : Adjust the front and rear speaker output balance. Fader [Initial: 00] BALANCE * L06 – R06 : Adjust the left and right speaker output balance. Balance [Initial: 00] LOUD •...
-
Page 26: Color Settings
: Enable “AM” in source selection, [4]. EXT IN * • CH / IPOD : To use a JVC CD changer, [15], or an Apple iPod, [18]. External input • EXT INPUT : To connect portable audio player to the CD changer jack, [19]. -
Page 27: References
More about this unit Basic operations Disc operations Turning on the power Caution for DualDisc playback • By pressing SRC button on the unit, you can also turn • The Non-DVD side of a “DualDisc” does not comply on the power. If the source is ready, playback also with the “Compact Disc Digital Audio”... -
Page 28: Bluetooth Operations
• CD-RWs may require a longer readout time since the Files recorded in VBR have a discrepancy in the reflectance of CD-RWs is lower than that of regular elapsed time display, and do not show the actual CDs. elapsed time. In particular, this difference becomes •... -
Page 29: Satellite Radio
ERROR UNFOUND LOADING * Displays only when your cellular phone is equipped with these functions and is compatible with this unit. PLEASE WAIT Notice: RESET 8 Satellite radio Title assignment Menu operations iPod When you connect the iPod nano to the interface adapter, be sure to disconnect the headphones;... -
Page 30: Troubleshooting
Troubleshooting What appears to be trouble is not always serious. Check the following points before calling a service center. Symptoms Remedies/Causes • Sound cannot be heard from the speakers. • Adjust the volume to the optimum level. • Check the cords and connections. •... - Page 31 Symptoms Remedies/Causes • Noise is generated. Skip to another track or change the disc. (Do not add the extension code <.mp3> or <.wma> to non-MP3 or WMA tracks.) • A longer readout time is required Do not use too many hierarchical levels and folders. (“READING”...
- Page 32 Symptoms Remedies/Causes ANALOG DIGITAL AUTO DIGITAL ANALOG AUTO...
- Page 33 Symptoms Remedies/Causes • “CALL 1-888-539-SIRIUS TO SUBSCRIBE” Starts subscribing to SIRIUS Satellite radio (see page 16). scrolls on the display while listening to the SIRIUS Satellite radio. • No sound can be heard. “UPDATING” The unit is updating the channel information and it takes appears on the display.
- Page 34 • The Bluetooth word mark and logos are owned by the Bluetooth SIG, Inc. and any use of such marks by Victor Company of Japan, Limited (JVC) is under license. Other trademarks and trade names are those of their respective owners.
-
Page 35: Maintenance
Maintenance How to clean the connectors To keep discs clean Frequent detachment will deteriorate the connectors. A dirty disc may not play correctly. To minimize this possibility, periodically wipe the If a disc does become dirty, wipe it with connectors with a cotton swab or cloth moistened with a soft cloth in a straight line from center alcohol, being careful not to damage the connectors. -
Page 36: Specifications
Output Impedance: 1 kΩ Other Terminal: AUX (auxiliary) input jack, CD changer jack, Steering wheel remote input (only for KD-A305), Antenna input TUNER SECTION Frequency Range: with channel interval set to 100 kHz 87.5 MHz to 107.9 MHz or 200 kHz with channel interval set to 50 kHz 87.5 MHz to 108.0 MHz... - Page 37 CD PLAYER SECTION Type: Compact disc player Signal Detection System: Non-contact optical pickup (semiconductor laser) Number of Channels: 2 channels (stereo) Frequency Response: 5 Hz to 20 000 Hz Dynamic Range: 96 dB Signal-to-Noise Ratio: 98 dB Wow and Flutter: Less than measurable limit MP3 Decoding Format: (MPEG1/2 Audio Layer 3) Max.
- Page 38 Having TROUBLE with operation? Please reset your unit Refer to page of How to reset your unit Still having trouble?? USA ONLY Call 1-800-252-5722 http://www.jvc.com We can help you! EN, SP, FR © 2008 Victor Company of Japan, Limited 0808DTSMDTJEIN...
- Page 39 KD-A305/KD-R300 Installation/Connection Manual Manual de instalación/conexión Manuel d’installation/raccordement GET0570-002A 0808DTSMDTJEIN EN, SP, FR © 2008 Victor Company of Japan, Limited ENGLISH ESPAÑOL FRANÇAIS WARNINGS ADVERTENCIAS AVERTISSEMENTS • • • • • • • • • • • • • •...
-
Page 40: Removing The Unit
JVC car audio dealer or a company supplying kits. instalación, consulte con su concesionario de JVC de equipos de audio d’installation, consulter votre revendeur d’autoradios JVC ou une •... -
Page 41: Electrical Connections
Los cables de los altavoces de esta unidad – Déconnectez les enceintes de cet appareil et connectez- – For KD-A305: The line output level of this unit is kept high to quedan sin usar. les à l’amplificateur. Laissez les fils d’enceintes de cet maintain the hi-fi sounds reproduced from this unit. - Page 42 CAUTION: PRECAUCION: PRECAUTION: • • • • • • To disconnect the connector Para desconectar el cable Pour déconnecter le connecteur • • • • • •...