
Related Manuals for JVC KD-R506


Summary of Contents for JVC KD-R506
- Page 1 CD RECEIVER KD-R506/KD-R505 KD-R506/KD-R505 For canceling the display demonstration, see page 7. For installation and connections, refer to the separate manual. INSTRUCTIONS GET0584-001A [U/UH]...
- Page 2 Thank you for purchasing a JVC product. Please read all instructions carefully before operation, to ensure your complete understanding and to obtain the best possible performance from the unit. IMPORTANT FOR LASER PRODUCTS 1. CLASS 1 LASER PRODUCT 2. CAUTION: Do not open the top cover. There are no user serviceable parts inside the unit; leave all servicing to qualified service personnel.
-
Page 3: Table Of Contents
CONTENTS Detaching the control panel Detaching the control panel ......3 Attaching the control panel ......3 How to reset your unit ......... 3 How to forcibly eject a disc ......3 OPERATIONS Basic operations ........... 4 • Using the control panel ....... Attaching the control panel •... -
Page 4: Operations
Basic operations Using the control panel • FM/AM: Select preset station. Detach the panel. • CD/USB: Select folder. Change the display information. • Turn on the power. • FM/AM: Search for station. • Attenuate the sound (if the power is on). •... -
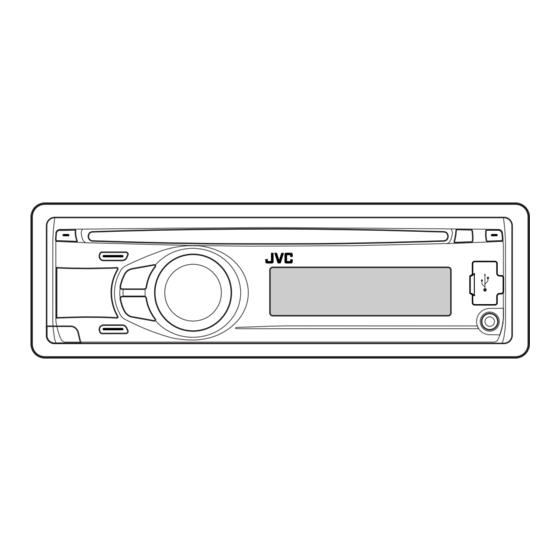
Page 5: Display Window
Display window Tr (track) indicator EQ (equalizer) indicator Source display / Track number / Folder number / LOUD (loudness) indicator Time countdown indicator Disc information indicators— DISC indicator TAG (Tag information), (track/file), (folder) Sound mode indicators—CLASSIC, HIP HOP, JAZZ, Main display ROCK, POPS, USER Tuner reception indicators—ST (stereo), Playback mode / item indicators—... -
Page 6: Using The Remote Controller (Rm-Rk50)
Using the remote controller (RM-RK50) Installing the lithium coin battery (CR2025) Caution: • Danger of explosion if battery is incorrectly replaced. Replace only with the same or equivalent type. • Turns the power on if pressed briefly or • Battery shall not be exposed to excessive heat such as attenuates the sound when the power is on. -
Page 7: Preparation
Preparation Canceling the display demonstration and setting the clock • See also page 14. Turn on the power. Cancel the display demonstrations Select “DEMO,” then “DEMO OFF.” Press and hold until Set the clock the main menu is “CLOCK SET.” Select “CLOCK”... -
Page 8: Listening To The Radio
Listening to the radio Select “FM” or “AM.” Search for a station to listen—Auto Search. When a station is tuned in, searching stops. To stop searching, press the same button again. • You can also search for a station manually—Manual Search. Hold either one of the buttons until “M”... -
Page 9: Disc Operations
Manual presetting (FM/AM) You can preset up to 18 stations for FM and 6 stations for AM. Ex.: Storing FM station of 92.50 MHz into preset number “04.” Selecting preset station Select preset number “04.” [Turn] [Press] Disc operations Turn on the power. Insert a disc. -
Page 10: Listening To The Usb Device
Pressing (or holding) the following buttons allows you • To cancel repeat play or random play, select to... “RPT OFF” or “RND OFF.” [Press] Pause/resume playback. • To return to the previous menu, press BACK. Listening to the USB MP3/WMA: Select folder device This unit can play MP3/WMA tracks stored in a USB [Press] Select track... -
Page 11: Listening To The Other External Components
To stop play and detach the USB device • This unit may not be able to play the files depending on the type of USB device. Straightly pull it out from the unit. • Operation and power supply may not work as •... -
Page 12: Selecting A Preset Sound Mode
Selecting a preset sound mode You can select a preset sound mode suitable to the music genre. • See also page 14. Selecting from Menu. [Turn] [Press] • See below and page 13 for “USER” settings. Preset value setting for each sound mode Preset value Sound BASS... -
Page 13: Title Assignment
Select a tone. Title assignment You can assign titles to 30 station frequencies (FM and [Turn] [Press] AM) using 8 characters (maximum) for each title. Select “FM” or “AM.” Show the title entry screen. Adjust the sound elements of the selected tone. -
Page 14: Menu Operations
Menu operations Repeat step 2 if necessary. Call up the menu. Select the desired item. • To return to the previous menu, press BACK. [Turn] [Press] • To exit from the menu, press DISP or MENU. Initial: Underlined Category Menu items Selectable settings, [reference page] DEMO •... - Page 15 Category Menu items Selectable settings, [reference page] IF BAND • AUTO : Increases the tuner selectivity to reduce interference noises Intermediate between adjacent stations. (Stereo effect may be lost.) frequency band • WIDE : Subject to interference noises from adjacent stations, but sound quality will not be degraded and the stereo effect will remain.
-
Page 16: More About This Unit
Category Menu items Selectable settings, [reference page] AM * • AM OFF : Disable “AM” in source selection. AM station • AM ON : Enable “AM” in source selection, [4]. AUX IN * • AUX OFF : Disable “AUX IN” in source selection. Auxiliary input •... - Page 17 Playing a CD-R or CD-RW • This unit can play back MP3/WMA files meeting the conditions below: • Use only “finalized” CD-Rs or CD-RWs. – Bit rate of MP3: 32 kbps — 320 kbps • This unit can only play back files of the same type as –...
- Page 18 Playing MP3/WMA tracks from a USB device • USB devices equipped with special functions such as data security functions cannot be used with the unit. • While playing from a USB device, the playback order • Do not use a USB device with 2 or more partitions. may differ from other players.
-
Page 19: Troubleshooting
Troubleshooting What appears to be trouble is not always serious. Check the following points before calling a service center. Symptoms Remedies/Causes • Sound cannot be heard from the speakers. • Adjust the volume to the optimum level. • Check the cords and connections. •... - Page 20 Symptoms Remedies/Causes • A longer readout time is required Do not use too many hierarchical levels and folders. (“READING” keeps flashing on the display). • Tracks do not play back in the order you The playback order is determined when the files are have intended them to play.
-
Page 21: Maintenance
Maintenance How to clean the connectors To keep discs clean Frequent detachment will deteriorate the connectors. A dirty disc may not play correctly. To minimize this possibility, periodically wipe the If a disc does become dirty, wipe it with connectors with a cotton swab or cloth moistened with a soft cloth in a straight line from center alcohol, being careful not to damage the connectors. -
Page 22: Specifications
Specifications AUDIO AMPLIFIER SECTION Maximum Power Output: Front/Rear: 50 W per channel Continuous Power Output (RMS): Front/Rear: 19 W per channel into 4 Ω, 40 Hz to 20 000 Hz at no more than 0.8% total harmonic distortion. Load Impedance: 4 Ω... - Page 23 CD PLAYER SECTION Type: Compact disc player Signal Detection System: Non-contact optical pickup (semiconductor laser) Number of Channels: 2 channels (stereo) Frequency Response: 5 Hz to 20 000 Hz Dynamic Range: 96 dB Signal-to-Noise Ratio: 98 dB Wow and Flutter: Less than measurable limit MP3 Decoding Format: (MPEG1/2 Audio Layer 3) Max.
- Page 24 Having TROUBLE with operation? Please reset your unit Refer to page of How to reset your unit EN, TH © 2008 Victor Company of Japan, Limited 1008DTSMDTJEIN...
- Page 25 „™È æ ‘ ° — ¥ ®”‡æ“–·∑πøî « À“°øî « Ï ¢ “¥∫Ë Õ ¬ „ÀÈ ª √÷ ° …“√È “ π¢“¬‡§√◊ Ë Õ ß‡ ’ ¬ ß√∂¬πµÏ • Replace the fuse with one of the specified rating. If the fuse blows frequently, consult your JVC car audio •...
-
Page 26: Removing The Unit
¿“æµ— « Õ¬Ë “ ßµË Õ ‰ªπ’ È · ¥ß∂÷ ß °“√µ‘ ¥ µ— È ß ·∫∫∑— Ë « ‰ª À“°§ÿ ≥ ¡’ ª í ≠ À“À√◊ Õ µÈ Õ ß°“√¢È Õ ¡Ÿ ≈ ‡°’ Ë ¬ «°— ∫ ™ÿ ¥ µ‘ ¥ µ— È ß °√ÿ ≥ “ª√÷ ° …“°— ∫ ºŸ È ¢ “¬‡§√◊ Ë Õ ß‡ ’ regarding installation kits, consult your JVC car audio dealer or a company supplying kits. -
Page 27: Electrical Connections
ENGLISH ‰∑¬ ELECTRICAL CONNECTIONS °“√‡™◊ Ë Õ ¡‚¥¬„™È ‰øøÈ “ PRECAUTIONS on power supply and speaker connections: ¢È Õ §«√√–«— ß ”À√— ∫ °“√µË Õ ·À≈Ë ß ®Ë “ ¬°”≈— ß ·≈–≈”‚æß • DO NOT connect the speaker leads of the power cord to the car battery; otherwise, the unit •... - Page 28 Signal cord (not supplied for this unit) §”·π–π” “¬‡§‡∫‘ ≈ — ≠ ≠“≥ ‰¡Ë ‰ ¥È „ ÀÈ ¡ “°— ∫ ™ÿ ¥ ª√–°Õ∫π’ È JVC Amplifier Rear speakers ≈”‚æßÀ≈— ß ‡§√◊ Ë Õ ß¢¬“¬‡ ’ ¬ ß Set “L/O MODE” to “SUB.W” (See page 15 of the Front speakers INSTRUCTIONS.)