Panasonic SC-AK48 Operating Instructions Manual
Cd stereo system model no. sc-ak48
Hide thumbs
Also See for SC-AK48:
- Operating instructions manual (33 pages) ,
- Service manual (104 pages) ,
- Operating instructions (4 pages)
Table of Contents
Advertisement
Quick Links
Advertisement
Table of Contents

Related Manuals for Panasonic SC-AK48


Summary of Contents for Panasonic SC-AK48
-
Page 1: Operating Instructions
CD Stereo System Operating Instructions SC-AK48 Model No. Note: The “EB” indication shown on the packing case indicates United Kingdom. Before connecting, operating or adjusting this pro- duct, please read these instructions completely. Please keep this manual for future reference. -
Page 2: Supplied Accessories
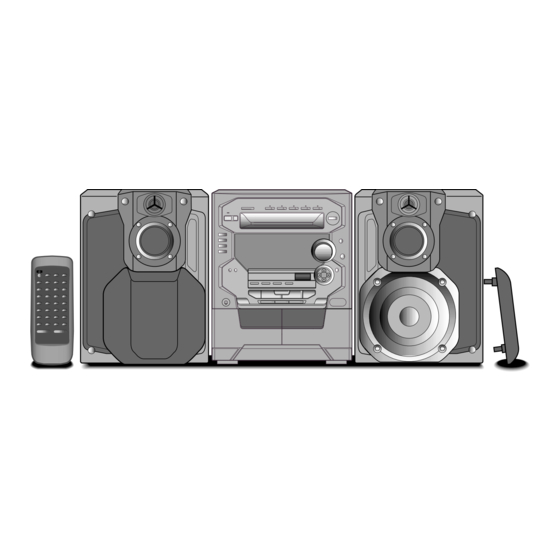
For optimum performance and safety, please read these instructions supplied accessories. carefully. These operating instructions are applicable to the following system. AC mains lead (RJA0053-2X) ...... 1 pc. System SC-AK48 Main unit SA-AK48 Speakers SB-AK48 Remote control transmitter (RAK-SC957WK) ........... 1 pc. -
Page 3: Table Of Contents
Table of contents Safety precautions Placement Before using Set the system up on an even surface away from direct sunlight, Supplied accessories ..............2 high temperatures, high humidity, and excessive vibration. These Safety precautions ................. 3 conditions can damage the cabinet and other components, thereby Caution for AC Mains Lead ............ -
Page 4: Caution For Ac Mains Lead
Caution for AC Mains Lead WARNING: DO NOT CONNECT EITHER WIRE TO (For United Kingdom) THE EARTH TERMINAL WHICH IS MARKED WITH THE LETTER E, BY THE EARTH SYMBOL (“EB” area code model only) COLOURED GREEN OR GREEN/YELLOW. For your safety, please read the following text carefully. THIS PLUG IS NOT WATERPROOF—KEEP DRY. -
Page 5: Concerning The Remote Control
Concerning the remote control Battery installation Use of batteries Insert the batteries observing the correct polarities (e, d). • Align the poles (+ and –) properly when inserting the batteries. • Do not mix old and new batteries or different types of batteries. •... -
Page 6: Connections
Connections Basic connections (for supplied accessories) • Plug the AC mains lead into a household mains socket only after all other connections have been made. • To prepare the AM loop antenna wires and speaker cords, twist the vinyl cover tip and pull off. Connect the FM indoor antenna. -
Page 7: Optional Antenna Connections
Connections Optional antenna connections FM outdoor antenna (not included) You may need an outdoor antenna if you use this system in a mountainous region or inside a reinforced-concrete building, etc. FM outdoor antenna A F M A N coaxial cable (not included) Disconnect the FM indoor antenna if an FM outdoor antenna is installed. -
Page 8: Front Panel Controls
Front panel controls Main unit A Name Ref. page 1 CD manager button (CD MANAGER) ........... 17, 23 2 AC supply indicator (AC IN) This indicator lights when the unit is connected to the AC mains supply. 3 Standby/on switch (f/I) ..........9 Press to switch the unit from on to standby mode or vice versa. -
Page 9: Turning The Demo Function Off
Front panel controls Remote control A Buttons 3, 5, !, $, % and . have the same functions as the corresponding buttons on the main unit. Name Ref. page ? Auto off button (AUTO OFF) ........10 @ Numeric buttons ( 10, 1 – 0) ....... 12, 15 [ Program button (PROGRAM) ........ -
Page 10: Auto-Off Function
Auto-off function by remote control only When CD or tape is selected as the source To save power, the unit turns off if it is left unused for four minutes. Note This function does not work if the source is tuner or AUX. Press [AUTO OFF]. -
Page 11: Presetting Radio Broadcasts
Presetting radio broadcasts • Up to 12 stations can be set in each band with the automatic or manual memory presetting. • If broadcast frequencies are preset in the memory, you can easily tune in any of these frequencies from the system or remote control unit. -
Page 12: Listening To Radio Broadcasts
Listening to radio broadcasts Press [TUNER, BAND] to select band. The unit will come on automatically. Every time you press the button: FM Press [L L L L L , TUNE MODE] to select “PRESET” or “MANUAL”. Every time you press the button: MANUAL PRESET PRESET: For preset stations... -
Page 13: Concerning Cds
Concerning CDs With this system, you can only play CDs having this mark. However, do not use irregular shaped CDs. XXXX XXXX XXXXX XXXX XX XXXX XXXX XXXXX XXXX XXXX XXXXX XXXX XXXX CDs of the sort can damage the unit. Handling precautions B –... -
Page 14: Listening To Compact Discs
Listening to compact discs Always stop the changer before loading or changing CDs. You cannot change CDs while a disc is playing. Press a [c] button. The unit will come on automatically and the tray opens. Set CD in the tray. To continue loading CDs in the other trays Press another [c] button to open the required tray. -
Page 15: Direct Access Play
Listening to compact discs Direct access play by remote control only Press [CD]. Press [DISC]. (within 10 seconds or so) Press [1] – [5] to select the disc you want. Press the numeric button to select the desired track number. The CD will be played from the selected track to the last track of the final disc (page 14). -
Page 16: Program Play
Listening to compact discs Program play by remote control only You can program up to 24 tracks. Press [CD]. Ensure CD is stopped. Press [PROGRAM]. Press [DISC]. (within 10 seconds or so) Press [1] – [5] to select the disc you want. Press the numeric button to select the desired track. -
Page 17: To Listen To Special Cds And Tracks (Cd Manager Function)
Listening to compact discs To listen to special CDs and tracks (CD Manager function) RANDOM This function makes it easier for you to select special CDs and tracks from amongst those loaded in the player. You can use this function to make recordings as well. There are 3 CD/track selection modes. -
Page 18: Listening To Tapes
Listening to tapes Types of tapes which can be played correctly: The unit automatically identifies the type of tape. NORMAL POSITION/TYPE I HIGH POSITION/TYPE II METAL POSITION/TYPE IV You can use either deck 1 or deck 2 for tape playback. Press [TAPE, DECK 1/2]. -
Page 19: Concerning Cassette Tapes
Listening to tapes To fast-forward or rewind the tape A Press [g/(] or [)/f] in the stop mode. Tape direction To rewind To fast-forward “ 3” [g/(] [)/f] “4” [)/f] [g/(] To find the beginning of a program (TPS: Tape Program Sensor) A TPS finds the beginning of a track and resumes play from there. -
Page 20: Before Recording (Deck 2 Only)
Before recording (Deck 2 only) Types of tapes which can be recorded correctly The unit automatically identifies the type of tape. NORMAL POSITION/TYPE I HIGH POSITION/TYPE II Recording part METAL POSITION/TYPE IV Metal position tapes can be used, but the unit will not be able to record or erase them correctly. -
Page 21: Recording From Radio Broadcasts
Recording from radio broadcasts Press [c DECK 2 OPEN] and insert the tape. Close the holder by hand. TUNE MODE Tape direction is automatically set to “ 3”. TAPE Press [REV MODE] to select the reverse mode. DECK 1/2 Every time you press the button: TUNE TIME ADJ : One side is recorded, then recording stops auto- matically. -
Page 22: Recording From Compact Discs
Recording from compact discs Press [c DECK 2 OPEN], and insert the tape. Close the holder by hand. Tape direction is automatically set to “ 3”. Press [REV MODE] to select the reverse mode. TAPE Every time you press the button: DECK 1/2 : One side is recorded, then recording stops auto- TUNE TIME ADJ... -
Page 23: To Record Special Cds And Tracks (Cd Manager Function)
Recording from compact discs To record special CDs and tracks Front side (CD Manager function) Reverse side This function makes it easier for you to select special CDs and tracks from amongst those loaded in the player. The interrupted track is re-recorded in its •... -
Page 24: Using The Built-In Sound Quality/Sound Field Settings
Using the built-in sound quality/ sound field settings Dial [SOUND CONTROL JOG] to select the sound quality or sound field. When it is dialed down, the settings are selected in the following sequence. 1 HEAVY (sound quality) Select this when playing rock or other kinds of music that sound better with an added punch. -
Page 25: Varying The Sound Quality With The Manual Equalizer
Varying the sound quality with the manual equalizer Dial [SOUND CONTROL JOG] to display “MANUAL”. When it is dialed down, the settings are selected in the following sequence. 1 HEAVY 2 CLEAR 3 SOFT 4 DISCO 5 LIVE 6 HALL 7 MANUAL 8 AI-EQ 9 FLAT... -
Page 26: Selecting The Tri-Amp Mode
Selecting the TRI-AMP mode The tri-amp control controls sound quality by allowing you to adjust the level of the amplifiers for the low, mid and high regions. It is a type of manual equalizer and cannot be used with the other TRI-AMP types of equalizers. -
Page 27: Using The Play/Record Timer
Using the timer Using the play/record timer The timer has two functions. It can be set to on at a certain time to wake you up, or it can be set to record the radio or from the aux source. The play timer cannot be used in combination with the record timer. - Page 28 Using the timer Using the play/record timer To check settings While the unit is on and the “rPLAY” (or “rREC”) indicator is on, press [CLOCK/TIMER] so “rPLAY” (or “rREC”) appears on the display. Two seconds after “rPLAY” (or “rREC”) appear, the settings are displayed in the following order: •...
-
Page 29: Convenient Functions
Convenient functions Switching displays A Press [-DISPLAY/–DEMO] to select the desired spectrum DISPLAY analyzer. DEMO Every time you press the button: Normal Peak hold Aurora Wiper (OFF) To mute the volume B by remote control only This feature is convenient when you have a telephone call, etc. Press [MUTING]. -
Page 30: Troubleshooting Guide
Troubleshooting guide Before requesting service for this unit, check the chart below for a possible cause of the problem you are experiencing. Some simple checks or a minor adjustment on your part may eliminate the problem and restore proper operation. If you are in doubt about some of the check points, or if the remedies indicated in the chart do not solve the problem, refer to the directory of Authorized Service Centers (enclosed with this unit) to locate a convenient service center, or consult your dealer for instructions. -
Page 31: Maintenance
Problem Probable cause(s) Suggested remedy Reference page(s) When there is a television set nearby The picture on the TV The location and orientation of the antenna If you are using an indoor antenna, change disappears or stripes appear are incorrect. to an outdoor antenna. -
Page 32: Technical Specifications
Technical specifications AMPLIFIER SECTION CD SECTION RMS power output Sampling frequency 44.1 kHz THD 10%, both channels driven Decoding 16 bit linear Beam source/wave length Semiconductor laser/780 nm (HIGH) 40 W per channel (6 ) Number of channels Stereo (MID) 40 W per channel (6 ) Frequency response 20 Hz –...