Chapters
Table of Contents

Related Manuals for Yard-Man YM1500


Summary of Contents for Yard-Man YM1500
- Page 1 Operator’s Manual Curved Shaft, 2-Cycle Trimmer Model YM400 IMPORTANT: Read safety rules and instructions carefully before operating equipment. PRINTED IN U.S.A. PART NO. 769-00506 (12/02)
-
Page 2: Table Of Contents
Content ............Rules for Safe Operation . -
Page 3: Rules For Safe Operation
SPARK ARRESTOR NOTE: For users on U.S. Forest Land and in the states of California, Maine, Oregon and Washington. All U.S. Forest Land and the state of California (Public Resources Codes 4442 and 4443), Oregon and Washington require, by law that certain internal combustion engines operated on forest brush and/or grass-covered areas be equipped with a spark arrestor, maintained in effective working order, or the engine be constructed, equipped and maintained for the... -
Page 4: While Operating
• Be aware of risk of injury to the head, hands and feet. • Clear the area to be cut before each use. Remove rocks, broken glass, nails, wire, string and other objects which may be thrown or become entangled in the cutting attachment. - Page 5 SECTION 1b: SAFETY & INTERNATIONAL SYMBOLS This operator's manual describes safety and international symbols and pictographs that may appear on this product. Read the operator's manual for complete safety, assembly, operating and maintenance and repair information. SYMBOL MEANING • SAFETY ALERT SYMBOL Indicates danger, warning or caution.
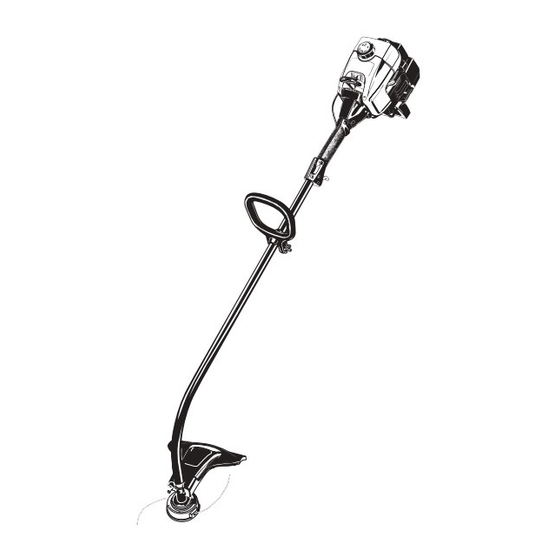
- Page 6 SECTION 2: KNOW YOUR UNIT Applications As a trimmer: • Cutting grass and light weeds • Edging • Decorative trimming around trees, fences, etc. On/Off Stop Control Shaft Housing Cutting Attachment Starter Rope Grip Shaft Grip D-Handle Throttle Control Primer Bulb Spark Plug Line Cutting Blade...
-
Page 7: Assembly Instructions
SECTION 3: ASSEMBLY INSTRUCTIONS Install and Adjust the D-handle 1. Push the D-handle down onto the shaft housing so that the handle slants towards the shaft grip. Make sure the squared bolt hole in the handle is to the right. See Figure 1. 2. -
Page 8: Oil And Fuel Information
SECTION 4: OIL AND FUEL INFORMATION Oil and Fuel Mixing Instructions Old and/or improperly mixed fuel is the main reason for improper unit performance. Be sure to use fresh, clean unleaded fuel. Follow the instructions carefully for the proper fuel/oil mixture. Definition of Blended Fuels Today's fuels are often a blend of gasoline and oxygenates such as ethanol, methanol, or MTBE (ether). -
Page 9: Starting/Stopping Instructions
SECTION 5: STARTING/STOPPING INSTRUCTIONS Starting Instructions WARNING: Operate this unit only in a well- ventilated outdoor area. Carbon monoxide exhaust fumes can be lethal in a confined area. WARNING: Avoid accidental starting. Make sure you are in the starting position when pulling the starter rope. -
Page 10: Operating Instructions
SECTION 6: OPERATING INSTRUCTIONS Holding the Trimmer WARNING: Always wear eye, hearing, foot and body protection to reduce the risk of injury when operating this unit. Before operating the unit, stand in the operating position. See Figure 9. Check for the following: •... -
Page 11: Maintenance And Repair Instructions
SECTION 7: MAINTENANCE AND REPAIR INSTRUCTIONS Maintenance Schedule Perform these required maintenance procedures at the frequency stated in the table. These procedures should also be a part of any seasonal tune-up. NOTE: Some maintenance procedures may require special tools or skills. If you are unsure about these procedures take your unit to any non-road engine repair establishment, individual or authorized service dealer. - Page 12 SECTION 7: MAINTENANCE AND REPAIR INSTRUCTIONS 5. Check the indexing teeth on the inner reel and outer spool for wear. If necessary, remove burrs or replace the reel and spool. See Figure 14. Indexing Teeth Figure 14 NOTE: SplitLine™ can only be used with the inner reel containing slotted holes.
-
Page 13: Air Filter Maintenance
SECTION 7: MAINTENANCE AND REPAIR INSTRUCTIONS Figure 19 NOTE: The spring must be assembled on the inner reel before reassembling the cutting attachment. 14. Hold the inner reel in place and install the bump knob by turning clockwise. Tighten securely. Eyelet Figure 20 Installing a Pre Wound Reel... -
Page 14: Spark Arrestor Maintenance
SECTION 7: MAINTENANCE AND REPAIR INSTRUCTIONS Air Filter Inside Muffler Cover Figure 22 Figure 24 6. Replace the air filter inside the air filter/muffler cover. See Figure 22. NOTE: Operating the unit without the air filter and air filter/muffler cover assembly, will VOID the warranty. Reinstalling the Air Filter/Muffler Cover 1. -
Page 15: Carburetor Adjustment
SECTION 7: MAINTENANCE AND REPAIR INSTRUCTIONS Carburetor Adjustment The idle speed of the engine is adjustable through the air filter/muffler cover. See Figure 28. NOTE: Careless adjustments can seriously damage your unit. An authorized service dealer should make carburetor adjustments. Check Fuel Mixture Old and/or improperly mixed fuel is usually the reason for improper unit performance. -
Page 16: Replacing The Spark Plug
SECTION 7: MAINTENANCE AND REPAIR INSTRUCTIONS Replacing the Spark Plug Use a Champion RDJ7Y spark plug (or equivalent). The correct air gap is 0.020 inch (0.5 mm). Remove the plug after every 25 hours of operation and check its condition. 1. -
Page 17: Troubleshooting
SECTION 8: TROUBLESHOOTING GUIDE Trouble Possible Cause(s) ENGINE WILL • On/Off control in the STOP position NOT START • Empty fuel tank • Primer bulb wasn’t pressed enough • Engine is flooded • Old or improperly mixed fuel • Fouled spark plug •... -
Page 18: Specifications
SECTION 9: SPECIFICATIONS Engine Engine Type ..............Air-Cooled, 2-Cycle Stroke . - Page 19 EPA Emission Control Warranty Statement The Environmental Protection Agency and MTD LLC (MTD) are pleased to explain the emission control system warranty on your 2002 and later small off-road engine. New small off-road engines must be designed, built and equipped to meet stringent anti-smog standards.
-
Page 20: Warranty
MANUFACTURER’S LIMITED WARRANTY FOR: The limited warranty set forth below is given by MTD LLC (“MTD”) with respect to new merchandise purchased and used in the United States, its possessions and territories. MTD warrants this product against defects in material and workmanship for a period of two (2) years commencing on the date of original purchase and will, at its option, repair or replace, free of charge, any part found to be defective in... - Page 21 Manuel de l'utilisateur Arbre courbé, Désherbeuse à 2-temps Modèle YM400 IMPORTANT : lisez soigneusement les règles et consignes de sécurité avant de faire fonctionner cet équipement. IMPRIME AUX ÉTATS-UNIS. PARTIE NUMÉRO. 769-00506 (12/02)
- Page 22 Contenu ............Consignes de sécurité...
-
Page 23: Consignes De Sécurité
PARE-ÉTINCELLES REMARQUE à l'intention des utilisateurs opérant dans les terres forestières des États-Unis et dans les états de Californie, du Maine, de l'Orégon et de Washington. Toutes les terres forestières des États-Unis et de l'état de Californie (Codes sur les ressources publiques 4442 et 4443), de l'Orégon et de Washington exigent de par la loi que certains moteurs à... - Page 24 • Dégagez la zone de coupe avant chaque usage. Enlevez tous les objets pouvant être projetés ou happés par l'accessoire de coupe : cailloux, morceaux de verre, clous, fil ou ficelle. Éloignez enfants, spectateurs et animaux de la zone de coupe.
- Page 25 SECTION 1a: SYMBOLES DE SÉCURITÉ ET INTERNATIONAUX Ce manuel de l'utilisateur décrit les symboles et pictogrammes de sécurité et internationaux pouvant apparaître sur ce produit. Consultez le manuel de l'utilisateur pour les informations concernant la sécurité, le montage, le fonctionnement, l'entretien et les réparations. SYMBOLE SIGNIFICATION •...
-
Page 26: Familiarisez-Vous Avec La Désherbeuse
SECTION 2 : FAMILIARISEZ-VOUS AVEC LA DÉSHERBEUSE APPLICATIONS Comme désherbeuse : • Coupe d'herbe et de mauvaises herbes légères • Taille autour des arbres, des clôtures, etc. Commande Marche/Arrêt Stop Corps de l'arbre Accessoire de coupe Poignée de la corde de démarrage Poignée de l'arbre... -
Page 27: Instructions De Montage
SECTION 3: INSTRUCTIONS DE MONTAGE INSTALLATION ET RÉGLAGE DE LA POIGNÉE EN D 1. Enfoncez la poignée en D sur le corps de l'arbre afin de l’incliner vers la prise de l'arbre (Fig. 1). Le trou de boulon carré de la poignée se trouve à droite. 2. - Page 28 SECTION 4 : FONCTIONNEMENT DE LA DÉSHERBEUSE MÉLANGE D'HUILE ET DE CARBURANT En général, si l'appareil ne fonctionne pas correctement, c'est que le carburant est vieux ou mal mélangé. Prenez soin d'utiliser de l’essence sans plomb fraîche et propre. Suivez à la lettre les instructions de mélange de carburant et d'huile.
- Page 29 SECTION 5: INSTRUCTIONS DE DÉMARRAGE ET ARRÊT INSTRUCTIONS DE DÉMARRAGE AVERTISSEMENT : faites marcher l’appareil dans un lieu extérieur bien aéré uniquement. Les fumées d'échappement d'oxyde de carbone peuvent être fatales dans un lieu confiné. AVERTISSEMENT : évitez tout démarrage accidentel.
- Page 30 SECTION 6: MODE D’EMPLO TENUE DE LA DÉSHERBEUSE AVERTISSEMENT : portez toujours des protections (yeux, oreilles, pieds et corps) pour diminuer les risques de blessures durant l'utilisation de l'appareil. Avant de faire marcher l'appareil, tenez-vous en position de fonctionnement (Fig. 9). Vérifiez les points suivants : •...
- Page 31 SECTION 7: INSTRUCTIONS D’ENTRETIEN ET RÉPARATIONS REMARQUE : certaines procédures d'entretien nécessitent des compétences ou des outils particuliers. Si vous n'êtes pas sûr de pouvoir les entreprendre, emmenez votre appareil dans un atelier, chez un technicien ou un concessionnaire agréé spécialisé dans les réparations de moteurs d’outils mécaniques de plein air.
- Page 32 SECTION 7: INSTRUCTIONS D’ENTRETIEN ET RÉPARATIONS 5. Vérifiez l'état d'usure des dents de positionnement du moulinet et de la bobine (Fig. 14). Enlevez les ébarbures ou remplacez le moulinet et la bobine au besoin. Dents de positionnement Figure 14 REMARQUE : le SplitLine peut être utilisé...
- Page 33 SECTION 7: INSTRUCTIONS D’ENTRETIEN ET RÉPARATIONS Figure 19 REMARQUE : le ressort doit être installé dans le moulinet intérieur avant de remonter l'accessoire de coupe. 14. Maintenez le moulinet en place et installez le bouton de butée en le tournant à droite. Vissez bien. Œillet Figure 20 INSTALLER UN MOULINET PRÉREMBOBINÉ...
- Page 34 SECTION 7: INSTRUCTIONS D’ENTRETIEN ET RÉPARATIONS Filtre à air Intérieur du couvercle du silencieux Figure 22 Figure 24 REMARQUE : l'utilisation de l'appareil sans filtre à air et sans couvercle du filtre à air/silencieux ANNULERA la garantie. Réinstallation du couvercle du filtre à air/silencieux 1.
-
Page 35: Informations Sur L'huile Et Le Carburant
SECTION 7: INSTRUCTIONS D’ENTRETIEN ET RÉPARATIONS RÉGLAGE DU CARBURATEUR Le régime ralenti du moteur est réglable par le couvercle du filtre à air/silencieux (Fig. 28). REMARQUE : des réglages non soigneux peuvent endommager sérieusement l'appareil. Les réglages de carburateur doivent être faits par un concessionnaire agréé. -
Page 36: F16
SECTION 7: INSTRUCTIONS D’ENTRETIEN ET RÉPARATIONS REMPLACEMENT DE LA BOUGIE Utilisez une bougie Champion RDJ7Y (ou un modèle équivalent). L'écartement correct est de 0,5 mm (0,020 po). Retirez la bougie après 25 heures de fonctionnement et vérifiez son état. 1. Arrêtez le moteur et laissez-le refroidir. Saisissez fermement le capuchon de la bougie et retirez-le de la bougie. -
Page 37: Depannage
SECTION 8 : GUIDE DE DÉPANNAGE Problème Causes possibles LE MOTEUR • La commande Marche/Arrêt Stop est en position STOP REFUSE DE DÉMARRER • Réservoir de carburant vide • La poire d'amorçage n'a pas été pressée assez fort • Moteur noyé •Carburant vieux ou mal mélangé... -
Page 38: Caracteristiques
SECTION 9: CARACTERISTIQUES Moteur Type de moteur... Refroidi par air, 2-temps Course ... 31,75 mm (1,25 po) Cylindrée ... 31 cc (1,9 po Régime de fonctionnement ... 7.200+ tr/min Régime ralenti ... 2.800-4.400 tr/min Type d'allumage... Électronique Contact d'allumage ... Interrupteur à glissiére Écartement de la bougie... - Page 39 Garantie portant sur les normes antipollution de l'EPA Vos droits et obligations en vertu de cette garantie La Environmental Protection Agency et MTD LLC (MTD) ont le plaisir de présenter la garantie du dispositif antipollution des petits moteurs à usage tout-terrain datant de 2002 et au-delà. Les nouveaux petits moteurs à usage tout-terrain doivent être conçus, construits et équipés pour être conformes aux strictes normes anti-smog.
-
Page 40: Garantie
GARANTIE LIMITÉE DU FABRICANT POUR: La garantie limitée énoncée ci-après est accordée par MTD LLC (« MTD ») et concerne les marchandises neuves achetées et utilisées aux États-Unis, ainsi que dans leurs possessions et territoires. MTD garantit ce produit contre tout vice de matière ou de façon pendant une période de deux (2) ans à... - Page 41 Manuel del Dueño/Operador Eje Curvo Recortador de 2-Tiempos Modelo YM400 IMPORTANTE: Lea las instrucciones y normas de seguridad detenidamente antes de usar el equipo. IMPRESO EN LOS EE.UU No. de catálogo 769-00506 (12/02)
- Page 42 Contenido ............Página Normas para una operacion segura .
- Page 43 PARACHISPAS NOTA: Para los usuarios en tierras forestales de los EE.UU. y en los estados de California, Maine, Oregon y Washington. Todos los terrenos forestales de los EE.UU. y en el estado de California (Códigos de Recursos Públicos 4442 y 4443), Oregon y Washington requieren, por ley, que ciertos motores de combustión interna operadas en zonas boscosas y /o zonas cubiertas por pastizales, estén equipados con un parachispas, que sean mantenidos en...
- Page 44 • Limpie el área de corte antes de cada uso. Retire todos los objetos como rocas, vidrios rotos, clavos, alambre o cuerda los cuales pueden ser despedidos o enredarse en el accesorio de corte. Aleje a todos los niños, espectadores y animales domésticos.
- Page 45 SECCIÓN 1b: SÍMBOLOS DE SEGURIDAD E INTERNACIONALES Este manual del operador describe los símbolos y figuras de seguridad e internacionales que pueden aparecer en este producto. Lea el manual del operador para obtener información completa acerca de la seguridad, ensamble, operación y mantenimiento y reparación. SIMBOLO SIGNIFICADO •...
- Page 46 SECCIÓN 2: CONOZCA SU RECORTADOR APLICACIONES Como recortadora: Tapa del combustible • Corte de césped y hierbas delgadas. • Recorte decorativo alrededor de árboles, cercos, etc. Mango de la cuerda de arranque Mango del eje Manija en D Control del regulador Palanca del Control de...
- Page 47 SECCIÓN 3: INTRUCCIONES DE ENSAMBLE INSTALACIÓN Y AJUSTE DE LA MANIJA EN D 1. Empuje la manija en D hacia abajo sobre el bastidor del eje de modo que la manija se incline hacia adelante del mango del eje (Fig. 1). El orificio del perno cuadrado de la manija queda hacia la derecha.
- Page 48 SECCIÓN 4: INFORMACION DEL ACEITE Y DEL COMBUSIBLE INSTRUCCIONES PARA MEZCLAR EL ACEITE Y EL COMBUSTIBLE El combustible viejo o mal mezclado son los motivos principales del mal funcionamiento de la unidad. Asegúrese de usar combustible nuevo, limpio y sin plomo.
- Page 49 SECCIÓN 5: INSTRUCCIONES DE ARRANQUE Y APAGADO INSTRUCCIONES DE ARRANQUE ADVERTENCIA: Use esta unidad sólo en un área exterior bien ventilada. Los gases de escape de monóxido de carbono pueden ser letales en un área cerrada. ADVERTENCIA: Evite los arranques accidentales.
- Page 50 SECCIÓN 6: INSTRUCCIONES DE OPERACIóN COMO SOSTENER EL RECORTADOR ADVERTENCIA: Use siempre protección para sus ojos, audición, pies y cuerpo para reducir el riesgo de una lesión al operar esta unidad. Antes de operar esta unidad, párese en posición de operación (Fig.
- Page 51 SECCIÓN 7: INSTRUCCIONES DE MANTENIMIENTO Y REPARACIóN NOTA: Algunos procedimientos de mantenimiento pueden requerir el uso de herramientas o habilidades especiales. Si no está seguro acerca de estos procedimientos, lleve su unidad a un establecimiento de reparación, persona o distribuidor de servicio autorizado que arregle motores para uso fuera de la carretera.
- Page 52 SECCIÓN 7: INSTRUCCIONES DE MANTENIMIENTO Y REPARACIóN 5. Inspeccione los dientes de posición del carrete interior y la bobina exterior para verificar que no exista desgaste (Fig. 14). De ser necesario, elimine las rebabas o cambie el carrete y la bobina. Dientes de posición Figure 14 NOTA: La línea SplitLine™...
- Page 53 SECCIÓN 7: INSTRUCCIONES DE MANTENIMIENTO Y REPARACIóN Ranuras de Fijación Figure 19 NOTA: El resorte debe estar ensamblado en el carrete interior antes de volver a ensamblar el accesorio de corte. 14. Sostenga el carrete interior en su lugar y coloque e instale el botón de tope enroscándolo en sentido horario.
- Page 54 SECCIÓN 7: INSTRUCCIONES DE MANTENIMIENTO Y REPARACIóN Filtro de aire Tapa interior del silenciador Figure 22 Figure 24 6. Cambie el filtro de aire dentro de la tapa del filtro de aire / silenciador (Fig. 22). NOTA: Si opera la unidad sin el filtro de aire y el ensamble de la cubierta del silenciador / filtro de aire, su garantía quedará...
- Page 55 SECCIÓN 7: INSTRUCCIONES DE MANTENIMIENTO Y REPARACIóN AJUSTE DEL CARBURADOR La velocidad lenta del motor puede ser ajustada por la cubierta del silenciador / filtro de aire (Fig. 28). NOTA: Los ajustes realizados sin cuidado pueden dañar seriamente su unidad. Los ajustes del carburador deben ser realizados por un proveedor de servicio autorizado.
- Page 56 SECCIÓN 7: INSTRUCCIONES DE MANTENIMIENTO Y REPARACIóN CAMBIO DE LA BUJIA DE ENCENDIDO Use una bujía de encendido Champion RDJ7Y (o similar). La separación correcta es de 0,5 mm (0,020 pulgadas). Retire la bujía luego de cada 25 horas de operación e inspeccione su estado.
- Page 57 SECCIÓN 8: GUÍA PARA SOLUCIÓN DE DESPERFECTOS Problema Causas posibles EL MOTOR NO • El control de encendido/apagado está en la posición apagado (OFF) ARRANCA • El tanque de combustible está vacío • La bombilla de cebado no fue oprimida lo suficiente •...
- Page 58 SECCIÓN 9: ESPECIFICACIONES Motor Tipo de motor... Enfriado por aire, de 2 ciclos Carrera ... 31,75 mm (1,25 pulg.) Desplazamiento ... 31 cm R.P.M. de operación... 7.200+ r.p.m. R.P.M. de marcha lenta... 2.800-4.400 r.p.m. Tipo de encendido ... Electrónico Interruptor de encendido ... Interruptor deslizante Separación de la bujía de encendido...
- Page 59 Declaración de Garantía de Control de Emisiones de la EPA La Agencia de Protección Ambiental y MTD LLC (MTD) se complacen en explicar la garantía del sistema de control de emisiones para su pequeño motor para uso fuera de la carretera del 2002 y posterior. Los nuevos motores pequeños para uso fuera de la carretera tienen que diseñarse, construirse y equiparse para cumplir las normas contra smog más estrictas.
- Page 60 NOTAS...
- Page 61 NOTAS...
-
Page 62: Parts List
PARTS LIST Item Part No. Description 791-182059 Air Cleaner/Muffler Cover Assembly (includes 2 & 36) 791-180350 Air Cleaner Filter 791-180351 Carburetor Mounting Screw Assembly 791-180226 Wavey Washer 753-1182 Choke Lever Assembly (includes 6) 753-1183 Choke Knob and Screw 753-1184 Choke Lever and Plate (includes 5) 753-04320 Carburetor Assembly (includes 9 &... - Page 63 PARTS LIST BOOM AND TRIMMER PARTS - MODEL YM400 2-CYCLE GAS TRIMMER PPN 41BDY40G401 Item Part No. 753-04294 791-610314 753-04295 791-145888 791-182068 753-04280 753-04366 791-153064 791-153317 753-04282 753-04283 791-180553 753-04284 791-610317 791-610318 791-153066 Optional Accessories 791-153577 791-682075 Items Not Shown Description Throttle Housing and Trigger Assembly (includes 2-4)
- Page 64 GARANTÍA LIMITADA DEL FABRICANTE PARA: La garantía limitada establecida a continuación es dada por MTD LLC (“MTD”) con respecto a mercancía nueva que sea comprada y usada en los Estados Unidos, sus posesiones y territorios. MTD garantiza este producto contra defectos en el material y la mano de obra durante un período de dos (2) años, a partir de la fecha de compra original y a su entera opción, arreglará...