Table of Contents
Advertisement
Blu-ray Disc
Dear customer
Thank you for purchasing this product.
For optimum performance and safety, please read these instructions carefully.
Before connecting, operating or adjusting this product, please read the instructions completely.
Please keep this manual for future reference.
Model number suffix "EB" denotes UK model.
EB
Operating Instructions
Home Theater Sound System
TM
SC-BTT362
Model No.
SC-BTT262
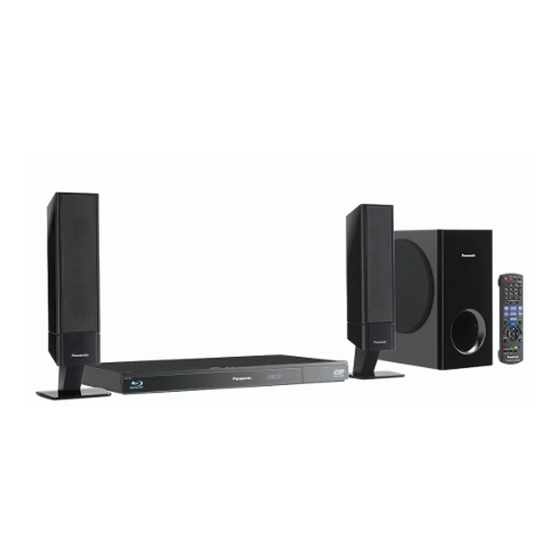
The illustration shows the image of SC-BTT362.
VQT3M52
Advertisement
Table of Contents

Related Manuals for Panasonic SC-BTT362


Summary of Contents for Panasonic SC-BTT362
-
Page 1: Operating Instructions
Home Theater Sound System SC-BTT362 Model No. SC-BTT262 The illustration shows the image of SC-BTT362. Dear customer Thank you for purchasing this product. For optimum performance and safety, please read these instructions carefully. Before connecting, operating or adjusting this product, please read the instructions completely. -
Page 2: Safety Precautions
R&TTE products from our DoC server: http://www.doc.panasonic.de CAUTION Contact in the EU: Panasonic Services Europe, a Division of Panasonic Marketing Europe GmbH, Unit Panasonic Testing Centre, Winsbergring 15, 22525 ≥ This unit utilizes a laser. Use of controls or adjustments or... -
Page 3: Caution For Ac Mains Lead
Caution for AC Mains Lead Information for Users on Collection and Disposal of Old Equipment and used For your safety, please read the following text carefully. Batteries These symbols on the products, This appliance is supplied with a moulded three pin mains plug packaging, and/or accompanying for your safety and convenience. - Page 4 MERCHANTABILITY or FITNESS FOR A PARTICULAR PURPOSE. “AVCHD” and the “AVCHD” logo are trademarks of Panasonic At least three (3) years from delivery of products, Panasonic will give to Corporation and Sony Corporation. any third party who contacts us at the contact information provided...
-
Page 5: Table Of Contents
•3D settings ..............29 •Useful functions .............. 29 Glossary Playing still pictures........30 Refer to following site for technical terms. •Useful functions .............. 30 http://www.panasonic.co.uk/html/en_GB/Technology/ 0-9/217724/index.html Radio Listening to the Radio........31 •Presetting stations automatically ........31 •Presetting stations manually........... 31 •Listening/confirming the preset channels ....... -
Page 6: Accessory
Indicates features applicable to: Getting started ≥ These operating instructions are applicable to models [BTT362]: SC-BTT362 only SC-BTT362 and SC-BTT262. Unless otherwise indicated, [BTT262] : SC-BTT262 only illustrations in these operating instructions are of SC-BTT362. ≥ Operations in these instructions are described mainly with the remote control, but you can perform the operations on the main unit if the controls are the same. -
Page 7: Unit And Media Care
≥ This lens cleaner may not be available for sale in all countries, e.g. not available in Germany, please consult your Panasonic dealer for advice. ≥ This lens cleaner is sold as specific for DIGA, but can be R6/LR6, AA used on this unit as well. -
Page 8: Control Reference Guide
Control reference guide Remote control Turn the unit on and off Select title numbers, etc./Enter numbers or characters [CANCEL]: Cancel Select the source ( Basic playback control buttons ( Select preset radio stations ( Show status messages ( Display the Home screen of VIERA CAST ( Selection/OK, Frame-by-frame ( Show OPTION menu ( 10 Coloured buttons (red, green yellow, blue) -
Page 9: Main Unit (Front)
Main unit (Front) OPEN/CLOSE Pull open. iPod SD CARD Standby/on switch (Í/I) ( Start play ( Press to switch the unit from on to standby mode or vice SD card slot ( versa. In standby mode, the unit is still consuming a small USB port ( amount of power. -
Page 10: Playable Discs/Cards/Usb Devices
Playable discs/Cards/USB devices Device Disc markings Device types Contents format* BD-Video Video Video BD-RE JPEG/ [BD] MPO (3D still picture) Video BD-R DivX ® DVD-Video Video Video DVD-R AVCHD DivX ® [DVD] DVD-R DL JPEG/ MPO (3D still picture) DVD-RW Video AVCHD +R/+RW/+R DL... -
Page 11: Region Management Information
∫ Discs that cannot be played by this unit ∫ 3D ≥ 3D videos and 3D still pictures can be played back when this ≥ DVD-RAM unit is connected to a 3D compatible TV using a High Speed ≥ Super Audio CD HDMI Cable. -
Page 12: Step 1: Preparing The Speakers
STEP 1: Preparing the speakers [BTT362] ∏ 2 Front speakers ∏ 2 Bases ∏ 2 Screws A (RYK1637-K) (XTB4+12GFJK) ∏ 2 Speaker cables (REEX1266A: RED) (REEX1267A: WHITE) Assembling the speakers [BTT362] Caution Preparation ≥ Do not stand on the base. Be cautious when children are near. ≥... -
Page 13: Step 2: Positioning
STEP 2: Positioning STEP 3: Connections Turn off all equipment before connection and read the Caution appropriate operating instructions. ≥ The main unit and supplied speakers are to be Do not connect the AC mains lead until all other used only as indicated in this setup. Failure to do connections are complete. -
Page 14: Connection To A Tv
≥Please use High Speed HDMI Cables that have the HDMI logo (as shown on the cover). It is recommended that you use Panasonic’s HDMI cable. When outputting 1080p signal, please use HDMI cables 5.0 meters or less. Recommended part number (High Speed HDMI Cable): RP-CDHS15 (1.5 m), RP-CDHS30 (3.0 m), RP-CDHS50 (5.0 m), etc. - Page 15 Connection for the best picture and audio ≥When connecting to a TV using an HDMI cable, check the HDMI terminal on the TV. If the HDMI terminal is labeled “HDMI (ARC)”, you can connect the unit simply with a single HDMI cable. ≥It is possible to play back 3D videos and 3D still pictures by connecting this unit with a 3D compatible TV.
-
Page 16: Connection With Set Top Box, Etc
Connection with Set Top Box, etc. ∫ When the connecting devices have an HDMI terminal [BTT362] A HDMI cable (not supplied) e.g., B Set Top Box (Cable/Satellite), etc. C Other devices (Video game, etc.) ≥ Make sure that the HDMI cable connection is made to enjoy AV IN AV OUT AV OUT... -
Page 17: Connection To A Broadband Network
The following limits are in place regarding the usage of this unit. You must be aware of these limits before using these devices. Panasonic will in no way be responsible for any incidental damage which may arise due to a failure to obey these limits, or to any condition of use or disuse of these devices. -
Page 18: Radio Antenna Connection
Radio antenna connection ∫ Using an indoor antenna ∫ Using an outdoor antenna Use outdoor antenna if FM radio reception is poor. e.g., Main unit Main unit FM ANT 75Ω FM ANT Ω A FM indoor antenna (supplied) A FM outdoor antenna [Using a TV antenna (not supplied)] B Adhesive tape The antenna should be installed by a competent technician. -
Page 19: Step 5: Easy Setup
Follow the on-screen prompts to make basic settings for the Setup screen appears. system. If this unit is connected to a Panasonic TV (VIERA) supporting HDAVI Control 2 or later via an HDMI cable, then setting information on the TV such as “On-Screen Language”... -
Page 20: Network Easy Setting
Network Easy Setting Search for wireless network: ≥ When you select “Search for wireless network”, the available wireless networks will be displayed. Select your network After completing “Easy setup”, you can perform “Network Easy name and press [OK]. Setting”. – If your network name is not displayed search again by pressing the red button on the remote control. - Page 21 Network Easy Setting (Home Network Connection Check) Network Easy Setting (Internet Connection Test) Network Easy Setting (Home Network Connection Check) Network Easy Setting (Internet Connection Test) Complete. Complete. 1. LAN cable connection : Fail - Connection to the Internet : Fail(B019) 2.
-
Page 22: Firmware Updates
DIGITAL IN (D-IN) If you have more than one Panasonic player/recorder and the remote control operates both products at once, you will need to To enjoy sound from other devices change the remote control code on one product to prevent this occurrence. -
Page 23: Home Menu
HOME menu Major functions of this unit can be operated from the HOME menu. Disc Play back the contents. Preparation 25, 28, 30) SD card Videos/ Turn on the television and select the appropriate video input on ≥ When multiple contents Photos/ the television. -
Page 24: Enjoying Sound Effects From All Speakers
Enjoying sound effects ∫ Changing the sound modes 1 Press [SOUND] several times to select the mode. from all speakers ≥ The selected mode will only be displayed on the main unit. 2 While the selected mode is displayed Press [2, 1] and select the desired setting. Enjoying surround sound EQUALIZER You can select sound quality settings. -
Page 25: Playing Video Contents
Playing video contents Playback Other operations during play These functions may not work depending on the media and [BD] [DVD] [CD] [SD] [USB] contents. Stop Insert the media. When the contents menu is displayed, press [3, 4, 2, 1] to select the item. ( Press [∫STOP]. -
Page 26: Useful Functions
Changing audio Useful functions Press [AUDIO]. Press [OPTION]. You can change the audio channel number or soundtrack Select an item and press [OK]. language, etc. While DIRECT NAVIGATOR screen is displayed ∫ Selecting the type of audio from the To display the title properties (recording Properties date, etc.). -
Page 27: Enjoying Bd-Live Or Picture-In-Picture In Bd-Video
Enjoying BD-Live or Playing picture-in-picture picture-in-picture in BD-Video To turn on/off secondary video Press [PIP]. Enjoying BD-Live discs with Internet BD-Live allows you to enjoy more functions such as subtitles, exclusive images and online games by connecting this unit to the Internet. -
Page 28: Regarding Divx
Playing music Regarding DivX [DVD] [CD] [USB] ABOUT DIVX VIDEO: DivX is a digital video format created by DivX, Inc. This is an ® (DVD-R/-R DL, music CD, CD-R/RW, USB device) official DivX Certified device that plays DivX video. Visit ®... -
Page 29: Enjoying 3D Video
Enjoying 3D video Useful functions You can enjoy powerful 3D videos with realistic sensations by While playing, connecting this unit with a High Speed HDMI Cable to a 3D Press [OPTION]. compatible TV. Press [3, 4] to select “3D Settings” and press [OK]. -
Page 30: Playing Still Pictures
Playing still pictures Useful functions [BD] [DVD] [CD] [SD] [USB] (BD-RE, DVD-R/-R DL, CD-R/RW, SD Card, USB device) Press [OPTION]. Select an item, then press [OK]. In order to play back 3D still pictures (MPO), this unit should be While Photo View screen is displayed connected to a Full HD 3D compatible TV via an HDMI terminal. -
Page 31: Listening To The Radio
Listening to the Radio Radio Listening/confirming the preset channels Presetting stations automatically Press [RADIO] to select “FM”. Press the number buttons to select the Up to 30 stations can be set. channel. Press [RADIO] to select “FM”. To select a 1-digit number e.g., 1: [1] [OK]. -
Page 32: Enjoying Tv With Unit's Speakers
[AUX, ARC, D-IN] to suit the connections to this unit. ( What is VIERA Link “HDAVI Control”? VIERA Link “HDAVI Control” is a convenient function that offers linked operations of this unit, and a Panasonic TV Surround sound effects (VIERA) under “HDAVI Control”. -
Page 33: Easy Control Only With Viera Remote Control
Playing music continuously even after turning off the TV button on the TV’s remote control. (When the unit is connected to a Panasonic TV (VIERA) that ≥ If you turn off this unit, TV speakers will be automatically supports HDAVI Control 2 or later.) activated. -
Page 34: Using The Ipod/Iphone
Using the iPod/iPhone Other devices Compatible iPod/iPhone (as of January 2011) ≥ Update your iPod/iPhone with the latest software before using this unit. ≥ Compatibility depends on the software version of your iPod/iPhone. ≥ iPod/iPhone compatibility assures music, video playback and battery charge functions of this unit as a home theatre system. -
Page 35: Ipod/Iphone Playback
iPod/iPhone Playback Enjoy photos Preparation Press [iPod] to select “IPOD”. ≥ Make sure that the “IPOD” source is selected. Press [iPod] to select the source. Press [STATUS] several times to select ≥ To view photos/videos from the iPod/iPhone “ALL” on the unit’s display. Operate the iPod/iPhone menu to make the appropriate ≥... -
Page 36: Enjoying Viera Cast
(TY-CC10W or compatible equipment). permanently without notice. Therefore, Panasonic will make no warranty Depending on the area, this optional camera may not be for the content or the continuity of the services. -
Page 37: Playing Back Contents On The Dlna Server (Dlna)
Press [3, 4] to select “Network” and press You can also enjoy viewing the video and still pictures [OK]. recorded in Panasonic DLNA compatible recorders (DIGA). Press [2, 1] to select “Home Network” ≥ The countries where DIGA is available are limited. Refer to following site for availability. -
Page 38: Playback Menu
Playback menu Play Repeat Play Press [DISPLAY]. (Only when the elapsed time is being displayed on the unit’s e.g., BD-Video display.) Select the item which you want to repeat. The items displayed Disc Signal Type differ depending on the type of media. Play Subtitle Main... -
Page 39: Setup Menu
Setup menu Sound Change the unit’s settings if necessary. The settings remain Music Sound Effects *1, *2 intact even if you switch the unit to standby. Select the sound effect. ≥ Digital Tube Sound: Press [HOME]. This feature gives you warm sound, like that produced by a Press [3, 4, 2, 1] to select “Others”... - Page 40 Disc Picture DVD-Video Ratings Still Mode Set a ratings level to limit DVD-Video play. Select the type of picture shown when you pause playback. ≥ Follow the on-screen instructions. Enter a 4-digit password Automatically selects the type of picture with the number buttons when the password screen is Automatic shown.
- Page 41 Digital Audio Input TV / Device Connection Press [OK] to show the following settings: 3D Settings PCM-Fix Press [OK] to show the following settings: Select the following audio signal to input. jARC jDIGITAL IN 3D Type j[BTT362] HDMI Input1 Select the format of the connected TV. j[BTT362] HDMI Input2 ≥...
-
Page 42: Network Settings
TV Audio Input HDMI Colour Mode This setting is for selecting colour-space conversion of the Select the TV audio input to work with the VIERA Link image signal when the unit is connected using an HDMI operations. cable. TV System Change the setting to match the equipment you are connecting HDMI Audio Output with. -
Page 43: Default Settings
A test signal is output. Front (L) ,) Front (R) Remote Control 2 Press [OK]. Change the remote control code if other Panasonic products The test signal stops. react to this remote control. ≥ No signal is output for the subwoofer. To adjust its volume, see page 24, “Adjusting speaker level during... -
Page 44: Speaker Installation Option
Speaker installation Optional speaker settings Fit the speaker securely onto the screw(s) with the hole(s). option e.g., [BTT362] Front speaker DO NOT Attaching to a wall You can attach all of the speakers (except subwoofer) to a wall. ≥ Move the speaker so that ≥... -
Page 45: Troubleshooting Guide
Troubleshooting guide Reference Positioning speakers horizontally [BTT262] Before requesting service, please perform the following checks. Attach the cushion foot (supplied) (A) on If the problem remains unresolved, consult the bottom of the speaker. your dealer for instructions. ≥ If you repeat attaching and removing the cushion foot, degree of tackiness weakens. -
Page 46: Tv Screen And Video
You have forgotten your ratings password. TV screen and video You want to cancel the ratings level. ≥ The ratings level returns to the factory preset. 1 While the unit is on, press and hold [OK], the yellow button The images from this unit do not appear on the TV. and the blue button on the remote control at the same time Picture is distorted. - Page 47 Sound Radio No sound. Distorted sound or noise is heard. Low volume. ≥ Adjust the position of the antenna. Distorted sound. ≥ Use an outdoor antenna. ( Cannot hear the desired audio type. ≥ Check connections to speakers and other equipment. A beat sound is heard.
-
Page 48: Messages
Messages HDMI ONLY ≥ Some BD-Video discs can only be output with HDMI. The following messages or service numbers appear on the television or unit’s display when something unusual is detected ≥ While connecting to a network. during startup and use. On the television No PLAY ≥... -
Page 49: Specifications
Specifications Subwoofer [BTT362] SB-HW370 Type: 1 WAY 1 SPEAKER Bass- ref. Woofer: 16 cm CONE TYPE GENERAL Impedance: 3 ≠ Output sound pressure: 78 dB/W (1 m) Frequency range: 30 Hz to 220 Hz (j16 dB), Power consumption: 85 W 35 Hz to 180 Hz (j10 dB) Power consumption in Dimensions (WkHkD):... -
Page 50: Supplemental Information
Supplemental VIDEO SECTION information Signal system: PAL/NTSC Video output Output level: 1.0 Vp-p (75 ≠) ∫ Display languages list Output connector: Pin jack (1 system) HDMI AV output* Display Language Display Language Display Language Output connector: Type A (19 pin) [BTT362] English Japanese... -
Page 51: Index
Index Audio iPod/iPhone ....34 Radio ......31 Changing audio during play . - Page 52 ≥ Or go on line through our Internet Accessory ordering application at www.pas-europe.com ≥ Most major credit and debit cards accepted. ≥ All enquiries transactions and distribution facilities are provided directly by Panasonic UK Ltd. ≥ It couldn’t be simpler! ≥...