Advertisement
Table of Contents
- 1 Specifications
- 2 Work Area
- 3 Personal Safety
- 4 Specific Safety Rules and Precautions
- 5 Grounded Tools: Tools with Three PRONG Plugs
- 6 Assembly Instructions
- 7 Operating Instructions
- 8 Inspection, Maintenance, and CLEANING
- 9 Troubleshooting
- 10 Please Read the Following Carefully
- 11 Parts List and Assembly Diagram
- 12 Limited 1 Year / 90 Day Warranty
- Download this manual
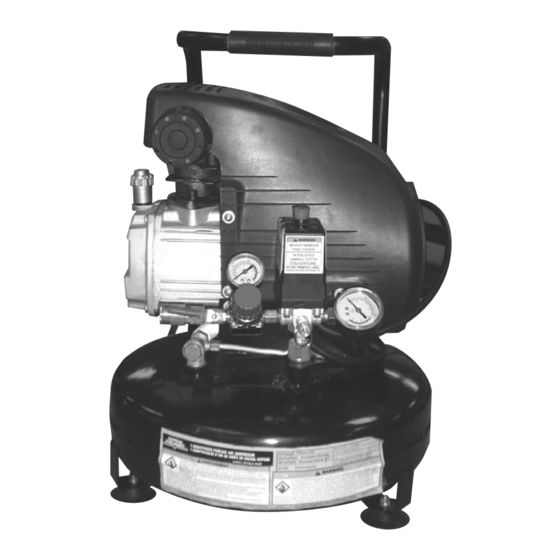
PANCAKE AIR COMPRESSOR
ASSEMbLy ANd OPERAtION INStRuCtIONS
you do not put
a.
Before each use, check the oil level. Never run the Compressor with low or no compressor oil.
Running the Compressor with low or no oil will permanently damage the unit.
b.
you
drop the Air Compressor.
Always lift the Air Compressor using its Handle.
Visit our website at: http://www.harborfreight.com
tO PREVENt SERIOuS INjuRy, REAd ANd uNdERStANd
ALL WARNINGS ANd INStRuCtIONS bEfORE uSE.
Copyright
2007 by Harbor Freight Tools
©
contained herein may be reproduced in any shape or form without the express written consent of Harbor
Freight Tools. Diagrams within this manual may not be drawn proportionally. Due to continuing improvements,
actual product may differ slightly from the product described herein. Tools required for assembly and service
may not be included.
for technical questions or replacement parts, please call 1-800-444-3353.
Revised Manual 09j
2 HP - 4 GALLON
Model
CAutION!
your Warranty Is Voided If:
compressor oil in the Compressor's crankcase prior to its first use.
. All rights reserved. No portion of this manual or any artwork
®
95499
Advertisement
Table of Contents

Related Manuals for Central Pneumatic CENTRAL PNEUMATIC 95499


Summary of Contents for Central Pneumatic CENTRAL PNEUMATIC 95499
- Page 1 PREVENt SERIOuS INjuRy, REAd ANd uNdERStANd ALL WARNINGS ANd INStRuCtIONS bEfORE uSE. Copyright 2007 by Harbor Freight Tools © contained herein may be reproduced in any shape or form without the express written consent of Harbor Freight Tools. Diagrams within this manual may not be drawn proportionally. Due to continuing improvements, actual product may differ slightly from the product described herein.
-
Page 2: Specifications
Electrical Requirements 120 V~ / 60 Hz / 2 HP Motor / 3400 RPM Compressor Style Pump Style Maximum Air Pressure Air Flow Capacity Auto Turn On/Shut Off Air Tank Capacity Air Outlet Size Recommended Oil Type SAE 15W-30W Non-Detergent Compressor Oil Overall Dimensions Weight You will need this manual for the safety warnings and precautions, assembly, oper-... -
Page 3: Personal Safety
Stay alert. Watch what you are doing, and use common sense when operating an air tool. do not use an air tool while tired or under the influence of drugs, alcohol, or medication. A moment of inattention while operating air tools may result in serious personal injury. -
Page 4: Specific Safety Rules And Precautions
Air Compressor is used for the purpose of breathing air application and proper in- line safety and alarm equipment is not simultaneously used, existing warranties are void, and Harbor Freight Tools disclaims any liability whatsoever for any loss, personal injury, or damage. - Page 5 85 PSI to 115 PSI. drain the Air Compressor every day. up inside the Air Compressor’s Tank. Do not open the Drain Valve (54) with more than 10 PSI of air pressure in the Tank. Do not unscrew the Drain Valve so that more than four threads are showing.
-
Page 6: Grounded Tools: Tools With Three Prong Plugs
SAVE tHESE INStRuCtIONS Improperly connecting the grounding wire can result in the risk of electric shock. Check with a qualified electrician if you are in doubt as to whether the outlet is properly grounded. do not modify the power cord plug provided with the tool. Never remove the grounding prong from the plug. - Page 7 When unpacking, check to make sure all the parts shown on the Parts List on page 13 are included. If any parts are missing or broken, please call Harbor Freight Tools at the number shown on the cover of this manual as soon as possible.
-
Page 8: Assembly Instructions
Air Outlet Valve (67) of the Air Compressor. (See figure C.) Prior to using the Air Compressor, the unit requires the attachment of a 1/4”-18 NPt female Quick Connector (not included). To do so, wrap approximately 3”... - Page 9 PRE-StARt INStRuCtIONS – Adding Compressor Oil IMPORtANt! Prior to first using the Compressor, the Compressor MuSt be filled with a high quality S.A.E. 15W-30W grade non-detergent compressor oil. To do so, unscrew and remove the Oil Breather Cap (24). Pour approximately 1/2 quart of compressor oil into the Oil Breather Cap hole.
-
Page 10: Operating Instructions
OPERAtING INStRuCtIONS to Start the Compressor: tANK dRAIN VALVE (54) Check to make sure the Air Tank’s Drain Valve (54), located at the bottom of the Air Tank (50), is fully closed. Pull on the Safety release valve to verify that it is unstuck. (See figure f.) Turn the Air Outlet Valve (67) to its Connect an air hose (not included) to the previously installed Quick Connector. -
Page 11: Inspection, Maintenance, And Cleaning
Remove any moisture in the Air Tank (50) by opening the Tank Drain Valve (54). Then, retighten the Drain Valve. (See figure f.) Allow the Air Compressor to completely cool. Then store the unit in a clean, dry, safe location out of reach of children. -
Page 12: Troubleshooting
Problem Compressor will not start. Low pressure. Safety valve releasing. Oil discharge in air. Pressure switch will not turn off Defective pressure switch. Compressor. PLEASE REAd tHE fOLLOWING CAREfuLLy THE MANUFACTURER AND/OR DISTRIBUTOR HAS PROVIDED THE PARTS LIST AND ASSEMBLY DIAGRAM IN THIS MANUAL AS A REFERENCE TOOL ONLY. -
Page 13: Parts List And Assembly Diagram
PARtS LISt ANd ASSEMbLy dIAGRAM Part description Plastic Cowling Spring Washer Washer (#5) Pan Head Screw (M5 x 14) Turbo Fan Screw (M5 x 15) Motor Rear Cover Wave Washer Bearing (6202) Stator Assy. Rotor Assy. Capacitor 150uf/250V Bearing (6204) Oil Seal Nut (M8) Crankcase... -
Page 14: Limited 1 Year / 90 Day Warranty
LIMItEd 1 yEAR / 90 dAy WARRANty Harbor Freight Tools Co. makes every effort to assure that its products meet high quality and durability standards, and warrants to the original purchaser that for a period of one year from date of purchase that the tank is free of defects in materials and workman- ship (90 days if used by a professional contractor or if used as rental equipment).