Table of Contents
Advertisement
Advertisement
Table of Contents

Related Manuals for Philips FaxJet 520


Summary of Contents for Philips FaxJet 520
- Page 1 User Manual...
-
Page 2: Dear Customer
Dear Customer, In buying this device you have chosen a quality product made by PHILIPS. Their device fulfils the most varied re- quirements for private use or in your office and business everyday. Your device is delivered with a starter cartridge for a few test pages. -
Page 3: En Installation Guide
Installation guide Packing contents Inserting paper Packing contents Basic Primo Voice Paper format ‚ Device Before you can receive documents or make copies, you must load paper into the machine. Please use only appro- ƒ Telephone handset (IPF¦525, IPF¦555) priate paper in standard format A4 (210 × 297 millimetre „... -
Page 4: Connecting Handset
Be careful not to touch trical socket. the nozzles or contacts. Netzkabel anschließen Faxjet 4 Insert the cartridge into the holder with the coloured end facing front and the contacts facing down. Philips IPF 520 · 525 · 555... -
Page 5: Initial Installation
Initial installation Only insert the cartridge if the device is connect- ed to the electricity power supply. Otherwise, the After you connect your device to the mains voltage, the in- cartridge will not be detected. itial installation commences. Subsequent initial installation You can start the initial installation at a later point of time using MENU and 1 also Printing the menu overview... -
Page 6: Overview
[ — RECEPT. SET-UP — o — [ — CALLER ID — [ — PBX FLASH Reception mode basic (TypeBasic) [ — RECEPTION MODE — o (IPF¦520) — [ — REMOTE CONTROL — [ — AUTOMATIC — [ — FAX/TEL TIMER (IPF¦525, IPF¦555) —... -
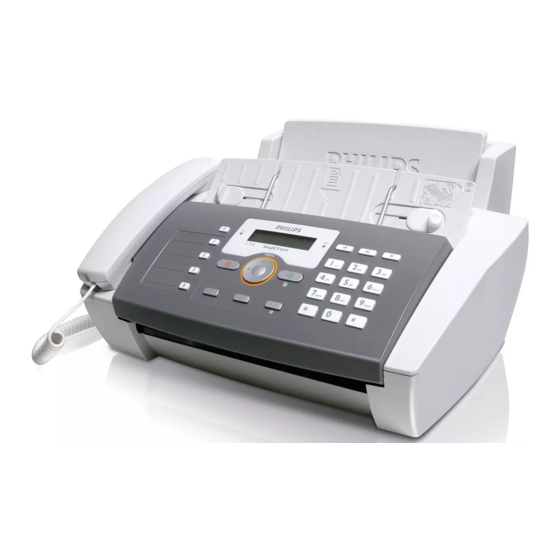
Page 7: Machine Overview
Machine Overview ‚ EXT-Socket—Connection socket for additional de- vices ‚ Handset (IPF¦525, IPF¦555) ƒ LINE-Socket—Connection socket for telephone cable ƒ Paper tray „ ) Telephone handset socket – Connection socket for „ Document feeder (writing facing up) the telephone handset (IPF¦525, IPF¦555) …... -
Page 8: Panel
Panel Loudspeaker Key with/without handset Ijet 3 ß—(IPF¦520): Listening while the connection is estab- Telephone book entries ljet 3 lished / (IPF¦525, IPF¦555): Dialling with the handset re- m—Calling up the telephone book entries. Select the en- placed / (IPF¦525, IPF¦555): hands-free... -
Page 9: General Safety Information
General Safety Information Your device has been tested in conformity with standards Power Supply EN 60950-1 and IEC 60950-1 and should only be operat- Check whether the mains voltage of your device Check whether the mains voltage of your device (indicated ed with telephone systems and power equipment that meet on the type label) matches the mains voltage available at these standards. -
Page 10: Table Of Contents
Sending Fax Later ............ 19 Fax Reception ............19 Polling faxes ............. 20 Selective spam filter ..........20 4 Copier ..........21 Inserting the document ..........21 Copying a Document ..........21 5 SMS ........... 22 Philips IPF 520 · 525 · 555... -
Page 11: Telephone Functions
1 Telephone functions Link: Additional telephones Secret mode For information on how to connect additional telephones and which functions are available to you, please refer the Type 3 (mit Telefon) (IPF¦525, IPF¦555) chapter on Telephone Connections and Additional Devic- You can put the handset on mute, if you want to speak to es, Page 30. -
Page 12: Telephone Book Of The Machine
The number and name will not be shown if the caller Please note that e-mail addresses cannot contain a suppresses his number. space. 9 Confirm with o. 10 Enter the name. 11 Confirm with o. The entry is saved. Philips IPF 520 · 525 · 555... -
Page 13: Missed Calls
Switching Caller Line Identification on/off 1 Press MENU. RECEPT. SET-UP appears on the display. 2 Select using [ INSTALLATION . 3 Confirm with o. STATION NAME appears on the display. 4 Select using [ TEL.LINE SETUP . 5 Confirm with o. 6 Select using [ CALLER ID . -
Page 14: Answering Machine
2 Select using [ TAD SET-UP . changed. 3 Confirm with o. ICM ON SPEAKER appears on the PLAY – To listen to the outgoing message: display. 4 Using [ select OGM #2 . 5 Confirm with o. Philips IPF 520 · 525 · 555... -
Page 15: Listening To Messages
Listening to messages 7 Confirm with o. If an access code was entered, this ap- pears on the display. If new messages have been received on the answering ma- 8 Enter the new access code using the numeric keys. chine, flashes _ on the display. The number of the new messages is shown on the display. -
Page 16: Remote Control Functions
10 Hang up the handset. 5 Confirm with o. 11 You can exit with j. 6 Select the desired recording duration using [. 7 Confirm with o. 8 You can exit with j. Philips IPF 520 · 525 · 555... - Page 17 Economy Operating Mode With this function you can identify whether new messages have been recorded or not from the number of rings. If the device picks up after the set number of rings, you have re- ceived new messages. If no new messages have been re- ceived, the answering machine switches on after two more rings than the setting if no new messages have been re- ceived.
-
Page 18: Fax
4 Press o. The direct-inward dialling number or sub ad- this: dress is dialled only after a short pause. (IPF¦520): You can only call up the redial list, caller list and telephone book if a document is lo- cated in the document feeder. -
Page 19: Sending To Multiple Recipients (= Broadcasting)
Sending to multiple recipients 7 Enter the time, at which the document should be trans- mitted, e.g. 14 00 for 2 pm. Confirm with o. (= broadcasting) 8 Enter the desired number using the numeric keypad or Broadcasting You can send one fax to multiple recipients in succession. select a saved entry. -
Page 20: Polling Faxes
7 Enter the telephone number from which you do not wish to receive a fax. 8 Confirm with o. 9 Using [ select if you would like save further entries. 10 You can exit with j. Philips IPF 520 · 525 · 555... -
Page 21: Copier
4 Copier 20 A5/A4 documents Use documents with sizes A5 or A4 with 60 to 100 g/m weight. You can insert up to 20 documents at a time. Inserting the document 1 Insert the documents face up into the document feeder. The top most document will be fed in first. -
Page 22: Sms
10 Press o. The message is sent. Select from the options displayed using [ and con- firm using o. 10 In some countries you can also send SMS messages to an extension number or sub address. Philips IPF 520 · 525 · 555... -
Page 23: Sending Saved Sms
Direct Inward Dialling or Selecting Sub- Editing SMS address You can add text to an SMS and save. Function is not supported in all countries and networks (Function is not supported in all countries and 1 When reading the SMS, press o. networks) 2 Select using [ EDIT . -
Page 24: Printing Smss
5 Confirm with o. phone service provider, you must change these numbers. The settings are printed. 1 Press _. 2 Using [ select CONFIGURATION . 3 Confirm with o. 4 Select using [ SERV.CENTRE NO. . Philips IPF 520 · 525 · 555... -
Page 25: Settings
6 Settings Calling Ijet 3 Menu Functions Reset When Setting the Country Press MENU to open the function menu. Page through When you select a new country, all settings are reset [ menu entries. Confirm the selected function with o. to the factory defaults for that country. -
Page 26: Setting The Contrast
9 Confirm with o. 5 Confirm with o. Setting the timer For the reception mode AUTOMATIC you can set whether the device is to ring before it picks up. This makes it pos- Philips IPF 520 · 525 · 555... -
Page 27: Setting The Fax Switch
sible for you to receive faxes silently at night without get- Setting the Fax Reception Mode ting disturbed. Setting the Fax Reception Mode You have the following options available (model dependent). The 1 Press MENU. RECEPT. SET-UP appears on the selected fax reception mode appears on the display. -
Page 28: Printing Lists
2 Select using [ PRINT REPORT . 8 Select the desired ring duration in seconds using [. 3 Confirm with o. 9 Confirm with o. 4 Using [ select CALLER ID LIST . 10 You can exit with j. Philips IPF 520 · 525 · 555... -
Page 29: Starting Initial Installation
5 Confirm with o. The caller list will be printed. Printing Settings You can print an overview of all device settings. Printing Transmission Report 1 Press MENU. RECEPT. SET-UP appears on the Printing Transmission Report After every transmission, the machine prints out a trans- display. -
Page 30: 7 Telephone Lines And Additional Devices
Contact your telephone service pro- 9 Confirm with o. vider (also see Chapters "Settings/Setting the Fax Switch"). Philips IPF 520 · 525 · 555... -
Page 31: Connecting Additional Devices
Connecting Additional Devices Changing code Easylink Code Additional Devices Change the code only if it is absolutely necessary. You can operate additional devices on a telephone line, The code must begin with * or #. such as cordless telephones, answering machines, modems or charge counters. -
Page 32: Detecting Call Signal Clock Pulse Automatically
4 Select using [ DISTINCT. RING . 5 Confirm with o. SET OPTION appears on the dis- play. 6 Confirm with o. 7 Select using [ YES . 8 Confirm with o. 9 You can exit with j. Philips IPF 520 · 525 · 555... -
Page 33: Service
8 Service 3 Press the lock in the centre of the holder towards the Changing the Ink Cartridge front and lift the cartridge. Original Consumable Materials Use only original consumable materials. These are available from a specialised retailer or through our order service. -
Page 34: Fixing A Paper Jam
Press j; the page is ejected. Repeat this proc- ess at a few times. Cleaning the Scanner 1 Open the control panel, by lifting it in the centre and folding it to the front. Philips IPF 520 · 525 · 555... -
Page 35: Power Cycling
2 Gently wipe the scanner glass behind the panel with a Do not touch the print jets (B)! cloth (A). 4 Clean the contacts on the holder before reinserting the cartridge. 3 Close the panel back. 5 Insert the cartridge and close the device. Cleaning the Cartridge If the quality of the printed documents diminishes, the car- tridge must be cleaned. -
Page 36: Troubleshooting
No fax reception It is possible that the telephone service provider has activat- ed the answering machine function (= voice mail-box) for your telephone connection. Disabling the Mailbox. En- quire with your telephone service provider. Philips IPF 520 · 525 · 555... -
Page 37: Appendix
Power Supply ......220¦–¦240¦V¦~ / 50¦–¦60¦Hz At the beginning of April 2002, SAGEM SA bought the Power Consumption PHILIPS fax business unit. SAGEM SA is now the Euro- Power Consumption Stand-by mode ..........<¦5¦W pean Number 1 in fax and offers a complete range of fax Stand-by mode Transmission ...........<¦25¦W... -
Page 38: Declaration Of Conformity (Doc)
Hereby, Sagem Communication Austria GmbH use of the equipment declares that this IPF¦520, IPF¦525, IPF¦555 is in com- • communication problems related to an unsuitable envi- pliance with the essential requirements and other relevant ronment, including: provisions of Directive 1999/5/EC. - Page 39 This user manual was printed on recycled paper bleached All rights reserved. No part of this publication may be re- without chlorine. This satisfies the highest standards for produced, stored in a retrieval system or transmitted in any low environmental impact. The cardboard packaging used form or by any means, electronic, mechanical, photocopy- and the packaging inserts of paper and cardboard can be ing, recording, or otherwise, without the prior written per-...
-
Page 40: Customer Information
Telephone: 08 71 - 075 07 11 (0,10 £/minute) Fax: 08 70 - 124 02 02 Direct-Sales Philips Allgemein Use only PHILIPS accessories. The warranty does not cover damages to the machine resulting from the use of other consumable materials. Direct-Sales Philips GB · INT In United Kingdom, you can order PHILIPS accessories by telephone via our toll-free telephone number.