Table of Contents
Advertisement
Quick Links
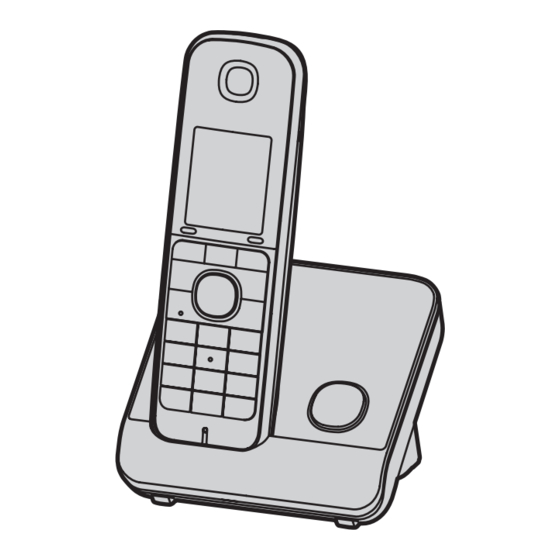
Model shown is KX-TG8151.
Before initial use, see "Getting Started"
on page 11.
Thank you for purchasing a Panasonic product.
Please read these operating instructions before using the unit and save them for
future reference.
Please access our online customer survey:
http://panasonic.net/pcc/tel/q
TG8151_61E(en)_1220_ver021.pdf
Operating Instructions
Model No.
Digital Cordless Answering System
Model No.
1
Digital Cordless Phone
KX-TG8151E
KX-TG8161E
KX-TG8162E
KX-TG8163E
2011/12/20
18:50:42
Advertisement
Table of Contents

Related Manuals for Panasonic KX-TG8161E


Summary of Contents for Panasonic KX-TG8161E
-
Page 1: Operating Instructions
Model shown is KX-TG8151. Before initial use, see “Getting Started” on page 11. Thank you for purchasing a Panasonic product. Please read these operating instructions before using the unit and save them for future reference. Please access our online customer survey: http://panasonic.net/pcc/tel/q... -
Page 2: Table Of Contents
Table of Contents Introduction Listening to messages using the base unit .............39 Model composition ........3 Listening to messages using the Accessory information ........4 handset ............39 General information ........6 Remote operation ........41 Important Information Answering system settings ......42 For your safety ..........7 Voice Mail Service Important safety instructions ......8 Voice mail service ........43... -
Page 3: Introduction
KX-TGA816 series KX-TG8162 KX-TG8161 KX-TGA816 KX-TG8163 KX-TG8161 KX-TGA816 R The suffix (E) in the following model numbers will be omitted in these instructions: KX-TG8151E/KX-TG8161E/KX-TG8162E/KX-TG8163E Feature differences Intercom Series Answering system Between handsets KX-TG8151 series – KX-TG8161 series Single handset models: Intercom calls can be made between handsets by purchasing and registering one or more optional handsets (page 5). -
Page 4: Accessory Information
See page 4 for replacement battery information. The handset cover comes attached to the handset. PNKE1135Z1: Black, Metallic grey PNLC1034ZB: Black, PNLC1034ZM: Metallic grey Additional/replacement accessories Please contact your nearest Panasonic dealer for sales information. Accessory item Model number Rechargeable HHR-4MVE... -
Page 5: Expanding Your Phone System
R Or go on line through our Internet Accessory ordering application at www.pas-europe.com R Most major credit and debit cards accepted. R All enquiries transactions and distribution facilities are provided directly by Panasonic U.K. R It couldn’t be simpler! R Also available through our Internet is direct shopping for a wide range of finished products. -
Page 6: General Information
R In the event of problems, you should contact your equipment supplier in the first instance. Declaration of Conformity: R Panasonic System Networks Co., Ltd. declares that this equipment is in compliance with the essential requirements and other relevant provisions of Radio & Telecommunications Terminal Equipment (R&TTE) Directive 1999/5/EC. -
Page 7: Important Information
Important Information R Do not allow the AC adaptor or telephone line cord to be excessively pulled, bent or For your safety placed under heavy objects. To prevent severe injury and loss of life/ Operating safeguards property, read this section carefully before using the product to ensure proper and safe R Unplug the product from power outlets operation of your product. -
Page 8: Important Safety Instructions
R Do not mix old and new batteries. Base unit location/avoiding noise R Do not open or mutilate the batteries. The base unit and other compatible Panasonic Released electrolyte from the batteries is units use radio waves to communicate with corrosive and may cause burns or injury to each other. -
Page 9: Other Information
Important Information R When you leave the product unused for a Information for Users on Collection long period of time, unplug the product from and Disposal of Old Equipment and the power outlet. used Batteries R The product should be kept away from heat sources such as radiators, cookers, etc. -
Page 10: Specifications
Important Information Note for the battery symbol This symbol (B) might be used in combination with a chemical symbol (C). In this case it complies with the requirement set by the Directive for the chemical involved. Specifications R Standard: DECT (Digital Enhanced Cordless Telecommunications), GAP (Generic Access Profile) R Frequency range:... -
Page 11: Getting Started
R USE ONLY Ni-MH batteries AAA (R03) size. Connections R Do NOT use Alkaline/Manganese/Ni-Cd batteries. R Use only the supplied Panasonic AC R Confirm correct polarities ( adaptor PNLV226E. R When mounting the unit on a wall, see page 52. -
Page 12: Note When Setting Up
(without AC adaptor) to the same telephone line or to the same telephone line Note: jack using a T-adaptor. Your Panasonic sales R It is normal for batteries not to reach full shop can offer you more information about capacity at the initial charge. -
Page 13: Controls
Getting Started Dial keypad Controls Receiver Display Handset MR/ECON R: Recall/Flash ECO: Eco mode shortcut key N (Off/Power) Microphone Charge contacts n Control type Soft keys The handset features 3 soft keys. By pressing a soft key, you can select the feature shown directly above it on the display. -
Page 14: Display
Getting Started N (Locator) Item Meaning The line is in use. n KX-TG8161 series: page 3 R When flashing slowly: The call is put on hold. R When flashing rapidly: An incoming call is now being received. Missed call (page 36) The base unit transmission power is set to “Low”. - Page 15 Getting Started Item Meaning Icon Action IN USE Answering system is being Adds new entry. (page 22, 33) used by another handset or Displays the phonebook search the base unit. menu. Caller ID subscribers only Turns the key lock feature off. KX-TG8161 series: page 3 (page 21) Voice mail subscribers only...
-
Page 16: Screen Saver Mode
Getting Started Icon Feature Display language Initial Setup (middle soft key) #110 Top Key Setup MbN: Select your desired language. a Memo Alarm Caller Barred KX-TG8161 series: page 3 Date and time KX-TG8151 series: page 3 Important: R When you install the batteries for the first time, the handset may prompt you to set Screen saver mode date and time. -
Page 17: One Touch Eco Mode
Getting Started n When the smart function indicator Setting the smart function key (Top flashes rapidly, you can: Key Setup) – Answer the call (outside call, intercom). (page 19, 44) The Top key setup for the following features – Stop the alarm sound. (page 31) must be “On”. -
Page 18: Display Mode
Getting Started R If you set the repeater mode to “On” (page 34): – One touch eco mode is cancelled. – “Eco Setup” is not shown in the display menu (page 28). Display mode You can select to display either a single item or multiple items on one screen at a time for the following features: –... -
Page 19: Making/Answering Calls
Making/Answering Calls When storing a calling card access number and/or PIN in the phonebook, a pause is also Making calls needed (page 23). Example: If you need to dial the line access Lift the handset and dial the phone number “0” when making outside calls with a number. -
Page 20: Useful Features During A Call
Making/Answering Calls n Programming the volume beforehand: Recall/flash (middle soft key) #160 MR/ECON allows you to use the special MbN: Select the desired volume. features of your host PBX such as transferring an extension call, or accessing optional telephone services. Temporary handset ringer off Note: R To change the recall/flash time, see... -
Page 21: Key Lock
Making/Answering Calls emphasise existing line noise. If it becomes difficult to hear, turn this feature off. R This feature is not available while using the speakerphone. Call share You can join an existing outside call. To join the conversation, press M N when the other handset is on an outside call. -
Page 22: Phonebook
Phonebook Finding and calling from a Handset phonebook phonebook entry The phonebook allows you to make calls Scrolling through all entries without having to dial manually. You can add 200 names and phone numbers, assign each (left soft key) phonebook entry to the desired category. MbN: Select the desired entry. -
Page 23: Copying Phonebook Entries
Phonebook select this dial key, you can overwrite Editing entries the previous assignment. Find the desired entry (page 22). a Making a call using a speed dial key MbN: “Edit” a Press and hold the desired speed dial key Edit the name if necessary (16 characters (1 to 9). - Page 24 Phonebook Copying an entry Find the desired entry (page 22). a MbN: “Copy” a MbN: Select the handset you want to send the phonebook entry to. a R When an entry has been copied, “Completed” is displayed. R To continue copying another entry: MbN: “Yes”...
-
Page 25: Programming
Programming Programmable settings You can customise the unit by programming the following features using the handset. To access the features, there are 2 methods. n Scrolling through the display menus (middle soft key) Press MCN, MDN, MEN, or MFN to select the desired main menu. a Press MCN or MDN to select the desired item from the next sub-menus. - Page 26 Programming Sub-menu 1 Sub-menu 2 Settings Code Greeting – #302 Start REC (Record greeting) Play Greeting – #303 – #304 Default (Reset to pre-recorded greeting) Settings 2–9: 2-9 Rings #211 Number of Rings 5: <5 Rings> 0: Auto 1: 1 Minute #305 Recording Time 3: <3 Minutes>...
- Page 27 Programming Sub-menu 1 Sub-menu 2 Settings Code *6, *7 – <Ringtone 1> #161 – Ringtone (Handset) Night Mode On/Off 1: On 0: <Off> #238 Start/End <23:00/06:00> #237 Ring Delay 1: 30 sec. #239 2: <60 sec.> 3: 90 sec. 4: 120 sec. 0: No Ringing Select Category 1–9: Category...
- Page 28 Programming Main menu: “Initial Setup” Sub-menu 1 Sub-menu 2 Settings Code Ringer Setup Ringer Volume 0–6: Off–6 <6> #160 – Handset Ringer Volume 0–6: Off–6 <3> #G160 – *1, *2 – Base Unit *6, *7 <Ringtone 1> #161 – Ringtone (Handset) Night Mode 1: On 0: <Off>...
- Page 29 Programming Sub-menu 1 Sub-menu 2 Settings Code Display Setup <Wallpaper1> #181 – Wallpaper 1: <Colour1> #182 – Display Colour 2: Colour2 Display Mode 1: <Multi Items> #192 0: Single Item Key Backlight 1: <On> 0: Off #276 – 1: <On> 0: Off #191 –...
- Page 30 Programming Main menu: “Memo Alarm” Operation Code Customising the alarm function. #720 Main menu: “Caller Barred” Operation Code Storing/Viewing bar call numbers. #217 KX-TG8161 series: page 3 If you program these settings using one of the handsets, you do not need to program the same item using another handset.
-
Page 31: Special Programming
Programming MbN: Select the desired alarm tone. a Special programming R We recommend selecting a different ringer tone from the one used for Alarm outside calls. An alarm sounds at the set time for 1 minute MbN: Select the desired snooze setting. and is repeated 5 times at 5 minute intervals (snooze function). -
Page 32: Changing The Handset Name
Programming MbN: Select the desired setting. a R If you select “Off”, press M N to exit. Changing the handset name Enter the desired hour and minute you Each handset can be given a customised wish to start this feature. a name (“Bob”, “Kitchen”, etc.). -
Page 33: Registering A Unit
Programming n From the caller list: Select the handsets to be restricted by MFN ( ) pressing 1 to 6. R All handsets registered to the base unit MbN: Select the entry to be barred. a are displayed. R “ ” is displayed next to the selected MbN: “Caller Barred”... -
Page 34: Registering A Handset To The Base Unit
KX-TG8151 series: page 3 unit by using a DECT repeater. Please use Press and hold M N for about 5 only the Panasonic DECT repeater noted on seconds. (No registration tone) page 4. Contact your Panasonic dealer for n KX-TG8161 series: page 3 details. - Page 35 Programming Base unit: Proceed with the operation for your model. n KX-TG8151 series: page 3 Press and hold M N for about 5 seconds. (No registration tone) n KX-TG8161 series: page 3 Press and hold M N for about 5 seconds, until the registration tone sounds.
-
Page 36: Caller Id Service
Caller ID Service phonebook, the stored name in the phonebook is displayed and logged in the Using Caller ID service caller list. Important: R This unit is Caller ID compatible. To use Category ringer tone Caller ID features, you must subscribe to a This feature can help you identify who is Caller ID service. - Page 37 Caller ID Service To call back, press M Erasing all caller information To exit, press M MFN ( ) Note: a MbN: “Yes” a R If the entry has already been viewed or answered, “ ” is displayed, even if it was viewed or answered using another handset.
-
Page 38: Answering System
Answering System announced to callers even though their messages are not recorded. Answering system Available for: KX-TG8161 series (page 3) Turning the answering system on/off The answering system can answer and record calls for you when you are unavailable to The answering system is preset to on. -
Page 39: Listening To Messages Using The Base Unit
Answering System – a pre-recorded greeting message Listening to messages Recording your greeting message using the base unit (middle soft key) #302 When new messages have been recorded, N on the base unit flashes. MbN: “Yes” a Press M After a beep sounds, hold the handset R If new messages have been recorded, the about 20 cm away and speak clearly into base unit plays back new messages. -
Page 40: Message List
Answering System Operation Using the smart function key Play greeting message When is displayed and the smart function Record greeting message indicator flashes slowly, there are new messages. Turn answering system on Press MSmart functionN in step 1 on Pause message “Listening to messages using the handset”, page 39. -
Page 41: Remote Operation
Answering System When finished, hang up. Erasing all messages (middle soft key) #325 Voice guidance MbN: “Yes” a During remote operation, the unit’s voice guidance starts and prompts you to press 1 to perform a specific operation, or press 2 to listen to more available operations. -
Page 42: Answering System Settings
Answering System system, turn off the answering system Turning on the answering system (page 38). remotely R To use this unit’s answering system rather than the voice mail service provided by If the answering system is off, you can turn it your service provider/telephone company, on remotely. -
Page 43: Voice Mail Service
Voice Mail Service Voice mail service Voice mail is an automatic answering service offered by your service provider/telephone company. After you subscribe to this service, your service provider/telephone company’s voice mail system answers calls for you when you are unavailable to answer the phone or when your line is busy. -
Page 44: Intercom/Locator
Intercom/Locator Intercom Transferring calls, conference calls Intercom calls can be made between handsets. Outside calls can be transferred or a Note: conference call with an outside party can be made between 2 handsets. R When paging the handset, the paged handset beeps for 1 minute. -
Page 45: Useful Information
Useful Information Character entry The dial keys are used to enter characters and numbers. Each dial key has multiple characters assigned to it. The characters that can be entered depend on the character entry mode (page 45). – Press MFN or MEN to move the cursor left or right. –... - Page 46 Useful Information Extended 1 character table ( R The following are used for both uppercase and lowercase: Extended 2 character table ( R The following are used for both uppercase and lowercase: Cyrillic character table ( Helpline Tel. No.: U.K. 0844 844 3899 Ireland 01289 8333 TG8151_61E(en)_1220_ver021.pdf 2011/12/20 18:50:50...
-
Page 47: Error Messages
Useful Information Error messages Display message Cause/solution Base no power R The handset has lost communication with the base unit. Move closer to the base unit and try again. No link to base. R Unplug the base unit’s AC adaptor to reset the unit. Reconnect Reconnect main base the adaptor and try again. -
Page 48: Troubleshooting
Useful Information Troubleshooting If you still have difficulties after following the instructions in this section, disconnect the base unit’s AC adaptor and turn off the handset, then reconnect the base unit’s AC adaptor and turn on the handset. General use Problem Cause/solution The handset does not... -
Page 49: Battery Recharge
Useful Information Programmable settings Problem Cause/solution The display is in a R Change the display language (page 16). language I cannot read. I cannot activate the eco R You cannot set eco mode when you set the repeater mode mode. “On”. - Page 50 Useful Information Problem Cause/solution Sound quality seems to R You have registered a handset that is not recommended be getting worse. (page 5). The clearest sound quality is only possible by registering the recommended handset. The handset does not R The ringer volume is turned off. Adjust ringer volume (page 19). ring.
-
Page 51: Liquid Damage
Useful Information Problem Cause/solution I cannot operate the R The remote access code is not set. Set the remote access code answering system (page 41). remotely. R You are entering the wrong remote access code. If you have forgotten your remote access code, enter the remote access code setting to check your current code (page 41). -
Page 52: Belt Clip
Useful Information Belt clip n To attach n To remove Wall mounting Note: R Make sure that the wall and the fixing method are strong enough to support the weight of the unit. R Drive the screws (not supplied) into the wall. n Base unit n Charger 25 mm... -
Page 53: Conditions Of Guarantee
8. The guarantee period applicable to this product shall be 12 months. Please keep these operating instructions with your receipt. Panasonic U.K. a branch of Panasonic Marketing Europe GmbH Receipt No. Date of purchase Model No. -
Page 54: Index
Index Registration: 34 Hold: 20 Index Incoming call barring: 32 Intercom: 44 Additional handsets: 33 Key lock: 21 Alarm: 31 Keytones: 29 Answering calls: 19 Answering system: 38 Making calls: 19 Call screening: 38 Missed calls: 36 Erasing messages: 39, 40, 41 Mute: 20 Greeting message: 38 Night mode: 31... - Page 55 Notes TG8151_61E(en)_1220_ver021.pdf 2011/12/20 18:50:52...
- Page 56 2 Check if telephone line cord is connected. 3 Use rechargeable Ni-MH batteries. (Alkaline/Manganese/Ni-Cd batteries CANNOT be used.) 4 Read troubleshooting page in the Operating Instructions. If you still have any problems, please call the Panasonic DECT Helpline 0844 844 3899 (U.K.) 01289 8333 (Ireland) or contact us through our website: www.panasonic.co.uk...