Panasonic Lumix DMC-LX7 Basic Operating Instructions Manual
Digital camera model no. dmc-lx7
Hide thumbs
Also See for Lumix DMC-LX7:
- Operating instructions manual (226 pages) ,
- Instrucciones básicas de funcionamiento (28 pages) ,
- Basic operating instructions manual (28 pages)
Table of Contents
Advertisement
Basic Operating Instructions
Before use, please read these instructions completely.
More detailed instructions on the operation
of this camera are contained in "Operating
Instructions for advanced features (PDF format)"
in the supplied CD-ROM. Install it on your PC to
read it.
Model number suffix "EB" denotes UK model.
EB
Web Site: http://www.panasonic-europe.com
Digital Camera
DMC-LX7
Model No.
VQT4J01
M0712KZ0
Advertisement
Table of Contents

Related Manuals for Panasonic Lumix DMC-LX7


Summary of Contents for Panasonic Lumix DMC-LX7
-
Page 1: Basic Operating Instructions
More detailed instructions on the operation of this camera are contained in “Operating Instructions for advanced features (PDF format)” in the supplied CD-ROM. Install it on your PC to read it. Web Site: http://www.panasonic-europe.com Model number suffix “EB” denotes UK model. VQT4J01 M0712KZ0... -
Page 2: Information For Your Safety
Dear Customer, We would like to take this opportunity to thank you for purchasing this Panasonic Digital Camera. Please read these Operating Instructions carefully and keep them handy for future reference. Please note that the actual controls and components, menu items, etc. of your Digital Camera may look somewhat different from those shown in the illustrations in these Operating Instructions. -
Page 3: Cautions For Use
(RP-CDHM15, RP-CDHM30: optional). Part numbers: RP-CDHM15 (1.5 m) (4.9 feet), RP-CDHM30 (3.0 m) (9.8 feet) • Always use a genuine Panasonic AV cable (DMW-AVC1: optional). Keep this unit as far away as possible from electromagnetic equipment (such as microwave ovens, TVs, video games etc.). -
Page 4: Caution For Ac Mains Lead
Caution for AC Mains Lead For your safety, please read the following text carefully. This appliance is supplied with a moulded three pin mains plug for your safety and convenience. A 5-ampere fuse is fitted in this plug. Should the fuse need to be replaced please ensure that the replacement fuse has a rating of 5-ampere and that it is approved by ASTA or BSI to BS1362. - Page 5 Information for Users on Collection and Disposal of Old Equipment and used Batteries These symbols on the products, packaging, and/or accompanying documents mean that used electrical and electronic products and batteries should not be mixed with general household waste. For proper treatment, recovery and recycling of old products and used batteries, please take them to applicable collection points, in accordance with your national legislation and the Directives 2002/96/EC and...
-
Page 6: Table Of Contents
Contents Information for Your Safety ..2 Taking pictures ...... 17 Before use ........ 6 Viewing your pictures Standard accessories ..... 7 [Normal Play] ......20 Names and Functions of Deleting pictures ....20 Main Parts ......10 Setting the menu ....21 Attaching the lens cap and Reading the Operating shoulder strap...... -
Page 7: Standard Accessories
Standard accessories Check that all the accessories are supplied before using the camera. Part numbers are as of July 2012. These may be subject to change. Battery pack CD-ROM DMW-BCJ13E • Software: • Charge the battery Use it to install before use. -
Page 8: Optional Accessories
RP-SDNA04GEK Class 4 2 GB SD Memory Card RP-SDNA02GEK The AC adaptor (optional) can only be used with the designated Panasonic DC Coupler (optional). The AC adaptor (optional) cannot be used by itself. ● Some optional accessories may not be available in some countries. - Page 9 • For customers within Ireland: 01 289 8333 • For further support on your product, please visit our website: www.panasonic.co.uk Direct Sales at Panasonic UK • Order accessory and consumable items for your product with ease and confidence by phoning our Customer Communications Centre Monday–Thursday 9:00 a.m.–5:30 p.m.,...
-
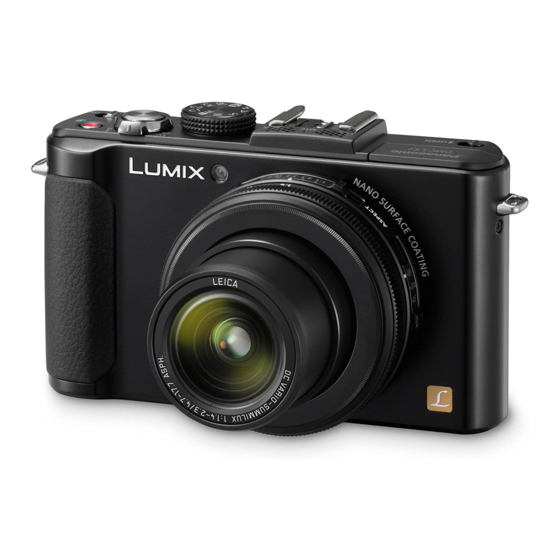
Page 10: Names And Functions Of Main Parts
Names and Functions of Main Parts Camera ON/OFF switch Built-in flash (flash) Self-timer indicator / AF Assist Lamp Shoulder strap eyelet • Attach the supplied shoulder strap and lens cap string to this eyelet. Focus selector switch Thread protector Lens Aperture ring Aspect ratio selector switch Zoom lever... - Page 11 ● Always use a genuine Panasonic AC adaptor (DMW-AC5E: optional). ● When using an AC adaptor, ensure that the Panasonic DC coupler (DMW-DCC7: optional) and AC adaptor (DMW-AC5E: optional) are used. ● Keep the hot shoe cover out of reach of children to prevent swallowing.
-
Page 12: Rear Dial
Names and Functions of Main Parts ■ [ND/FOCUS] lever To operate this lever, move it left or right, or push it in. Manual Focus Turning the built-in adjustment, etc. ND filter on/off, etc. When the built-in ND filter is turned on, you can use even slower shutter Press... -
Page 13: Attaching The Lens Cap And Shoulder Strap
Attaching the lens cap and shoulder strap Cover the lens with the lens cap to protect it when you are not taking pictures. We also recommend attaching the shoulder strap to prevent the camera from being dropped. Use the supplied string to attach the lens cap to the camera Attach the lens cap When taking pictures, remove the... -
Page 14: Charging The Battery
Charging the battery Insert the battery terminals and attach the battery to the charger Ensure [LUMIX] faces outwards. Connect the charger to the electrical outlet Charging light ([CHARGE]) On: Charging in progress (approx. 155 min. if fully depleted) Off: Charging complete ■... -
Page 15: Inserting And Removing The Card (Optional)/The Battery
Move lever in direction of arrow. Push the card until it clicks, then pull the card out. Lever ● Always use genuine Panasonic batteries (DMW-BCJ13E). ● If you use other batteries, we cannot guarantee the quality of this product. ●... -
Page 16: Setting The Clock
Setting the clock The clock is not set when the camera is shipped. Before using the camera, remove the lens cap. Turn the camera on ( ) Press [MENU/SET] ( ) Press to select the items (year, month, day, hour, minute, display order or time display format), and press to set... -
Page 17: Taking Pictures
Taking pictures Before using the camera, remove the lens cap. Motion picture button Turn the camera on ( ) Shutter button Rotate the mode dial to select the recording mode ( ) ■ Recording mode Take pictures with automatic settings. Take pictures with automatic shutter speed and aperture value settings. - Page 18 Taking pictures ■ Use the zoom lever to adjust the range of the picture to be captured Capture a wider area Enlarge the subject (wide-angle) (telephoto) ■ Select the combination of shutter speed and aperture value (Mode dial: Press the shutter button halfway to measure the exposure Press halfway Rotate the rear dial to select the combination...
- Page 19 ■ About recording motion pictures ● We recommend you use a battery with sufficient battery power or the AC adaptor when recording motion pictures. ● If the power supply is cut off due to a power cut or the AC adaptor being disconnected, the motion picture being recorded using the AC adaptor will not be recorded.
-
Page 20: Viewing Your Pictures [Normal Play]
Viewing your pictures [Normal Play] Press the Playback button ( ) Press to select a picture to be displayed • You can also rotate the rear dial to select a picture. ● To play back a motion picture, select a picture with , and then press to start playback. -
Page 21: Setting The Menu
Setting the menu Refer to the following procedures to operate the menus. Example: Setting [AF Mode] from in the [Program AE] Mode Press [MENU/SET] to display the menu Press to select [AF Mode] and then press Press to select then press [MENU/SET] to set Press [MENU/SET] to close the menu Switching to other menus... -
Page 22: Reading The Operating Instructions (Pdf Format)
Reading the Operating Instructions (PDF format) More detailed instructions on the operation of this camera are contained in “Operating Instructions for advanced features (PDF format)” in the supplied CD-ROM. Install it on your PC to read it. ■ For Windows Turn the PC on and insert the CD-ROM containing the Operating Instructions (supplied) Select the desired language... -
Page 23: Supplied Software
Supplied software The supplied CD-ROM contains the following software. Install the software on your computer to use. ■ PHOTOfunSTUDIO 8.3 PE This software allows you to acquire pictures to the PC, and also categorise these acquired pictures by their recording date or the model name of the camera used. -
Page 24: Installing Supplied Software
Supplied software ■ LoiLoScope 30-day full-trial version (Windows XP/Vista/7) This software allows you to make full use of your computer and edit motion pictures easily. • This will only install a shortcut to the trial version download site. Installing supplied software Preparations: •... -
Page 25: Specifications
Specifications Specifications are subject to change without notice. Digital Camera: Information for Your Safety Power Source DC 5.1 V Power When recording: 1.6 W Consumption When playing back: 1.1 W Camera effective 10,100,000 pixels pixels Image sensor 1/1.7” MOS sensor, total pixel number 12,800,000 pixels Primary colour filter Lens... - Page 26 Specifications LCD monitor 3.0” TFT LCD (3:2) (Approx. 921,600 dots) Microphone Stereo Speaker Monaural Recording media Built-in Memory (Approx. 70 MB) SD Memory Card / SDHC Memory Card / SDXC Memory Card Recording file format Still picture RAW / JPEG (based on Design rule for Camera File system, based on Exif 2.3 standard / DPOF corresponding) / MPO Motion pictures AVCHD / MP4...
- Page 27 0 °C to 40 °C (32 °F to 104 °F) temperature Operating 10%RH to 80%RH humidity Battery charger (Panasonic DE-A82A): Information for Your Safety Input AC~ 110 V to 240 V, 50/60 Hz, 0.2 A Output 4.2 V, 0.65 A Battery pack (lithium-ion) (Panasonic DMW-BCJ13E): Information for Your Safety Voltage / capacity 3.6 V / 1250 mAh...
- Page 28 Multimedia Interface are trademarks or registered trademarks of HDMI Licensing LLC in the United States and other countries. • HDAVI Control™ is a trademark of Panasonic Corporation. • “AVCHD Progressive”, “AVCHD”, the “AVCHD Progressive” Logo and the “AVCHD” Logo are trademarks of Panasonic Corporation and Sony Corporation.