Advertisement
Available languages
Available languages
Quick Links
Download this manual
See also:
Use and Care Manual
INSTALLATIONINSTRUCTIONS
IMPORTANT:
READ AND SAVE THESE
INSTRUCTIONS.
INSTALLATION
REQUIRES
2 OR MORE PEOPLE.
INSTRUCCIONESDE INSTALACION
IMPORTANTE:
LEA Y GUARDE
ESTAS INSTRUCCIONES.
LA INSTALACION
REQUIERE
DE 20
M,&,S PERSONAS.
INSTRUCTIONSD'INSTALLATION
IMPORTANT
: LIRE ET CONSERVER
CES INSTRUCTIONS.
L'INSTALLATION
N¢CESSITE
L'INTERVENTION
DE 2 PERSONNES
OU PLUS.
Table of Contents / indice / Table des mati6res
ASSISTANCE
OR SERVICE ............................
1
REFRIGERATOR
SAFETY ...............................
2
INSTALLATION
REQUIREMENTS
................. 2
Tools and Parts .............................................
2
Product Dimensions ......................................
2
Door and Side Panels ...................................
4
Location Requirements .................................
5
Electrical Requirements ................................
5
Water Supply Requirements ......................... 6
INSTALLATION
INSTRUCTIONS
................... 6
Unpack the Refrigerator ................................
6
Install New Water Line ..................................
7
Install Custom Door Panels .......................... 7
Connect Water Supply ..................................
7
Plug in Refrigerator .......................................
8
Prepare the Water System ............................ 8
Level Refrigerator ..........................................
8
Door Height Adjustment ...............................
9
Complete Installation ....................................
9
AYUDA O SERVIClO TF=CNICO .................... 10
SEGURIDAD
DEL REFRIGERADOR
............ 10
REQUISlTOS
DE INSTALAClON
.................. 11
Piezas y Herramientas ................................
11
Medidas del producto .................................
11
Paneles de puerta y laterales ...................... 13
Requisitos de ubicacion ..............................
14
Requisitos €lectricos ...................................
14
Requisitos del suministro de agua .............. 14
INSTRUCCIONES
DE INSTALACI(_N
.......... 15
Desempaque
el refrigerador ....................... 15
C6mo instalar una tuberia de agua nueva.. 15
Instalacion de los paneles a
la medida para la puerta .............................
16
Concxion del suministro de agua ............... 16
Como enchufar el refrigerador .................... 16
Preparaci6n del sistema de agua ............... 17
Como nivelar el refrigerador ....................... 17
Como ajustar la altura de la puerta ............. 18
Complete la instalaci6n ...............................
18
ASSISTANCE
OU SERVICE ..........................
lg
SleCURITle DU RleFRIGleRATEUR ................ lg
EXlGENCES
D'INSTALLATION
.................... 20
Outillage et pieces n_cessaires .................. 20
Dimensions du produit ................................
20
Panneaux lat_raux et de porte .................... 22
Exigences d'emplacement
......................... 23
Specifications
_lectriques ........................... 23
Specifications
de I'alimentation en eau ...... 23
INSTRUCTIONS
D'INSTALLATION
.............. 24
D_ballage du r_frig_rateur .......................... 24
Installation d'une nouvelle
canalisation d'eau .......................................
24
Installation de panneaux
de porte personnalis_s ...............................
25
Raccordement
& la canalisation d'eau ....... 25
Brancher le r_frig_rateur .............................
26
Preparer le systemc d'eau .......................... 26
Nivellement du r_frig_rateur ........................ 26
Ajustement
de la hauteur des portes .......... 27
Achever I'installation ...................................
27
Assistance or Service
If You Have Questions
If you have questions
about
operating,
cleaning
or maintaining
your
refrigerator,
see the Use & Care Guide.
If You Need Service
Maintain the quality built into your refrigerator by calling an
authorized service company.
To locate an authorized service company, see the Use & Care
Guide for the number to call, phone the dealer from whom you
purchased the refrigerator, or check the yellow pages of your local
phone directory.
Keep this book and your sales slip together
for future
reference. You must provide proof of purchase or installation
date for in-warranty service.
Write down the following
information
about
your appliance
to help
you obtain
assistance
or service
if you ever need it. You will need
to know your complete
model
number
and serial number.
You can
find this information
on the model and serial number
label, located
on the inside
wall of the refrigerator
compartment.
Dealer name
Serial number
Address
Phone number
Model number
Purchase date
2223996
Advertisement

Related Manuals for KitchenAid KSCS25INWH01


Summary of Contents for KitchenAid KSCS25INWH01
- Page 1 INSTALLATIONINSTRUCTIONS IMPORTANT: READ AND SAVE THESE INSTRUCTIONS. INSTALLATION REQUIRES 2 OR MORE PEOPLE. INSTRUCCIONESDE INSTALACION IMPORTANTE: LEA Y GUARDE ESTAS INSTRUCCIONES. LA INSTALACION REQUIERE DE 20 M,&,S PERSONAS. INSTRUCTIONSD'INSTALLATION IMPORTANT : LIRE ET CONSERVER CES INSTRUCTIONS. L'INSTALLATION N¢CESSITE L'INTERVENTION DE 2 PERSONNES OU PLUS.
-
Page 2: Refrigerator Safety
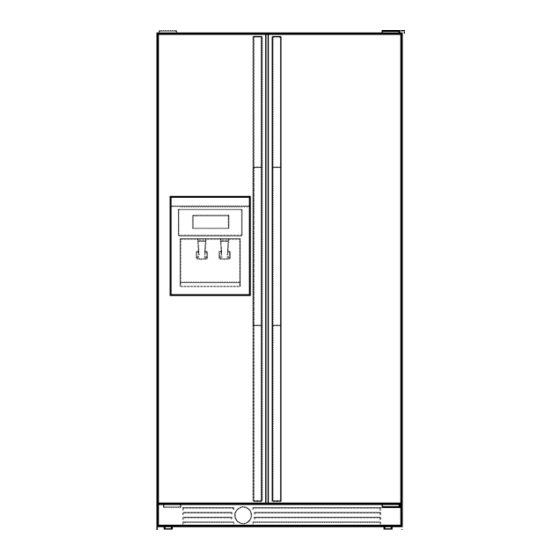
REFRIGERATOR SAFETY Your safety and the safety of others are very important. We have provided many important safety messages in this manual and on your appliance. Always read and obey all safety messages. This is the safety alert symbol. This symbol alerts you to potential hazards that can kill or hurt you and others. All safety messages will follow the safety alert symbol and either the word "DANGER"... - Page 3 Side View Front View • Height dimensions are shown with the leveling legs extended to the minimum height of 1/4"(6.35 mm) below the refrigerator. • The power cord is 66" (167.7 cm) long. • The water line attached to the back of the refrigerator is 78" (198.1 cm)long.
- Page 4 Opening Dimensions • Height dimensions are shown with the leveling legs extended Factory Door Panels and Side Trim Kits to the minimum height of 1/4"(6.35 mm) below the refrigerator. NOTE: When leveling legs are fully extended to 11/4"(32 mm) All factory parts are available through your Whirlpool dealer or by below the refrigerator, add 11/8"(29 mm) to the height calling Whirlpool Parts and Accessories at 1-800-442-9991.
-
Page 5: Door And Side Panels
Raised panels: A raised panel design can be created by screwing or gluing wood panels to 1/4"(6.35 mm) backing or by using 3/4"(19.05 mm) stock with routed edges. Raised panels should be spaced 21/4 '' (5.70 cm) from the back edge of the handle to allow room for fingers to grasp the handle. -
Page 6: Installation Instructions
IMPORTANT: Ifthisproduct isconnected toaGFCI (Ground Fault Circuit Interrupter) protected outlet, nuisance tripping o fthe INSTALLATIONINSTRUCTIONS power supply m ay occur, resulting inloss ofcooling. Food quality and flavor may beaffected. Ifnuisance tripping h asoccurred, and ifthecondition ofthefoodappears poor, dispose o fit. NOTE: Before p erforming any type ofinstallation, cleaning, or removing alight b ulb, t urn thecontrol (Thermostat,... - Page 7 6. Replace the hinge side trims by inserting the notched end under the top trim first. ii!lq_41,$(]::i!i!i !_",,,i_iii'_w W,!]:_LI!!_! ¸¸Lii!i_ii,_i!i_ ¸ 7. Tighten the two top trim screws. (iiiiiii __[_ii_<ii L_iiii_i _%_:iiiiil,) TOOLS NEEDED: Flat-blade screwdriver, 7A6" and 1/2"open-end wrenches or two adjustable wrenches, 1/4"drill bit, hand drill or electric drill (properly grounded).
- Page 8 Style 2: Push the bulb end of the tubing into the water valve as far as it will go. Slide the nut forward and finger tighten. i::I!:,,1:;ii' :1_=:i;i, I 0,_ i!{:!=ili NOTE: Tighten the nut by hand. Then tighten it with a wrench Please read before using the water system.
-
Page 9: Prepare The Water System
Level the Refrigerator TOOLS NEEDED: _8" or adjustable wrench. There are two sets of level bolts found at the base of the refrigerator on each side behind the base grille. The top bolts IMPORTANT: Models are preset with a quarter's-thickness adjust the rear of the refrigerator, and the bottom bolts adjust the difference in door height and may not need adjusting. -
Page 10: Seguridad Del Refrigerador
INSTRUCCIONES DE INSTALACION Ayuda o Servicio T@cnico compra o una fecha de instalacibn para obtener servicio bajo Si tiene preguntas la garantia. Escriba la siguiente informaci6n acerca de su electrodomestico Si usted tiene preguntas acerca del funcionamiento, la limpieza o para ayudarle a obtener asistencia o servicio tecnico si alguna vez el mantenimiento de su refrigerador, vea el Manual de uso y... - Page 11 REQUlSlTOSDE INSTALACION Vista Lateral IMPORTANTE: • Las medidas de altura indicadas consideran las patas niveladoras extendidas come minimo 1A"(6,35 mm) per Observe todos los c6digos y reglamentos aplicables. debajo del refrigerador. Instalador: Deje las instrucciones de instalaci6n con el propietario. •...
- Page 12 La posici6n fija m(nima respecto de la pared es de 131/4" Vista frontal (34 cm) desde la puerta del congelador y de 161/2 '' (42 cm) desde la puerta del refrigerador. 36" (91.5 cm) (34 cm) (42 cm) (90,6 3%" (9.2 Modelo Altura A...
- Page 13 Paneles en relieve: Un dise_o de panel en relieve puede crearse atornillando o pegando con goma paneles de madera a un respaldo de 1/4" (6,35 mm) o usando un soporte de madera de 3A"(19,05 mm) con Juegos de f&brica de paneles de puerta y adornos bordes contorneados.
- Page 14 M6todo de conexibn a tierra recomendado Se requiere una fuente de energia electrica de 115 Voltios, 60 Hz., CA solamente y con fusibles de 15 6 20 amperios, debidamente conectados a tierra. Se recomienda que se use un circuito separado s61o para su refrigerador. Use un tomacorriente que no se puede apagar con un interrupter.
- Page 15 • Si su refrigerador tiene un cartucho del filtro de agua, se podra reducir la presi6n aQn mas si se usa en conjunto con un sistema de 6smosis inversa. Quite el cartucho del filtro de agua; vea "Sistema de filtraci6n de agua" en el Manual de uso y cuidado.
- Page 16 NOT.&: Apriete la tuerca a mano. Luego aprietela dos vueltas con una Ilave de tuercas. No apriete demasiado. 1. Quite toda cinta de embalaje. 2. Quite los adornos de las puertas del refrigerador y del congelador del lado de la bisagra de cada puerta, separando primero los adornos de la parte inferior de la puerta.
- Page 17 Sfrvase leer antes de usar el sistema de agua. IMPORTANTE: Las cuatro patas niveladoras deberan hacer contacto con el piso para soportar y estabilizar el peso total del Inmediatamente despues de la instalaci6n, siga los pasos a refrigerador. continuaci6n para asegurarse de que el sistema de agua este debidamente limpio.
- Page 18 • Si no tiene un armario encima del refrigerador, 1. Ubique el perno para ajustar la altura en la bisagra inferior de simplemente ajuste el refrigerador para nivelarlo. la puerta del refrigerador. NOTA: Para facil acceso al perno para ajustar la altura, la puerta del refrigerador debe estar cerrada.
- Page 19 INSTRUCTIONS D'INSTALLATION Assistance ou service Conservez ce manuel et votre re(_u de vente ensemble pour Si vous 8vez des questions r@f@rence ult_rieure. Pour le service sous garantie, vous devez pr@senter un document prouvant la date d'achat ou Si vous avez des questions concernant le fonctionnement, d'installation.
- Page 20 EXIGENCES D'INSTALLATION Vue lat_rale Ciili,2iii!iii,_;%!i_iiiii_i:::i_ ,_ii_i?i_ ¸¸ i ii:;_',,_,_ii_iiii_,O_!ii_i!!i;; _i! _i_,C,_iii?_i!!;;;_i_!;;_i:i:iiiii_i_:,:ili?_i!!i;; IMPORTANT : • Les dimensions de hauteur sent illustrees avec les pieds de nivellement deployes a la hauteur minimum de 1/4"(6,35 mm) • Respecter toutes les prescriptions des codes et reglements en vigueur.
- Page 21 36" (91,5 cm) 161/2'' 131/4 '' (34 cm) (42 cm) (90,6 crn) Modele Hauteur A Hauteur A 35/8 '' Armoire standard Recouvrement (9,2 cm) complet* ModUle Hauteur A 69" (175,3 cm) 691/s'' (175,6 cm) 72" (182,9 cm) 72%" (183,2 cm) 647/8 '' (164,8 cm) 673/4 '' (172,1 cm) *Pour les portes d'armoire fl recouvrement complet avec...
- Page 22 Panneaux en relief : Un panneau en relief peut _tre cree en vissant ou en collant des ii:)(]:i!!,_i_i!_i@i::]_L;i)(: !(]_!_i!!!i_,i,'(i]L;i),,_i ,_iliii_,!,_ ¸_ (]:!@iiil])O_l'_iii@ panneaux en bois a un appui de 1/4"(6,35 mm) ou en utilisant un panneau de %" (19,05 mm) avec rebord aminci. Les panneaux en Troueses de panneaux de porte et de garnitures relief doivent _tre espaces de 21/4 '' (5,70 cm) du bord arriere de la...
- Page 23 M_thode recommand6e de mise & la terre Une source d'alimentation de 115 volts, 60 Hz, type 15 ou _iiii:i! )(i:!!:]ill i@!l'_i_ O@ ;_!i_, Oii ' _ , @ i!!'"i_i i!i])ii CiO_i!!!_ ,¸¸ !!'_Y_i_ @!!'_i_ ii ¸ 20 amperes CA seulement, protegee par fusible et adequatement mise a la terre est necessaire.
- Page 24 Laisser le reservoir du systeme d'osmose inverse se remplir apres une utilisation intense. Nettoyage avant utilisation Si votre refrigerateur a une cartouche de filtre a eau, celle-ci Apres avoir enleve tous les materiaux d'emballage, nettoyer peut reduire encore plus la pression de I'eau Iorsqu'elle est I'interieur du refrigerateur avant de I'utiliser.
- Page 25 5. Fixer le robinet d'arr_t sur le tuyau d'alimentation en eau I'aide d'une bride de tuyau. Verifier que le raccord du robinet est bien engage dans le trou de 1/4"(6,35 mm) perce dans la 1. Enlever le ruban d'expedition du serpentin gris pour I'eau canalisation et que la rondelle d'etanch6ite est placee sous la I'arriere du refrigerateur.
- Page 26 Ouvrir la porte du congelateur et mettre la machine a gla(_ons en marche. Mettre le commutateur a la position ON (marche) (vers la gauche). Pour plus d'instructions sur le fonctionnement de votre machine a gla9ons, consulter le Guide d'utilisation et d'entretien. •...
- Page 27 Ajuster les boulons de nivellement avant pour mettre le Localiser le boulon d'ajustement de la hauteur sur la charniere sommet du rdrigerateur parallele a I'armoire au-dessus du inferieure de la porte du refrigerateur. refrigerateur. REMAROUE : Pour acceder plus facilement au boulon •...
- Page 28 2223996 © 2004. 3/04 Printed in U.S.A. All rights reserved. Todos los derechos reservados. Impreso en EE,UU. Tous droits r_serves. Imprim6 aux E.-U.