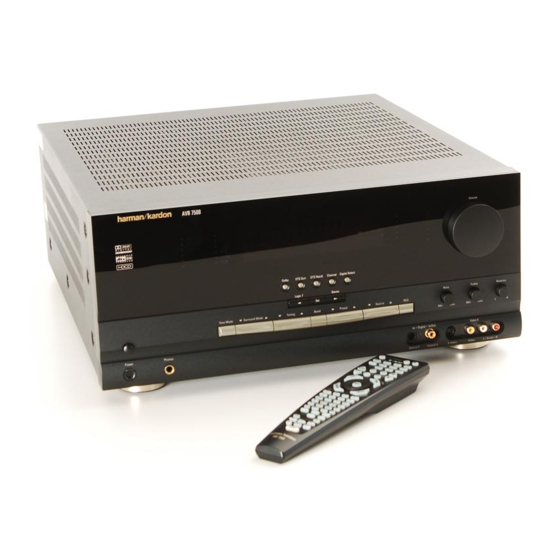
Harman Kardon AVR 7500 Owner's Manual
Audio/video receiver
Hide thumbs
Also See for AVR 7500:
- Service manual (158 pages) ,
- Manual (11 pages) ,
- Owner's manual (2 pages)
Table of Contents
Advertisement
Advertisement
Table of Contents

Related Manuals for Harman Kardon AVR 7500


Summary of Contents for Harman Kardon AVR 7500
- Page 1 AVR 7500 Audio/Video Receiver OWNER’S MANUAL ® Power for the Digital Revolution ™...
-
Page 2: Table Of Contents
EN 60065:1993 HDCD EN 61000-3-2/4.1995 MP3 Audio Playback Selecting a Digital Source Digital Status Indicators Daniel Moyano Night Mode Harman Kardon Europe A/S Tape Recording 11/01 Front Panel Input/Output Connections Output Level Adjustment With Source Signals 6/8-Channel Direct Input Memory backup... -
Page 3: Introduction
With the purchase of a Harman Kardon to provide the most realistic playback of CDs Decoding, and the full suite of DTS ® AVR 7500 you are about to begin many years of when a digital connection is used, even with a modes, including DTS-ES ®... -
Page 4: Safety Information
Verify Line Voltage Before Use The carton and shipping materials used to potential for safety hazards, place the unit on Your AVR 7500 has been designed for use with protect your new receiver during shipment were a firm and level surface. When placing the 220-240-Volt AC current. -
Page 5: Front Panel Controls
AVR 7500. When the switch listen to the AVR 7500’s output through a pair of DTS source is in use the AVR 7500 will select the is pressed in, the unit is placed in a Standby headphones. - Page 6 “12 o’clock” position. play the various messages that are part of the RDS adjusted. data system of the AVR 7500’s tuner. (See page 30 Treble Control: Turn this control to modify the Surround Mode Selector: Press this but- for more information on RDS).
-
Page 7: Front Panel Information Display
Front Panel Information Display Bitstream Indicators Hall Mode Indicator Tuned Indicator Optical Source Indicators Theater Mode Indicator Auto Indicator Sample Rate Indicators VMAx Mode Indicator Main Information Display DTS Mode Indicator Multiroom Indicator Mute Indicator Dolby Digital Indicator OSD Indicator Traffic Indicator Coaxial Source Indicators Speaker/Channel Input Indicators... - Page 8 Standby mode. Mute Indicator: This indicator illuminates to remind you that the AVR 7500’s output has been silenced by pressing the Mute button . Press the Mute button again to return to the previously selected output level.
-
Page 9: Rear Panel Connections
Rear Panel Connections AM Antenna Center Speaker Outputs Video 3 Video Inputs FM Antenna Surround Speaker Outputs Video 2 Video Inputs Tape Inputs Switched AC Accessory Outlet Optical Digital Inputs Tape Outputs Unswitched AC Accessory Outlet Coaxial Digital Inputs Subwoofer Output AC Power Cord Video 2 Audio Outputs DVD Audio Inputs... - Page 10 MP3 files or streams, LD the signal will be sent to these jacks. black (–) terminals on the AVR 7500 to the black player, MD player or CD player to these jacks. (–) terminals on the speakers. See page 15 for...
-
Page 11: Main Remote Control Functions
Learn Button Mute EzSet Sensor Microphone NOTE: The function names shown here are each button’s feature when used with the AVR 7500. Most buttons have additional functions when used with other devices. See page 48-49 for a list of these functions. - Page 12 Power Off Button: Press this button to changes the time until turn-off in the following configuration and channel output level adjust- place the AVR 7500 or a selected device unit in the order: ment. Standby mode. Note that when the AVR 7500 is...
- Page 13 DTS Digital Mode Selector: When a DTS storing and recalling macros.) process of “learning” the codes from another source is in use the AVR 7500 will select the product’s remote into the AVR 7500’s remote. (See RDS Select Button: Press this button to dis-...
-
Page 14: Zone Ii Remote Control Functions
AVR 7500’s Multi IR input jack b. When it is Tuning Up/Down – Fast Play Record/Pause used in the same room as the AVR 7500, it will control the functions of the AVR 7500 or any Preset/Track Skip compatible Harman Kardon products in that Disc Skip room. -
Page 15: Installation And Connections
(+) connection. the Optical and Coaxial Digital Inputs AVR 7500 only with their S-Video In/ Connect the “negative” or “black” wire to the Outputs, not with their composite video connec- same terminal on both the receiver and the tors too. -
Page 16: Scart A/V Connections
Thus both connections must be made jacks with the corresponding color. from the AVR 7500 to the TV if both, Video and But this is only correct as long as only the three S-Video sources, are used, and the appropriate RGB video signals are output by the video input on the TV must be selected. - Page 17 RGB signal, this SCART output must be connected directly to your TV. Figure 4: Schwarz Black Although the AVR 7500 RDS can switch three- SCART/S-Video Adapter way video signals (like component signals for playback; S-Video In...
-
Page 18: System And Power Connections
Multiroom IR Input an optional IR receiver or any other remotable on the AVR 7500 and use the Zone II remote to Harman Kardon device in the remote room with control the room volume. Alternatively, you may... -
Page 19: Speaker Selection
Depending on the type of center-channel Center Front Left Front Right Front When the AVR 7500 is used in 5.1-channel oper- Speaker Speaker Speaker speaker in use and your viewing device, place ation, the preferred location for surround speak-... -
Page 20: System Configuration
In order to view the AVR’s displays, the correct press the Digital Select Button You are now ready to power up the AVR 7500 to video input must be selected on your video dis- then any of the Selector buttons begin these final adjustments. -
Page 21: Input Setup
Note: A signal will be sent to this jack only when change the settings for most inputs so that they with the selected input source, press the the input selected for use by the AVR 7500 is dig- are properly configured to reflect the use of digi- Button on the remote while the ital. - Page 22 If you choose this option and there is no works well without a Center too. subwoofer connected, you will not hear any low- • If no subwoofer is connected to the AVR 7500, 5. When you have completed your selection for frequency sounds with front channel signals.
-
Page 23: Surround Setup
System Configuration • If a subwoofer is connected and you wish to Within five seconds, either press buttons log inputs and Dolby Digital for inputs connected use it for bass reproduction in conjunction with on the remote to select a different speaker to digital sources. -
Page 24: Adjustments For Other Inputs
When the 6.1/7.1 mode is selected, the DTS-ES After the selections are made in the Dolby, DTS, AVR 7500 will not appear unless a digital source Discrete mode will automatically be activated Logic 7, DSP (Surround) or Stereo menus, press is selected and playing the correct bitstream. -
Page 25: Night Mode Settings
System Configuration Due the different distances between the listening If repositioning of the speakers is not possible, Note that the delay settings may also be adjusted position for the front channel speakers and the adjust the center delay time, adding one milli-sec- at any time when the Dolby Digital or Dolby Pro surround speakers, the amount of time it takes ond of center channel delay for every 30 cm clos-... -
Page 26: Output Level Adjustment
(if connected) AVR 7500’s output levels without the use of a and in the Main Information Display Note that the Night mode may be adjusted sound pressure meter, although manual adjust-... -
Page 27: Manual Output Level Adjustment
The tone each speaker before circulating, and a blinking color to indicate the level. Adjust the level using will stop and the AVR 7500 will return to nor- on-screen cursor will appear next to the name of Buttons on the remote until mal operation. - Page 28 Note that any settings changed at any time, also when the discrete buttons are used only, will be stored in memory in the AVR 7500, also if it´s turned off completely, unless it will be reset (see page 68). The settings will either depend on the...
-
Page 29: Operation
The Pro Logic II Emulation mode creates compelling five-channel surround sound from conventional stereo recordings. Logic 7 Cinema Exclusive to Harman Kardon for AV receivers, Logic 7 is an advanced mode that extracts the Delay time not adjustable Logic 7 Music... - Page 30 Operation Surround Mode Chart MODE FEATURES DELAY TIME RANGE HALL 1 The two Hall modes create sound fields that resemble a small (HALL1) or Delay time not adjustable HALL 2 medium sized (HALL 2) concert hall, with stereo and even pure mono sources. VMAx Near When only the two front-channel loudspeakers are used, Harman’s patented VMAx mode No surround channels...
-
Page 31: Basic Operation
• As the input is changed, the AVR 7500 will buttons (except VID4) to turn the unit on, • To set the output of the AVR 7500 so that the automatically switch to the digital input (if press the AVR Selector to have the output is “flat, ”... -
Page 32: Surround Mode Selection
Main Information Display or on-screen to the Dolby Digital mode) and will decode a full is required to use the AVR 7500 to listen to the display. range 5.1 channel surround sound even from Dolby Digital sound tracks available on laser those recordings (see also "Dolby Digital"... -
Page 33: Dts
To utilize either digital mode you must have The AVR 7500 is one of the few A/V receivers to CD/DVD or LD player (LD only for PCM or DTS properly connected a digital source to the... -
Page 34: Digital Status Indicators
5.1 When a digital source is playing, the AVR 7500 feed to the AVR 7500 or to select the appropriate : When the MP3 indicator lights, a compat- senses the type of bitstream data that is present. -
Page 35: Night Mode
When a digital audio recorder is connected to vated at either level of compression using the to a digital input of the AVR 7500 only. But the any of the Digital Audio Outputs , you are... -
Page 36: Channel Direct Input
AVR 7500 may not be capable Once the change has been made, press the Set of processing or to allow connection to the out-... -
Page 37: Advanced Features
As is the case with most audio/video receivers, cannot be heard while the setting is being made, specific listening session, you will need to make when the AVR 7500 is turned on, it will always you may wish to determine the setting before an adjustment in the menu. -
Page 38: Semi-Osd Settings
The semi-OSD system places one line messages menu system is used to sim- AVR 7500 is turned off. Once the unit is turned at the lower third of the video display screen plify the setup and adjustment of the... -
Page 39: Multiroom Operation
Selector buttons to turn on to a specific source. Power Off Button or the System Power As long as an IR feed to the AVR 7500 has been Control on the front panel. To turn off the established from the remote room, using any of... -
Page 40: Tuner Operation
Direct button , and then pressing the Using the remote, up to 30 stations may be The AVR 7500’s tuner is capable of tuning AM, Numeric Keys that correspond to the sta- stored in the AVR 7500’s memory for easy recall FM and FM Stereo broadcast stations and receiv- tion’s frequency. -
Page 41: Rds Operation
, the option in front of • : Weather Information illuminate when text data is being received and the list. The AVR 7500 RDS will find the next ready to be displayed. • : Financial Programs appropriate station, even if it is not broadcasting •... -
Page 42: Programming The Remote
Code Entry method. entered. Auto-Search Method If the unit you wish to include in the AVR 7500’s remote is not listed in the code tables in the booklet or if the code does not seem to operate properly, you may wish to program the correct code using the Auto Search method that follows. -
Page 43: Code Readout
For future reference enter the Setup Codes for the again for the device within which the individual equipment in your system here: 4. Press the button on the AVR 7500 remote that button to be erased has been programmed. you wish to program. Note that the Program/ 4. -
Page 44: Macro Programming
Example: To program the Macro 1 button so that it turns on the AVR 7500, TV and a Sat- Receiver, follow these steps: • Press the Macro 1 button and Mute buttons at the same time and then release them. -
Page 45: Programmed Device Functions
To program the remote for Volume Punch- reacts on the command. In these cases it’s a the same as they are with the AVR 7500. Other Through, follow these steps: good idea to edit the reaction of the unit into the... -
Page 46: Channel Control Punch-Through
TV, you may wish nal code). to start or stop your VCR or DVD without having to change the device selected by the AVR 7500 or the remote. To program the remote for Transport Control Punch-Through, follow these steps:... -
Page 47: Resetting The Remote Memory
Programming the Remote Resetting the Remote Memory As you add components to your home-theater sys- tem, occasionally you may wish to totally repro- gram the remote control without the confusion of any commands, macros or ”Punch-Through“ pro- gramming that you may have done. To do this, it is possible to reset the remote to the original factory defaults and command codes by following these steps. -
Page 48: Function List
Function List Button Name AVR Function CD/CDR Power On Power On Power On Power On Power Off Power Off Power Off Power Off Mute Mute AVR Select DVD Input Select DVD Select CD Input Select CD Select Tape Tape Input Select VID 1 Video 1 Select VID 2... - Page 49 Function List Button Name Tape VCR (VID 1) TV (VID 2) CBL (VID 3) SAT(VID 3) Power On Power On Power On Power On Power On Power On Power Off Power Off Power Off Power Off Power Off Power Off Mute Mute Tape...
-
Page 50: Troubleshooting Guide
• Analog feed in use • Connect and select digital connection to CD player Processor Reset To clear the AVR 7500’s entire system memory NOTE: Resetting the processor will erase any including tuner presets, output level settings, configuration settings you have made for speak-... -
Page 51: Technical Specifications
Height measurement includes feet and chassis. All features and specifications are subject to change without notice. Harman Kardon is a registered trademark, and Power for the digital revolution is a trademark, of Harman International Industries, Inc. is a trademark of Harman International Industries, Inc. - Page 52 250 Crossways Park Drive, Woodbury, New York 11797 www.harmankardon.com Harman Consumer International: 2, route de Tours, 72500 Château-du-Loir, France © 2001 Harman Kardon, Incorporated Part No.: 5527 3100...