
Related Manuals for Haier HWM70-928NZP


Summary of Contents for Haier HWM70-928NZP
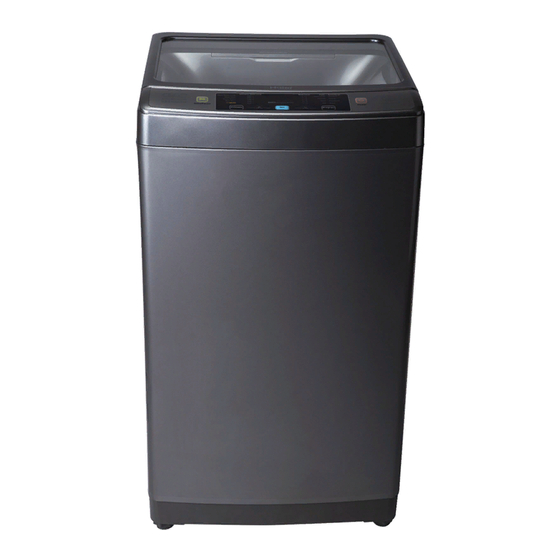
- Page 1 Double Drive Fully Automatic Washing Machine User’s manual HWM70-928NZP HWM80-928NZP ● Please read this manual carefully before using. ● Retain it for future reference.
-
Page 2: Table Of Contents
Contents Names of the parts ...3 Safety precautions ...4 Installation and adjustment ...6 Install the water inlet hose ...9 Preparation before washing ...11 Put in the laundries ...12 Use the operation buttons ...13 Disposal after washing ...17 Trouble-shooting answer to question ...18 Packing List ...19 Specifications ...19... -
Page 3: Names Of The Parts
Names of the parts Top lid component Detergent box Hook Balance ring Softener inlet Control panel seat Base frame Adjustable foot label(2 pieces) Inner cover Meaning and description of the symbols Warning sign Contents marked with that symbol are related to the safety of the product and the personal safety of the users. -
Page 4: Safety Precautions
Safety precautions Please plug the plug on special receptacle with rated voltage. Be sure to use singlephase three pins receptacle. Ensure the earthing prong of the power receptacle is earthed reliably. Use leakage protector if possible. ● Do not bend ,extend, twist, bind by force. Do not press or nip it with weight. ●... - Page 5 ● Please don’t use the washer in the environment below 0°C; if the washer has been stored below 0°C, please be sure to ensure the washer is placed under the room temperature for 2~4 hours and then use otherwise the washing effects may be lowered or the washer may be damaged.
-
Page 6: Installation And Adjustment
Installation and adjustment Please install and adjust the machine according to the requirement of the manual. It is very important to your security and correct operating the machine. Install the inner cover component 1. Open the top lid of the washing machine. 2. -
Page 7: Usage Of The Drain Hose
Adjust the installation position The largest allowed slope of the shank base of the machine is 2°. The slanting or rough ground will result in unstable running or stoppage of the machine. Please adjust it with following methods: ● Adjust the adjustable foot: To adjust the washing machine, please first lift up the front of the machine slightly, then twist the adjustable foot on the both side. -
Page 8: How To Change The Direction Of The Drain Hose
Remarks: In order to make sure of the correct of installation, it is suggested to change the direction of the drain hose with our company serviceman. HWM70-928NZP 1.Dismantle the back cover of the washing machine. 2.Press the spring lamination lightly and pull the top segment of the drain hose decumbent then put down the drain hose from the drain hose frame. -
Page 9: Install The Water Inlet Hose
Install the water inlet hose Confirm the water faucet Water tap, suitable Outlet end surface >10mm It is required that the front end shall be longer than 10mm. The outlet end surface of the tap shall be flat and smooth. If not please file it to avoid leakage. -
Page 10: Connection Between The Water Inlet Hose And The Washing Machine
Connection between the water inlet hose and the washing machine Do not take off the water absorption cushion. Please check if the cushion is dropped or damaged before each usage. If it happens please contact our after-sale department immediately. Put the nut of the water inlet hose on the valve jointer. -
Page 11: Preparation Before Washing
Preparation before washing Preparation before washing Connect the water inlet hose. Confirm that the washing machine is earthed reliably. Then insert the power plug into the receptacle. Do not connect the earth terminal to the gas pipe and tap water pipe. Put down the drain hose. -
Page 12: Put In The Laundries
It is suitable for one time washing to put in reasonable amount of laundries and the laundries can be turned round in washing. ● Do not select “35L” (for HWM80-928NZP) or “26L” (for HWM70-928NZP) water level for laundries less than 1.0kg, so as to avoid splashing of water. Usage of the detergent... -
Page 13: Use The Operation Buttons
Use the operation buttons Description of the function of the buttons Soak Wash High Close 3rd Rinse Cover Medium 2nd Rinse Delay 1st Rinse Speed Reserve Water Water Level Soak Indicator mode and meaning Flashing: indicate the running program On: indicate the program about to run,or indicate the selected mode Child lock function ●... - Page 14 If there’s water inside the tub, the machine cannot detect the laundries and will display water ● level 45L(33L for HWM70-928NZP). If wet laundries are put in, it may display water level 70L( 51L for HWM70-928NZP). You must set suitable water level by yourself.
- Page 15 H “Reserve Water” button ● Press “Reserve Water” button to keep rinsing water; ● When Reserve Water mode is selected, the washing machine will keep rinsing water after each rinsing with buzz and voice indications (for example, if 2nd rinsing is selected, then 2nd rinsing water will be kept; if 1st rinsing and 2nd rinsing) are selected at the same time, then 1st and 2nd rinsing water will be both kept).
-
Page 16: Close The Top Lid
To change the running program or cancel the reserve setting, you need to switch off the power and make new selection. 6 Push the “Start/Pause” button Close the top lid As the top lid opened, the washer will automatically alarm and stop running, exclusively during draining and water filling. When shrinkage occurs Stretch the laundry to its original size and locate it with pins. -
Page 17: Disposal After Washing
Disposal after washing ● After using, please clean the lint and foreign materials of the lint filter etc. in time. Otherwise it may influence your using the machine. ● Please first pull off the power plug from the receptacle before cleaning. Clean the detergent box and set it on the control panel seat. -
Page 18: Trouble-Shooting Answer To Question
Trouble-shooting answer to question (If there’s breakdown, please pull off the power plug before checking) The following phenomena are not breakdowns sometimes.Please confirm again before sending it to repair. If there are real breakdowns, please come to the special maintenance department or after-sale service department of our company. -
Page 19: Packing List
Bottom plate Tapping screw Inner cover component Double Drive Fully Automatic Washing Machine Warranty card Specifications Model No. HWM70-928NZP 14L, 18L, 22L, 26L, Water level 30L, 33L, 36L, 39L, 42L, 45L, 48L, 51L Water Injection 0.001MPa - 1.0MPa pressure Washing / 7.0kg/7.0kg...