Table of Contents
Advertisement
Advertisement
Table of Contents

Related Manuals for Singer 8007; 8019; 8002


Summary of Contents for Singer 8007; 8019; 8002
- Page 1 8007/8019/8002 SINGER...
- Page 2 IMPORTANT SAFETY INSTRUCTIONS When using this machine. basic safety precautions should always be followed including the following; Read all instructions before using this machine. DANGER To reduce the risk of electric shock: * The niachins should never be left unattended when plugged in. Always unplug the machine from the electric outlet immediately after using and before cleaning.
- Page 3 Never operate the machine if it has a damaged cord or plug* if it is not working properly. if has been dropped or damage. or dropped into the water. Return the machine to the nearest authorized dealer of Service Center for examination .repair. electrical .or mechanical adjustment.
-
Page 4: Table Of Contents
Index 5. Twin-Needle Stitching Getting to Know Your Machine .... 2 Principal Parts... Threading the Twin-Needle ..26 Machine Settings. Accessories ..Decorative Twin-Needle Stitching Optional Accessories. Changing the Needle ..6 Changing Presser Feet , ..6. Fre-Motion Stitching.. Removing and Replacing Needle Plate Preparation .. -
Page 5: I Getting To Know Your Machine
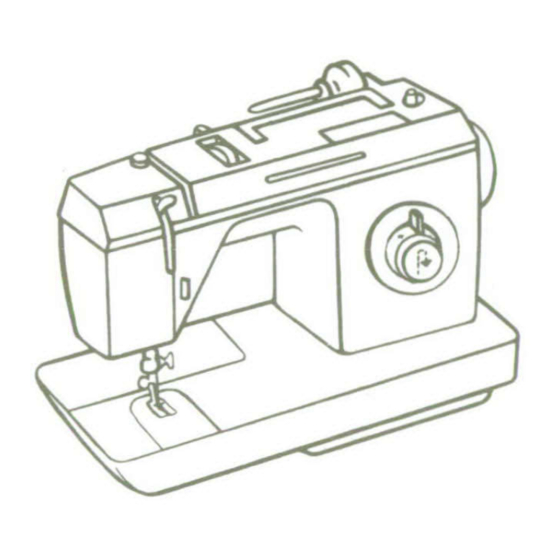
Getting to Your Machine Know principal parts- 1. Hand Wheel 9. Bobbin Winder Tension 2. Bobbin Winder 10. Take-up Lever 3. Spool Holder 11. Thread Guides 4. Stitch Pattern Selector 12. Built-in Sewing Light (only 8019) 13. Thread Cutter 5. Pattern Group Selector 14. - Page 6 Manufacturer reserves the right the appearance, design Or to change accessories of this sewing machine when considered necessary - A Trademark of The Singer Company 1990 Singer Sewing Machine Company Copyright An rtghts resered it the world...
-
Page 7: Accessories
Needles SINGER IMPORTANT: Yoursewingmachinehasbeen designed to obtain best results with SINGER* needles You should follow the recommenda- tions in this instruction book and on the nee- dle package for correct style and size of nee- die for different types and weights of fabric... -
Page 8: Optional Accessories
Thread Lead-Off This lead-off holds narrow-diameter spools of thread on the spool pin (See page 9) Container Of Oil One container of oil, Your machine will sernie you perfectly for many years if you will take a few moments to keep it in good operating condition. -
Page 9: Changing The Needle
flllThe straight stitch nieIdle plate is for use with the straight stitch presser foot Spool Pin For Twin-Needle Stitching This spool pin permits you to stitch two paral- lel rows of stitching simultaneously (see page 26 for detailed instructions). Lint Brush The lint brush is used for cleaning your sewing machine. -
Page 10: Changing Presser Feet
Changing Pressor Feet Most presser feet furnished with your machine snap on and off a common shank * Raise needle and take-up lever to highest position by turning hand wheel toward you < .Raise presser toot To remove the complete presser toot (with shank), of snap-on presser feet and one- •"... -
Page 11: Getting Reedy To Sew
i~~~~~~~~~~~~~ .iiiii¢iiiiiiiMi~~~~~~~~~• ..iiiiii ii ..ý1400to sew preliminary steps Connecting Machine Before plugging in your machine, be sure that CAUTION: Disconnect the power-line plug the voltage and frequency indicated on the from the socket outlet when changing needle, right end of the machine are within the range feet or needle plates or when leaving the marked on theelectric meter installed by your... -
Page 12: Threading The Machine
Threading The Machine Raise presser foot and be sure needle is in Place spool of thread on horizontal spool pin If spool being used has a retaining slit. its highest position, this should be placed to the right Press appropriate thread lead-off holder firmly against spool A. - Page 13 6 Draw thread firmly between left tension disc c and tension separator d. then down around thread guide e on front of machine ( Presser toot must be raised to allow thread to enter discs ) 7 Thread take-up lever I by guiding thread through slot g and into eyelet h.
-
Page 14: Winding The Bobbin
Winding a bobbin Winding a bobbin is quick and easy when you follow the directions below. Always wind the bobbin before threading the machine and needle. " Push in indent (1) on hand wheel disc. This will stop The needle from moving, "... -
Page 15: Inserting A Bobbin
Inserting a bobbin To insert a bobbin, follow the instructions below: * Raise presser foot * Turn hand wheel toward you until needle is in its highest position. " Open slide plate and remove empty bobbin. 1, Pull 4" (10cm) of thread from replacement- bobbin and insert bobbin into case, as shown, 2. -
Page 16: How To Start Sewing
how to start sewing How you begin to sew alter winding a bobbin depends on whether your stitching is to start at or away from the edge of the fabric To Start At Fabric Edge Pull thread back under presser fooc * Posito needle very edge of fabric by... -
Page 17: Setting Selectors
setting selectors Stitch Stitch Pattern Pattern Width Selector Group Selector Selector Needle-Thread fa;TrNeedle Position _eý Stitch Balance Control ~Stitch Length Selector Setting Stitch Width The stitch width selector does two jobs; it sets the machine for straight stitching, and it controls the width of zig-zag stitching. Four stitch width settings are indicated plus a setting for straight stitching Before moving the selector, make sure needle... -
Page 18: Setting A Needle Position
Setting a Needle Position places the The needle position selector 8 ), center ( J± ) or right needle in left ( stitching position You will need to set it before you start running the machine. Before moving the selector, always make sure the needle is out of the fabric, To position the needle, slidethe lever to left Cr right until indicator line is under desired... -
Page 19: Regulating Needle-Thread Tension
Regulating Needle-Thread Correct A tension is important because too much or too little will weaken your seams or Tension mar the appearance of decorative work To determine the correct tension, make a test on The needle-thread tension dial regulates the a sample of your fabric If the stitches look amount of tension on the needle thread and loose B,... -
Page 20: Setting Pattern Group Selector
a(only 8019) A (only 8007 and 8019) Setting Pattern Group Selector (A) The pattern group selector A gives you a chorce of six groups each con- taining three patterns _________________________ Raise the needle to its highest positi * Set the stitch width selector to the (This allows straight position the pattern selector to be moved... -
Page 21: Sewing A Seam
_-ý:.q setting selectors Beftore making any setting adjustments, raise the needle out of the fabric * Pattern Group: Any Yellow Pattern Stitch Width: Dl -Needle Position: j -Stitch Length: To suit fabric S± * Zig-Zag or Straight Stitch Foot When your fabric or sewing procedure re- quires close control, YOU May Wish to use the straight stitch presser foot and the straight Stitch needle plate that come with your ac-... - Page 22 9mm (3/8") (3/4') If---Il.cm (5/8") 1.6cm Starting a Seam 1. Set stitch length selector for desired length of stitch 2. Align edge of fabric along one ofthenurn- bered guidelnes on the needle plate 3. Position needle in fabric about 1 3cm (Wi from the edge 4, Lower the presser foot Depress and hold reverse-stitch push button, and run the...
- Page 23 Ending A Seam Leave presser foot in down position Depress and hold reverse-stitch push but- ton and run the machine at slow speed While holding reverse-stitch push button, back-stitch about 1.3cm (1/2") in from edge of fabric to reinforce end of seam.. 2.
-
Page 24: Zig-Zag Stitching
how patterns are produced Therearetwokindsofstitchpatternsbuilt intoyour The six groups of three stitches each that machine: Fashion *Stitch patterns A (only 8007 are built into your machine are illustrated and 8019) and Flexi-Sttch* patterns B (onty below 8019) The Fashion Stitch patterns, colour-coded yel- low on your machine are produced by the side to side movement of the needle. -
Page 25: Selecting And Adjusting Zig-Zag Stitches
selecting and adjusting zig-zag stitches Selecting a Pattern Group (only 8007 and 8019) When you rotate the pattern group selector C selector as required, sliding the indicatorthrough one of six different groups of pattern stitches the panel, until it positions oneof the pattern groups is available to you Rotate the pattern group you've chosen Selecting a Stitch Pattern... -
Page 26: Adjusting A Stitch Length
1. Adjusting Width Of The Design selector, always Before moving stitch width raise needle above fabric To produce a zig-zag stitch, the stitch width selector must be moved from the right The further you move the Mtoward selector lever toward the right the wider your stitch will be 2. -
Page 27: Adjusting A Stitch Balance
4. Adjusting Needle-Thread Tension When you are preparing to do zig-zag stitching, make a test sample with the fabric and thread you plan to use so that you can adjust the needle-thread tension Correctly. Zig-zag stitching requires less tension than straight stitching. Notice the stitching on your test sample Thestitchesshould lie flat 0 againstthefabricwithoutcausing the fabric to pucker If the stitches are not flat... -
Page 28: Satin Stitching
Satin Stitching Satin stitching is a series of closely spaced zig-zag stitches that form a smooth satin-like *Pattern Group Yellow surface ift is useful for both utility and decora- Stitch Width tive work Aiways make a lest sample first so that you can adjust the stitch length and .Needle Position thread tension property... -
Page 29: Threading The Twin-Needle
4 Pass the horizontal spool pin thread through left or spool pin These may be obtained from your local eye of needle. SINGER stockist as optional accessories. 5 Place vertical spool of thread on detachable Before inserting the twin needle, place the needle... -
Page 30: Machine Settings
machine settings Zig-Zag Stitching With a Twin Needle Straight Stitching With a Twin Needle * Pattern Group Any Zig-Zag Pattern .Stitch Width Note: Do not exceed this stitch width setting .Stitch Width NeedePosition NeedlePosition r , •k .Ztg-Zag Presser Foot (open patterns or .Stitch Pattern Any Yellow Pattern Special Purpose Foot (satin stitching) .Zig-Zag Presser Foot... -
Page 31: Fre-Motion Stitching
Stitching Free-Motion In free-motion stitching, you sew without a presser foot and control fabric movement by means of an embroidery hoop Either a straight stitch or a Plain zig-zag stitch can be used. Because you can move the hoop in any direction-forward or backward, from side to side, or even diagonally - free-motion stitch- ing is extremely useful for embroidery de-... -
Page 32: Floral Designs
floral designs .Patter Group Yellow •Stitch Width• 1S• .NeedlePosition * Stitch Length 0 . Presser Fool None * Snap-In Feed Cover " Speed Range To suit operator Flower Design With a little practice on yoursewing machine you will be able to embroider flowers to decor- ate table linens and other household items, as well as dresses and blouses If you have de- signing skill, you will enjoy creating your own... -
Page 33: Sewing The Professional Way
Sewing the sewing knit and stretch fabric When you sew stretch fabrics doubleknit. ing job Remember to use a SINGER* ball- tricot and jersey choose one of the stretch point (yellow band) needle, Catalog 2045. patterns that sews stretch into the seam... - Page 34 Guiding and Supporting Fabric Most fabrics of stretch or knit construction need only to be guided in front of the presser foot. Some fabrics, however, require support while being stitched. CAUTION: Do nor pull the fabric as you apply gentle or firm tension while stitching, as (his may deflect the needle, causing to break 1.
- Page 35 Plain Stretch Seams Pattern Group III (Green)---- I I I Stitch Width. * Needle Position Sth Length (Green/Blue/Pink) * Special Purpose Presser Foot * Zig-Zag Needle Plate When you use the straight stretch stitch for 2. Stitch and guide the fabric as you do for stress seams or to seam knit stretch, and plain seams stitched with the regular elasticized fabric, stretch and strength are...
- Page 36 Overedged Seams • (Green) - Pattern Group[ Seams in knit and stretch fabric can be joined I I I . Stitch Width and finished in one operation Two different methods may be used. Method No 1 is recommended for firm fabrics where a 6rmm .
-
Page 37: Finishes For Hems And Facings
Attaching Elastic (Green) (Blue/Pink)or " Pattern Group: (Yellow) Stitch Width: " " Needle Position. L 1. * Stitch Length: Approx. 1.5 (for Yellow pattern) or(Green Blue, Pink) * Zig-Zag Presser Foot and Needle Plate To Attach Waistline Elastic Fit elastic for desired snugness at waistline, allowing 1 inch (25cm) for joining Lap ends to form a band and straight stitch together as shown using a ball point needle... -
Page 38: Handling Special Fabrics
handling special fabrics Many fabrics because of their construction or hnish, demand special atlen- tion in sewing Techniques used in stitching and handling, and choice of machine accessories, will vary with the fabric Let the table below guide your selection Fabric Handling Table Fabric Speaa Hacnding... -
Page 39: Construction Details
construction details Zipper Inserted under left Lapped Seam Zipper Insertion Baste the seam line the exact length of the How the zipper is inserted will depend on the garment opening and press the seam open. type of the garment and the location of the . - Page 40 Corded Seams The corded seam is a professional treatment for slipcovers, children's clothes, blouses, and lingerie To make a corded seam. make the welting first jor buy it ready-made), then stitch it into the seam For both steps, use the following settings and accessories "...
- Page 41 Blindstltch Hems (only 8007 and 8019) Blindstitching provides a durable hem finish that is almost invisible, It is best suited to straight hems. Taped, bound, turned, or un- finished hem edges can be blindstitched with equal ease Blindstitching takes a little prac- tice, however, so make a test sample first.
-
Page 42: Buttons
buttons . Pattern Group qiYelow utbto .Stitch WdhT Needle Position . Button Foot . Snap-in Feed Cover Flat buttons can be sewn onquickly andeasily using the plain zig-zag stitch The space between the holes in the button determines stitch width settings Attach snap-in feed cover to zig-zag needle plate 1. -
Page 43: Buttonholes
buttonholes You have a choice between two methods of making bar-tack buttonholes: using the built- in four-step system. or manually controlling the selectors On pages 41 and 43 you will find detailed instructions for using the iwo methods; but you will find the following information basic to both I. -
Page 44: Four-Step Buttonholing
Buttonhole Length A buttonhole length should be just long enough to allow the button to slip through the opening without stretching. You can esti- mate the proper buttonhole length by mea- Suring the width Plus the thickness of the button To make sure the measurements is correct, cut a slit in a scrap of fabric the diameter of the button you intend to use, Increase length of opening until button slips... - Page 45 Step 1: Side Stitching With the needle raised above the fabric, turn the buttonhole dial clockwise to step 1. Posi- tion needle in fabric at point A. Lower the foot and stitch to end of buttonhole (point S). The end marking should be aligned with the horizontal red lines on the foot.
-
Page 46: Adjusting Forward-Reverse Stitch Balance
Adjusting Forward-Reverse Stitch Balance DGiterence in stitch density between the left and right sides of the buttonhole Iforward and reverse stitching) are equalized by ad- lusting the reverse-stitch push button A very slight rotation of the button will produce a noticeable change 1. - Page 47 Procedure Place work under needle, aligning centre ____ _____ marking of buttonhole with the black line in the center of the special purpose foot. Step 1: Side Stitching Position needle in fabric at point A. Lower the foot and stitch to end of marking. Leave needle in fabric at point B.
-
Page 48: Topstitching - Applique
Method No. 1 Top Stitching 1. Select a stitch pat ern suitable for the desi- A practical simple way to accent the lines o red sewing application. Set stitch width se. dress or coat is to place one or more rows of lector for the desired width For white pat- stitching along collars, lapels, facing edges, terns, set stitch length dial for satin stitching... -
Page 49: Keeping Up Appearances
Keeping up appearance Mending Many of the zig-zag stitch patterns are just as useful for mending as they are for creative sewing The multi-stitch zig-zag yellow ( -*:: ) forms a firm, flexible bond for repairing tears and for replacing elastic. - Page 50 Darning Darning Without Embroidery Hoop You may choose to darn either with of with- out an embroidery hoop When greater con- trol is needed, an embroidery hoop is usu- (yelow IAtYlow . Pattern Group ally best .*Stitch Width Li . Needle Position .
- Page 51 Free-Arm Sewing Fabric handling, when sewing tubular and hard to reach garment areas, is simplified when you convert your sewing machine to free-arm sewing Some of the sewing jobs for which you will find the free arm particularly useful are shown on this and the following pages.
-
Page 52: Caring For Your Machine
ni-Caring for. Your Sewing Machine cleaning and lubricating Every Few Weeks- How often you will need to Clean and lubricate the machine will depend on how often you use it and where you keep it. The following gen- Remove lint or fluff from exposed parts. oral guidelines assume that you will be sewing With the lint brush, and a soft cloth, clean: several times a week. -
Page 53: Removing And Replacing Bobbin Case
Removing and replacing bobbin case Caution. Before cleaning or adjusting the machine, remove plug from the socket outlet. * Raise presser toot and needle. " Open slide Plate, remove bobbin and remove needle plate (see instruction on page 7). To remove bobbin case "... -
Page 54: Cover
every few months-• Remove face plate by grasping it around the bottom edge and pulling toward the left, then down and away from machine. Caution: Before lubricating your machine, disconnect the power-line plug from your To Replace Face Plate electrical outlet. Replace face plate and tighten screw A. -
Page 55: Changing The Light Bulb
If Machine Is To Be Stored Apply three drops of oil to all places indi- cated. * Occasionally apply one drop of oil to all other rotating or moving machine connec- • Disconnect power-line plug from electric tions to ensure freedom of movement, outlet. -
Page 56: Hints For Home Service
hints for home service If needle breaks, make sure... Needle is straight, correct style for machine and proper size for thread being used. " Needle is correctly inserted into machine " Stitch width and needle position selectors are correctly set for work being done * Stitch width setting does not exceed setting when twin needle is used. - Page 57 8007/8019/8002 Engish Part Number 356712-001 (REV.