
Related Manuals for Haier HLC22E


Summary of Contents for Haier HLC22E
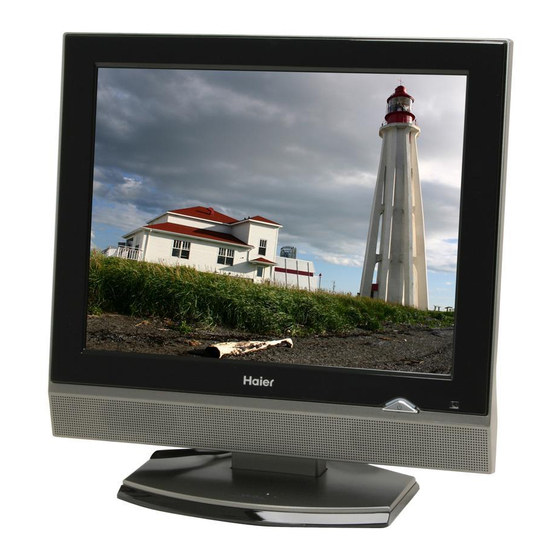
- Page 1 HLC15B / HLC15E / HLC19W / HLC19E / HLC22E LCD TV/DVD Player Combo USER MANUAL Please read this manual carefully before using this TV set and keep it for future reference.
- Page 2 WARNING AND CAUTION CAUTION: TO REDUCE THE RISK OF ELECTRIC SHOCK, DO NOT REMOVE COVER (OR BACK). NO USER SERVICEABLE PARTS INSIDE.FOR ANY PROBLEM, REFER SERVICING TO QUALIFIED SERVICE PERSONNEL. THERE IS A LIGHTNING ARROW SYMBOL IN THE TRIANGLE: THIS SYMBOL INDICATES HIGH VOLTAGE IS PRESENT INSIDE. IT IS DANGEROUS TO MAKE ANY KIND OF CONTACT WITH ANY INSIDE PART OF THIS PRODUCT.
- Page 3 IMPORTANT SAFETY INSTRUCTIONS 1) Read these instructions. 2) Keep these instructions. 3) Heed all warnings. 4) Follow all instructions. 5) Do not use this apparatus near water. 6) Clean only with a dry cloth. 7) Do not block any ventilation openings. Install in accordance with the manufacturer's instructions.
- Page 4 Safety Instructions FCC WARNING-This equipment may generate or use radio frequency energy.Changes or modifications to this equipment may cause harmful interference unless the modifications are expressly approved in the instruction manual.The user could lose the authority to operate this equipment if an unauthorized change or modification is made.
-
Page 5: Table Of Contents
CONTENT Safety Notice Items... Front Panel Controls... Connection Options... Remote Control Key Functions... Remote Control Installing Batteries... Connection Instructions... Grounding... External equipment Connections... Antenna Connection... VGA Setup... Component Setup... VCR Setup... HDMI Input Cable TV Setup... External Component Source Setup... Basic Operating Instructions... -
Page 6: Safety Notice Items
Safety Notice Items Incorrect usage may cause fire or electric shock. required when you are installing, using and cleaning this machine. To your safety and extend the life-span of LCD-TV, please read the following items carefully before using: l Please read and understand all the instructions before operation; Please keep this manual for later use;... -
Page 7: Front Panel Controls
Front Panel Controls HLC15B TV/AV MENU VOL- HLC19E HLC22E Control Panel Function 1. Power supply switch 2. TV/AV Selects the input signals. 3. MENU Press to select the main menu 4. VOL- Volume down / Left orientation to adjust the item in the OSD... -
Page 8: Connection Options
Connection Options STOP PLAY/PAUSE OPEN/CLOSE PREV NEXT DVD insert may differ depending upon the models and terminals Label towards back of some models may be on the back bottom of the set Please see the real set of the DVD position Antenna Input Connect cable or antenna signals to... -
Page 9: Remote Control Key Functions
Remote Control Installing Batteries Remove the battery cover. Insert two size AA batteries matching the +/-polarities of the battery to the +/- marks inside the battery compartment. Precautions Make sure that there is no obstacle between the remote controller and television set. Keep the remote control away from heat sources or humid areas to ensure... -
Page 10: Remote Control
Remote Control Key Functions When using the remote control, aim it towards the remote sensor on the TV POWER TV/AV TV/DVD OPEN/CLOSE SLEEP Q.VIEW INFO MENU STOP SETUP PAUSE/STEP FWD . PREV D.MENU REPEAT PLAY/ENTER ANGLE TITLE/PBC AUDIO PROGRAM ZOOM EXIT CH.LIST FAV.LIST AUDIOLIST... -
Page 11: Connection Instructions
Connection Instructions Grounding Ensure that you connect the grounding / earth wire to prevent possible electric shock. If grounding methods are not possible, have a qualified electrician install a separate circuit breaker. Do not try to ground the unit by connecting it to telephone wires, lightening rods, or gas pipes. External Equipment Connections Antenna Connection - Antenna or Cable Service with a Cable Box Connections... -
Page 12: Vga Setup
Connection Instructions VGA Setup You can use your LCD-TV as a monitor for your personal computer using a VGA cable (not supplied). Connection and use steps: 1.Read the user guide supplied with your computer and ensure that it has a VGA connector; 2.Make sure that the power of the LCD -TV and the PC are off;... -
Page 13: Vcr Setup
Connection Instructions VCR Setup - To avoid picture noise (interference), leave an adequate distance between the VCR and TV Connection and use steps: 1.Read the user guide supplied with your AV devices and ensure that it has Composite or S-Video connectors; 2.Make sure that the power of the LCD-TV and the AV device are off;... -
Page 14: Cable Tv Setup
Connection Instructions Cable TV Setup - After subscribing to a cable TV service from a local provider you can watch cable TV programming. The TV cannot display TV programming unless a TV tuner device or cable TV converter box is connected to the TV. - For further information regarding cable TV service, contact your local cable TV service provider(s). -
Page 15: Basic Operating Instructions
Basic Operating Instructions Turn on the LCD-TV When the POWER POWER TV/AV TV/DVD OPEN/CLOSE is turned on, the indicator light on the front of the LCD-TV SLEEP Q.VIEW INFO MUTE changes from red to green. When the LCD-TV is turned off using the power button, the LCD-TV will go into standby mode and the indicator light turns red(or turns dark). -
Page 16: Select The Tv Channel You Want
Basic Operating Instructions Select the TV Channel You Want You can use the number buttons and select TV channels and press OK to confirm. And you can press the buttons(CH+/CH-) on the remote control or on the panel to make a selection. Picture Mode Press P.MODE button on the remote control for menu display . -
Page 17: Button
ÓÉ Foxit Reader ±à¼- °æȨËùÓÐ (C) Foxit Software Company,2005-2006 Basic Operating Instructions ½öÓÃÓÚÆÀ¹À¡£ button Press to select additional channels (digital and analog) being broadcast by the same station. For example, to select digital channel “11.1”, press “11”, then press “ ”... -
Page 18: Menu Operations
Menu Operations * In this manual, the OSD (On Screen Display) may be differ from your TV These are examples to illustrate the TV's operation. Press TV/AV to select the input source. The menu for each source may be different . 1. -
Page 19: Picture Menu Options Continued
ÓÉ Foxit Reader ±à¼- °æȨËùÓÐ (C) Foxit Software Company,2005-2006 Menu Operations ½öÓÃÓÚÆÀ¹À¡£ Picture Menu Options continued Function: Picture Mode: Select the type of picture which best corresponds to your viewing requirements by selecting Picture Mode in Picture menu. You may select the picture mode directly by pressing the P.MODE button on the remote control. -
Page 20: Audio Menu Options Continued
Menu Operations Audio Menu Options continued You can adjust sound options to the levels you prefer. 2. Press VOL+/OK button to enter the Audio menu and CH+/CH- to go up and down to select the desired option . 3.Press VOL+/OK button to confirm and VOL+/VOL- increase and decrease the level to adjust the selected option to your preference . -
Page 21: Setup Menu Options
Menu Operations Setup Menu Options 1. Press MENU button and CH+/CH- until the following menu appears on the screen. Picture Audio Setup Feature 2. Press VOL+/OK button to enter the Setup menu and CH+/CH- to go up and down to select the desired option . 3.Press VOL+/OK button to confirm and VOL+/VOL- increase and decrease the level to adjust the selected option to your preference . - Page 22 Menu Operations Setup Menu Options Add On Ch Search: When the channels are found, use VOL+/OK to add it to the channel list. Manual Ch Set: Press OK button to display a channel list that you can select channels as below: Channel Label: Allows you to name the channel that is selected.
-
Page 23: Feature Menu Options
Menu Operations Feature Menu Options 1. Press MENU button and CH+/CH- until the following menu appears on the screen. Picture Audio Setup Feature 2. Press VOL+/OK button to enter the Feature menu and CH+/CH- to go up and down to select the desired option . 3.Press VOL+/OK button to confirm and VOL+/VOL- increase and decrease the level to adjust the selected option to your preference . -
Page 24: Feature Menu Options Continued
ÓÉ Foxit Reader ±à¼- °æȨËùÓÐ (C) Foxit Software Company,2005-2006 Menu Operations ½öÓÃÓÚÆÀ¹À¡£ Feature Menu Options Continued Advance Video Menu: Press VOL+/OK to enter the menu as below: Noise Reduction-Spatial: Press VOL-/VOL+ to select on or off Noise Reduction-Speckle: Press VOL-/VOL+ to select on or off. Noise Reduction-Temporal: Press VOL-/VOL+ to select on or off. - Page 25 Menu Operations Feature Menu Options Continued PARENTAL LOCK TECHNOLOGY: The "P.L. Technology" allows you to use U.S. and Canadian Movies and TV PROGRAMS Guide ratings to block certain types of TV programs and movies. To clearly understand TV program rating codes, read the following information: U.S.
- Page 26 Menu Operations Feature Menu Options Continued Press CH+/CH- to select Canadian Rating and VOL+/OK button to confirm. Then press CH+/CH-/VOL+/VOL- to select the item and OK to confirm. Canadian Rating Menu Canadian English To clearly understand Canadian program rating codes, read the following list: Canadian English Rating Chart This type of programming is intended for children under age 8.
-
Page 27: Vga Menu Options Continued
ÓÉ Foxit Reader ±à¼- °æȨËùÓÐ (C) Foxit Software Company,2005-2006 Menu Operations ½öÓÃÓÚÆÀ¹À¡£ Feature Menu Options Continued IMPORTANT: Closed captioning availability entirely depends on broadcasters supplying the signal. Therefore, closed captioning might not always be available and language availability will differ by broadcast. Note: Select CC1 for full translation of the primary language such as English in your area. -
Page 28: Vga Menu Options Continued
ÓÉ Foxit Reader ±à¼- °æȨËùÓÐ (C) Foxit Software Company,2005-2006 Menu Operations ½öÓÃÓÚÆÀ¹À¡£ VGA Menu Options Continued 3.Press VOL+/OK button to confirm and VOL+/VOL- increase and decrease the level to adjust the selected option to your preference . 4. Repeat step 2 and step 3 until desired quality has been achieved . Picture Audio Setup... -
Page 29: Component Menu Options
ÓÉ Foxit Reader ±à¼- °æȨËùÓÐ (C) Foxit Software Company,2005-2006 Menu Operations ½öÓÃÓÚÆÀ¹À¡£ Component Menu Options 1. Press MENU button and CH+/CH- button to select Feature menu in Component mode. 2. Press VOL+/OK button to enter the Feature menu and CH+/CH- to go up and down to select the desired option . -
Page 30: Hdmi And S-Video Menu Options
Menu Operations HDMI and S-Video Menu Options 1. Press MENU button and CH+/CH- button to select Feature menu in HDMI or S-Video mode. 2. Press VOL+ button to enter the Feature menu and CH+/CH- to go up and down to select the desired option . 3.Press VOL+/OK button to confirm and VOL+/VOL- increase and decrease the level to adjust the selected option to your preference . -
Page 31: Dvd Features
DVD Features Basic Playback Preparations Preparations Press the TV/DVD button on the remote control to enter the DVD status. Note: Do not insert a disc until the DVD input states open Basic playback Basic playback 1.Place the DVD in the disc slot. The disc will be loaded automatically after one to two seconds then the DVD player reads the DVD and displays the opening menu If there is no disc placed in... -
Page 32: Advanced Playback
DVD Features(Continued) Advanced Playback IMPORTANT NOTE: ALL DESCRIBED FUNCTIONS A FOR DVD DISCS. IF YOU PLAY OTHER DISC FORMATS THE OPERATION AND ON SCREEN DISPLAY WILL BE DIFFERENT. SUBTITLE Press " SUBTITLE ", the screen will display "SUBTI- TLE 01/XX XXXXX", "01" indicates the ordinal number of this language;... -
Page 33: Special Function Playback
Special Function Playback JPEG DISC PLAYBACK When a disc containing standard JPEG picture files is inserted into the player, a navigation menu will be displayed automatically. Use the UP and DOWN cursor buttons to select a file then press PLAY/ENTER. The slide show will commence. Press PREVIOUS or NEXT to move between pictures. -
Page 34: Dvd System Setup
DVD System Setup DVD System Setup General Setup Process 1.Press the setup button, the SETUP general set up page will be displayed press twice the preference page will be displayed 2.Press CH+/- b item, then press submenu. PLAY/ENTER 3.Press CH+/- bu to select then press PLAY/ENTER to confirm. - Page 35 DVD System Setup(Continued) DVD System Setup General Setup Page ANGLE MARK: Users can select a particular camera angle when playing a DVD which offers multiple angles. This item allows you to set Angle Mark ON or OFF. On Screen Display (OSD) Language: Users can select on-screen display language.
- Page 36 DVD System Setup(Continued) DVD System Setup SETUP PLAY/ENTER SETUP PLAY/ENTER Preference Page The Preference Page is only available when there is no disc in the player. PARENTAL: The parental control function works in conjunction with the different censorship classes assigned to DVDs. These classes help to control the types of DVDs that the family watches, There are up to 8...
- Page 37 DVD System Setup(Continued) DVD System Setup SETUP PLAY/ENTER DEFAULT: Resets all settings (except password and parental lock status) for this DVD player back to the manufacturers original settings. Press ENTER to perform the reset. Note: Some functions may not be available depending on the type of disc.
-
Page 38: Playable Discs
Playable Discs The following discs can be played: You cannot play discs other than those listed above. You cannot play non-standardized discs, even if they may be labelled as above. The performance of CD-R or CD-RW disc depends on the way the disc was burned. In a few cases, their performance may not be consistant or may not even operate at all. -
Page 39: Disc Protection And Dvd Characteristics
Disc Protection and DVD Characteristics Compare DVD disc with other discs: Encode method Single- side Capacity single- layer 4.7G Playing Time minutes Disc diameter Horizontal resolution Picture proportion Subtitle Language Sound quality Digital/MPEG Analog Double Double- Single- -side side side single double- double-... -
Page 40: Troubleshooting Guide
Troubleshooting Guide To assist in location possible faults use help guide below Troubleshooting No picture, no sound Blank screen No sound Poor sound No picture in some channel No color for some channel program (black and white) Spots with some or all pictures Abnormal functioning Note:... -
Page 41: Specifications
NTSC, ATSC, Clear QAM 1.5W+1.5W AV input PC input S-VIDEO input PC audio input Headphone output YPbPr input Antenna input ~120V 60Hz Working:+5 ~+35 Storage:-15 ~+45 Working:20% ~ 80% Storage: 5% ~ 90% Remote control Batteries User manual /HLC19W /HLC22E... -
Page 42: Warranty
Warranty Warranty Warranty 90 days labor and one year parts . - Page 43 V0.1 0090503374...