Canon iR2030 User Manual
Hide thumbs
Also See for iR2030:
- Service manual (418 pages) ,
- Portable manual (122 pages) ,
- Reference manual (444 pages)

Related Manuals for Canon iR2030


Summary of Contents for Canon iR2030
- Page 1 User's Guide Read this guide first. Please read this guide before operating this product. ENGLISH After you finish reading this guide, store it in a safe place for future reference.
- Page 3 User’s Guide...
-
Page 4: Manuals For The Machine
Manuals for the Machine The manuals for this machine are divided as follows. Please refer to them for detailed information. The manuals supplied with optional equipment are included in the list below. Depending on the system configuration and product purchased, some manuals may not be needed. Guides with this symbol are PDF manuals included on the Guides with this symbol are printed manuals. -
Page 5: Table Of Contents
Contents Preface ............v How To Use This Manual. - Page 6 Chapter 1 Before You Start Using This Machine Installation Location and Handling......... . 1-2 Installation Precautions .
-
Page 7: Preface
Preface Thank you for purchasing the Canon iR2030/iR2025/iR2022i/iR2018i. Please read this manual thoroughly before operating the machine to familiarize yourself with its capabilities, and to make the most of its many functions. After reading this manual, store it in a safe place for future reference. -
Page 8: Keys Used In This Manual
Keys Used in This Manual The following symbols and key names are a few examples of how keys to be pressed are expressed in this manual: • Touch Panel Display Keys: [Key Name] Examples: [Cancel] [Done] • Control Panel Keys: <Key icon>... -
Page 9: Available Features
*1: Only the feeder is available. *2: The platen cover or the feeder can be selected at the time of purchase. NOTE For more information on the optional equipment, see Chapter 3, “Optional Equipment,” in the Reference... -
Page 10: Legal Notices
Use of shielded cable is necessary to comply with the technical requirements of EMC Directive. If you move to another EU country and are experiencing trouble please call the Canon Help Desk. (For Europe Only) Canon Inc./Canon Europa N. V. -
Page 11: Additional Information
Additional Information When servicing or adjusting the optical system of the product, be careful not to place screwdrivers or other shiny objects in the path of the laser beam. Also, accessories such as watches and rings should be removed before working on the product. The reflected beam, even though visible or invisible, can permanently damage your eyes. -
Page 12: International Energy Star-Program
International Energy Star-Program As an E Partner, Canon Inc. has determined that NERGY this product meets the E Program for energy NERGY efficiency. The International E Office Equipment Program is NERGY an international program that promotes energy saving through the use of computers and other office equipment. -
Page 13: Ipv6 Ready Logo
Windows Trademarks Canon, the Canon logo, iR, and NetSpot are trademarks of Canon Inc. Adobe and Adobe Acrobat are trademarks of Adobe Systems Incorporated. Macintosh and Mac OS are trademarks of Apple Inc., registered in the U.S. and other countries. -
Page 14: Copyright
Disclaimers The information in this document is subject to change without notice. CANON INC. MAKES NO WARRANTY OF ANY KIND WITH REGARD TO THIS MATERIAL, EITHER EXPRESS OR IMPLIED, EXCEPT AS PROVIDED HEREIN, INCLUDING WITHOUT LIMITATION, THEREOF, WARRANTIES AS TO MARKETABILITY, MERCHANTABILITY, FITNESS FOR A PARTICULAR PURPOSE OF USE OR NON-INFRINGEMENT. -
Page 15: Important Safety Instructions
If these items are dropped or spilled inside the machine, immediately turn OFF the main power switch, and disconnect the power cord from the power outlet. Then, contact your local authorized Canon dealer. - Necklaces and other metal objects - Cups, vases, flowerpots, and other containers filled with... -
Page 16: Power Supply
Power Supply WARNING • Do not damage or modify the power cord. Also, do not place heavy objects on the power cord, or pull on or excessively bend it, as this could cause electrical damage and result in a fire or electrical shock. •... -
Page 17: Handling
• If the machine makes strange noises, or gives off smoke, heat, or strange smells, immediately turn OFF the main power switch, and disconnect the power cord from the power outlet. Then, contact your local authorized Canon dealer. Continued use of the machine in this condition may result in a fire or electrical shock. -
Page 18: Maintenance And Inspections
• The laser beam can be harmful to human bodies. Since radiation emitted inside the product is completely confined within protective housings and external covers, the laser beam cannot escape from the machine during any phase of user operation. Read the following remarks and instructions for safety. -
Page 19: Replacing The Toner Cartridge
CAUTION • The fixing unit, the duplex unit, and their surroundings inside the machine may become hot during use. When removing jammed paper or when inspecting the inside of the machine, do not touch the fixing unit, the duplex unit, and their surroundings, as doing so may result in burns. -
Page 20: Consumables
Consumables WARNING • Do not burn or throw used toner cartridges into open flames, as this may cause the toner remaining inside the toner cartridges to ignite, resulting in burns or a fire. • Do not store toner cartridges or copy paper in places exposed to open flames, as this may cause the toner or paper to ignite, resulting in burns or a fire. -
Page 21: About The Electronic Instruction Manuals
About the Electronic Instruction Manuals Contents of Documentation Kits Multi-lingual Documentation Kit Instruction Manual Disc This contains the multilingual versions of the following guides. ■ Easy Operation Guide • Basic Features Contains the basic operation instructions of the Copy, Mail Box, Send, Fax, Remote UI, and Printer functions. •... -
Page 22: User Manual Disc Menu
User Manual Disc Menu The User Manual Disc Menu is software that enables you to select and view PDF Manuals included on the Disc via your computer screen. Follow the instructions below to use the User Manual Disc Menu. System Requirements The User Manual Disc Menu can be used in the following system environments. -
Page 23: Using The Disc Menu
Using The Disc Menu This section describes how to use the Disc Menu. When you insert the User Manual Disc provided into the Disc drive, the Language Selection screen is displayed. Clicking a language on this screen displays the following menu. (The sample screenshot shown here is for Windows users.) NOTE •... - Page 24 xxii...
- Page 25 Before You Start Using This Machine CHAPTER This chapter describes what you should know before using this machine, such as parts and their functions, and how to turn ON the main power. Installation Location and Handling ...........1-2 Installation Precautions.
-
Page 26: Installation Location And Handling
Installation Location and Handling This section describes precautions for installation location and handling. We recommend that you read this section prior to using this machine. Installation Precautions Avoid Installing the Machine in the Following Locations ■ Avoid locations subject to extremes of temperature and humidity, whether low or high. - Page 27 ■ Avoid poorly ventilated locations. This machine generates a slight amount of ozone during normal use. Although sensitivity to ozone may vary, this amount is not harmful. Ozone may be more noticeable during extended use or long production runs, especially in poorly ventilated rooms. It is recommended that the room be appropriately ventilated, sufficient to maintain a comfortable working environment, in areas of machine operation.
- Page 28 ■ Avoid exposing the machine to rapid changes in temperature. If the room in which the machine is installed is cold but rapidly heated, water droplets (condensation) may form inside the machine. This may result in a noticeable degradation in the quality of the copied image, the inability to properly scan an original, or the copies having no printed image at all.
-
Page 29: Select A Safe Power Supply
Select a Safe Power Supply ■ Plug the machine into a standard 230 V AC, three-wire grounded outlet. ■ Make sure that the power supply for the machine is safe, and has a steady voltage. ■ Do not connect other electrical equipment to the same power outlet to which the machine is connected. -
Page 30: Provide Adequate Installation Space
■ If you intend to move the machine, even to a location on the same floor of your building, contact your local authorized Canon dealer beforehand. ■ The machine is heavy, and requires two or more people to lift it. - Page 31 ■ When carrying the machine, be sure to hold the handles, as indicated below. Failure to do so may cause the machine to be dropped, and result in personal injury. Hold these Pull out and recessed hold these handles. handles. Installation Location and Handling...
-
Page 32: Handling Precautions
Handling Precautions ■ Some parts inside the machine are subject to high-voltages and temperatures. Take adequate precautions when inspecting the inside of the machine. Do not carry out any inspections not described in this manual. ■ Do not attempt to disassemble or modify the machine. - Page 33 OFF, disconnect the power cord from the outlet, and call your local authorized Canon dealer. Using the machine in this state may cause a fire or electrical shock. Also, avoid placing objects around the power plug so that the machine can be disconnected whenever necessary.
- Page 34 ■ This machine generates a slight amount of ozone during normal use. Although sensitivity to ozone may vary, this amount is not harmful. Ozone may be more noticeable during extended use or long production runs, especially in poorly ventilated rooms. It is recommended that the room be appropriately ventilated, sufficient to maintain a comfortable working environment, in areas of machine operation.
-
Page 35: What This Machine Can Do
What This Machine Can Do All the elements you will ever need in a digital multitasking machine. The iR2030/iR2025/iR2022i/iR2018i incorporates a rich array Copy range of input and output features that can greatly enhance your efficiency. Print Send Equipped with features that meet the needs of document work in a digitized office, the iR2030/iR2025/iR2022i/iR2018i represents the ultimate in digital multitasking machines. -
Page 36: Network Interface
Faxing* Sending and Facsimile Guide See the This machine’s Super G3 fax function is compatible with most Super G3 fax Original machines used in office environments. If the optional Super G3 FAX Board and Fax Driver are installed, you can send facsimiles from your computer. * The optional Super G3 FAX Board is required. -
Page 37: Using The Remote Ui
Network Scanning Color Network ScanGear User’s Guide See the The Network Scan function enables you to use the iR2030/iR2025/ iR2022i/iR2018i as a conventional scanner. You can scan a document using the machine, and read the data in an application Original you are using on your computer. -
Page 38: System Configuration And Parts
Additional Finisher Tray-C1 d Cassette Feeding Module-Q1 j Finisher-U2 e Duplex Unit-B1 NOTE • The Duplex Unit-B1 is standard equipment for the iR2030/iR2025. • The optional Inner 2 Way Tray-E2 cannot be used with the optional Finisher-U2. 1-14 System Configuration and Parts... -
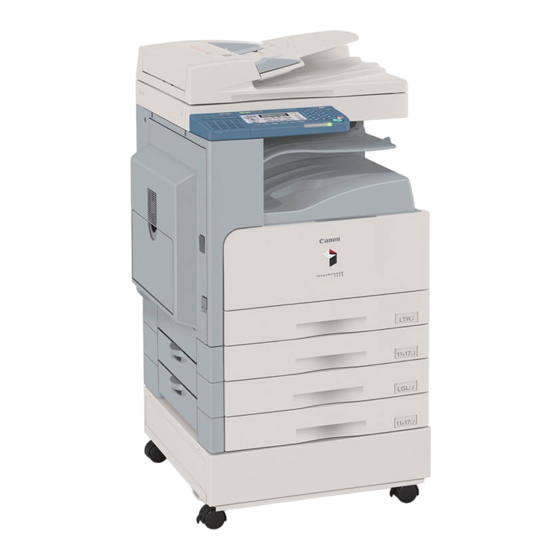
Page 39: External View And Internal View
External View and Internal View The iR2022i with the optional Inner The iR2022i with the optional Finisher-U2, 2 Way Tray-E2 and Cassette Feeding Additional Finisher Tray-C1 and Module-Q1 attached Cassette Feeding Module-Q1 attached a Stack Bypass d Main Power Switch b Main Control Panel e Paper Drawer 1 c Feeder (DADF-P2) -
Page 40: Control Panel Parts And Functions
When the Error indicator Network ScanGear User’s Guide.) maintains a steady red light, contact your local authorized Canon dealer. d Reset key m Log In/Out key Press to restore the standard settings of the machine. -
Page 41: Touch Panel Display
Touch Panel Display a Adjust Contrast f Finishing Press [Light] or [Dark] to manually control the copy Press to select the Collate, Group, or Staple mode. exposure. Press [A] to select or cancel the automatic g 2-sided exposure control. Press to make [1 2-Sided], [2 2-Sided], [2 1-Sided], or [Book 2-Sided] copies. - Page 42 Icon (Type of Job) Description Copy Job Send Job Fax Job Printer Job Report Job Additional Functions Job Icon (Machine Status) Description Error Paper Jam Staple Jam Replace Toner Cartridge 1-18 System Configuration and Parts...
-
Page 43: Main Power And Control Panel Power
Main Power and Control Panel Power The machine is provided with two power switches, a main power switch and a control panel power switch. How to Turn ON the Main Power Make sure that the power plug is firmly inserted into the power outlet. WARNING Do not connect or disconnect the power cord with wet hands, as this may result in electrical shock. - Page 44 The screens on the right are displayed while the system software is loading. ❑ The Start Up screen is displayed until the machine is ready to scan. ❑ The screen on the right is displayed when the machine is ready to scan. IMPORTANT •...
-
Page 45: Things You Must Do Before Using This Machine
Things You Must Do Before Using This Machine This section describes the important setting registrations and procedures that must be done before the machine is used for sending operations. For the further details of the operations, see “Things You Must Do Before Using This Machine” in the Sending and Facsimile Guide. IMPORTANT •... - Page 46 Press [User Settings] under <Fax Settings>. Press [Tel Line Type].I Select the type of telephone line ➞ press [OK]. If you do not know the telephone line type, call your telephone service provider for details. The selected mode is set. Press [Done] repeatedly until the Basic Features screen appears.
-
Page 47: Setting The Current Date And Time
Setting the Current Date and Time You can set the current date and time. The current date and time settings are used as standard timer settings for functions that require them. • GMT: The time at the Greenwich Observatory in England is called GMT (Greenwich Mean Time). - Page 48 Enter the current date (day, month, year) and time using (numeric keys). ● If you are setting the Time Zone: ❑ Press [Time Zone Setting] ➞ select the time zone where the machine is located ➞ press [OK]. NOTE • The default setting is ‘GMT 0:00’. ▼...
- Page 49 ❑ Select the month and day from the Month and Day drop-down lists, respectively. ❑ Press [OK]. ❑ Press [End Date] ➞ make the settings in the same way as [Start Date] ➞ press [OK]. ❑ Press [OK]. NOTE • If you set Daylight Saving Time, the machine automatically sets the standard time of the machine one hour forward at the specified date and time.
-
Page 50: Registering This Machine's Fax Number
Registering This Machine’s Fax Number You must store the machine’s fax number. This number is printed on the document that you fax to the receiving party. The number may also be displayed on the touch panel display of the receiving party’s machine, depending on their type of machine. -
Page 51: Registering The Unit Name
Registering the Unit Name Your name or company’s name must be registered as the unit name (a department name is optional). When you send a document, the recipient’s machine displays or prints your name or company’s name (and department’s name, if applicable) as the sender’s information on the recording paper. - Page 52 1-28 Things You Must Do Before Using This Machine...
-
Page 53: Routine Maintenance
Routine Maintenance CHAPTER This chapter describes how to load paper, and replace the toner cartridge. Loading Paper..............2-2 Replacing the Toner Cartridge . -
Page 54: Loading Paper
- Cassette Feeding Module-P1 (paper drawer 2) and Cassette Feeding Module-Q1(paper drawer 3 and 4) are optional for the iR2018i. - Cassette Feeding Module-Q1 (paper drawers 3 and 4) is optional for the iR2030/iR2025/iR2018i. • For more information on available paper stock that can be loaded into the paper drawers, see “Available Paper Stock”... - Page 55 NOTE • For high-quality printouts, use paper recommended by Canon. • Before loading paper, always fan the sheets several times, and align the edges to facilitate feeding. Push down the metal plate to lock.
- Page 56 Load the paper stack into the paper drawer. Even out the edges of the paper stack. Load the paper stack against the right wall of the paper drawer. When loading paper into the paper drawer for the first time, set the size plate and the paper-size detecting lever for the paper being loaded.
- Page 57 Gently push the paper drawer back into the machine until it clicks into place in the closed position. CAUTION When returning the paper drawer to its original position, be careful not to get your fingers caught, as this may result in personal injury. IMPORTANT You will not be able to make copies or prints if you load paper that exceeds the loading limit, or if the paper drawer is not completely pushed into the machine.
-
Page 58: Replacing The Toner Cartridge
Replacing the Toner Cartridge When there is only a small amount of toner remaining inside the machine, the following message appears on the touch panel display. You may continue printing, but it is highly recommended that you purchase a new toner cartridge and use it as when needed. - Page 59 CAUTION • Keep toner out of the reach of small children. If toner is ingested, consult a physician immediately. • Take care not to allow toner to come into contact with your hands or clothing. If toner gets onto your hands or clothing, wash it off immediately with cold water. Washing it off with warm water will set the toner, and make it impossible to remove the toner stains.
- Page 60 While pushing down the release tab, pull the toner cartridge out in the direction of the arrow in the illustration on the right. Rock the new toner cartridge five or six times to distribute the toner evenly inside the toner cartridge. WARNING Do not throw used toner cartridges into open flames, as they may ignite the toner remaining inside the...
- Page 61 With the side with the label facing up, insert the new toner cartridge in the direction of the arrow while grasping its handle. Hold the toner cartridge with one hand, and remove the seal by pulling it out with the other hand.
- Page 62 Turn the toner cartridge in the direction of the arrow. IMPORTANT Turn the toner cartridge fully until it locks into place. Close the front cover. CAUTION When closing the front cover, be careful not to get your fingers caught, as this may result in personal injury.
-
Page 63: Chapter 3 Troubleshooting
Troubleshooting CHAPTER This chapter explains what to do in response to a paper jam and an error message display. Clearing Paper Jams............. .3-2 List of Error Messages . -
Page 64: Clearing Paper Jams
Clearing Paper Jams The screen indicating the location of the paper jam and instructions on how to clear the paper jam appears on the touch panel display. This screen repeatedly appears on the touch panel display until the paper jam is entirely cleared. The location of the paper jam is indicated, by a black circle. - Page 65 Inspect all paper jam locations indicated on the touch panel display, and remove any jammed paper. See the appropriate pages below for instructions on finding and removing jammed paper. Or, you can follow the instructions on the touch panel display. If jammed paper tears while it is being removed, be sure to remove any remaining pieces from inside the machine.
- Page 66 Duplex Unit (See “Duplex Unit (Duplex Unit-B1),” in the Reference Guide.) d Cassette Feeding Module-P1/Q1 (See “Paper Drawers 2, 3, and 4,” in the Reference Guide.) The Cassette Feeding Module-P1 cannot be attached to the iR2030/iR2025/iR2022i. e Finisher-U2 (See “Finisher-U2 (Optional),” in the Reference Guide.) Clearing Paper Jams...
- Page 67 After you have removed all of the jammed paper at the locations indicated on the touch panel display, restore all levers and covers to their original positions. Continue to follow the procedure and instructions displayed on the touch panel display. Once you have removed all of the jammed paper in locations other than the feeder, printing or copying resumes.
-
Page 68: List Of Error Messages
List of Error Messages List of Error Codes without Messages If a job or operation does not complete successfully, check the error code, and perform the necessary operations according to the error code displayed. You can check the error code on the Details screen under [Log] from the System Monitor screen. - Page 69 Turn the main power OFF, wait for three or more seconds, and turn the main power back ON. If the machine still does not work normally, turn the main power OFF, disconnect the machine, and contact your local authorized Canon dealer. # 816 Cause You cannot print because the set page limit total has been reached.
- Page 70 List of Error Messages...
-
Page 71: Chapter 4 Appendix
Appendix CHAPTER This chapter provides other useful information. Multifunctional Operations ............4-2 Available Paper Stock . -
Page 72: Multifunctional Operations
Multifunctional Operations The iR2030/iR2025/iR2022i/iR2018i offers the user many functions, such as printing, scanning, copying, and sending, which can be used together. The following tables provide you with the details of multifunctional operations. : Available : Unavailable : Available, but with conditions... -
Page 73: Available Paper Stock
Available Paper Stock The paper types that can be used with this machine are shown in the following table. Icons indicating the type of paper loaded in each paper drawer can be displayed on the paper selection screen if you store that information in the machine beforehand. (See “Identifying the Type of Paper in a Paper Source,”... - Page 74 - Paper Drawers: “Loading Paper,” in the Reference Guide - Stack Bypass: “Making Prints Using the Stack Bypass,” in the Reference Guide • Paper Drawers 2, 3, and 4 are optional for the iR2018i. Paper Drawers 3 and 4 are optional for the iR2030/iR2025/iR2022i. Available Paper Stock...
- Page 76 30-2, Shimomaruko 3-chome, P.O. Box 27616 Dubai Ohta-ku, Tokyo 146-8501, Japan United Arab Emirates Europe, Africa and Middle East Canon Europa N.V. email: info@canon-me.com P.O. Box 2262, 1180 EG Amstelveen, Netherlands Specifications subject to change without notice. © Canon Europa N.V. 2007...