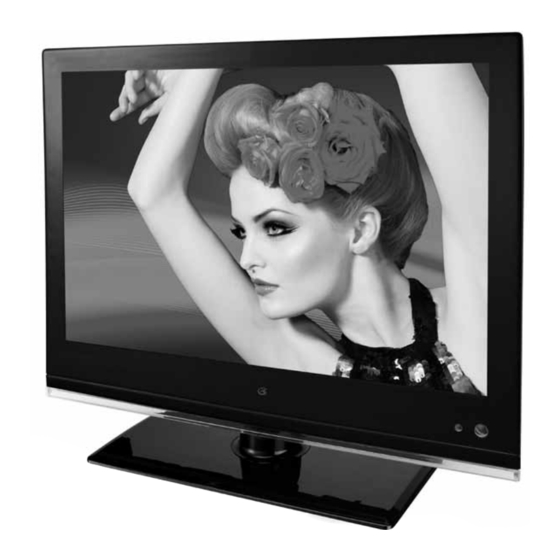
Summary of Contents for GPX TE1380
- Page 1 USER’S GUIDE V:1647-0816-10 TE1380 13” HDTV For the most up-to-date version of this User’s Guide, go to www.gpx.com...
-
Page 2: Warnings And Precautions
Warnings and Precautions • CAUTION: TO PREVENT ELECTRIC SHOCK, • WARNING: Lithium batteries, like all rechargeable MATCH WIDE BLADE OF PLUG TO WIDE SLOT, batteries are recyclable and should be recycled or FULLY INSERT. disposed of in normal household waste. Contact your local government for disposal or recycling practices in • WARNING: To reduce the risk of fire or electric shock, your area. -
Page 3: Important Safety Instructions
Important Safety Instructions Read these Instructions. FCC Warnings Keep these Instructions. WARNING: Changes or modifications to this unit not expressly approved by the party responsible for compliance could void the Heed all Warnings. user’s authority to operate the equipment. Follow all instructions. NOTE: This equipment has been tested and found to comply with the limits for a Class B digital device, pursuant to Part 15 of the FCC Do not use this apparatus near water. -
Page 4: 13" Hdtv
13” HDTV Features Included • 13.3” LED display • TE1380 • ATSC/NTSC tuner • Remote: requires 2, AAA size, batteries • Electronic program guide (included) • Aspect ratio: 16:9 widescreen • Detachable stand: requires 3 screws • Resolution: 1280 x 800 (included) •... -
Page 5: Table Of Contents
TAble oF ConTenTS Warnings and Precautions Important Safety Instructions • FCC Warnings • Additional Warnings 13” HDTV • Features • Included Introduction Setup • Power • Remote • TV Stand Television Setup • Connecting a TV Antenna • Connecting a Set-Top Box •... -
Page 6: Introduction
Introduction MenU Press to access the television menu. PoWeR VolUMe Press to power Press to adjust the the television off volume. or on. CHAnnel SoURCe Press to adjust the Press to adjust the television channel. television source. DC PoWeR InPUT USb PoRT Use for connecting a... - Page 7 PoWeR MUTe Press to power the television off or on. Press to mute the volume. nUMbeR KeYPAD SleeP Press repeatedly to set the sleep timer. PReV After the set time has expired the television In TV mode, press to switch to the previous will automatically power off.
-
Page 8: Setup
Setup Power DC power input: requires an AC/DC power adapter (included). Plug the included AC/DC power adapter into the DC PoWeR InPUT and a standard AC power outlet to power the television. Remote Requires 2, AAA size, batteries (included) TV Stand Requires TV stand and screws (included). -
Page 9: Television Setup
Television Setup Connecting a TV Antenna Connecting basic Cable Requires a TV antenna (not included). Requires a cable connection. 1. Connect a cable to the RF InPUT on the 1. Connect a VHF, UHF, or HDTV antenna to the RF InPUT on the television. television. -
Page 10: Television
Television Auto Scanning for Channels The Auto Channel Scan must be run before any channels can be viewed on the television. 1. Press the SoURCe button to switch to TV mode. 2. Press the MenU button to access the setup menu. 3. -
Page 11: Television
Television Setting the Clock Television Menu 1. Press the MenU button to access the setup Press the MenU button to access the TV menu. Press the eXIT button to exit the TV menu. menu. 2. Press the ARRoW () buttons to Picture highlight the SETUP icon. -
Page 12: Connecting Other Devices (Set-Top Box, Gaming Device, Dvd Player, Vcr, Or Pc)
Connecting Other Devices (Set-Top Box, Gaming Device, DVD Player, VCR, or PC) Connecting a Set-Top box Composite and RCA stereo • You will need: a set-top box, composite and RCA stereo cables or component and RCA stereo cables or an HDMI cable. (not included) •... -
Page 13: Connecting A Computer
Connecting a Computer vGA/PC INPUT • You will need: a PC with a VGA output, and a PC Audio Input VGA cable. (not included) • Connect the computer’s VGA output to the VGA/PC InPUT on the television. • Power the television on and press the SoURCe button to switch to the PC Mode. -
Page 14: Usb Port
USB thumb drive. 4. Press the eXIT button to return to the media menu. The USB port can also be used to upgrade the televisions firmware. For detailed instructions and the latest software, go to www.gpx.com... - Page 15 Customer Support: 1-888-999-4215...
-
Page 16: Company Information
Para transferir esta guía de usuario en inglés, español, o francés, visite la sección de la ayuda en www.gpx.com. Pour télécharger ce guide de l’utilisateur en anglais, espagnol, ou français, visitez la section de soutien chez www.gpx.com. Contact Information Phone: 1-888-999-4215 email: prodinfo@gpx.com Parts email: partsinfo@dpi-global.com Website: www.gpx.com...


