
Related Manuals for Olivetti PR2 plus


Summary of Contents for Olivetti PR2 plus
- Page 1 USER'S GUIDE GUIDA OPERATIVA PRINTER GUIDE D'UTILISATION PR2 plus BEDIENUNGSANLEITUNG GUIA OPERATIVA...
- Page 2 Publication issued by: Olivetti S.p.A. Via Jervis, 77 - 10015 Ivrea (Italy) Copyright © 2013 by Olivetti All rights reserved ENERGY STAR is a U.S. registered mark. The ENERGY STAR program is an energy reduction plan introduced by theUnited States Environmental Protection Agency in response to environmental issues and for the purpose of advancing the development and utilization of more energy efficient office equipment.
- Page 3 Table of contents Indice Table des matières Inhaltsverzeichnics Indice READY STATION1 LOCAL STATION2 EJECT BREAK EJECT plus...
- Page 4 CAUSING EQUIPMENT REGULATIONS ICES-003. CET APPAREIL NUMERIQUE DE LA CLASSE B EST CONFORME A LA NORME NMB-003 DU CANADA. For PR2 plus RFID version: This equipment is available with an optional RFID reader/writer. RFID version comply with EN 300 330, EN 301 489-1 V1.8.1 (2008-04) and EN 301 489-3 V1.4.1 (2002-08).
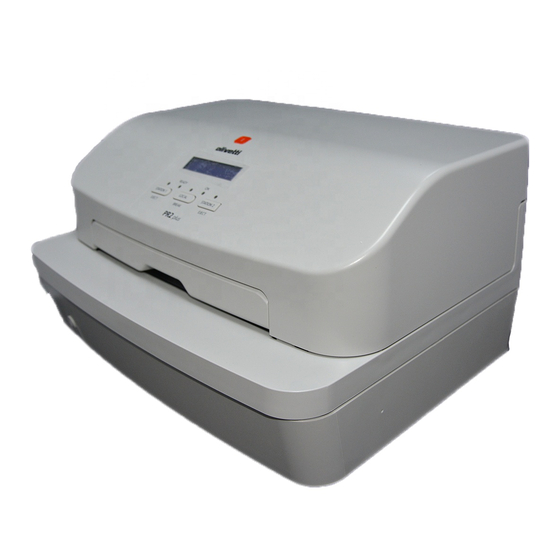
- Page 5 Package Contents Note: The display (option) located on the console is used to view useful information for the correct management of your printer. Contenuto dell’imballo Nota: Il display (opzionale) presente sulla console è utilizzato per visualizzare indicazioni utili alla corretta gestione della stampante.
- Page 6 Installation of ferrite core Position the USB cable (not included) inside the open ferrite core (not included) close to the printer connector, then close until clamped. Installazione nucleo di ferrite Posizionare il cavo USB (non incluso) all interno del nucleo di ferrite aperto ’...
- Page 11 READY STATION1 LOCAL STATION2 EJECT BREAK EJECT plus = off - spento - éteint - aus - apagado = lit - acceso - allumé - ein - encendido = flashing - lampeggiante - clignotant - blinkt - parpadeante Connecting the printer A - Connection to electrical power outlet B - Serial cable connection C - Parallel cable connection...
- Page 12 READY STATION1 LOCAL STATION2 EJECT BREAK EJECT plus Printing test Turn on the printer while holding the STATION 2 button down. Hold the button down for a few seconds. Insert a single sheet of paper (A4 format). The test character sequence will be printed. Warning: Do not touch the printhead when it is hot.
- Page 13 Loading a document Documents : NOT crumpled or torn. New passbooks : fold them along the binding so that they stay completely flat. Push the document and release it as soon as the automatic alignement is acti- vated. Do not hold the document back. Caricamento del documento Documenti : NON stropicciati o strappati.
- Page 14 READY STATION1 LOCAL STATION2 EJECT BREAK EJECT plus Reading the check's code line Align the check to the edge of the inlet and push it forward until it is gripped. Place the stripe face down. Lettura della code line dell'assegno Allineate l'assegno a destra e spingetelo in avanti.
- Page 15 READY STATION1 LOCAL STATION2 EJECT BREAK EJECT plus Replacing the ribbon cartridge Always use manufacturer-recommended ribbon cartridges. Sostituzione della cartuccia nastro Il buon funzionamento della stampante è assicurato dall’uso delle cartucce nastro originali. Remplacement de la cartouche ruban Pour un bon fonctionnement de l’impri- mante il est recommandé...
- Page 16 READY STATION1 STATION2 LOCAL EJECT BREAK EJECT plus Replacing the ribbon cartridge Remove the spent cartridge (steps 1-3). Sostituzione della cartuccia nastro Rimuovete la cartuccia esaurita (punti 1-3) Remplacement de la cartouche ruban Enlevez la cartouche épuisée (étapes 1 à 3). Auswechseln des Farbbandes Die verbrauchte Kassette herausnehmen (Punkte 1-3).
- Page 17 Replacing the ribbon cartridge Insert the new cartridge (steps 4-6). Sostituzione della cartuccia nastro Inserite la nuova cartuccia (punti 4-6) Remplacement de la cartouche ruban Mettez en place la nouvelle cartouche (étapes 4 à 6). Auswechseln des Farbbandes Die neue Kassette einsetzen (Punkte 4-6). Sustitución del cartucho de cinta Introduzca el nuevo cartucho (puntos 4-6).
- Page 18 Replacing the ribbon cartridge Latch ("click") the ribbon guide pushing it against the carriage and pulling it upwards (step 7). Tension the ribbon, remove the protective tab and lower the carriage assembly (steps 8-9). Sostituzione della cartuccia nastro Agganciate ("clac") il guidanastro spingendolo contro il carrello e tirandolo verso l'alto (punto 7).
- Page 19 READY STATION1 LOCAL STATION2 EJECT BREAK EJECT plus Indicator lights Indicatori luminosi Témoin lumineux Leuchtanzeigen Indicadores luminoso Printer powered on READY: Printer on-line/receiving a document or document present (*) LOCAL: Printer in the LOCAL mode (off-line) STATION 1: LED on: Awaiting document from operator 1 or printer assigned to operator 1 or document present (*) Flashing LED: Awaiting document from operator 1 or data present in the buffer (*) STATION 2: LED on: Awaiting document from operator 2 or printer assigned to operator 2 or document present (*)
- Page 20 READY STATION1 LOCAL STATION2 EJECT BREAK EJECT plus Buttons Tasti Touches Tasten Botones STATION 1: Reserves operator 1 or assigns the printer to operator 1 (*) STATION 2: Reserves operator 2 or assigns the printer to operator 2 (*) LOCAL/BREAK: Toggles the printer between on-line and off-line EJECT (ST.
- Page 21 READY STATION1 LOCAL STATION2 EJECT BREAK EJECT plus Paper jam: external To remove a document jammed in the front inlet, or in the rear slot, gently pull on the document, taking care not to tear Inceppamento carta: esterno Per rimuovere un documento inceppato nella bocchetta di introduzione anteriore, o nella feritoia posteriore, tirate il documento delicatamente,...
- Page 22 READY STATION1 LOCAL STATION2 EJECT BREAK EJECT plus Paper jam: internal (1) Open printer cover. Acting on the appropriate lever, open the inner top part of the machine.Remove jammed document by gently pulling it. If you cannot see the document, go to page 17. Inceppamento carta: interno (1) Aprite il coperchio della stampante.
- Page 23 READY STATION1 LOCAL STATION2 EJECT BREAK EJECT plus Paper jam: internal (2) Open the top cover and then lift the machine internal upper assebly, turn printer off and on while holding down the STATION 1 button.Wait for the beep and press STATION 1 (or ST ATION 2) to move the document forward (or backward), until it can be removed.