Table of Contents
Advertisement
Advertisement
Table of Contents

Related Manuals for Eton E10


Summary of Contents for Eton E10
- Page 1 AM/FM/Shortwave Radio OWNER’S MANUAL...
-
Page 3: Do You Need Help
OWNER’S MANUAL DO YOU NEED HELP? Thank you for purchasing the E10 AM/FM/Shortwave Radio. We want you to thoroughly enjoy the use of this product. To take advantage of its many excellent and unique features, we urge you to carefully read the owner’s manual. If you need help while learning its operation, please contact us, using the methods below. -
Page 4: Table Of Contents
TABLE OF CONTENTS DO YOU NEED HELP?... TABLE OF CONTENTS... MAJOR FEATURES OF THE ETÓN E10... DIAGRAMS... GETTING STARTED... WHAT THE E10 INCLUDES... INSTALLING BATTERIES... PREVENTING BATTERY ACID LEAKAGE... USING THE INCLUDED AC ADAPTER/CHARGER... CHARGING BATTERIES IN THE E10... BASIC RADIO OPERATIONS... -
Page 5: Major Features Of The Etón E10
OWNER’S MANUAL 3 MAJOR FEATURES OF THE ETÓN E10 • FM Frequency Range: 87 – 108 MHz (For America); 76 – 108 MHz (For Japan) • Shortwave Frequency Range: 1711 – 29999KHz • 9/10KHz step selector for Medium Wave (AM) reception •... -
Page 6: Diagrams
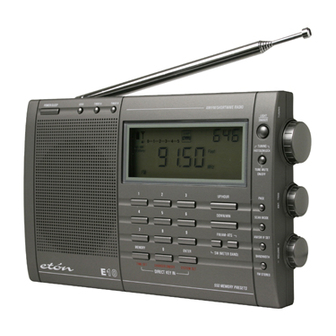
4 DIAGRAMS Memory & Edit/Time set Button Charger On/Off Button Enter/Sys. Set Button Hand Carry Belt FM/SW ANT. Socket ANT. Gain DX/Normal/Local Tone Control Earphone Socket DC 6V Socket Vertical Stand POWER/SLEEP Lock Button Timer A Button Timer B Button OWNER’S MANUAL LCD Display Light Snooze Button... - Page 7 4 DIAGRAMS continued RADIO OFF DISPLAY Triangle Pointer Battery Symbol Antenna Symbol Alarm AM/PM Indicator 1-5 Scale Alarm Activation Symbol Clock Digits Time AM/PM Indicator Ni-MH Battery Symbol MEMORY DISPLAY Refers only to the display’s upper right corner. Delete Indicator SYSTEM SET CODE DISPLAY RADIO ON DISPLAY Triangle Pointer...
-
Page 8: Getting Started
INSTALLING BATTERIES The battery compartment is located on the back of the E10. Its cover is on the lower right corner of the back. To remove the battery compartment cover, ap- ply thumb pressure and slide it towards the bottom of the radio. -
Page 9: Charging Batteries In The E10
The charging circuit 6 BASIC RADIO OPERATION TURNING THE E10 ON AND OFF The E10 can be turned on by the two methods shown below. To turn it off, press the POWER/SLEEP button (1). 1. BATTERY SAVER/TIMER METHOD: Perform a quick, short press of the POWER/SLEEP button (1). - Page 10 OUTSIDE OF NORTH AMERICA You can skip this section if you are in North America and just purchased the E10. It is already set-up in the factory for use in North America. Outside of North America, AM stations (MW in the E10’s display) are spaced in 9 KHz tuning steps.
- Page 11 When activated, pIF shows in the display. CANCELLING TUNE-MUTE The tune-mute cancellation capability makes the E10 ‘feel’ more like an analog tuned radio, even though it’s a high-tech digital tuner. The difference is somewhat subtle and is mainly noticeable in slow tuning mode using the tuning knob.
-
Page 12: Clock And Timer Features
SETTING THE TIMERS (use as wake-up alarm) The E10 has two, independently programmable timers, timer A and B, enabling the E10 to turn on and play the radio for 30 minutes and then turn off. The timers can be used as wake-up alarms. After setting a timer, store a radio station into timer memory and activate the timer. -
Page 13: Setting The Clock
To hear a radio station when the timer activates, the station must be stored into timer memory. Here’s the 3 step procedure: 1. Turn on the E10 and tune to the desired station. 2. Press/Release the MEMORY button. 3. Press/Release the TIMER A or TIMER B button. -
Page 14: Working With Memory
8 WORKING WITH MEMORY At the factory, the E10 is set up with 10 pages of memory, each page holding 50 frequencies. This enables storing of 500 frequencies into memory. This factory setting can be changed and tailored to your personal needs or can be left as-is. When first learning to store stations into memory, we suggest using the factory setting. -
Page 15: Deleting A Memory's Contents
6. Within 5 seconds press/release the MEMORY button. CUSTOMIZING MEMORY PAGES The E10 is configured at the factory with 10 memory pages, each page having 50 memories, for a total of 500 memories. You can change this set-up via the SYSTEM SET CODES, shown below. -
Page 16: System Set Codes
9 SYSTEM SET CODES System Set Codes allow the radio to be tailored to your needs by changing certain programmable functions. These functions and their descriptions are noted in the table. SYSTEM SET CODE TABLE CODE NUMBER 00 (factory default setting) 87 (factory default setting) FUNCTION Divide the memories into 10 pages with... -
Page 17: Changing The Clock From 24 To
MONITORING THE CURRENT STATUS OF SET CODES AND OTHER SETTINGS Performing a three second press of the SYSTEM SET button, with the E10 turned off, allows monitoring of key set codes and other settings. This information quickly flashes in the display in the following order. -
Page 18: Additional E10 Controls
(note that this will decrease battery life). Turn off the light with a quick short press of the button. The E10 has a ‘timed backlight’ feature. When this feature is activated, pressing any key during the hours of 6 pm to 7 am activates the backlight for 3 seconds. -
Page 19: Listening To Shortwave Stations
120, 90, 75, 60, 49, 31, 25, 22, 19, 16, 15, 13 and 11 meters and are commonly called ‘Meter Bands’. The E10 offers two ways to access a shortwave band. Each method places the tuner at the begin- ning of the band’s frequency range. -
Page 20: Shortwave Time Stations
11 LISTENING TO SHORTWAVE STATIONS continued BAND CHART OF SHORTWAVE AUTO-SCANING RANGES BAND FREQUENCY RANGE (METERS) 2250 – 2550 3150 - 3450 3850 - 4050 4700 - 5100 5800 – 6300 7100 – 7500 SHORTWAVE TIME STATIONS (North America) The United States and Canada have shortwave time stations. The time of day is broadcast continually in Universal Time, also know as UTC and Greenwich Mean Time. -
Page 21: Shortwave Publications: Finding
Since some radios show frequency in megahertz and some in kilohertz, both are shown here. The E10 shows shortwave radio frequencies in kilohertz, KHz. The following information can be used with any shortwave radio. - Page 22 12 UNDERSTANDING SHORTWAVE BANDS continued bands may vary somewhat from one radio model to another. This is perfectly OK. On some radios the bands are clearly marked, on others they are not marked at all. If it is not apparent how to get into a band on your radio, consult the owner’s manual, the Etón Corporation web site (www.etoncorp.com) or contact Etón Corporation and we’ll show you...
- Page 23 12 UNDERSTANDING SHORTWAAVE BANDS continued DAY BANDS AND NIGHT BANDS THE DIFFERENCE IS IMPORTANT Because shortwave signals depend on such factors as the sun, the ionosphere and interaction with the earth itself, signals cannot be heard on all bands throughout the day. Some bands are best during the daylight hours, and some are best at night.
-
Page 24: Troubleshooting
The solutions to this are to do 13 TROUBLESHOOTING RESET PROCEDURE The RESET button is on the bottom of the E10. When performing a reset, have good batteries in the radio or power it with an AC adaptor and turn it off. -
Page 25: Warranty Registration
14 WARRANTY REGISTRATION To ensure full warranty coverage or product updates, registration of your Etón or Grundig product should be complete as soon as possible after purchase or receipt. To register your radio, please select one of the follow- ing methods: 1. -
Page 26: Limited Warranty To The Original Customer
15 LIMITED WARRANTY TO THE ORIGINAL CUSTOMER This Etón or Grundig brand product, as supplied and distributed by Etón Corporation (Etón) is warranted by Etón against manufacturing defects in material and workmanship for the following limited warranty period: One (1) year parts and labor... -
Page 27: Service Information
16 SERVICE INFORMATION Service your Etón or Grundig product To obtain service for your Etón or Grundig product we recommend first contacting an Etón service repre- sentative at 800-872-2228 US, 800-637-1648 Canada or (650) 903-3866 for problem determination and trouble-shooting. Many of the common questions can be resolved quickly over the phone. - Page 28 OWNER’S MANUAL...
- Page 29 Etón Corporation Corporate Headquarters 1015 Corporation Way Palo Alto, California 94303 USA tel +1 650-903-3866 tel +1 800-872-2228 fax +1 650-903-3867 Etón Europe/Lextronix Germany Rosenstrasse 2 D-10178 Berlin, Germany tel +49 [0]30 243102142 Etón Canada 1 Yonge Street, Suite 1801 Toronto, Ontario M5E 1W7 Canada tel +1 416-214-6885 v.