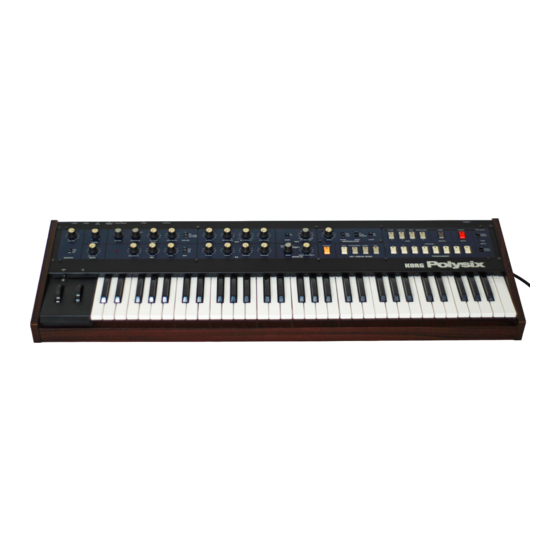
Korg POLYSIX Owner's Manual
Programmable polyphonic synthesizer
Hide thumbs
Also See for POLYSIX:
- Owner's manual (32 pages) ,
- Service manual (30 pages) ,
- Installation & setup manual (14 pages)
Table of Contents
Advertisement
Quick Links
KORG POLYSIX
PROGRAMMABLE POLYPHONIC SYNTHESIZER
Owner's Manual
Congratulations and thank you for purchasing the new Korg PS-6 "Polysix" Programmable Polyphonic
Synthesizer.
This versatile six-voice synthesizer offers the wide range of sounds and enormous ease of use that only a
programmable synthesizer can offer, at a revolutionary price.
Always be sure to use the correct AC line voltage. If line voltage is 90% or less of rated voltage, S/N ratio
and stability will suffer. If you have any reason to believe the AC voltage is too low, have It checked with a
voltmeter before you turn on the power supply switch.
Do not use any type of plug except for standard phone plugs (guitar type) in the KORG POLYSIX input and
output jacks.
Avoid using or storing your KORG POLYSIX in very hot, cold, or dusty places.
Important note
Because this unit employs a microprocessor, abnormal performance may occur if you switch the power on too
soon after turning it off. Should this occur, turn off the power, wait about ten seconds, then turn the power back on
again.
Handling precautions
1
Advertisement
Table of Contents

Related Manuals for Korg POLYSIX


Summary of Contents for Korg POLYSIX
- Page 1 If you have any reason to believe the AC voltage is too low, have It checked with a voltmeter before you turn on the power supply switch. Do not use any type of plug except for standard phone plugs (guitar type) in the KORG POLYSIX input and output jacks.
- Page 2 Features 32 programs stored in memory allow the user to create his own sounds for instantaneous recall at the push of a button. Full edit capabilities allow the user to make temporary changes to any program, and to move programs about in memory.
- Page 3 Connections Rear panel facilities 1) FROM TAPE TO TAPE For connection to a tape recorder. This interface lets you store unlimited sets of programs on tape. These can then be loaded back into the synthesizer’s programmer as needed even in the middle of a set. Connect FROM TAPE to the recorder’s output jack (line out, earphone, or headphone terminal).
-
Page 4: Features And Functions
The Voltage Controlled Oscillator (VCO) is the basic sound source for the synthesizer. There are 6 VCOs in the Polysix, one per voice. The VCO waveform you select has a large effect on the timbre or tone quality of a particular sound. - Page 5 3) PW/PWM This controls the pulse width of the PW waveform, and the modulation depth of the PWM waveform (see above). 4) PWM SPEED This controls the speed of the modulation effect in the PWM waveform (see above). It has no effect on the PW waveform.
- Page 6 Understanding how to use it is a key part of getting the most of your instrument. There are 6 VCFs in the Polysix, one for each voice. Each VCF is a 4 pole, 24dB/octave low pass filter with voltage controlled cutoff frequency, variable resonance, positive and negative EG modulation ("enveloping"), and...
-
Page 7: Kbd Track
"C" would sound bright and buzzy at the lowest "C", and muted or even non-existent at the highest "C". The Polysix also allows deliberate over- and under-tracking. This produces smooth and controlled tone quality changes as you move up and down the keyboard, for special effects, or to simulate instrument with changing timbres (e.g., many orchestral and keyboard instruments). - Page 8 The voltage controlled Amplifier (VCA) controls the amplitude (volume) of the sound. It is used to produce volume contours (volume changes over time) similar to the timbre or tone color changes produced by the VCF. There are 7 VCAs in the Polysix, one for each voice plus one overall VCA for the programmable attenuator. MODE...
-
Page 9: Sustain Level
0 when you release the key. There are six EGs in the Polysix, one per voice, so that each voice may be independently articulated. The VCF EG Depth control allows the amount of contouring (enveloping) to be continuously varied and either normal or inverted (reverse, negative) envelopes to be used. - Page 10 The Modulation Generator (MG) is used for cyclic or repetitive modulation effects like VCO frequency modulation (vibrato); VCF cutoff frequency modulation (waa-waa); and VCA amplitude modulation effects (tremolo). FREQUENCY DELAY LEVEL 1) FREQUENCY Determines the cyclic speed of the effect, as indicated by the LED next to the knob. As the knob is turned clockwise, the speed increases from a minimum of about 1 cycle every 30 seconds to a maximum of approximately 50 cycles per second.
- Page 11 EFFECTS This section applies chorus, phasing, or ensemble effects to the basic program. It is very helpful in creating fat sounds, rotary speaker effects, and textures that range from warm and realistic to shimmering and futuristic. All settings can be stored in program memory along with the other control settings. MODE SPEED/INTENSITY EFFECTS...
- Page 12 OUTPUT BEND 1) TUNE Adjusts pitch over a range of +/-50 cents (1/2 semitone). Use this knob when you want to tune the Polysix to match other instruments. 2) BEND Knob adjusts the range of pitch bends controlled by wheel to a maximum of +/-13 semitones.
- Page 13 1. You can latch a chord into the arpeggiator and then play a solo on another instrument against the background provided automatically by the Polysix. You can then change the arpeggio at any time by simply playing a new chord on the Polysix.
- Page 14 "scan" a keyboard of any size, and assign each key depression to one of several synthesizer "voices" (6 for the Polysix). This is called channel assigning, and the micro-computer that performs that task is called the Assigner. Since musicians do not normally play more than five to eight notes at the same time, this allows considerable economy because each note on the keyboard does not need a synthesizer voice permanently assigned to it.
-
Page 15: Chord Memory
2) CHORD MEMORY This mode allows you to "memorize" an interval or chord of up to 6 notes, and then produce parallel harmonies based on that interval or chord with monophonic ("one-finger") playing. It effectively eliminates the need for manual tuning oscillators to form intervals or chords, for greater user convenience. To enter an interval or chord into Chord Memory: 1. - Page 16 3) UNISON This mode provides monophonic lead and bass line capabilities, with all 6 voices assigned to one note. Individual voices are automatically detuned slightly to produce a thick, fat texture. For maximum flexibility, "Last Note Priority" is used and "Return to Previous Note" capabilities are provided. Last Note Priority causes the instrument to always sound the last note played, regardless of how many other keys are still depressed, or whether the new note is higher or lower than the previous note.
- Page 17 All sounds produced by the Polysix are determined by the combined settings of the controls and switches in the VCO, VCF, VCA, MG, EG, and EFFECTS sections. The act of setting up the controls for a specific sound is called programming, and the group of control settings that result in that sound is called a program.
-
Page 18: Write Enable
D button. Editing The Polysix also allows the user to alter any program either temporarily or permanently via a powerful and easy to use EDIT system. The user may: - Make any number of temporary changes to any program parameters or settings previously stored in memory, without changing the memory itself. - Page 19 6. To Make Temporary Changes to Programs: Move controls and switches as desired. Each change will be reflected in the sound heard. You can adjust and readjust control settings in an unlimited manner this way. 7. To Cancel Temporary Changes: Simply depress the lighted PROGRAM button.
-
Page 20: Tape Interface
TAPE INTERFACE 1) How to store program data on tape FROM TAPE TO TAPE HIGH HIGH MIC IN : LOW LINE IN : HIGH (AUX) MIC IN LINE IN (AUX) 1. Make connections as shown in the chart. Connect TO TAPE to the recorder’s input jack (mic, aux in or line in). Set rear panel switch to HIGH for line in or aux in;... - Page 21 2) Verification (VERIFY) FROM TAPE TO TAPE HIGH HIGH EARPHONE LINE OUT : LOW (AUX) HEAD PHONE OUT : HIGH EAR PHONE LINE OUT (AUX) 1. Make connections as shown in the chart. Connect tape recorder’s output (earphone, headphone or line out) to the FROM TAPE jack.
- Page 22 3) To load recorded data from tape into the programmer. FROM TAPE TO TAPE HIGH HIGH EARPHONE LINE OUT : LOW (AUX) HEAD PHONE OUT : HIGH EAR PHONE LINE OUT (AUX) 1. Make connections as shown in the chart (same as for verification). 2.
-
Page 23: Specifications
Specifications: KEYBOARD ............61 keys (C - C) VOICES ..............6 (Program and edit functions are possible for items marked *) VCO* ..............Octave Selector (16’, 8’, 4’) Waveform (Saw, PW, PWM) Pulse Width/PWM Sensitivity PWM Speed SUBOSCILLATOR* ..........OFF 1 oct Down 2 oct Down VCF* .............. - Page 24 KEIO ELECTRONIC LABORATORY CORP. 15-12, Shimotakaido 1-chome, Suginami-ku, Tokyo, Japan.