Roland V-Drums TD-30 Owner's Manual
Drum sound module
Hide thumbs
Also See for V-Drums TD-30:
- Quick manual (4 pages) ,
- Midi implementation manual (15 pages)
Table of Contents
Advertisement
Quick Links
Download this manual
See also:
Quick Manual
Advertisement
Chapters
Table of Contents

Related Manuals for Roland V-Drums TD-30


Summary of Contents for Roland V-Drums TD-30
-
Page 2: Important Safety Instructions
WARNING: To reduce the risk of fire or electric shock, do not expose this apparatus to rain or moisture. The lightning flash with arrowhead symbol, within an CAUTION equilateral triangle, is intended to alert the user to the RISK OF ELECTRIC SHOCK presence of uninsulated “dangerous voltage”... - Page 3 The manual should be saved and kept on hand as a convenient reference. Copyright © 2012 ROLAND CORPORATION All rights reserved. No part of this publication may be reproduced in any form without the written permission of ROLAND CORPORATION.
-
Page 4: Using The Unit Safely
Refer all servicing to your retailer, remove the power cord from the The unit should be connected the nearest Roland Service Center, or outlet, and request servicing by to a power supply only of the an authorized Roland distributor, as... - Page 5 Before using the unit in a foreign time. Any accumulation of dust country, consult with your retailer, between the power plug and the the nearest Roland Service Center, or power outlet can result in poor an authorized Roland distributor, as insulation and lead to fire.
-
Page 6: Important Notes
• A small amount of heat will radiate from • With the factory settings, the TD-30 will non-abrasive detergent. Afterwards, be the unit during normal operation. - Page 7 Damaged or dirty CD discs may not be either registered trademarks or trademarks read properly. Keep your discs clean using of Roland Corporation in the United States a commercially available CD cleaner. and/or other countries. • Company names and product names...
-
Page 8: Table Of Contents
Setting an instrument to the Default Values Turning the TD-30 On ......39 (DEFAULT) . - Page 9 Viewing Information About the Audio File ..88 Overall Settings for the TD-30 (SETUP) . . . . . . . . . . . . . . .114 Pattern Sequencer .
- Page 10 Installing the USB Driver ......140 Connecting the TD-30 to the Computer ... . 140 MIDI Settings .
-
Page 11: Overview
Overview... -
Page 12: Main Features
The TD-30 is the most advanced drum & percussion sound module in the world. Newly Developed V-Drums SuperNATURAL Sound Engine Roland takes digital drums to a new height with the implementation of its exclusive SuperNATURAL concept. The best electronic drums in the world just got better. - Page 13 How the drummer hears himself and how the drum sounds are heard within the music have been given priority, and by taking advantage of enhanced DSP power, a new ambience section has been created. On the front panel of the TD-30 there is a dedicated fader for the overall ambience balance.
- Page 14 Backup function All of the TD-30’s settings, including the 100 drum kits, can be backed up (saved) to a USB flash drive in a single operation (up to maximum of 99 backups). You can also save drum kits individually (up to maximum of 999 kits) (p. 108).
-
Page 15: Overview Of The Td-30
The pads and pedals on which you perform are called controllers. When a pad is struck it outputs a “trigger signal. ” That signal is input to a TRIGGER INPUT jack on the rear panel of the TD-30, and is received by the sound generator section. Sound generator section This section produces the sound. -
Page 16: About Memory
Non-Rewritable Memory User memory Preset memory The memory area in the TD-30 is rewritable. This is non-rewritable memory inside the TD-30. All settings are stored as soon as you edit them. You can copy preset memory data to user memory, and then edit it as desired. -
Page 17: Drum Kit
When you edit a drum kit, previous settings will be overwritten. If you want to restore a kit to its factory settings, copy the specific kit from the preset memory (p. 49), or execute the “factory reset” (p. 122) operation to return the TD-30 to its factory-settings. Instruments Each sound such as a snare drum or kick drum is called an “instrument. -
Page 18: Sequencer
The “multi-effect” lets you choose one of 21 different effects on a per-kit basis. Each sound has its own effect-send level. MASTER COMPRESSOR/MASTER EQ The compressor and equalizer can be used on a per-kit basis, or in a global way for the whole TD-30. (This means those settings will apply to all kits.) Sequencer A “sequencer”... -
Page 19: Various Performance Techniques
Overview of the TD-30 Various Performance Techniques Here we explain the techniques that you can use to play the pads, cymbals, and hi-hat that are connected to the TD-30. MEMO • Some pads do not support the performance techniques described below (such as detecting the strike location). For details on the techniques supported by each pad, refer to “Selecting the Pad Type (BANK)”... -
Page 20: Hi-Hat
Overview of the TD-30 Playing method Explanation Shallow rim shot Simultaneously strike the head near the rim and the rim itself. Hi-Hat Playing method Explanation The hi-hat tone changes smoothly and continuously from open to closed in response to how far the pedal is pressed. -
Page 21: Cymbal
Overview of the TD-30 Cymbal Playing method Explanation Nuance changes depending on the strike location This is the most common playing method, playing the Bow shot middle area of the cymbal. It corresponds to the sound of the “head-side” of the connected trigger input. -
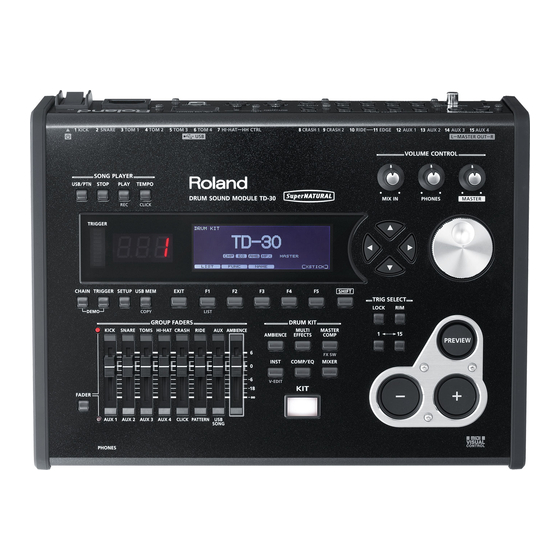
Page 22: Panel Descriptions
51 [TRIGGER] button For access to trigger parameters. p. 126 For access to functions that affect the TD-30 globally, such as MIDI parameters or [SETUP] button p. 114 Output Assign function etc. Performs operations related to USB memory, such as saving or loading data. - Page 23 Panel Descriptions Number Name Explanation Page GROUP FADERS These faders adjust the volume of the kick, snare, hi-hat, other percussion instru- Faders p. 28 ments, backing instrument sounds, click, and ambience. [FADER] button Selects the sources whose volume will be adjusted by the faders. p.
-
Page 24: Rear Panel (Connecting Your Equipment)
Panel Descriptions Rear Panel (Connecting Your Equipment) NOTE • To prevent malfunction and/or damage to speakers or other devices, always turn down the volume, and turn off the unit on all devices before making any connections. • When connection cables with resistors are used, the volume level of equipment connected to the inputs (MIX IN jack) may be low. -
Page 25: Midi Connectors
USB MEMORY port USB COMPUTER port You can connect a USB flash drive With a USB cable, you can connect the TD-30 to (separately sold) here (p. 85). You can your computer for recording MIDI information to play back audio files from it (p. 86), your software sequencer (DAW) (p. -
Page 26: Basic Operation
Saving your settings On the TD-30, values you edit are saved automatically by overwriting the previous value; there is no need to perform a specific operation to save the settings. Settings are also saved when you turn off the unit. -
Page 27: Choosing A Pad To Edit
Basic Operation Returning to the previous screen ([EXIT] button) Press the [EXIT] button to return to the previous screen, for example after you’ve edited a setting. Choosing a Pad to Edit About the upper right display screen indications In screens that allow you to edit specific settings for each pad, the upper right of the display will show the trigger number and name of the TRIGGER INPUT jack to which the selected pad is connected. -
Page 28: Using The Group Faders (Group Faders/[Fader] Button)
AMBIENCE AMBIENCE MEMO The GROUP FADERS temporarily adjust the overall balance of the TD-30. By using the mixer (p. 65) you can adjust the volume balance of the pads for each kit. Mixer settings are saved individually for each kit. -
Page 29: Assigning A Name
Basic Operation Assigning a Name On the TD-30 you can assign names to the following items. • Drum kits • Drum kit chains • Percussion sets • Patterns • Backups • Trigger banks The procedure is the same, regardless of what you’re naming. -
Page 30: About The Screens
About the Screens When you press the top panel buttons, a screen showing the corresponding functions or settings will appear. The explanations in this manual include illustrations that depict what should typically be shown by the display. Note, however, that your unit may incorporate a newer, enhanced version of the system (e.g., includes newer sounds), so what you actually see in the display may not always match what appears in the manual. - Page 31 About the Screens Button Screen Page EFFECTS SWITCH screen Here you can turn the effects on/off. [SHIFT] button p. 67 [MASTER COMP] button INST screen Here you can assign the instruments. [INST] button p. 54 INST EDIT screen Here you can edit the instruments. [SHIFT] button p.
- Page 32 About the Screens Button Screen Page Setup screen Here you can make settings that apply to the entire TD-30. [SETUP] button p. 114 USB memory screen Here you can perform operations related to USB memory. [USB MEM] button p. 108 Copy screen Here you can copy settings such as drum kits and instruments.
-
Page 33: Purpose-Oriented Index
You can also specify that only the ambience component will be output from the MASTER OUT jacks. The TD-30’s preset drum kits or drum kits backed up to a USB flash drive can be played without having to load them. This is called the “Kit selection” function. - Page 34 MEMO...
-
Page 35: Setup
Setup... -
Page 36: Mounting The Td-30 On The Stand
Attach the sound module mounting plate (included with the sold separately drum stand) to the TD-30 . * ONLY use the screws on the bottom panel of the TD-30. Other screws may damage the unit. Wide... -
Page 37: Connecting The Pads
When mounting a TD-30 on an MDS-25 or an MDS-12V drum stand, use the built-in connection cables. Set up example Connect the various pads to the TD-30’s TRIGGER INPUT jacks. The names of the corresponding TRIGGER INPUT jacks on the TD-30 are enclosed with a solid line in the illustration below. CONTROL TRIGGER... - Page 38 Connecting the Pads Check after making connections Kick setting In order to take full advantage of the TD-30’s potential, such as the kick sound’s response to playing dynamics, please adjust the following parameters before you perform. Parameter Explanation Page Adjusts the kick sensitivity.
-
Page 39: Turning The Td-30 On/Off
CAUTION With the factory settings, the TD-30 will automatically be switched off 4 hours after you stop playing or operating the unit. If you don’t want the unit to turn off automatically, change the “AUTO OFF” setting to “OFF” as described on p. 124. -
Page 40: Adjusting The Hi-Hat And Mesh Pads
The VH OFFSET ADJUSTMENT screen will appear. MEMO You can also adjust the offset by holding down the TD-30’s [KIT] button and pressing the [TRIGGER] button. Loosen the clutch screw of the top hi-hat and let it sit on the bottom hi-hat . -
Page 41: Adjusting Mesh Head Tension
Adjusting the Hi-Hat and Mesh Pads While reading the meter displayed on the right side of the TD-30’s screen, adjust the offset with the VH-11’s VH offset adjustment screw . Adjust the offset so that the appear in the meter. -
Page 42: Listening To The Demo Songs
The demo songs introduce the TD-30’s sounds and expressive capability. The drums on these songs were recorded from the TD-30 to a sequencer in realtime. * When playing back the demo song, turn the [MASTER] and [PHONES] knobs to the left (counterclockwise) to bring the volume level down. -
Page 43: Changing The Drum Kit Used
Use the cursor [ ] [ ] buttons, [–] [+] buttons, and dial to select a drum kit . Parameter Value Explanation TD-30 PRESET The TD-30’s preset drum kit TD-20X PRESET The TD-20X’s preset drum kit Memory USER A drum kit in user memory... - Page 44 MEMO...
-
Page 45: Performance
Performance... -
Page 46: Drum Kit
About the DRUM KIT screen select a drum kit . Press the [KIT] button to return to the DRUM KIT This screen is the TD-30’s main screen; it will appear screen . when you press the [KIT] button. Drum kit name... -
Page 47: Making Settings For Drum Kit (Func)
Press the [KIT] button to return to the DRUM KIT If the tempo of the individual drum kit is at a different screen . setting than the tempo of the overall TD-30, an “*” is shown before the tempo. Adjusting the Volume (VOLUME) You can adjust the drum kit’s volume... -
Page 48: Playing Brushes (Brush)
Drum Kit Naming a Drum Kit (NAME) Playing Brushes (BRUSH) In each kit, you can choose whether sticks or brushes will You can rename the currently selected kit; the maximum be used. is 12 characters. Press the [KIT] button . The DRUM KIT screen will appear. -
Page 49: Playing Cross Stick (Xstick)
[F1] (USER) button copy-destination is possible only if the copy-source is user memory. Copy from preset memory. You can choose from TD-30 or TD- [F2] (PRESET) button 20X preset data. Select this if you want to return to the factory-set settings. -
Page 50: Copying Fifty Drum Kits At A Time
Find the backup data that you want to copy, and copy it to your USB flash drive (p . 110) . Connect your USB flash drive to the TD-30’s USB MEMORY port (p . 85) . Hold down the [SHIFT] button and press the If you decide to cancel, press the [F1] (CANCEL) button. -
Page 51: Specifying The Order In Which Drum Kits Will Be
Chain number Steps “Drum kit chain” allows you to step through the drum kits of your choice and in the order you want. The TD-30 lets you create and store 16 different chains of up to 32 steps each. You can specify the order in which you’ll be using drum kits in your live performance;... -
Page 52: Naming A Drum Kit Chain (Name)
Drum Kit Switching drum kits Naming a Drum Kit Chain (NAME) Each chain’s name can use up to 12 characters. Use the [–] [+] buttons or the dial to recall the drum kits in the step order you specified . Select the drum kit chain you want to name in the DRUM KIT CHAIN screen . - Page 53 Drum Kit Press the [F2] (CHAIN) button . Copy-source Copy-destination Use the [F1]–[F3] buttons to select the copy- source . Button Explanation Copy from user memory. Exchanging the copy-source and [F1] (USER) button copy-destination is possible only if the copy-source is user memory. Copy from preset memory.
-
Page 54: Instrument
List (LIST) Selecting an Instrument Here you can select from the list of all available instruments. All the TD-30 sounds are referred to as “instruments (INST). ” Press the [INST] button . Press the [INST] button . Press the [F1] (LIST) button . -
Page 55: Choosing A Pad To Edit
Instrument Choose with the TRIG SELECT buttons The indication below the instrument name Press the [INST] button . The [INST] button will light, and the INST screen will appear. If you turn the [F5] (H&R) button off, the following information will be shown below the instrument Press the [1] or [15] button to select the pad (the name. -
Page 56: Editing An Instrument's Settings (Edit)
Instrument Editing an Instrument’s Editing Procedure Settings (EDIT) Press the [INST] button . Here’s how to edit the settings of an instrument. Press the [F2] (EDIT) button . The procedure will differ depending on the type of INST EDIT screen will appear. instrument. - Page 57 Instrument The edit screens for each pad SNARE (INST EDIT screen) KICK Parameter Value Explanation [F1] (SHELL) button WOOD, STEEL, Material Material of the shell BRASS Shell Depth 1.0"–20.0" Depth of the shell Parameter Value Explanation [F2] (HEAD) button [F1] (SHELL) button CLEAR, COATED, Head Type Type of head...
- Page 58 Instrument HI-HAT Parameter Value Explanation Parameter Value Explanation [F1] (SHELL) button [F1] (SIZE) button NORMAL, Size 1"–40" Hi-hat diameter Shell Depth Depth of the shell DEEP1–2 [F2] (ADD) button [F2] (HEAD) button Allows you to add CLEAR, COATED, OFF, TAMBOURINE, tambourine, cabasa, or Head Type Type of head...
- Page 59 Instrument Instruments for which V-EDIT is not CRASH, SPLASH, CHINA, STACKED CYMBAL, RIDE available Electronic instruments (Dynamic pitch bend) This function can be used with electronic instruments. The following settings will be available if you’ve selected certain instruments from the “SNARE ELEC, ” “KICK ELEC, ” or “TOM ELEC”...
-
Page 60: (Control)
Instrument * The performance of a pattern played back by the Using the Pads to Control the pad pattern function cannot be recorded into the sequencer. Pattern or Sound (CONTROL) Parameter Value Explanation Specifies whether the Lets you use a pad or pedal to play a pattern or modify PadPtn Pad Pattern function will the sound. -
Page 61: Using The Hi-Hat Pedal To Change An Instrument's Pitch (Pdlbend)
Instrument Using the Hi-Hat Pedal to Change Making MIDI Settings for Each Pad an Instrument’s Pitch (PDLBEND) (MIDI) Parameter Value Explanation MIDI settings for each pad Specifies the amount of pitch change produced by the hi-hat pedal. Pedal Bend Parameter Value Explanation -24–0–+24... -
Page 62: Setting An Instrument To The Default Values
Instrument When setting multiple pads to the same note Setting an instrument to the number Default Values (DEFAULT) When the note number is set to be more than one pad, the instrument assigned to the pad with the lowest trigger input number is played. When note numbers for Here’s how to set an instrument’s V-EDIT settings to their the head and rim are duplicated, the head instrument is default values. -
Page 63: Copying An Instrument
If you selected [F2] (PRESET) in step 3, specify whether You can copy an instrument from preset memory or from you’re copying from TD-30 or from TD-20X. a USB flash drive. If you selected [F3] (USB) in step 3, select the copy-source When copying an instrument, you can choose whether backup number. -
Page 64: Copying A Set Of Multiple Instruments
Instrument set . Instruments If you selected [F2] (PRESET) in step 3, specify whether you’re copying from TD-30 or from TD-20X. You can copy multiple instruments to another drum kit If you selected [F3] (USB) in step 3, select the copy-source in a single operation. -
Page 65: Mixer
Mixer For each drum kit, settings such as the volume and pan MEMO (stereo position) of each pad can be stored together. Pressing the [F5] (H & R) button in the [F1] (VOLUME), Settings such as volume and pan are made in the “mixer. ” [F2] (PAN), or [F3] (MIN VOL) setting screen, you can choose to set the head and rim simultaneously or individually. -
Page 66: Copying Mixer Settings
If you selected [F2] (PRESET) in step 4, specify whether The drum kit mixer’s VOLUME (volume of each pad) and you’re copying from TD-30 or from TD-20X. PAN (stereo position of each pad) settings can be copied If you selected [F3] (USB) in step 4, select the copy-source to another drum kit in a single operation. -
Page 67: Effects
Effects The TD-30 provides the following effects, and allows you Turning Effects On/Off to make detailed settings for each effect. Effect Explanation These switches allow you to turn the effects on/off within each drum kit. These are a compressor and... -
Page 68: Adjusting Volume Change And Tone (Pad Compressor/Pad Eq)
Effects Adjusting Volume Change and Adjusting the Volume Change (COMP) Tone (PAD COMPRESSOR/PAD EQ) A compressor adjusts the envelope (changes in the Here’s how to adjust the volume change (pad volume over time) and changes the character of the compressor) and tone (pad equalizer) for each pad. sound in response to playing dynamics. -
Page 69: Adjusting The Tone (Eq)
Effects About Threshold and Ratio Simulating the Acoustics As shown in the diagram below, these parameters of a Performing Location determine how the volume is to be compressed. 0.5:1 (AMBIENCE SECTION) Ratio 1.7:1 Here you can modify the actual acoustics of the space in which you’re playing the drums. -
Page 70: Editing The Ambience (Edit)
Effects Editing the Ambience (EDIT) Parameter Value Explanation TINY, SMALL, Room Size MEDIUM, LARGE, Size of the room Here’s how to edit the ambience settings. HUGE In the AMBIENCE SECTION screen, press the [F5] Room shape and Room Shape 0–100 reverberation length (EDIT) button . -
Page 71: Auditioning The Ambience Effect (Amb Only)
The [AMBIENCE] button will light, and the AMBIENCE and spaciousness to the sound or shifting the pitch. SECTION screen will appear. The TD-30 provides the following 21 types of effect. Press the [F1]–[F3] buttons to turn each effect on/off . -
Page 72: Auditioning The Multi-Effects (Mfx Only)
Effects Use the [–] [+] buttons or the dial to adjust the Auditioning the Multi-Effects setting . (MFX ONLY) Parameter Value Explanation [F2] (MFX) button In the MULTI EFFECTS screen, pressing the [F5] (MFX ONLY) button will cause the MASTER OUT jacks and Type Type of multi-effects (p. -
Page 73: Stereo Delay
Effects STEREO DELAY TAPE ECHO This is a stereo delay. Simulates a tape-type echo unit of the past. Parameter Value Explanation Parameter Value Explanation Rate OFF: Time specified as 0–127 Tape speed numerical value Intensity 0–127 Amount of echo repeat BPM Sync OFF, ON ON: Time specified as note... -
Page 74: Step Phaser
Effects STEP PHASER REVERB This is a stereo phaser. The phaser effect will be varied Adds reverberation to the direct sound, simulating an gradually. acoustic space. Parameter Value Explanation Parameter Value Explanation 4-STAGE, 8-STAGE, Number of stages in the Type of reverb Mode 12-STAGE phaser... -
Page 75: Long Reverb
Effects LONG REVERB SUPER FILTER This is a very rich sounding reverb with a choice of This is a filter with an extremely sharp slope. The cutoff Character. frequency can be varied cyclically. Parameter Value Explanation Parameter Value Explanation Time length of reverbera- Filter type Reverb Time 0–127... -
Page 76: Auto Wah
Effects AUTO WAH DISTORTION Cyclically controls a filter to create cyclic change in timbre. Intensely distorts the sound. The tone quality of the distorted sound is adjusted with a filter. Parameter Value Explanation Parameter Value Explanation Type of filter Frequency of the filter that LPF: The wah effect will BYPASS, cuts the low-frequency... -
Page 77: Ring Modulator
Effects RING MODULATOR PITCH SHIFT This is an effect that applies amplitude modulation (AM) Shifts the pitch of the original sound. This pitch shift can to the input signal, producing bell-like sounds. You can add two pitch shifted sounds to the original sound. also change the modulation frequency in response to changes in the volume of the sound sent into the effect. -
Page 78: Adjusting The Overall Sound (Master Compressor/Master Eq)
Effects Use the [–] [+] buttons or the dial to adjust the Adjusting the Overall Sound setting . (MASTER COMPRESSOR/ Parameter Value Explanation [F2] (M COMP) button MASTER EQ) Type of compressor * If you set Type, the mas- COMP 1, You can make settings for the stereo compressor/limiter ter comp parameters COMP 2,... -
Page 79: Copying Effect Settings
[F1] (USER) button copy-destination is possible only if the copy-source is user memory. Copy from preset memory. You can choose from TD-30 or TD- [F2] (PRESET) button 20X preset data. Select this if you want to return to the factory-set settings. - Page 80 Use the cursor buttons, [–] [+] buttons, and dial to specify the copy-source and copy-destination . If you selected [F2] (PRESET) in step 4, specify whether you’re copying from TD-30 or from TD-20X. If you selected [F3] (USB) in step 4, select the copy-source backup number.
-
Page 81: Tempo
Tempo Here you can make settings for the tempo and click. Setting the Tempo by Hitting a Pad (TAP) Specifying the Tempo You can set the tempo by hitting a pad or the [PREVIEW] button two or more times at quarter-note intervals of the Press the [TEMPO] button . -
Page 82: Viewing The Tempo As A Blinking Button
Tempo Sounding a Click Viewing the Tempo as a Blinking Button Press the [TEMPO] button . You can make the [TEMPO] button blink in time with the The [TEMPO] button will light, and the TEMPO screen will tempo. appear. Press the [TEMPO] button . Each time you press the [F5] button, the setting will alternate between sounding the click (ON) The [TEMPO] button will light, and the TEMPO screen will... - Page 83 Tempo MEMO Parameter Value Explanation To adjust the click level, move the GROUP FADERS [F1] (INST) button [CLICK] fader (p. 28). VOICE, CLICK, ELECTRONIC, Press the [EXIT] button to return to the TEMPO PULSE, BEEP, screen . METRONOME, CLAVES, WOOD BLOCK, STICKS, Inst CROSS STICK,...
-
Page 84: Synchronizing With An External Midi Device (Sync)
Synchronizing the TD-30 with the playback of The TEMPO SYNC screen will appear. an external MIDI sequencer In this case, the TD-30 will be the slave and the external MIDI sequencer will be the master. Connect the TD-30 to your external MIDI sequencer (p . -
Page 85: Song Player
USB flash drive or containing double-byte characters (such as Japanese) will not be displayed correctly. * The TD-30 can recognize up to 100 audio files. Keep the number of audio files saved on the USB flash drive to 100 or fewer. -
Page 86: Playing An Audio File
The USB SONG LIST screen will appear. You can also use a footswitch or pad to start playback (p. 117). Connect your USB flash drive to the TD-30’s USB memory port (p . 85) . Press the [USB/PTN] button . -
Page 87: Playback Settings (Func)
Song Player Playback Settings (FUNC) Changing the Playback Speed (SPEED) Here’s how you can determine the way in which audio files will play back, and how to adjust the playback volume. Here’s how to change the audio file playback speed. In the USB SONG screen (p . -
Page 88: Viewing Information About The Audio File
Song Player Viewing Information About the Audio File Here’s how to view information about the audio file. In the USB SONG screen (p . 86), press the [F2] (FUNC) button . The USB SONG INFO/FUNC screen will appear, showing information about the audio file. Name of the audio file Length of the audio file Press the [USB/PTN] to return to the USB SONG... -
Page 89: Pattern Sequencer
Pattern Sequencer The TD-30’s sequencer organizes music into six “parts. ” Basic Operation The Drum Kit part is used to record/play back what is played on the pads. Additionally, Melody Part, Bass Part, Backing 1 Part, and Backing 2 Part are the four backing instrument parts, and there is another Percussion part. -
Page 90: Choosing A Pattern
Pattern Sequencer Choosing a Pattern Selecting a Pattern from the List Here you can select patterns from a list of pattern names. Press the [USB/PTN] button . Pattern number, pattern name, beat, measure length, pattern playback type, and tempo are displayed. [USB/PTN] button will light. -
Page 91: Playing Back A Pattern
Pattern Sequencer Playing Back a Pattern Making Settings for Each Part (PART) * You can’t play back audio files while a pattern is playing back. If you want to change the settings for each part of a Select the pattern that you want to playback (p . pattern (mainly for a user pattern), access the PATTERN 90) . -
Page 92: Muting A Specific Part (Mute)
Pattern Sequencer Muting a Specific Part (MUTE) Specifying the Instruments for the Backing Parts (BACKING) You can mute specific parts in patterns. In the PATTERN PART screen (p . 91), press the [F1] Here’s how to select the instruments to be used by (MUTE) button . -
Page 93: Tuning Settings For The Backing Parts
About the Percussion Sets You can set this to 440.0 Hz by pressing the [F5] (440 Hz) button. The TD-30 features eight percussion sets. Press the [EXIT] button twice to return to the You can select which percussion set is to be used in each pattern in the PERCUSSION PART screen. -
Page 94: Percussion Set Settings
Pattern Sequencer Percussion set settings Press the [F1] (LIST) button . The PERCUSSION SET INST LIST screen will appear. In the PATTERN PART screen (p . 91), press the [F5] (EDIT) button . PERCUSSION SET EDIT screen will appear. Button Explanation Previous page of the list appears. - Page 95 Pattern Sequencer Naming a percussion set (NAME) Use the [F1]–[F3] buttons to select the copy- source . The percussion set can be named (up to 12 characters). Button Explanation In the PERCUSSION SET EDIT screen (p . 94), press the [F2] (NAME) button . Copy from user memory.
-
Page 96: Setting The Volume And Pan Of Each Part
Pattern Sequencer Setting the Volume and Pan of Applying Reverb/Chorus to the Each Part (MIXER) Backing Parts (REV/CHO) Set the volume and pan for each part. Set the amount of reverb and chorus for each backing part. MEMO In the PATTERN PART screen (p . 91), press the •... -
Page 97: Making Settings For A User Pattern (Func)
Pattern Sequencer Press the [F1] and/or [F5] buttons to turn the Making Settings for a User reverb/chorus ON or OFF . Pattern (FUNC) Button Explanation [F1] button Reverb on/off Set various settings for a user pattern. [F5] button Chorus on/off * If a preset pattern is selected, you won’t be able to change. -
Page 98: Specifying The Playback Type (Type)
Pattern Sequencer Specifying the Playback Type Parameter Value Explanation This is a “TAP” setting dedicated to (TYPE) the VISUAL CONTROL (p. 146). Play Type You will switch to the next image reach time you strike the pad or press In the PATTERN PART screen (p . 91), press the [F3] the [PLAY] button. -
Page 99: Recording A Pattern
Positional STANDBY screen will appear. Sensing. The TD-30 will enter record-standby mode, and the click * Please keep in mind that even though there are 100 will begin sounding. user patterns, the amount of memory available will be determined by how much data is recorded into TD-30. - Page 100 • If you set “Local Control” to “ON (PERC), ” you’ll be able to use the pads to record the percussion part. For more information, refer to”MIDI Channel Settings for the Entire TD-30 Play with pads or MIDI keyboards to record . (GLOBAL)” (p. 142).
-
Page 101: Checking The Tones And Phrases During Recording (Rehearsal)
Pattern Sequencer Editing a Pattern (EDIT) Checking the Tones and Phrases During Recording (Rehearsal) When you want to edit a pattern, for example by copying a pattern or joining two patterns, access the PATTERN The Rehearsal function temporarily suspends recording EDIT screen as follows. -
Page 102: Copying A Pattern (Copy)
Pattern Sequencer Use the cursor buttons and the [–] [+] buttons or Copying a Pattern (COPY) the dial to select the pattern, part, or measures that you want to copy . Copy the pattern as is to the user patterns. Copy-source part Measures to be copied (First Measure–Last Measure) -
Page 103: Connecting Two Patterns (Append)
Pattern Sequencer Connecting Two Patterns Erasing a Pattern (ERASE) (APPEND) This erases the pattern. Performance data is erased, while beat, measure length, and other settings are left intact. This connects two patterns to create one pattern. The pattern specified as “Dst” will be first, and the pattern specified as “Src”... -
Page 104: Deleting A Pattern (Delete)
Pattern Sequencer Press the [F5] (ERASE) button . In the PATTERN EDIT screen (p . 101), press the [F4] (DELETE) button . A confirmation message will appear. The PATTERN DELETE screen will appear. If you decide to cancel, press the [F1] (CANCEL) button. When you want to delete selected measures, Press the [F5] (EXECUTE) button . -
Page 105: Saving A Pattern (Usb Mem)
Press the [F1] (SAVE) button . The PATTERN SAVE screen will appear. MEMO • When you make a backup of the entire TD-30 on your USB flash drive (p. 109), the 100 user patterns are saved together. User patterns cannot be saved individually. -
Page 106: Loading A Pattern From A Usb Flash Drive
You can delete the unneeded pattern from a USB flash the TD-30. drive. Connect your USB flash drive to the TD-30’s USB Connect your USB flash drive to the TD-30’s USB MEMORY port (p . 85) . MEMORY port (p . 85) . -
Page 107: Settings
Settings... -
Page 108: Backing Up The Settings
Backing Up the Settings The settings and kits in TD-30’s user memory can be saved (backed up) to a USB flash drive, or loaded back Backup file names into the TD-30. * Carefully insert the USB flash drives all the way in—... -
Page 109: Backing Up All Data To A Usb Flash Drive (Save)
(p. 16) to your USB flash drive (up to 99 sets). The USB SAVE NAME screen will appear. Connect your USB flash drive to the TD-30’s USB MEMORY port (p . 85) . Press the [USB MEM] button . -
Page 110: Loading Backup Data From A Usb Flash Drive
Here’s how to load backup data from a USB flash drive into the TD-30. Kit data can be imported from TD-20, TD-20X, or TDW-20 Connect your USB flash drive to the TD-30’s USB backup data. MEMORY port (p . 85) . -
Page 111: Deleting Backup Data From A Usb Flash Drive
TD-20X or TDW-20 backup data will [F2] (TD-20X) button be imported. Connect your USB flash drive to the TD-30’s USB MEMORY port (p . 85) . (Example: When [F1] (TD-20X) is selected) Press the [USB MEM] button . -
Page 112: Backing Up A Drum Kit To A Usb Flash Drive (Kitsave)
Here’s how kit data saved on a USB flash drive can be drive (up to 999 kits). loaded into the TD-30. Connect your USB flash drive to the TD-30’s USB Connect your USB flash drive to the TD-30’s USB MEMORY port (p . 85) . -
Page 113: Checking The State Of A Usb Flash Drive (Info)
Here’s how to initialize (format) a USB flash drive. flash drive, such as the number of items. NOTE Connect your USB flash drive to the TD-30’s USB When you execute this operation, all data saved on MEMORY port (p . 85) . -
Page 114: Overall Settings For The Td-30 (Setup)
Overall Settings for the TD-30 (SETUP) SETUP B screen “Setup” refers to the settings that apply in common to the entire TD-30, such as output destination settings and footswitch assignments. To make setup settings, access the SETUP screen as follows. -
Page 115: Output Assignments (Output)
Overall Settings for the TD-30 (SETUP) Output Assignments (OUTPUT) [F5] (DEFAULT) button Pressing this button will return all displayed output assign- ments to their default settings (p. 116). You can choose how the outputs will function from the MASTER OUT jacks and DIRECT OUT jacks. -
Page 116: Output Destination Setting Examples
Overall Settings for the TD-30 (SETUP) Sending Ambience and/or MFX Output Destination Setting separately Examples This chart shows how you can use the MASTER OUT jacks Here are some examples of output destination settings. to output the Ambience and/or MFX (multi-effects). -
Page 117: Assigning A Function To A Footswitch Or Pad
Overall Settings for the TD-30 (SETUP) In the SETUP A screen (p . 114), press the [F2] Assigning a Function to a (CONTROL) button . Footswitch or Pad (CONTROL) Press the [F1] (FOOT SW) button . The FOOT SWITCH screen will appear. -
Page 118: Assigning A Function To A Pad (Pad Sw)
Overall Settings for the TD-30 (SETUP) Assigning a Function to a Pad Function Display Explanation Specify the functions assigned to SW1 (PAD SW) and SW2. For USER, you can select the following functions in addition to those listed for A pad connected to a TRIGGER INPUT 14/AUX 3 or 15/ each Function. - Page 119 Overall Settings for the TD-30 (SETUP) Function Explanation Function Explanation 3 OFF − Specify the functions assigned to AUX3 and AUX4. USB SONG Play/stop the audio USB SONG Head For USER, you can select the following functions file. PLAY1 in addition to those listed for each Function.
-
Page 120: Other Settings (Option)
Overall Settings for the TD-30 (SETUP) Making the Master Comp/EQ Settings Other Settings (OPTION) Identical for All Kits (COMP/EQ) Here you can make settings for the preview button, the master compressor/equalizer, MIX IN jack, and the You can specify which is used for the master comp/EQ display. -
Page 121: Using The Mix In Jacks As Two Monaural Inputs (Mix In)
The MIX IN jack can handle mono or stereo signal. The display contrast is strongly influenced by the location of the TD-30 and the lighting of the room it’s in. If it occurs that the audio signal going to the MIX IN jack Adjust this parameter when needed. -
Page 122: Restoring The Factory Settings (F Reset)
(Factory reset). NOTE When you execute this operation, all data and settings in the TD-30 will be lost. Before you proceed, you should save any important data and settings to your USB flash drive (p. 108). In the SETUP A screen (p . 114), press the [F4] (F RESET) button . -
Page 123: Playing A Kit From The Usb Flash Drive Without Loading It (Kit Selection) (Kit Sel)
(Kit Selection) (KIT SEL) Copying the Drum Kit Chosen in A TD-30 or TD-20X preset drum kit or any kit saved Kit Selection on a USB flash drive can be played without loading it. This function is called “Kit selection. ” It’s an easy way to “audition”... -
Page 124: Digital Audio Level (Gain)
The TD-30 has an “Auto off” function that automatically OUT jack volume. turns the TD-30 off if 4 hours have elapsed without any pad being played or any operation performed. In the SETUP B screen (p . 114), press the [F2] (GAIN) To cancel this function, proceed as follows to set the auto button . -
Page 125: Viewing The Remaining Memory And The Program
Overall Settings for the TD-30 (SETUP) Viewing the Remaining Memory and the Program Version (INFO) Here’s how to check the remaining amount of internal memory, or verify the program version. In the SETUP C screen (p . 114), press the [F4] (INFO) button . -
Page 126: Trigger Settings
To ensure that the signals from the pads can be KD-140 KD140 – – – – processed appropriately by the TD-30, you must specify KD-120 KD120 – – – – the type of pad you’re using (the trigger type) for each... -
Page 127: Corresponding Chart
Trigger Settings Pad Sensitivity Settings (SENS) MEMO When you select the trigger type, the trigger parameters (except the crosstalk cancel parameters) When you set the Trigger Type (p. 126), the following settings are automatically set to the most efficient values for (basic trigger parameters) are automatically changed to each pad. -
Page 128: (Rim Gain)
Trigger Settings Hi-Hat Settings (HI-HAT) Adjusting the Rim/Edge Dynamic Response (Rim Gain) Press the [TRIGGER] button . You can adjust the relation between your playing The [TRIGGER] button will light. velocity (force) on the rim/edge and the resulting volume level. Press the [F3] (HI-HAT) button . -
Page 129: Settings For The Vh-11
Press the [F5] (EXECUTE) button . foot from the pedal, and while keeping your foot The [TRIGGER] button flashes, and the offset parameter is off the pedal, turn on the TD-30 . set automatically. When finished, the [TRIGGER] button stops flashing and Loosen the clutch screw and let the hi-hat rest remains lit, and the TRIGGER HI-HAT screen appears. -
Page 130: Settings For The Fd-8
Trigger Settings While reading the meter displayed on the right Viewing Trigger Information side of the TD-30’s screen, adjust the offset with the VH-11’s offset adjustment screw . for Each Pad (MONITOR) Offset adjustment screw You can view realtime information that shows the force... -
Page 131: Eliminate Crosstalk Between Pads (Crosstalk Cancellation) (Xtalk)
Crosstalk cancellation settings * When the TD-30 is shipped from the factory, it is set for optimal operation with the separately sold drum stand (MDS-25 or MDS-12V), so you will not normally need to change the settings. -
Page 132: Advanced Trigger Parameters (Advance)
Trigger Settings Press the [F5] (SET) button . Advanced Trigger Parameters The value is automatically set to “32, ” which is the minimum value that can cancel triggering for crash 1. (ADVANCE) Value Explanation The following parameters are automatically set to the 0–80 Strength of crosstalk cancellation most efficient values for each pad when you select the... -
Page 133: Making Advanced Settings For A Pad (Thre)
Trigger Settings Specifying How Volume Responds to Making Advanced Settings for a Velocity (Curve) Pad (THRE) Adjust this curve until the response feels as natural as possible. Value Explanation The standard setting. This produces the most natural correspondence between playing dynamics and volume change. -
Page 134: Making Advanced Settings For Rim Shots (Rim)
Trigger Settings Cross stick threshold (XStick Threshold) Making Advanced Settings for Rim Shots (RIM) When using a V-pad such as the PD-128, you can adjust the force at which you’ll switch between the cross stick sound and the open rim shot sound. Value Explanation Setting this to a higher value makes it easier... - Page 135 Trigger Settings Trigger signal detection time Detecting trigger signal attenuation (Scan Time) (Retrigger Cancel) Since the rise time of the trigger signal waveform may Important if you are using acoustic drum triggers. Such differ slightly depending on the characteristics of each triggers can produce altered waveforms, which may also pad or acoustic drum trigger (drum pickup), you may cause inadvertent sounding at Point A in the following...
-
Page 136: Making Advanced Settings For Strike Position
Playing bow, bell, and edge (3Way Trigger) Enable/disable separate triggering of bow/bell/ 3Way Trigger OFF, ON edge strikes on the ride Playing method TD-30 trigger input cymbal Bow shot 10 RIDE (head) Bell shot 10 RIDE (rim) Edge shot 11 EDGE (rim) -
Page 137: Copying A Trigger Bank
Trigger Settings Use the cursor buttons, [–] [+] buttons, and dial Copying a Trigger Bank to specify the copy-source and copy-destination . If you selected [F3] (USB) in step 4, select the copy-source You can copy a trigger bank from preset memory or from backup number. - Page 138 MEMO...
-
Page 139: Expansion
Expansion... -
Page 140: Connecting To Your Computer Via Usb
Connecting to your Computer via USB If you connect a commercially available USB cable from Connecting the TD-30 to the the TD-30’s rear panel USB COMPUTER port to a USB port on your computer, you’ll be able to do the following Computer things. -
Page 141: Midi Settings
About MIDI Connectors The MIDI CHANNEL screen will appear. The TD-30 is equipped with the following two types of MIDI connectors, each of which has the following role. Use the cursor [ ] [ ] buttons to select the part you wish to set . -
Page 142: Midi Channel Settings For The Entire Td-30 (Global)
MIDI thru: on Using the TD-30 as a USB MIDI Interface (Soft Thru) MIDI IN MIDI OUT If the TD-30 is connected to your computer, the MIDI MIDI OUT MIDI IN device connected to the TD-30’s MIDI connectors can send TD-30 and receive performance data to and from the computer. -
Page 143: Setting The Device Id
The setting described here is necessary only when you parameter . wish to transmit separate data to two or more TD-30 units at the same time. Do not change this setting in any Use the [–] [+] buttons or the dial to make other case. -
Page 144: Specifying The Drum Kits Recalled By Program
The drum kits/percussion sets will switch when a Program Change message is received from an external MIDI device. When you switch TD-30’s drum kits/percussion sets, the Program Change number set here is transmitted. Press the [KIT] button to return to the DRUM KIT... -
Page 145: Appendices
Appendices... -
Page 146: Visual Control
Visual Control Controlling Images from the Turning VISUAL CONTROL On/Off TD-30 (VISUAL CONTROL) In the SETUP C screen (p . 114), press the [F2] (V . CTRL) button . Visual Control is a function that lets you control images The VISUAL CONTROL screen will appear. - Page 147 Making VISUAL CONTROL Settings control images In the SETUP C screen (p . 114), press the When playing pads to trigger patterns on the TD-30 (Pad [F2] (V . CTRL) button . pattern function, p. 60), note number messages in the The VISUAL CONTROL screen will appear.
-
Page 148: Troubleshooting
Check the connections. p. 141 A MIDI cable may be broken. Try using a different cable. – Set the MIDI channels of the TD-30 and external MIDI Is the MIDI channel set correctly? p. 141 device to the same setting No sound When a note number that is not assigned to any pad is received, the TD-30 produces no sound. -
Page 149: Error Message List
Error Message List This section lists the messages (error messages) that the TD-30 produces and explains the meaning of each message, giving you the appropriate action to take When an indication of “ACCEPT” is shown above the [F5] button as in the figure, pressing that button will close the message window. -
Page 150: Note Number (Factory Settings)
Note Number (Factory Settings) Drum kit 1–100 Note number Trigger input (7) Closed HH Rim (for BrushSweep) (p. 61) – (11) Ride-Edge (7) Open HH Rim (12) AUX1 (12) AUX1 Rim (13) AUX2 (13) AUX2 Rim (14) AUX3 (14) AUX3 Rim (15) AUX4 (15) AUX4 Rim (1) Kick Rim... -
Page 151: Main Specifications
Personal Drum Monitors (PM-30, PM-10) USB Flash Memory * Use USB Flash Memory sold by Roland. We cannot guarantee operation if other products are used. 962a In the interest of product improvement, the specifications and/or appearance of this unit are subject to change without... -
Page 152: Block Diagram
Block Diagram Drums INST COMP/ MIXER MIXER MIXER AMBIENCE AMBIENCE /VOLUME /KIT VOL /PAN /OH MIC /ROOM Head INST COMP/EQ Volume KICK 1 KICK COMP/EQ Volume INST Head INST COMP/EQ Volume OH Send ROOM Send SNARE 2 SNARE INST COMP/EQ Volume Head 3 TOM1... - Page 153 Block Diagram AMBIENCE MULTI /REVERB EFFECTS SETUP REV Send MFX Send /OUTPUT /MASTER MASTER MFX Send COMP/EQ COMP SETUP /OUTPUT /DIRECT COMP MULTI EFFECTS (MFX) SETUP/GAIN DIGITAL Output Gain SETUP L/MONO /OUTPUT /OTHER MASTER FADER MASTER AMBIENCE DIRECT 1 DIRECT 2 DIRECT 3 DIRECT 4 CHO Send...
-
Page 154: Index
Index Trigger bank ..... . . 137 Gate time ....... 62 Symbols Copy screen . - Page 155 MIDI ....... 100 Turning the TD-30 On/Off ....39 Pattern .
- Page 156 MEMO...
- Page 158 For EU Countries For China...
- Page 159 For the USA DECLARATION OF CONFORMITY Compliance Information Statement Model Name : TD-30 Type of Equipment : Drum Sound Module Responsible Party : Roland Corporation U.S. Address : 5100 S. Eastern Avenue Los Angeles, CA 90040-2938 Telephone : (323) 890-3700...