Kyocera Kona User Manual
Hide thumbs
Also See for Kona:
- User manual (108 pages) ,
- Get started (25 pages) ,
- Getting started (12 pages)
Table of Contents
Advertisement
Quick Links
Download this manual
See also:
User Manual
Advertisement
Table of Contents

Related Manuals for Kyocera Kona


Summary of Contents for Kyocera Kona
-
Page 1: User Guide
KYOCERA Kona User Guide ©2013 Kyocera Corporation. All Rights Reserved. Public Mobile, Everybody Talk and the Public Mobile logo are trade-marks of Public Mobile Inc. Other marks are the property of their respective owners. KYOCERA is a registered trademark of Kyocera Corporation. -
Page 2: Table Of Contents
Table of Contents Get Started ..........................1 Your Phone at a Glance ......................1 Set Up Your Phone......................... 2 Set Up Voicemail ........................3 Customer Support ........................4 Phone Basics ..........................5 Your Phone’s Layout ......................6 Turn Your Phone On and Off ....................8 Battery and Charger ....................... - Page 3 Set Up Voicemail .......................21 Voicemail Notification ......................22 New Voicemail Message Alerts ..................22 Retrieve Your Voicemail Messages..................22 Phone Call Options........................23 Caller ID ..........................23 Call Waiting ........................23 3-Way Calling ........................24 Call Forwarding ........................24 Call Setup Options.........................25 Call Answer Mode ......................25 Auto-Answer Mode ......................25 Auto Redial Mode ......................25 DTMF Tones ........................26 Voice Privacy ........................26...
- Page 4 Change the Font Size ......................32 Sounds Settings ........................32 Adjust the Phone’s Volume Settings ..................33 Silence All ..........................33 Ringer Settings ........................33 Alerts Settings ........................34 Phone Setup Options ......................34 TTY Mode ..........................35 Hearing Aid Device Compatibility ..................36 Airplane Mode ........................36 Headset Mode ........................36 Select a Vibration Pattern ....................37 Location Services .......................37 Navigation Key Shortcuts ....................37...
- Page 5 View Contacts Entry ......................47 The Contacts List .......................47 Contacts Details .........................47 View Recent Calls From Contacts ..................48 Create a New Contacts Entry ....................48 Create a Contacts Entry .....................48 Create a Group Entry ......................48 Save a Number Using the Phone Keypad ................49 Edit a Contacts Entry ......................49 Edit a Contacts Entry ......................49 Delete a Contacts Entry .....................50...
- Page 6 Delete Events ........................63 Tools ............................65 Alarm .............................65 Voice Services ........................66 Automatic Speech Recognition (ASR) ................66 Manage Voice Memos .......................69 Calculator ..........................71 World Clock ...........................71 Countdown Timer ........................72 Stopwatch ..........................72 Bluetooth ...........................73 Turn Bluetooth On and Off .....................73 Make Your Phone Discoverable ....................73 Bluetooth Menu ........................74 Pair Bluetooth Devices ......................74 View the Trusted Devices List ....................75...
- Page 7 Assign Your Pictures ......................84 Delete Your Pictures ......................84 Downloaded Files ........................85 View Downloaded Files ......................85 Erase Downloaded Files ....................85 Preloaded Files ........................85 Web and Data ...........................87 Data Services ........................87 Launch a Web Connection ....................87 Data Connection Status and Indicators ................87 Browser ..........................88 Learn to Navigate the Web ....................88 Browser Menu ........................89...
-
Page 8: Get Started
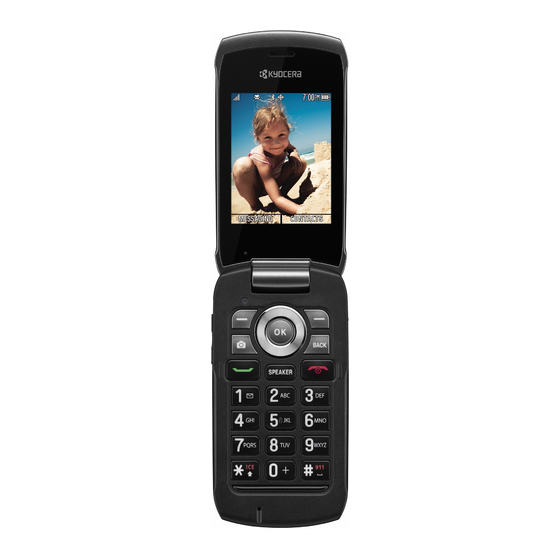
Get Started This section gives you all the information you need to set up your phone and use your service the first time. Your Phone at a Glance Set Up Your Phone Set Up Voicemail Customer Support Your Phone at a Glance The following illustration outlines your phone’s primary external features. -
Page 9: Set Up Your Phone
Set Up Your Phone You must first install and charge the battery to begin setting up your phone. 1. Install the battery. Hook your fingernail into the slot at the bottom of the battery cover and lift the cover off gently (Figure ... -
Page 10: Set Up Voicemail
Replace the cover, making sure all the locking tabs of the cover are seated with no gaps (Figure 2. Charge your battery. Plug the USB connector into the charger/accessory jack on the lower left side of your phone. ... -
Page 11: Customer Support
For more information about using your voicemail, see Voicemail. Customer Support Please contact Public Mobile through one of the options below: ● Use our Support page on PublicMobile.ca which has answers to a range of questions. ● Contact us by email at support@publicmobile.ca. We’ll get back to you within 72 hours. ●... -
Page 12: Phone Basics
Phone Basics Your phone is packed with features that simplify your life and expand your ability to stay connected to the people and information that are important to you. The topics in this section will introduce the basic functions and features of your phone. Your Phone’s Layout Turn Your Phone On and Off Battery and Charger... -
Page 13: Your Phone's Layout
Your Phone’s Layout The illustrations and descriptions below outline your phone’s basic layout. Phone Basics... - Page 14 Key Functions ● Earpiece lets you hear the caller and automated prompts. ● Main Screen displays all the information needed to operate your phone, such as the call status, the Contacts list, the date and time, and the signal and battery strength. ●...
-
Page 15: Turn Your Phone On And Off
Warning: Use only Kyocera-approved batteries and chargers with your phone. The failure to use a Kyocera-approved battery and charger may increase the risk that your phone will overheat, catch fire, or explode, resulting in serious bodily injury, death, or property damage. -
Page 16: View The Display Screen
Tip: Watch your phone’s battery level indicator and charge the battery before it runs out of power. Install the Battery ► See Set Up Your Phone. Remove the Battery 1. Make sure the power is off so that you don’t lose any stored numbers or messages. 2. - Page 17 Location On - Your phone’s location feature is on and available for location-based services such as GPS Navigation. Location Off - Your phone’s location feature is off. Your location is available only for 911. Silence All - Your phone’s sound is turned off. Vibrate All - Your phone’s sound is turned off but vibrate is turned Ringer Off - Your phone’s ringer is turned off.
-
Page 18: Navigate Through The Menus
Calendar - You have event notifications. HAC Enabled - Your phone’s HAC (hearing aid compatibility) setting is enabled. Airplane Mode - Your phone is in Airplane mode. Navigate Through the Menus The navigation key on your phone lets you scroll through onscreen items. To navigate through a menu, press the navigation key up or down. -
Page 19: Enter Text
Enter Text You can type on your phone using various input modes. Select a Text Input Mode T9 Text Input Abc Mode Set Text Entry Options Select a Text Input Mode Your phone provides convenient ways to enter letters, numbers, and symbols whenever you are prompted to enter text. -
Page 20: T9 Text Input
T9 Text Input T9 Text Input lets you enter text by pressing keys just once per letter. To select the T9 Word mode when entering text, see Select a Text Input Mode. T9 Text Input uses an intuitive word database to analyze the letters you enter and create a suitable word. -
Page 21: Set Text Entry Options
Set Text Entry Options The text entry options menu allows you to specify a suitable feature during the text entry process. Note that some of the options are applicable to T9Word mode only. 1. When entering text, press OPTIONS (right softkey) > Text Options. –... -
Page 22: Phone Calls & Settings
Phone Calls & Settings With the network and your phone’s calling feature, you can enjoy clear calling across the country. This section explains the features related to phone calls. Make Phone Calls Receive Phone Calls End Phone Calls Voicemail Phone Call Options Call Setup Options Roaming Make Phone Calls... -
Page 23: Call From Recent Calls
3. Press when you are finished. Call From Recent Calls Place a call to the numbers in your recent calls. 1. From standby mode, press RECENT CALLS (left softkey). – or – Press > Recent Calls. 2. Highlight an entry and press Tip: To redial your last outgoing call, press twice. -
Page 24: Call Using Abbreviated Dialing Features
You must have already assigned a speed dial number to an existing phone number. See Assign Speed Dial Numbers. To use speed dial for locations 2-9: ► From standby mode, press and hold the appropriate key for approximately two seconds. To use speed dial for locations 10-99: ►... -
Page 25: Call A Phone Number With Pauses
Call a Phone Number With Pauses You can dial or save phone numbers with pauses for use with automated systems, such as voicemail or credit card billing numbers. There are two types of pauses available on your phone: ● Hard Pause sends the next set of numbers when you press SEND TONES (left softkey). ●... -
Page 26: Receive Phone Calls
During an emergency call, press OPTIONS (right softkey) to display your options. Highlight an option and press ● Transfer Audio to switch the call to an external device (if applicable). ● Contacts to show the Contacts list. ● Voice Memo to record the other party’s voice. ●... - Page 27 Note: If your phone is turned off, all calls automatically go to voicemail. Note: Your phone will answer an incoming call by opening the phone by default. To change the setting, see Call Answer Mode. Answer an Incoming Call ► Press to answer an incoming call.
-
Page 28: End Phone Calls
● Main Menu to display the phone’s main menu. ● 3-Way Call to open a call with two other parties. ● Contacts to display your Contacts list. ● Voice Memo to record the other party’s voice. ● Phone Info to display information about your phone. Further options may also be available. -
Page 29: Voicemail Notification
Create your password. Record your name announcement. Record your greeting. Voicemail Password – It is strongly recommended that you create a password Important: when setting up your voicemail to protect against unauthorized access. Without a password, anyone who has access to your phone is able to access your voicemail messages. -
Page 30: Phone Call Options
From standby mode, press > Messages > Voicemail. Enter your voicemail password if prompted. Follow the voice prompts to listen to and manage your voicemail messages. Note: You are charged for airtime minutes when you are accessing your voicemail from your wireless phone. -
Page 31: 3-Way Calling
► Press . (This puts the first caller on hold and answers the second call.) To switch back to the first caller: ► Press again. 3-Way Calling With 3-Way Calling, you can talk to two people at the same time. When using this feature, the normal airtime rates will be charged for each of the two calls. -
Page 32: Call Setup Options
Call Setup Options Various call-related settings are available. You can configure call options through your phone’s Call Setup menu. Call Answer Mode Auto-Answer Mode Auto Redial Mode DTMF Tones Voice Privacy 1-Touch Dialing Call Restrictions Call Answer Mode Select how to answer incoming calls on your phone. 1. -
Page 33: Dtmf Tones
DTMF Tones Follow the steps below if you need to change the DTMF tones. 1. Press > Settings > Others > Call Setup > DTMF Tones. 2. Select either Short or Long. Voice Privacy You can enable the enhanced privacy mode. 1. -
Page 34: Roaming Settings
Roaming on Other Network When you’re roaming on other networks, your call quality and security will be similar to the quality you receive when making calls on the Public Mobile network. However, you may not be able to access certain features, such as data services, depending on the available network. If you’re on a call when you leave the home network, your call is dropped. - Page 35 2. Select On or Off. Phone Calls & Settings...
-
Page 36: Settings
Settings This section provides an overview of items you can change using your phone’s settings menus. Display Settings Sounds Settings Phone Setup Options Security Settings Display Settings Adjusting your phone’s display settings not only helps you see what you want, they can also help increase battery life. -
Page 37: Change The Brightness
2. Select a screen saver option (No Image, Downloaded, or Preloaded) and press 3. Select a screen saver you want to display on the screen. To set the screensaver timer: 1. Press > Settings > Display > Screensaver > Screensaver Timer. 2. -
Page 38: Select A Picture Id
Select a Picture ID You can select an image as a picture ID. 1. Press > Settings > Display > Picture ID. 2. Select Contact, Unsaved Numbers, or Private / Unknown. If you select Contact, select an entry. 3. Select a picture ID option and press 4. -
Page 39: Display Language
1. Press > Settings > Display > Main Screen or Outer Screen > Personal Banner > Custom. 2. Enter a custom greeting and press 3. Press DONE (left softkey) to save your greeting. Display Language You can choose to display your phone’s onscreen menus in English or in French. 1. -
Page 40: Adjust The Phone's Volume Settings
Adjust the Phone’s Volume Settings You can separately adjust the volume of various sounds your phone makes. 1. Press > Settings > Sounds > Volume. 2. Select Ringer Volume, Keypad Volume, Earpiece Volume, Auto Volume, or Power On/Off Volume. If you select Auto Volume, select On or Off. -
Page 41: Alerts Settings
Select Ringers for Voicemail, Calendar, Power On, or Power Off. 1. Press > Settings > Sounds > Ringers. 2. Select Voicemail, Calendar, Power On, or Power Off. 3. Select a ringer option by pressing the navigation key up or down, and then select a ringer. -
Page 42: Tty Mode
Airplane Mode Headset Mode Select a Vibration Pattern Location Services Navigation Key Shortcuts TTY Mode A TTY (also known as a TDD or Text Telephone) is a telecommunications device that allows people who are deaf, hard of hearing, or who have speech or language disabilities to communicate by telephone. -
Page 43: Hearing Aid Device Compatibility
software used by PSAPs. This matter has been brought to the attention of the FCC, and the wireless industry and the PSAP community are currently working to resolve this. Hearing Aid Device Compatibility Your phone has been tested and rated for hearing aid device compatibility. To use this function effectively, set the Hearing Aid option to On. -
Page 44: Select A Vibration Pattern
Normal to play the ringer for incoming calls through both the headset and the speaker. Headset Only to play the ringer for incoming calls only through the headset. Select a Vibration Pattern You can select vibration patterns for incoming calls, messages, alarms, and scheduled events. 1. -
Page 45: Security Settings
1. Press > Settings > Others > Navigation Keys. 2. Highlight the navigation key you wish to reassign and press 3. Using the navigation key or your keypad, highlight a function. 4. Press ASSIGN (left softkey) to save. (For options with submenu levels, such as Settings, you can assign submenu options by navigating to the desired option before pressing ASSIGN [left softkey].) Security Settings... -
Page 46: Delete Phone Content
4. Enter your lock code and press CONTINUE (left softkey). 5. Re-enter your new lock code and press SAVE (left softkey). (You will be prompted to create a lock code hint to help you remember your new lock code.) 6. If you want to create a lock code hint, press YES (left softkey). Enter a hint and press –... -
Page 47: Reset Your Phone And Phone Content
Contacts to delete all of your Contacts including speed dial numbers saved in your Contacts. Voice Memo to delete all voice data and call memos saved in the phone. My Photos to delete all pictures stored in My Photos. ... - Page 48 To disable data services: 1. Press > Settings > Others > Data > Data On. 2. Read the disclaimer and press DISABLE (right softkey) to sign out. Net Guard The Net Guard helps you avoid accidental connections when you connect to the Web. To enable or disable Net Guard: ►...
-
Page 49: Recent Calls
Recent Calls Recent Calls keeps track of the calls placed, received, and missed on your phone. View Recent Calls Recent Calls Options Make a Call From Recent Calls Save the Information in Your Recent Calls Delete Recent Calls Call Timer View Recent Calls Recent Calls is a list of the last 60 incoming, outgoing, or missed phone calls. -
Page 50: Recent Calls Icons
Recent Calls Icons You can determine if an entry was an incoming, outgoing, or missed call from the icons shown below. = Incoming Call = Outgoing Call = Missed Call Recent Calls Thread The Recent Calls thread screen shows all history for a selected entry. You can also keep track of all the messages you have sent and received for the selected entry. -
Page 51: Make A Call From Recent Calls
● Contact Details to display information about the entry if it has already been saved in your Contacts. ● Save Contact to save a phone number. See Save a Number From Recent Calls. ● Delete to delete the entry. ● Delete All to delete all Recent Calls entries. See Delete Recent Calls. -
Page 52: Make A New Group Entry From Recent Calls
Make a New Group Entry From Recent Calls You can create a new group from your Recent Calls and save it to your Contacts. 1. From standby mode, press RECENT CALLS (left softkey) > OPTIONS (right softkey) > New Group. 2. - Page 53 3. Select the item you want to reset and press RESET (right softkey) > YES (left softkey). Note: Lifetime Calls tracks all calls made and received for life of the phone and cannot be reset. Recent Calls...
-
Page 54: Contacts
Contacts Your phone’s Contacts help you stay in touch with family, friends, and colleagues by keeping track of all their contact information. This section explains how to use your phone’s Contacts. View Contacts Entry Create a New Contacts Entry Edit a Contacts Entry Find Contacts Entries Use Contacts Information in Other Applications Assign Speed Dial Numbers... -
Page 55: View Recent Calls From Contacts
View Recent Calls From Contacts You can view the call history of a selected Contacts entry from the Contacts list. From standby mode, press CONTACTS (right softkey). Highlight an entry and press OPTIONS (right softkey) > Contact History. Create a New Contacts Entry It’s easy to add new Contacts entries to your Contacts list. -
Page 56: Save A Number Using The Phone Keypad
Tip: Press OPTIONS (right softkey) > Enter New Address or Recent Calls to enter a new phone number or address or to select an entry from your recent calls. 4. When you have selected all the entries you want to add, press CONTINUE (left softkey). 5. -
Page 57: Delete A Contacts Entry
2. Highlight the entry you want to edit and press OPTIONS (right softkey) > Edit Contact or Edit Group. 3. Highlight the information you wish to edit. 4. Add or edit the information and press 5. Press DONE (left softkey) or SAVE (left softkey) to save your changes. Delete a Contacts Entry You can delete existing entries from your Contacts. -
Page 58: Assign A Picture To A Contacts Entry
5. Highlight a ringer category, such as Default Ringer, Downloaded, Preloaded Ringers, or No Ringer and then press 6. Highlight a ringer and press Assign a Picture to a Contacts Entry Assign a picture to display each time a certain contact calls you. 1. -
Page 59: Find Contacts Entries
2. Highlight the group you want to remove members from and press OPTIONS (right softkey) > Edit Group. 3. Highlight a member and press OPTIONS (right softkey) > Remove from Group > YES (left softkey). 4. Repeat step 3 to remove additional members. 5. -
Page 60: Use Contacts Information In Other Applications
Highlight an entry and press to display further options available. Use Contacts Information in Other Applications You can use saved Contacts information in other applications. To copy information into a message: 1. From standby mode, press CONTACTS (right softkey). 2. Highlight an entry and press 3. -
Page 61: Secret Contacts Entries
Secret Contacts Entries When you make an entry secret and hide it, that entry is not displayed in your Contacts. In Recent Calls, a telephone number is displayed but the Contacts entry’s name is not. To make an entry secret: From standby mode, press CONTACTS (right softkey). -
Page 62: Messages
Messages The Messages menu allows you to stay connected 24 hours a day anywhere on the network. With your phone, you can use two types of messages, text messages (SMS) and multimedia messages (MMS). With text messages, you can send and receive instant text messages between your phone and another messaging-ready phone. -
Page 63: Access Messages
7. Review your message and press SEND (left softkey). Access Messages Read and reply to the messages you have received. To read a message: ► When you receive a message, your phone will display a notification message. Use your navigation key or select View. To reply to a message: 1. -
Page 64: Messages Settings
You can select certain information from a message and automatically save it or use it in a related application. See Simple Data Exchange. Threaded Messages Options When you are viewing a messages thread list, a message thread, or a message details screen, you can choose from among the following options. - Page 65 Set Reset Envelope Reset Envelope will clear the envelope icon on the display. 1. Press > Messages > OPTIONS (right softkey) > Reset Envelope. 2. Press YES (left softkey). Set a Callback Number With this feature, you can specify the callback number which your recipients see when you send messages.
-
Page 66: Simple Data Exchange
Select Delete > YES (left softkey) to delete the message. (You can also reset all messages by selecting Reset all messages > YES [left softkey].) To change the language of the preset message: 1. Press > Messages > OPTIONS (right softkey) > Preset Messages. 2. - Page 67 Save to Contacts to save the phone number in Contacts. Contact Details to display the Contacts entry if the phone number is already saved in Contacts. Web Address (URL) Options ► Highlight a Web address (URL), press , and select an option: ...
-
Page 68: Calendar
Calendar Use Calendar to create and manage events, meeting, and appointments. Your Calendar helps organize your time and reminds you of important events. Add an Event to the Calendar Add a To Do List Item to the Calendar Calendar Alerts View Events Delete Events Add an Event to the Calendar... -
Page 69: Add A To Do List Item To The Calendar
If you chose Specific Period, set a start and end date for the repeat status and press OK (left softkey). If you chose Weekly, select the check box for each day of the week you wish to set and press DONE (left softkey). -
Page 70: View Events
► Press SNOOZE (left softkey) or select Snooze to stop the alarm and start snooze mode (if applicable). ► Press DISMISS (right softkey) to clear the alarm (if applicable). ► Select View to display the event detail screen. Tip: To change the alarm settings, from the main menu select Calendar > OPTIONS (right softkey) >... - Page 71 All on This List to delete all events on the list. All Completed Events to delete completed To Do List items. 5. Press YES (left softkey). To delete old events or all events: ► Press > Calendar > OPTIONS (right softkey) > Delete Memory > Delete Old (or Delete All) >...
-
Page 72: Tools
Tools Learn how to use many of your phone’s productivity-enhancing features. Alarm Voice Services Calculator World Clock Countdown Timer Stopwatch Alarm Your phone comes with a built-in alarm that has multiple alarm capabilities. 1. Press > Tools > Alarm. 2. Highlight an alarm number and press 3. -
Page 73: Voice Services
11. Select the number of times the snooze should repeat by highlighting the snooze time field and pressing 12. Press SAVE (left softkey). Tip: Press ON or OFF (left softkey) to toggle the alarm on and off. Voice Services Your phone’s voice services let you place calls using your voice, store voice reminders, and record memos right on your phone. - Page 74 Tip: During ASR operation, press TUTORIAL (left softkey) or HELP (left/right softkey) to get instructions for using the software. Make a Voice Call Using ASR 1. Press and hold 2. When you hear “Say a command,” say “Call.” 3. When you hear “Say the name or number,” say a name or a phone number. 4.
- Page 75 3. When you hear “Which shortcut?,” say an application name (for example, “Messages”). 4. The phone opens the selected menu. Say “More Options” to display additional application names. Tip: Check Phone Status Using ASR You can use ASR to obtain information about your phone: ●...
-
Page 76: Manage Voice Memos
3. Press START (left softkey) and repeat each word, phrase, or telephone number you hear. To reset the adaptation: 1. Press and hold 2. Press SETTINGS (right softkey) > Adaptation > Reset Voice > YES (left softkey). To change the ASR mode: 1. - Page 77 Record Voice Memos To record an audio memo: 1. Press > Tools > Voice Services > Voice Memo > Record. 2. Start recording after the beep. 3. To stop recording, press , or STOP (right softkey). To record the other party’s voice during a phone call: 1.
-
Page 78: Calculator
Play to play selected memos or all memos. Select from This, Multiple, or All. Speaker On or Speaker Off to activate or deactivate the speakerphone mode. Edit Title to edit the title of a memo. Properties to display information about a memo. ... -
Page 79: Countdown Timer
Countdown Timer This feature allows you to use your phone as a countdown timer to alert you when a specified period of time has elapsed. You can set up to five timers. 1. Press > Tools > Countdown. 2. Highlight a countdown timer number and press 3. -
Page 80: Bluetooth
Bluetooth ® Bluetooth is a short-range communications technology that allows you to connect wirelessly to a number of Bluetooth devices, such as headsets and hands-free car kits, and Bluetooth- enabled handhelds, computers, printers, and wireless phones. The Bluetooth communication range is usually approximately 30 feet. Turn Bluetooth On and Off Make Your Phone Discoverable Bluetooth Menu... -
Page 81: Bluetooth Menu
Bluetooth Status Indicators The following icons show your Bluetooth connection status at a glance: Icon Description Your phone’s Bluetooth feature is turned on. Your phone is visible to other Bluetooth devices. Your phone is connected to a Bluetooth device. The above icons will blink while your phone is communicating with a Bluetooth device. Bluetooth Menu The Bluetooth menu allows you to set up many of the characteristics of your phone’s Bluetooth feature, including:... -
Page 82: View The Trusted Devices List
devices, allowing for fast, secure connections while bypassing the discovery and authentication process. 1. Press > Bluetooth > Add New. 2. Select the device you wish to pair with and press 3. If prompted, accept the connection on the receiving device, and enter the same passcode on both your phone and the other device, or confirm the auto-generated passcode, and then press 4. -
Page 83: Send Items Via Bluetooth
Delete to delete the selected device from the list. Delete All to delete all devices from the list. Auto-Accept to configure your phone’s accessibility to other Bluetooth devices. View/Edit Info to view or edit the information of the selected device. ... -
Page 84: Camera
Camera You can use the camera to take and share pictures. Your phone comes with a 2.0 megapixel camera. Take Pictures Store Pictures Send Pictures Take Pictures Taking pictures with your phone’s built-in camera is as simple as choosing a subject, aiming the lens, and pressing a button. -
Page 85: Assign Pictures
Assign to assign a picture as a picture ID or as a wallpaper. See Assign Pictures. Delete to delete the picture you just took. Review Media to go to the My Photos folder to review your saved pictures. ... - Page 86 ● Review Media to go to the My Photos folder to review your saved pictures. ● Key Guidance to show keypad shortcuts in camera mode. ● User Settings to provide convenient access to your favorite settings. Self-timer 1. From camera mode, press OPTIONS (right softkey) > Self-Timer. 2.
-
Page 87: Camera Settings
2. Press , or CAPTURE (left softkey) to take a picture. Camera Settings You can customize the camera settings. 1. From camera mode, press OPTIONS (right softkey) > CameraSettings. 2. Highlight an option and press Resolution to select a picture’s file size from 2.0M (1200x1600), 1.3M (960x1280), ... -
Page 88: Use Other Settings Menu
Use Other Settings Menu The Other Settings menu allows you to set up many of the settings of your phone’s picture’s function. 1. Press > Other Settings. Select one of the following options and press Location to select whether to include the location information. ... -
Page 89: Review Pictures In The Assigned Media Folder
● Details/Edit to edit or display details relating to your pictures. Text Caption to edit the selected picture’s caption. Special Effects to select from Fun Frames, Color Tone, Fun Stamps, or Rotate. Resize to resize the selected picture. Select 1.3M (960x1280), 0.3M (480x640), or 0.1M (240x320). - Page 90 NEW ADDRESS (right softkey) to enter a recipient’s wireless phone number directly. Press CONTINUE (left softkey) to proceed. 4. Compose a message. 5. Confirm the recipients, message, and pictures. (You may also select additional options by pressing the right softkey. Follow the onscreen instructions to add available options.) 6.
-
Page 91: Multimedia
Multimedia The Multimedia menu allows you to take a picture, view images, assign a preloaded items to a phone function, and manage your downloaded ringers, images, etc. Photos Downloaded Files Preloaded Files Photos In Photos, you can view and manage all taken or downloaded images stored on your phone. The camera is also accessible within this menu screen. -
Page 92: Downloaded Files
3. Read the message and press DELETE (left softkey). Downloaded Files The files you download from the website are stored in your phone's internal storage. You can use the Downloaded menu to view, reopen, or delete what you’ve downloaded. View Downloaded Files Erase Downloaded Files View Downloaded Files 1. - Page 93 To use the preloaded files: Press > Multimedia > Preloaded. 2. Select a category (Wallpaper, Screensaver, Picture ID, or Ringers) and any applicable subcategories. 3. Use the navigation key to search through available files. When you find one you want, highlight it and press Multimedia...
-
Page 94: Web And Data
Web and Data Your phone’s data capabilities let you wirelessly access the Internet. This section addresses your phone’s data connections and the built-in Web browser. Data Services Browser Info Portal Data Services If your plan includes data services, you are ready to start enjoying the advantages of data services. -
Page 95: Browser
Browser Your phone’s Web browser gives you access to websites on the go, using data connections. Learn to Navigate the Web Browser Menu Learn to Navigate the Web Navigating through menus and websites during a data session is easy once you’ve learned a few basics. -
Page 96: Browser Menu
To select links: ► Highlight the link and press the appropriate softkey. Go Back To go back one page: ► Press on your phone. Tip: You can also use for deleting text (like a BACKSPACE key) when you are entering text. -
Page 97: Browser Settings
To go forward a page: ► Highlight and press To reload a page: ► Highlight and press Open the Browser Options: ► From any open Web page, press Options (right softkey). Options available within the browser menu include: ● to change the display font size on the Web page. ●... -
Page 98: Info Portal
Disable JavaScript/Enable JavaScript to disable or enable Java scripting. Disable error log/Enable error log to set whether to save error logs (text files useful for debugging browser errors). To display the error log, select the View error log option from the submenu (available only when the error log is enabled). ... -
Page 99: Notes
Notes ● Instructions to perform tasks in this guide may change depending on the software version on your phone. Notes... -
Page 100: Copyrights
® The Bluetooth word mark and logos are owned by the Bluetooth SIG, Inc. and any use of such marks by Kyocera Corporation is under license. Other trademarks and trade names are those of their respective owners. ® is a registered trademark of Nuance Communications, Inc. and its affiliates in the United States and other countries. -
Page 101: Index
Index 3-Way Calling, 24 Abbreviated Dialing, 17 Airplane Mode, 36 Alarm, 65 Alerts, 34 Auto Redial Mode, 25 Auto-Answer Mode, 25 Automatic Speech Recognition (ASR), 66 Backlight, 30 Battery, 8 Capacity, 8 Charge, 3 Install, 2 Remove, 9 Bluetooth, 73 Icons, 10, 74 Make Your Phone Discoverable, 73 Menu, 74... - Page 102 Phone Call Options, 23 Settings, 25 Call Answer Mode, 25 Call Waiting, 23 Caller ID, 23 Camera, 77 Assign Pictures, 78 Camera Mode Options, 78 Settings, 80 Store Pictures, 81 Take a Picture, 77 Clock Display, 31 World Clock, 71 Contacts Assign a Picture to a Contacts Entry, 51 Assign a Ringer to a Contacts Entry, 50...
- Page 103 Abc Mode, 13 T9 Text Input, 13 Text Entry Options, 14 Text Input Mode, 12 Font Size, 32 Forward a Call, 24 Greeting, 31 Headset, 36 Hearing Aid Device Compatibility (HAC) Mode, 36 Icon Indication, 9, 43, 74, 87 Info Portal, 91 Key Functions, 7 Language Display, 32...
- Page 104 Downloaded, 85 Photos, 84 Preloaded, 85 Navigation Key Shortcuts, 37 Net Guard, 41 Notification Pop-up, 30 Phone Illustration, 1, 6 Key Functions, 7 Lock, 38 Reset, 40 Set Up, 2 Turn On and Off, 8 Unlock, 38 Phone Number With Pauses, 18 Picture ID, 31 Pictures Assign, 31, 51, 78...
- Page 105 Assign, 50 Mute, 20 Roaming, 26 Data Roaming, 27 Icon, 26 Settings, 27 Save Number From Recent Calls, 44 Number Using Keypad, 49 Number With Pauses, 18 Screensaver, 29 Secret Contacts Entries, 54 Security, 38 Data Services, 40 Delete Phone Content, 39 Lock Code, 38 Lock Phone, 38 Net Guard, 41...
- Page 106 Voice Memos, 69 Voicemail, 21 Check Messages While Roaming, 27 New Message Alerts, 22 Notification, 22 Retrieve Messages, 22 Set Up, 3, 21 Volume, 32 Adjust, 33 Silence All, 33 Wallpaper, 31 Web, 87 Browser, 88 Launch, 87 Navigation, 88 Status and Indicators, 87 World Clock, 71 Zoom, 79...