
Related Manuals for EnGenius ESR9855G


Summary of Contents for EnGenius ESR9855G
- Page 1 User Manual ESR9855G Wireless 300N Gigabit Gaming Router Gigabit & StreamEngine Support...
-
Page 3: Table Of Contents
Table of Contents INTRODUCTION ........................................7 1.1. & B ....................7 EATURES ENEFITS 1.2....................9 ACKAGE ONTENTS 1.3..................... 9 AFETY UIDELINES 1.4. SOHO R ..............10 IRELESS OUTER ESCRIPTION 1.5..................... 12 YSTEM EQUIREMENTS 1.6......................12 PPLICATIONS 1.7. - Page 4 5.1.2.1. Wireless Security Level: BEST (WPA2) ................................37 5.1.2.2. Wireless Security Level: BETTER (WPA) ................................38 5.1.2.3. Wireless Security Level: GOOD (WEP 64/128-bit) ............................40 5.1.2.4. Wireless Security Level: None (Security Disabled) ............................42 MANUAL WEB CONFIGURATION ..................................43 6.1........................
- Page 5 6.4.2.3. Restore To Factory Default ....................................94 6.4.2.4. Reboot the device ......................................95 6.4.3. Firmware Upgrade ....................................96 6.4.4. System Logs ......................................97 6.4.5. Dynamic DNS ......................................98 6.4.6. System Check ......................................99 6.4.7. Schedules ......................................100 6.5........................101 TATUS 6.5.1.
- Page 6 W ................................................ 126 X ................................................. 127 Y ................................................. 127 APPENDIX C – FCC INTERFERENCE STATEMENT .............................. 129...
-
Page 7: Introduction
1. Introduction The Wireless-N Gigabit Router is a 802.11n compliant device that delivers up to 6x faster speeds than 802.11g while staying backward compatible with 802.11g and 802.11b devices. It is not only a Wireless Access Point, which lets you connect to the network without wires. There's also a built-in 4-port full-duplex 10/100/1000 Gigabit Switch to connect your wired-Ethernet devices together. - Page 8 Lets users assign a fixed host and domain name to a dynamic Internet IP address. Supports DNS/ DDNS Shares single Internet account and provides a type of firewall by hiding internal IP Supports NAT (Network Address addresses for keeping hacker out Translation)/NAPT Avoids unallowable users sharing bandwidth, increases efficiency of the network Hide SSID...
-
Page 9: Package Contents
1.2. Package Contents Open the package carefully, and make sure that none of the items listed below are missing. Do not discard the packing materials, in case of return; the unit must be shipped in its original package. Wireless Gaming Router x 1 ... -
Page 10: Wireless Soho Router Description
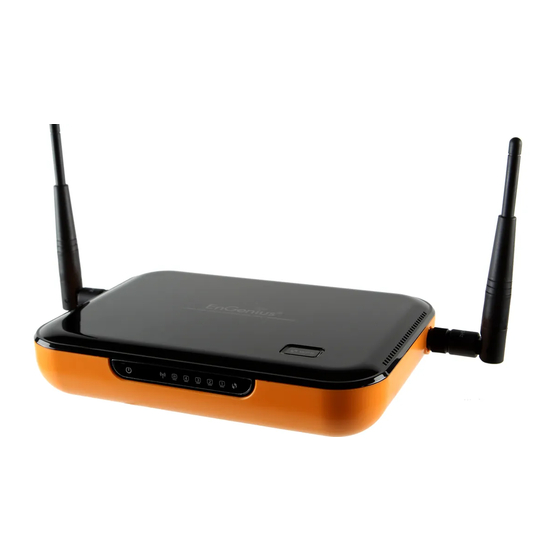
1.4. Wireless SOHO Router Description Rear Panel LAN Ports WAN / Internet Power Switch Port Power... - Page 11 Front Panel Antenna Antenna Connector WPS button LED panel...
-
Page 12: System Requirements
Parts Description LAN Ports (1 – 4) Use an Ethernet cable to connect each port to a computer on your Local Area Network (LAN). WAN Port Use an Ethernet cable to connect this port to your WAN router. Antenna Connector Interface for the antennas. - Page 13 c) The ability to access real-time information Doctors/nurses, point-of-sale employees, and warehouse workers can access real-time information while dealing with patients, serving customers and processing information. d) Frequently changed environments Show rooms, meeting rooms, retail stores, and manufacturing sites where frequently rearrange the workplace. e) Small Office and Home Office (SOHO) networks SOHO users need a cost-effective, easy and quick installation of a small network.
-
Page 14: Network Configuration
1.7. Network Configuration To better understand how the wireless LAN products work together to create a wireless network, it might be helpful to depict a few of the possible wireless LAN PC card network configurations. The wireless LAN products can be configured as: a) Ad-hoc (or peer-to-peer) for departmental or SOHO LANs. -
Page 15: B) Infrastructure Mode
b) Infrastructure Mode The infrastructure mode requires the use of an access point (AP). In this mode, all wireless communication between two computers has to be via the AP. It doesn’t matter if the AP is stand-alone or wired to an Ethernet network. If used in stand-alone, the AP can extend the range of independent wireless LANs by acting as a repeater, which effectively doubles the distance between wireless stations. -
Page 16: Understanding The Hardware
2. Understanding the Hardware 2.1. Hardware Installation 1. Place the device in an appropriate location after conducting a site survey. 2. Plug one end of the Ethernet cable into the LAN port of the device and another end into your PC/Notebook. 3. -
Page 17: Ip Address Configuration
2.2. IP Address Configuration This device can be configured as a Bridge/Router or Access Point. The default IP address of the device is 192.168.1.1 In order to log into this device, you must first configure the TCP/IP settings of your PC/Notebook. 1. - Page 18 2. Select Internet Protocol (TCP/IP) and then click on the Properties button. This will allow you to configure the TCP/IP settings of your PC/Laptop. Select Obtain an IP address automatically radio button. 3. Click on the OK button to close this window, and once again to close LAN properties window.
-
Page 19: Login
3. Login To configure the device through the web-browser, enter the IP address of the device (default: 192.168.1.1) into the URL bar of the web-browser and press Enter. Make sure that the device and your computers are configured on the same subnet. Refer to previous chapter in order to configure the IP address of your computer. -
Page 20: Internet Settings
4. Internet Settings This device offers a quick and simple configuration through the wizard. This chapter describes how to use the wizard to configure the WAN, LAN, and wireless settings. Please refer to Chapter 6 in order to configure the more advanced features of the device. IMPORTANT NOTICE Internet Settings Page contains various settings related to WAN / Internet service. -
Page 21: Internet Connection Type
4.1. Internet Connection Type Select your Internet service WAN type This device supports several types of Internet / WAN connections: DHCP Connection (Dynamic IP address) – Choose this connection type if your ISP provides you the IP address. Most cable modems use this type of connection. -
Page 22: Dhcp Connection (Dynamic Ip Address)
4.1.1. DHCP Connection (Dynamic IP Address) The WAN interface can be configured as a DHCP Client in which the ISP provides the IP address to the device. This is also known as Dynamic IP. Host Name: this is optional if you need to specify the host name for this router. Use Unicasting: This option is normally turned off, and should remain off as long as the WAN-side DHCP server correctly provides an IP address to the router. -
Page 23: Pppoe (Point-To-Point Protocol Over Ethernet)
4.1.2. PPPoE (Point-to-Point Protocol over Ethernet) The WAN interface can be configured as PPPoE. This type of connection is usually used for a DSL service and requires a username and password to connect. Address Mode: PPPoE can be used with a dynamic or static IP address. If you select the Dynamic IP radio button, then the IIP address in the next field is not required. - Page 24 Automatic Connect: This option provides an automatically connect. Manual Connect: This option provides a connection on demand. Maximum Idle Time: Specify the maximum idle time (disconnect when device is idled over the specified period.
-
Page 25: Pptp (Point-To-Point Tunneling Protocol)
4.1.3. PPTP (Point-to-Point Tunneling Protocol) PPTP (Point to Point Tunneling Protocol) uses a virtual private network to connect to your ISP. This method of connection requires you to enter a username and password (provided by your ISP) to gain access to the Internet. The supported authentication protocols are PAP and CHAP. - Page 26 PPTP Server IP Address: If the PPTP Server’s IP address is different from the default gateway, then you may specify it here. Usernname: Specify the user name which is provided by your ISP. Password: Specify the password which is provided by your ISP, and then verify it once again in the next field. ...
-
Page 27: Static Ip Address Configuration
4.1.4. Static IP Address Configuration In this type of connection, your ISP provides you with a dedicated IP address. IP Address: Specify the IP address for the device, which is assigned by your ISP. Subnet Mask: Specify the subnet mask for this IP address, which is assigned by your ISP. ... -
Page 28: Other Internet Settings
4.2. Other Internet Settings IMPORTANT NOTICE Internet Settings Page contains various settings related to WAN / Internet service. Usually, you only need to configure Internet Connection Type section to connect to the Internet. Unless your ISP specified otherwise, please keep the default settings if you are unsure of the configuration. Please consult your local ISP for your Internet Connection Type and account information. -
Page 29: Dns Settings
4.2.2. DNS Settings Most of the ISP does not require user to specify DNS settings. In case where DNS needs to be specified you can change the setting in this section. 4.2.3. MTU Settings Most of the ISP does not require user to specify MTU settings. In case where MTU needs to be specified. You can change the setting in this section. -
Page 30: Wan Ping
4.2.4. WAN Ping If you enable this feature, the WAN port of your router will respond to ping requests from the Internet that are sent to the WAN IP Address. Enable WAN Ping Respond: checking the box. You can specify the Inbound Filter and choose whether to Allow All or Deny All. 4.2.5. -
Page 31: Mac Cloning
4.2.6. MAC Cloning MAC Address: specify the MAC address. Click on [Clone Your PC’s MAC address] button to enter the MAC address of your PC/laptop automatically. -
Page 32: Wireless Setup Wizard
5. Wireless Setup Wizard This wizard will guide you in the configuration of the wireless network settings such as the SSID and security (WEP/WPA). .Please refer to Chapter 6 in order to configure more advanced features of the device 5.1. Wireless Network Wizard Setup ... -
Page 33: Automatic Network Setup
The wizard will inform you that there are two options: auto and manual. 5.1.1. Automatic Network Setup If you select the Auto option, then the device will automatically configure the SSID and security mode. Click on the Next button to continue. -
Page 34: Manual Network Setup
The wizard has automatically configured the SSID and security mode for the device. Click on the Save button to complete the setup. 5.1.2. Manual Network Setup If you select the Manual option, then you will be required to specify the SSID and select the appropriate network security. ... - Page 35 Click on the Next button to continue. Specify the Wireless Network Name (SSID) for the device. The SSID is a unique named shared amongst all the points of the wireless network. The SSID must be identical on all points of the wireless network and cannot exceed 32 characters. Click on the Next button to continue.
- Page 36 This step requires that you configure the security features based on your needs. The following options are available. BEST – Select this option if your wireless adapters support WPA2 BETTER – Select this option if your wireless adapters support WPA GOOD –...
-
Page 37: Wireless Security Level: Best (Wpa2)
5.1.2.1. Wireless Security Level: BEST (WPA2) Select the BEST radio button which supports WPA2 encryption. Then click on the Next button. Enter a security password between 2 and 20 characters then click on the Next button. The setup is complete. Click on the Save button and then reboot the device. -
Page 38: Wireless Security Level: Better (Wpa)
5.1.2.2. Wireless Security Level: BETTER (WPA) Select the BETTER radio button which supports WPA encryption. Then click on the Next button. Enter a security password between 2 and 20 characters then click on the Next button. - Page 39 The setup is complete. Click on the Save button and then reboot the device.
-
Page 40: Wireless Security Level: Good (Wep 64/128-Bit)
5.1.2.3. Wireless Security Level: GOOD (WEP 64/128-bit) Select the GOOD radio button which supports WEP encryption. Then click on the Next button. Enter a security password between 2 and 20 characters then click on the Next button. The setup is complete. -
Page 42: Wireless Security Level: None (Security Disabled)
5.1.2.4. Wireless Security Level: None (Security Disabled) Select the NONE radio button if you do not want to activate any security features. Then click on the Next button. The setup is complete. Click on the Save button and then reboot the device. ... -
Page 43: Manual Web Configuration
6. Manual Web Configuration 6.1. Logging In To configure the device through the web-browser, enter the IP address of the Bridge (default: 192.168.1.1) into the address bar of the web-browser and press Enter. Make sure that the device and your computers are configured on the same subnet. Refer to Chapter 2 in order to configure the IP address of your computer. -
Page 44: Basic
6.2. Basic Click on the Basic link on the navigation drop-down menu. 6.2.1. Internet Settings Refer to Chapters 4 in order to use the wizard. The other options are described below. 6.2.2. Wizard Wireless Refer to Chapters 5 in order to use the wizard. The other options are described below. -
Page 45: Network Settings
6.2.3. Network Settings This device can be configured at a Router or a Bridge. Select Router mode if the WAN port is connected to the Internet. Select Bridge if the device is connected to a local network downstream from another router. 6.2.3.1. -
Page 46: Router Mode
6.2.3.2. Router Mode In this mode, the device functions as a NAT router and is connected to the Internet. Select the Router Mode radio button. WAN Port Mode: Select the Router Mode radio button. Router IP Address: Specify the IP address of this device ... - Page 47 RIP (Routing Information Protocol) RIP enables the router to share routing information with other routers and hosts on the LAN. Enable RIP: Enable RIP if the LAN has multiple routers or if the LAN has other hosts that listen for RIP messages, such as auto-IP devices or the Windows XP RIP Listener Service.
- Page 48 subnet that has conflicting IP addresses. Enter the password twice for verification. Leave both password fields empty if RIP passwords are not used. Accept RIP Updates: The "Accept RIP Updates" option controls whether the router updates its routing tables when it receives RIP messages from other LAN devices.
- Page 49 DHCP Server Settings DHCP stands for Dynamic Host Configuration Protocol. The DHCP section is where you configure the built-in DHCP Server to assign IP addresses to the computers and other devices on your local area network (LAN).
- Page 50 Enable DHCP Server: Once your router is properly configured and this option is enabled, the DHCP Server will manage the IP addresses and other network configuration information for computers and other devices connected to your Local Area Network. There is no need for you to do this yourself.
- Page 51 Primary WINS Server IP address: Configure the IP address of the preferred WINS server. WINS Servers store information regarding network hosts, allowing hosts to 'register' themselves as well as discover other available hosts, e.g. for use in Network Neighbourhood. This setting has no effect if the 'Learn NetBIOS information from WAN' is activated.
- Page 52 Add/Edit DHCP Reservation This option lets you reserve IP addresses, and assign the same IP address to the network device with the specified MAC address any time it requests an IP address. This is almost the same as when a device has a static IP address except that the device must still request an IP address from the router.
- Page 53 colons such as 00-0D-88-11-22-33 or 00:0D:88:11:22:33. If your network device is a computer and the network card is already located inside the computer, you can connect to the router from the computer and click the Copy Your PC's MAC Address button to enter the MAC address.
-
Page 54: Wireless Settings
6.2.4. Wireless Settings These options allow you to enable/disable the wireless interface, switch between the 11b, 11g, 11n and mixed radio band and channel frequency Enable Wireless: Place a check in this box to enable the wireless interface, it is enabled by default. ... - Page 55 Wireless Channel: Select a channel from the drop-down list. The channels available are based on the country’s regulation. A wireless network uses specific channels in the wireless spectrum to handle communication between clients. Some channels in your area may have interference from other electronic devices. Choose the clearest channel to help optimize the performance and coverage of your wireless network.
-
Page 56: Wireless Security Mode
6.2.4.1. Wireless Security Mode To protect your privacy this mode supports several types of wireless security: WEP WPA, WPA2, and WPA-Mixed. WEP is the original wireless encryption standard. WPA provides a higher level of security. The following section describes the security configuration in detail. -
Page 57: Wep (Wired Equivalent Privacy)
6.2.4.2. WEP (Wired Equivalent Privacy) Select the WEP from the drop-down list if your wireless network uses WEP encryption. WEP is an acronym for Wired Equivalent Privacy, and is a security protocol that provides the same level of security for wireless networks as for a wired network. WEP is not as secure as WPA encryption. -
Page 58: Wpa Personal (Wi-Fi Protected Access)
6.2.4.3. WPA Personal (Wi-Fi Protected Access) Select the WPA-Personal from the drop-down list if your wireless network uses WPA encryption. WPA (Wi-Fi Protected Access) was designed to improve upon the security features of WEP (Wired Equivalent Privacy). The technology is designed to work with existing Wi-Fi products that have been enabled with WEP. -
Page 59: Wpa Enterprise (Wi-Fi Protected Access & 802.1X)
6.2.4.4. WPA Enterprise (Wi-Fi Protected Access & 802.1x) Select the WPA-Enterprise from the drop-down list if your wireless network uses WPA encryption. WPA (Wi-Fi Protected Access) was designed to improve upon the security features of WEP (Wired Equivalent Privacy). The technology is designed to work with existing Wi-Fi products that have been enabled with WEP. - Page 60 WPA Mode: Select the WPA / WPA2 from the drop-down list. Cipher Type: Select TKIP or AES as the cipher suite. The encryption algorithm used to secure the data communication. TKIP. Use TKIP only. TKIP (Temporal Key Integrity Protocol) provides per-packet key generation and is based on WEP. AES. Use AES only. AES (Advanced Encryption Standard) is a very secure block based encryption.
-
Page 61: Advanced
6.3. Advanced Click on the Advanced link on the navigation tree menu. The configuration steps for each option are described below. -
Page 62: Advanced Wireless
Advanced Wireless 6.3.1. By clicking on Advanced tab, you will be able to access Advanced Wireless page. If you are not familiar with Advanced Wireless Settings, please read the help section before attempting to modify these settings. Transmit Power: Set the power output of the wireless signal... - Page 63 Beacons are packets sent by a wireless router to synchronize wireless devices. Specify a Beacon Beacon Period: Period value between 20 and 1000. The default value is set to 100 milliseconds. Values that are not a multiple of 4, are forced to a multiple of 4.
-
Page 64: Virtual Server
6.3.2. Virtual Server The Virtual Server option gives Internet users access to services on your LAN. This feature is useful for hosting online services such as FTP, Web, or game servers. For each Virtual Server, you define a public port on your router for redirection to an internal LAN IP Address and LAN port. - Page 65 Public Port: Specify the public port number. Private Port: Specify the private port number. Schedule: Select a schedule to Always or Never from the drop-down list. If a schedule does not exist, you may create it in the Tools >...
-
Page 66: Special Applications
6.3.3. Special Applications An application rule is used to open single or multiple ports on your router when the router senses data sent to the Internet on a trigger port or port range. An application rule applies to all computers on your internal network. ... -
Page 67: Port Forwarding
6.3.4. Port Forwarding Multiple connections are required by some applications, such as internet games, video conferencing, Internet telephony, and others. These applications have difficulties working through NAT (Network Address Translation). This section is used to open multiple ports or a range of ports in your router and redirect data through those ports to a single PC on your network. - Page 68 Inbound Filter: Select an inbound filter from the drop-down list. If an inbound filter does not exist, you may create it from Advanced > Inbound Filter section. Click on the Add button to insert the entry into the Port Forwarding list.
-
Page 69: Streamengine
6.3.5. StreamEngine The StreamEngine feature helps improve the network performance by prioritizing applications. Enable Traffic Shaping: Place a check in the box to enable traffic shaping. When this option is enabled, the router restricts the flow of outbound traffic so as not to exceed the WAN uplink bandwidth. ... - Page 70 associated with your ISP's network. Typically, this figure will be between 87% and 91% of the stated uplink speed for xDSL connections and around 5 kbps lower for cable network connections. Manual Uplink Speed: Specify an uplink speed or select it from the drop-down list. If Automatic Uplink Speed is disabled, this options allows you to set the uplink speed manually.
- Page 71 Enable StreamEngine: Place a check in this box to enable this option. Enable this option for better performance and experience with online games and other interactive applications, such as VoIP. Automatic Classification: Place a check in this box to enable this option. This option is enabled by default so that your router will automatically determine which programs should have network priority.
- Page 72 Add StreamEngine Rule: A StreamEngine Rule identifies a specific message flow and assigns a priority to that flow. For most applications, automatic classification will be adequate, and specific StreamEngine Rules will not be required. StreamEngine supports overlaps between rules, where more than one rule can match for a specific message flow. If more than one rule is found to match the rule with the highest priority will be used.
-
Page 73: Routing
6.3.6. Routing This section adds a new entry into the routing table. Name: Specify a name for the rule. Destination IP: Specify the destination IP address. Netmask: Specify the subnet mask for the IP address. Gateway: Specify the IP address of the gateway. ... -
Page 74: Access Control
6.3.7. Access Control The Access Control section allows you to control access in and out of devices on your network. Use this feature as Parental Controls to only grant access to approved sites, limit web access based on time or dates, and/or block access from applications such as peer-to-peer utilities or games. - Page 75 Click on the Next button to continue. Specify a policy name and then click on the Next button to continue. Select a schedule from the drop-down list: Always or Never, or you may define a new schedule. Click on the Next button to continue.
- Page 76 Select a machine to which the policy applies. Address Type: Select the IP address or MAC address radio button. IP Address: If you selected IP address above, then specify the IP address here. MAC Address: If you need to change the MAC address of the rounter's WAN-side Ethernet interface, either type in an alternate MAC address (for example, the MAC address of the router initially connected to the ISP) or click on Clone Your PCs MAC Address.
- Page 77 Select a filtering method: Log Web Access Only: Select this radio but in order to log web access. Block All Access: Select this radio but in order to block all web access. Block Some Access: Select this radio but in order to block some web access. ...
-
Page 78: Web Filter
6.3.8. Web Filter This is a type of parental control feature used to restrict certain websites form being accessed through your network. These filters can be used for securing and restricting your network. Website/URL/Domain: Specify the web address that you would like to filter. Do not use “http://” Click on the Save button to store the changes. -
Page 79: Mac Address Filter
6.3.9. MAC Address Filter This feature is used to restrict certain MAC address from accessing the Internet. These filters can be used for securing and restricting your network. Configure MAC Filtering: Select one of the options from the drop-down list. ... -
Page 80: Firewall
6.3.10. Firewall The device provides a tight firewall by virtue of the way NAT works. Unless you configure the router to the contrary, the NAT does not respond to unsolicited incoming requests on any port, thereby making your LAN invisible to Internet cyber attacks. However, some network applications cannot run with a tight firewall. - Page 81 TCP / UDP NAT Endpoint Filtering options control how the router's NAT manages incoming connection requests to ports that are already being used. Select one of the radio buttons. End Point Independent Once a LAN-side application has created a connection through a specific port, the NAT will forward any incoming connection requests with the same port to the LAN-side application regardless of their origin.
- Page 82 Enable anti-spoof checking: Place a check in this box to enable anti-spoof checking. Enabling this option can provide protection from certain kinds of "spoofing" attacks. However, enble this option with care. With some modems, the WAN connection may be lost when this option is enabled.
- Page 83 Application Layer Gateway (ALG) Configuration: Place a check in appropriate feature boxes to enable them. . Some protocols and applications require special handling of the IP payload to make them work with network address translation (NAT). Each ALG provides special handling for a specific protocol or application.
-
Page 84: Inbound Filter
6.3.11. Inbound Filter When you use the Virtual Server, Port Forwarding, or Remote Administration features to open specific ports to traffic from the Internet, you could be increasing the exposure of your LAN to cyber attacks from the Internet. In these cases, you can use Inbound Filters to limit that exposure by specifying the IP addresses of internet hosts that you trust to access your LAN through the ports that you have opened. -
Page 85: Wish
Action: Select Allow or Deny from the drop-down list. This will apply the inbound filter rule on the WAN interface. Remote IP Range: Specify the remote IP address range and then click in the check box to enable the range. ... - Page 86 HTTP: Place a check in this box to add HTTP as a classifier. This allows the device to recognize HTTP transfers for many common audio and video streams and prioritize them above other traffic. Such streams are frequently used by digital media players. ...
-
Page 87: Wi-Fi Protected Setup
6.3.13. Wi-Fi Protected Setup Wi-Fi Protected Setup is a feature that locks the wireless security settings and prevents the settings from being changed by any new external registrar using its PIN. Devices can still be added to the wireless network using Wi-Fi Protected Setup. ... -
Page 88: Advanced Network (Upnp, Wan Ping
6.3.14. Advanced Network (UPNP, WAN Ping…) In this section you can configure the UPNP, WAN Ping, WAN port speed, multicast streams, and PPPoE pass-through settings. Enable UPnP: Place a check in this box to enable UPnP. UPnP stands for Universal Plug and Play, which is a networking architecture that provides compatibility among networking equipment, software, and peripherals. - Page 89 Enable Multicast Streams: Place a check in this box to enable multicast streams. The router uses the IGMP protocol to support efficient multicasting -- transmission of identical content, such as multimedia, from a source to a number of recipients. This option must be enabled if any applications on the LAN participate in a multicast group.
-
Page 90: Tools
6.4. Tools Click on the Tools link on the navigation drop-down menu. You will then see seven options: Time, System, Firmware, SysLog, Dynamic DNS, System Check, and Schedules. The configuration steps for each option are described below. -
Page 91: Time Zone Setting
6.4.1. Time Zone Setting Click on the Time link in the navigation menu. This feature allows you to configure, update, and maintain the correct time on the device’s internal system clock as well as configure the time zone. The date and time of the device can be configured manually or by synchronizing with a time server. -
Page 92: System
Enable Daylight Saving: Place a check in this box to enable daylight savings time. Daylight Saving Offset: Select the offset from the drop-down list. Daylight Saving Date: Select the daylight savings date from the drop-down list. Select the starting and ending times for the change to and from daylight saving time. -
Page 93: Save To Local Hard Drive
6.4.2.1. Save To Local Hard Drive This option allows you to save the current configuration of the device into a file. Click on the Save Configuration button to begin. Save the file on your local disk by using the Save or Save to Disk button in the dialog box. 6.4.2.2. -
Page 94: Restore To Factory Default
Please wait while the system is rebooting. Note: Do no un-plug the device during this process as this may cause permanent damage. 6.4.2.3. Restore To Factory Default Click on the Restore all Settings to Factory Defaults button. This option restores all configuration settings back to the settings that were in effect at the time when the device was shipped from the factory. -
Page 95: Reboot The Device
6.4.2.4. Reboot the device Click on the Reboot the Device button to reboot the device using its current settings. Once the dialog box appears, click on the OK button to confirm the action. Once the dialog box appears, click on the OK button to confirm the action. Note: The current settings will be lost. -
Page 96: Firmware Upgrade
6.4.3. Firmware Upgrade Click on the Firmware link in the navigation menu. This page allows you to upgrade the firmware of the device in order to improve the functionality and performance. This page also displays the current firmware version and its release date. Ensure that you have downloaded the appropriate firmware from the vendor’s website. -
Page 97: System Logs
6.4.4. System Logs Logs display a list of events that are triggered on the Ethernet and Wireless interface. This log can be referred when an unknown error occurs on the system or when a report needs to be sent to the technical support department for debugging purposes ... -
Page 98: Dynamic Dns
6.4.5. Dynamic DNS The Dynamic DNS feature allows you to host a server (Web, FTP, Game Server, etc.) using a domain name that you have purchased with your dynamically assigned IP address. Most broadband Internet Service Providers assign dynamic (changing) IP addresses. When you use a Dynamic DNS service provider, your friends can enter your host name to connect to your server, no matter what your IP address is. -
Page 99: System Check
6.4.6. System Check Click on the System Check link in the navigation menu. This page allows you to ping a host name or IP address. Host Name or IP address: Specify the host name or IP address and then click on the Ping button. -
Page 100: Schedules
6.4.7. Schedules Click on the Schedules link in the navigation menu. Schedules can be created for use with enforcing rules. For example, if you want to restrict web access to Mon-Fri from 3pm to 8pm, you could create a schedule selecting Mon, Tue, Wed, Thu, and Fri and enter a Start Time of 3pm and End Time of 8pm. -
Page 101: Status
6.5. Status Click on the Status link on the navigation tree menu. You will then see six options: Wireless, Logs, Statistics, WISH Sessions, Routing, and Internet Sessions. The configuration steps for each option are described below. -
Page 102: Wireless Status
6.5.1. Wireless Status Click on the Wireless link in the navigation menu. The wireless section allows you to view the wireless clients that are connected to the device. MAC Address: The Ethernet ID (MAC address) of the wireless client. ... -
Page 103: Logs Status
6.5.2. Logs Status Click on the Logs link in the navigation menu. The router automatically logs (records) events of possible interest in its internal memory. If there is not enough internal memory for all events, logs of older events are deleted, but logs of the latest events are retained. The Logs option allows you to view the router logs. -
Page 104: Statistics
6.5.3. Statistics Click on the Statistics link in the navigation drop-down menu. This page displays the transmitted and received packet statistics of the wired (LAN & WAN) and wireless interface. Click on the Refresh button to refresh the statistics. -
Page 105: Wish Session Status
6.5.4. WISH Session Status Click on the WISH Sessions link in the navigation drop-down menu. The WISH Sessions page displays full details of active local wireless sessions through your router when WISH has been enabled. A WISH session is a conversation between a program or application on a wirelessly connected LAN-side computer and another computer, however connected. - Page 106 CL: Closed -- The connection is no longer active but the session is being tracked in case there are any retransmitted packets still pending. Priority: The priority given to packets sent wirelessly over this conversation by the WISH logic. The priorities are: ...
-
Page 107: Routing
6.5.5. Routing This function shows current routing table... -
Page 108: Internet Session Status
6.5.6. Internet Session Status Click on the Internet Sessions link in the navigation drop-down menu. The Internet Sessions page displays full details of active Internet sessions through your router. An Internet session is a conversation between a program or application on a LAN-side computer and a program or application on a WAN-side computer. - Page 109 300 seconds - UDP connections. 240 seconds - Reset or closed TCP connections. The connection does not close instantly so that lingering packets can pass or the connection can be re-established. 7800 seconds - Established or closing TCP connections.
-
Page 110: Firewall
6.5.7. Firewall This page displays the full details about firewall holes in your router -- ports that accept unsolicited messages from the WAN. -
Page 111: Appendix A - Glossary
Appendix A – Glossary... - Page 112 802.11 A family of specifications for wireless local area networks (WLANs) developed by a working group of the Institute of Electrical and Electronics Engineers (IEEE). Access Control List ACL. This is a database of network devices that are allowed to access resources on the network. Access Point AP.
- Page 113 ESR9855G Wireless N Gaming Router Application layer 7th Layer of the OSI model. Provides services to applications to ensure that they can communicate properly with other applications on a network. ASCII American Standard Code for Information Interchange. This system of characters is most commonly used for text files Attenuation The loss in strength of digital and analog signals.
- Page 114 ESR9855G Wireless N Gaming Router Bottleneck A time during processes when something causes the process to slowdown or stop all together Broadband A wide band of frequencies available for transmitting data Broadcast Transmitting data in all directions at once Browser...
- Page 115 ESR9855G Wireless N Gaming Router Data-Link layer The second layer of the OSI model. Controls the movement of data on the physical link of a network DB-25 A 25 ping male connector for attaching External modems or RS-232 serial devices...
- Page 116 ESR9855G Wireless N Gaming Router Domain Name System: Translates Domain Names to IP addresses Domain name A name that is associated with an IP address Download To send a request from one computer to another and have the file transmitted back to the requesting computer Digital Subscriber Line.
- Page 117 ESR9855G Wireless N Gaming Router A computer on a network that stores data so that the other computers on the network can all access it File sharing Allowing data from computers on a network to be accessed by other computers on the network with different levels of access rights...
- Page 118 ESR9855G Wireless N Gaming Router Data cannot be transmitted and received at the same time Hashing Transforming a string of characters into a shorter string with a predefined length Hexadecimal Characters 0-9 and A-F The action of data packets being transmitted from one router to another...
- Page 119 ESR9855G Wireless N Gaming Router A system of worldwide networks which use TCP/IP to allow for resources to be accessed from computers around the world Internet Explorer A World Wide Web browser created and provided by Microsoft Internet Protocol The method of transferring data from one computer to another on the Internet...
- Page 120 ESR9855G Wireless N Gaming Router Kilobits per second Kbyte Kilobyte L2TP Layer 2 Tunneling Protocol Local Area Network Latency The amount of time that it takes a packet to get from the one point to another on a network. Also referred to as delay...
- Page 121 ESR9855G Wireless N Gaming Router Management Information Base is a set of objects that can be managed by using SNMP Modem A device that Modulates digital signals from a computer to an analog signal in order to transmit the signal over phone lines. It also...
- Page 122 ESR9855G Wireless N Gaming Router OFDM Orthogonal Frequency-Division Multiplexing is the modulation technique for both 802.11a and 802.11g Open Systems Interconnection is the reference model for how data should travel between two devices on a network OSPF Open Shortest Path First is a routing protocol that is used more than RIP in larger scale networks because only changes to the routing table...
- Page 123 ESR9855G Wireless N Gaming Router PPTP Point-to-Point Tunneling Protocol is used for creating VPN tunnels over the Internet between two networks Preamble Used to synchronize communication timing between devices on a network Quality of Service RADIUS Remote Authentication Dial-In User Service allows for remote users to dial into a central server and be authenticated in order to access...
- Page 124 ESR9855G Wireless N Gaming Router Server A computer on a network that provides services and resources to other computers on the network Session key An encryption and decryption key that is generated for every communication session between two computers Session layer...
- Page 125 ESR9855G Wireless N Gaming Router Determines what portion of an IP address designates the Network and which part designates the Host Syslog System Logger -- a distributed logging interface for collecting in one place the logs from different sources. Originally written for UNIX, it is now available for other operating systems, including Windows.
- Page 126 ESR9855G Wireless N Gaming Router Universal Plug and Play Uniform Resource Locator is a unique address for files accessible on the Internet Universal Serial Bus Unshielded Twisted Pair Virtual Private Network VPN: A secure tunnel over the Internet to connect remote offices or users to their company's network...
- Page 127 ESR9855G Wireless N Gaming Router Wired Equivalent Privacy is security for wireless networks that is supposed to be comparable to that of a wired network Wide Area Network The larger network that your LAN is connected to, which may be the Internet itself, or a regional or corporate network...
- Page 128 ESR9855G Wireless N Gaming Router...
-
Page 129: Appendix C – Fcc Interference Statement
ESR9855G Wireless N Gaming Router Appendix C – FCC Interference Statement Federal Communication Commission Interference Statement This equipment has been tested and found to comply with the limits for a Class B digital device, pursuant to Part 15 of the FCC Rules. These limits are designed to provide reasonable protection against harmful interference in a residential installation.