Table of Contents
Advertisement
1385-7206-00_R3_V9:-
230V Interconnectable Mains Operated Alarms For models:
COMPATIBLE
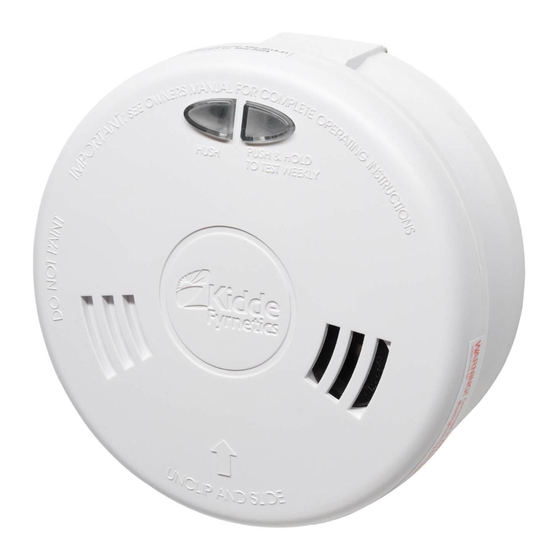
Thank you for purchasing a Kidde Fyrnetics alarm.
Please read through our guide in full.
Kidde Fyrnetics recommends for maximum protection that both ionisation and photo-elec-
tric (optical) smoke alarms be installed. Ionisation sensing alarms may detect invisible fire
particles (associated with fast flaming fires) sooner than photoelectric alarms.
Photoelectric sensing alarms may detect visible fire particles (associated with slow smoul-
dering fires) sooner than ionisation alarms. Home fires develop in different ways and are
often unpredictable. For maximum protection, Kidde recommends that both Ionisation and
Photoelectric alarms be installed.Heat alarms are useful in areas with condensa-
tion/dust/high humidity, such as kitchens and lofts.
Heat alarms MUST ALWAYS be interconnected to smoke alarms.
Electrical rating 230V AC, 50Hz 80mA
max per alarm (maximum 80mA for
originating unit with 24 Devices inter-
connected).These alarms may be used
with the Kidde Wireless base accesso-
ry, enabling interconnection between
alarms, wirelessly. The Remote, Test &
Hush accessory will also work with
alarms on Wireless bases.
Kidde Safety Europe, Mathisen Way, Colnbrook, SL3 0HB, UK.
The additional Owner's Manual should be left in a safe place
Contents
Section
1.
Section
2.
Section
3.
Section
4.
Section
5.
Section
6.
Section
7.
Section
8.
Section
9.
Section 10.
Section 11.
Section 12.
Section 13.
Section 14.
Section 15.
Section 16.
2011.3.14
5:28 PM
Smoke and Heat alarm
EN14604: 2005
Licence No. KM524754
BS 5446: Pt. 2: 2003
Lic No: KM503753
*Applicable to 1SF & 2SF Series
www.kiddefyrnetics.co.uk
© Kidde Fyrnetics 2008
for the property owner. e.g. near Consumer Unit.
. . . . . . . . . . . . . . . . . . . . . . . . . . . . . . . . . . . . . . . . . . . . . .4
. . . . . . . . . . . . . . . . . . . . . . . . . . . . . . . . . . . . . . . .6
. . . . . . . . . . . . . . . . . . . . . . . . . . . . . . . . . . . . . . . . . . . . . .6
. . . . . . . . . . . . . . . . . . . . . . . . . . . . . . . . . . . . . . . . . . . . . . . . . . .7
. . . . . . . . . . . . . . . . . . . . . . . . . . . . . . . . . . . . . . . . . . . . . . . . .7
. . . . . . . . . . . . . . . . . . . . . . . . . . . . . . . . . . . . . . . .7
. . . . . . . . . . . . . . . . . . . . . . . . . . . . . . . . . . . . . . . . .7
. . . . . . . . . . . . . . . . . . . . . . . . . . . . . . . . . . . . . . . . . . . . .8
. . . . . . . . . . . . . . . . . . . . . . . . . . . . . . . . . . . . . . . . . . . . . .9
1
Page 1
Installer's Guide
1SFW, 1SFWR, 2SFW, 2SFWR,
3SFW and 3SFWR
*
0086-CPD-535595
+
+Applicable to 3SF Series
. . . . . . . . . . . . . . . . . . . . . . . . .2
. . . . . . . . . . . . . . . . . . . . . .4
. . . . . . . . . . . . . . . . . . . . . . . . . .6
. . . . . . . . . . . . . . . . . . . . . . . . . . . . . .7
. . . . . . . . . . . . . . . . . . . . . . . . . . . .8
. . . . . . . . . . . . . . .10
®
. . . . . . . . . . . . .2
1385-7206-00
Advertisement
Table of Contents

Related Manuals for Kidde Fyrnetics Slick 1SFW


Summary of Contents for Kidde Fyrnetics Slick 1SFW
-
Page 1: Table Of Contents
Thank you for purchasing a Kidde Fyrnetics alarm. Please read through our guide in full. Kidde Fyrnetics recommends for maximum protection that both ionisation and photo-elec- tric (optical) smoke alarms be installed. Ionisation sensing alarms may detect invisible fire particles (associated with fast flaming fires) sooner than photoelectric alarms. -
Page 2: Installation Instructions - Introduction
1385-7206-00_R3_V9:- 2011.3.14 5:28 PM Page 2 1. Installation Instructions – Introduction This alarm is designed for installation by a qualified electrician, in accordance with the latest I.E.E. Regulations and in regard to relevant Building Regulations. • Read these instructions thoroughly before proceeding. People’s lives depend on it. - Page 3 1385-7206-00_R3_V9:- 2011.3.14 5:28 PM Page 3 • When mounting the alarm on the wall, use an inside wall with the top edge of the detection ele- ment a minimum of 15cm (6”) and a maximum of 30cm (12”) below the ceiling, and at least 61cm (2 feet) from any inside corner (see DIAGRAM A).
-
Page 4: Locations To Be Avoided (Smoke Alarms)
1385-7206-00_R3_V9:- 2011.3.14 5:28 PM Page 4 3. Locations to be Avoided (Smoke Alarms) • In the garage. Products of combustion are present when you start your car. Only a Heat Alarm is suitable in such locations • In front of forced air supply ducts used for heating and air conditioning, near ceiling fans, or other high air flow areas. - Page 5 1385-7206-00_R3_V9:- 2011.3.14 5:28 PM Page 5 • Care should be taken to insure the wires are pressed firmly into the appropriate holes on the terminal block (Do not use slots for wire retention, see figure d). Pull back lightly on each wire to verify it is seated well.) •...
-
Page 6: Loose Battery Models
1385-7206-00_R3_V9:- 2011.3.14 5:28 PM Page 6 Battery Changing • Loose battery models (battery changing) See section 12 • Reconnect mains supply and check green L.E.D. is lit – red L.E.D. will flash intermit- tently. GREEN LED RED LED 6. Initial Testing and Checking of Alarm •... -
Page 7: Timing Of Installation/Decorating
1385-7206-00_R3_V9:- 2011.3.14 5:28 PM Page 7 8. Timing of Installing/Decorating • Install the base plate (and surface pattress if used) at 1st fix. • Do not install alarm until following trades have finished e.g. plasterers/painters/carpet fitters etc.. • Do not install alarms until property has stabilized at a habitable environment to avoid alarm contamination. -
Page 8: Repair/Servicing
1385-7206-00_R3_V9:- 2011.3.14 5:28 PM Page 8 • If a chirping noise is present after this, wait for 10 minutes to elapse. On rechargeable models there are no user replaceable components. NOTE: TEST ALARM USING TEST BUTTON AFTER BATTERIES ARE REPLACED. 13. -
Page 9: Troubleshooting
1385-7206-00_R3_V9:- 2011.3.14 5:28 PM Page 9 15. Troubleshooting • Always turn off the mains supply to AC alarms before checking connections etc.. Symptom Possible cause/solutions 1. Green L.E.D. not lit a. Loss of mains power – check at Consumer Unit for Blown Fuse or tripped Circuit Breaker. -
Page 10: Service And Guarantee For Smoke/Heat Alarms
AC or DC electrical power,or damage caused by failure to abide by the instructions supplied. The liability of Kidde Fyrnetics, arising from the sale of this alarm or under the terms of this guarantee shall not in any case exceed the cost of replacement of the alarm, in no...