
Related Manuals for Grundig G5


Summary of Contents for Grundig G5
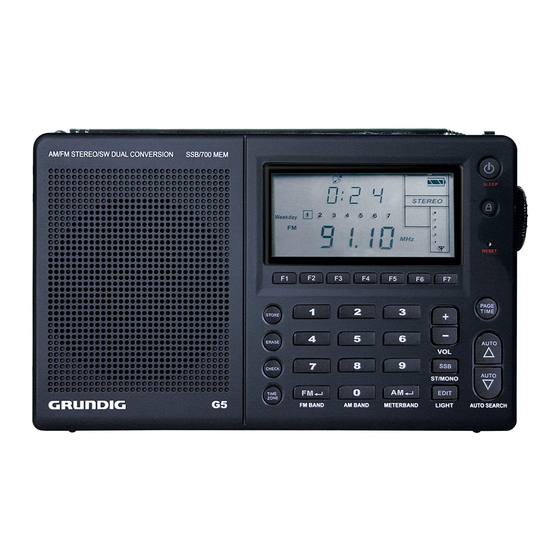
- Page 1 AM/FM/Shortwave Radio with SSB OWNER’S MANUAL etón re_inventing radio Grundig Radio Line By www.etoncorp.com...
- Page 3 OWNER’S MANUAL Grundig Radio Line By DO YOU NEED HELP? Contact Us Etón Corporation, 1015 Corporation Way, Palo Alto, CA 94303, USA. 1-800-872-2228 (U.S.); 1-800-637-1648 (Canada); 650-903- 3866 (worldwide); M-F, 8:30-4:00, Pacific Standard Time; www. etoncorp.com. WARNING • Do not expose this appliance to rain or moisture.
-
Page 4: What's Included
• Owner’s manual POWER SOURCES Power the G5 by installing 4 AA alkaline, lithium or Ni-MH batteries or by plugging in the included AC adapter. A symbol appears in the upper right of the LCD, indicating battery or AC adapter power. -
Page 5: Initial Settings
CHARGING Ni-MH BATTERIES IN THE G5 With its included AC adapter/charger connected, the G5 internally recharges 4 Ni-MH (nickel-metal-hydride) rechargeable batteries (not included). Note that the G5 can still play while the batteries are charging and the alarm functions will work. To charge batteries: 1. -
Page 6: Setting Up Am And Fm Outside Of North America
87.5 MHz. In other parts of the world, it may begin at 87 MHz or 76 MHz. Follow these steps to set this for your area: 1. With the G5 off, press the F5 button for about 3 second - ‘9’ or ‘10’ flashes in the display. -
Page 7: Volume Control
OWNER’S MANUAL VOLUME CONTROL With the G5 on or off, use the +-/VOL buttons or the numeric keypad to adjust to volume levels 0-31. The level number appears in the display. To adjust the volume with the numeric keypad, enter the desired volume level and press either the + or –... -
Page 8: Optimizing Shortwave Reception
‘utility’ signals. The Internet and your local library are great resources to learn more. Turn on the G5. To use SSB, turn on the SSB circuit by pressing the SSB button. Note that SSB appears in the display. Tune to the short- wave frequency of your choice. -
Page 9: Tuning In Stations
DIRECT FREQUENCY ENTRY Turn on the G5. Use this method when the desired frequency of a radio station is known. AM and SW frequencies are entered in kilo- hertz (KHz), e.g. 810 KHz or 9475 KHz.; FM frequencies are entered in megahertz (MHz), e.g. -
Page 10: Setting Your Time Zone
(Use this same procedure to change your time zone when travel- ing). 1. With the G5 turned on, perform a quick, short press of TIME ZONE button. ‘Tzone’ appears in the display. 2. Use the tuning knob to select your home time zone (see time zone abbreviation list below). - Page 11 This allows viewing other time zones without changing the home time zone. 1. With the G5 off, use quick, short press of TIME ZONE button. ‘Tzone’ appears in the display. 2. Use tuning knob to select desired time zone. Once selected, that time zone’s time appears in the display for about 30 seconds.
-
Page 12: Activating And Deactivating The Alarms
SETTING THE CLOCK AND WEEKDAY The G5’s clock is in 24-hour format. Turn off the G5. 1. With the G5 off, press the PAGE/TIME button for about 2 sec- onds or until the hour digits start flashing. 2. Within 3 seconds, use the tuning knob to set the correct hour;... - Page 13 To set an alarm: With the G5 turned off, perform a long press of one of the F1-4 buttons (about 3 seconds), causing the hour to flash. Use the tuning knob to set the hour; and press one of the F1- 7 buttons to highlight the day of the week for turn on.
-
Page 14: Checking Memory Capacity
Empty memories do not have the box around them. ACCESSING STORED MEMORIES 1. Turn on the G5 and enter MEMO mode by pressing the PAGE/ TIME button, causing MEMO to appear in the display. 2. Select the desired memory page with the buttons. -
Page 15: Checking Pages And Memories
LABELING MEMORY PAGES Memory pages can be uniquely labeled with four, intermixed digits or letters. 1. With the G5 turned on, select memory mode with the PAGE/ TIME button. MEMO appears in the display. 2. Use the buttons to select the desired memory page. -
Page 16: External Antenna Socket
LIGHT button activates the light for 15 seconds. Pressing it again within 15 seconds turns the light off. EXTERNAL ANTENNA SOCKET The external antenna socket is used to connect the G5 to advanced performance shortwave antennas using a 50 or 75-Ohm coaxial cable feed-line. -
Page 17: Music/Wide And News/Narrow Switch
LINE-OUT SOCKET This socket provides an industry standard, fixed level audio output source for safely routing the G5’s audio to the line-in socket of a stereo system or recording device. Follow your external device’s line-input instructions. The G5’s volume control has no effect on this output. -
Page 18: Signal Strength Indicator
OWNER’S MANUAL REAR FOLDING STAND Pull the folding stand from the rear of the G5, allowing viewing at a comfortable angle. RESET BUTTON The reset button is located inside the small hole labeled RESET. If the G5 operates erratically, poke a paper clip into the reset hole to reset its microprocessor. -
Page 19: Warranty Registration
OWNER’S MANUAL FM STEREO To hear FM in stereo via earphones or the LINE-OUT socket, press the ‘ST/MONO’ button while tuned to a FM station. Note that ‘STEREO’ appears in the display. WARRANTY REGISTRATION To ensure full warranty coverage or product updates, registration of your product should be completed as soon as possible after purchase or receipt. -
Page 20: Service For Your Product
OWNER’S MANUAL SERVICE FOR YOUR PRODUCT To obtain service for your product, we recommend first contacting an Etón service representative at 1-800-872-2228 US, 1-800-637- 1648 Canada, (650) 903-3866 US, customersvc@etoncorp.com or your respective country distributor in Europe (see enclosed list) for problem determination and trouble-shooting. - Page 21 OWNER’S MANUAL...
- Page 23 G5 MANUAL D’OPÉRATION Grundig Radio Line By Vous avez besoin d’aide? N’HESITEZ PAS A NOUS CONTACTER. Eton Corporation, 1015 Corporation Way, Palo Alto, CA 94303, USA. 1-800-872-2228 (États-Unis) ; 1-800-637-1648 (Canada) ; 650-903-3866 (international) ; du lundi au vendredi de 8h30 à...
-
Page 24: Sources D'alimentation
• Manuel de l’utilisateur SOURCES D’ALIMENTATION Alimentez le G5 avec 4 batteries alcalines AA, des batteries à base de lithium ou Ni-MH ou en le branchant à l’adaptateur AC inclus. Un symbole apparaîtra en haut à droite sur le LCD (écran à cristal liquide), indiquant l’alimentation par batterie ou adaptateur AC. -
Page 25: Réglages Initiaux
Pour recharger les batteries : 1. Installer 4 batteries Ni-MH et brancher l’adaptateur/chargeur AC. 2. Le G5 éteint, appuyez sur la touche F7 pour environ 3 secondes, ou jusqu’à ce que CHG apparaît sur le haut de l’affichage à droite et que les heures de recharge apparaissent sur l’affichage. -
Page 26: Utilisation De La Minuterie D'endormissement
à 87 mHz ou 76 mHz. Suivez ces étapes pour la régler dans votre localité : 1. Le G5 éteint, appuyez sur la touche F5 pour environ 3 secondes – « 9 » ou « 10 » clignoteront sur l’affichage. -
Page 27: Contrôle Du Volume
G5 MANUAL D’OPÉRATION CONTRÔLE DU VOLUME Le G5 allumé ou éteint, utilisez les touches +/-VOL ou le clavier numérique pour s’ajuster au niveau de volume 0-31. Le numéro de niveau apparaît sur l’affichage. Pour ajuster le volume avec le clavier numérique, entrez le niveau de volume désiré et appuyez sur la touche + ou - VOL avant 3 secondes. - Page 28 • S’approcher beaucoup d’une fenêtre et tenir la radio améliore la réception de bande courte. UTILISER LE COMMUTATEUR DX/LOCAL Le commutateur DX/LOCAL sur le côté gauche du G5 ajuste la sen- sibilité. Utiliser DX comme réglage par défaut pour une sensibilité maximum aux signaux. Si les stations puissantes semblent altérées,...
- Page 29 ( ) pendant environ 2 secondes. Le G5 dispose de 3 modes d’auto recherche sélectable : STOP, ATS ou D-5. Le mode d’usine programmé par défaut est STOP. Ceux-ci sont décrits plus bas. Quand vous êtes en auto recherche de stations de bande courte, placez le commutateur de largeur de bande sur la position WIDE (large).
- Page 30 G5 MANUAL D’OPÉRATION AJUSTEMENT AUTO RECHERCHE continué trouvée pour continuer ensuite. ATS: (Auto Tuning Storage ou stockage d’auto ajustement): L’auto recherche sauvegarde automatiquement les stations FM locaux les plus puissants. Après la recherche ATS, si trop de mémoires sont remplies de statique, essayez une nouvelle recherche avec le com- mutateur DX/LOCAL à...
- Page 31 G5 MANUAL D’OPÉRATION UTILISER L’OPTION MÉMOIRE ATS ATS sauvegarde automatiquement les stations locales FM les plus puissantes dans la mémoire, en commençant par la page 99 et en continuant vers le bas jusqu’à ce qu’elles soient toutes sauvegardées (comme 99, 98, 97, etc… par exemple).
- Page 32 G5 MANUAL D’OPÉRATION AJUSTER L’HEURE ET LE JOUR DE LA SEMAINE L’horloge du G5 est en format de 24 heures. Appuyez sur une des touches 1-7 pour choisir le jour de la semaine dans la procédure de réglage de l’horloge en bas, tandis que les chiffres d’heure ou de minute clignotent dans les étapes 2 ou 4 : La touche 1 représente le...
- Page 33 G5 MANUAL D’OPÉRATION RÉGLER LES ALARMES 1 À 4 Les alarmes peuvent être réglés avec le G5 éteint et allumé. Le G5 dispose de 4 minuteries d’alarme indépendamment program- mables (touches F1-4) pour le mettre en marche à des heures spécifiques. De plus, chaque minuterie peut être programmée pour un jour de la semaine, volume, temps de jeu et location-mémoire...
- Page 34 1. Allumez le G5. 2. Réglez la station désirée. 3. Appuyez sur la touche PAGE/TIME pour mettre le G5 en mode MEMO (mémo). 4. Pour choisir la page-mémoire (00-99) désirée, utilisez les touches ou gardez la touche STORE (sauvegardé) pressée et utilisez le...
-
Page 35: Vérification De La Capacité De Mémoire
G5 MANUAL D’OPÉRATION VÉRIFICATION DE LA CAPACITÉ DE MÉMOIRE Tournez le bouton de réglage pour choisir les pages de mémoire en gardant la touche CHECK (vérification) enfoncée. Le mémoire vide n’a pas de boîtes autour. ACCÉDER AUX MÉMOIRES SAUVEGARDÉE 1. Entrez le code MEMO en appuyant sur la touche PAGE/TIME, ce qui cause MEMO à... - Page 36 G5 MANUAL D’OPÉRATION EFFACER TOUS LE CONTENU MÉMOIRE continué par coups rapides et courts pour choisir ATS, puis appuyez sur la touche PAGE/TIME. 3. Appuyez sur la touche AUTO SEARCH pendant 2 secondes environ pour commencer le balayage ATS. ÉTIQUETAGE DES PAGES MÉMOIRE Les pages-mémoires peuvent être uniquement étiquetées par quatre...
- Page 37 Mode normal: Appuyer sur n’importe quelle touche active la lumière. La lumière s’éteint automatiquement après 15 secondes. Mode Always-On (toujours allumée): La lumière demeure toujours allumée quand le G5 est en marche et alimentée par son adaptateur AC. Mode manuel lumière On/Off: Si la lumière est éteinte, ap- puyer sur la touche LIGHT activera la lumière pour 15 secondes.
- Page 38 G5 à la prise line-in (ligne entrée) d’un système stéréo ou un appareil d’enregistrement. Suivez les instructions du line-input (ligne-entrée) de votre appareil externe. Le contrôle du volume du G5 n’a aucun effet sur cette sortie. PRISE D’ÉCOUTEURS ET UTILISATION DES ÉCOUTEURS (non fournis)
-
Page 39: Touche De Réinitialisation
G5 MANUAL D’OPÉRATION SUPPORT ARRIÈRE RÉTRACTABLE Tirez le support rétractable de l’arrière du G5, permettant de voir à un angle confortable. (voir plus bas) TOUCHE DE RÉINITIALISATION La touche de réinitialisation se situe dans le petit trou étiqueté RESET. Si le G5 se comporte erratiquement, enfoncez un trombone dans le trou à... -
Page 40: Garantie Limitée
G5 MANUAL D’OPÉRATION ENREGISTRATION DE LA GARANTIE Il est conseillé d’effectuer l’enregistrement de votre produit dès que possible après l’achat ou la réception afin d’assurer une couverture de garantie complète ou les mises à jour du produit. Vous pouvez enregistrer votre produit de trois manières différentes : 1. - Page 41 G5 MANUAL D’OPÉRATION SERVICE PRODUIT continué vous informera de la marche à suivre. Elle diffère si votre radio est toujours sous garantie ou si elle est soumise à une réparation hors garantie. GARANTIE – Une autorisation de retour sera émise et des instruc- tions seront données si votre produit est toujours sous garantie et...
-
Page 43: Necesita Ayuda
GUÍA DE FUNCIONADMIENTO DE G5 Grundig Radio Line By ¿NECESITA AYUDA? Si necesita ayuda, contáctenos de lunes a viernes, de 8:30 a.m. a 4:00 p.m., hora estándar del Pacífico de EE. UU. 1-800-872-2228 desde los EE UU; 1-800-637-1648 desde Canadá; 650-903-3866 desde el resto del mundo;... -
Page 44: Qué Se Incluye
• Manual de usuario FUENTES DE ALIMENTACIÓN Suministre energía a la radio G5 instalando las 4 baterías alcalinas AA, de litio o Ni-MH (níquel-metal-hidruro) o bien conectando la radio en el adaptador AC incluido. Aparecerá un símbolo en la parte derecha superior del visualizador LCD, que le indicará... -
Page 45: Configuración Inicial
1. Instale las 4 baterías Ni.MH (níquel-metal-hidruro) y conecte el cargador o adaptador AC. 2. Con la radio G5 apagada, pulse el botón F7 durante 3 segundos, o hasta que aparezca CHG en la parte derecha superior del visualizador y las horas de carga se mostrarán en el visualizador. -
Page 46: Uso Del Temporizador Para Dormir
CONFIGURACIÓN DE AM Y FM FUERA DE AMÉRICA DEL NORTE No es necesario realizar modificaciones en la configuración inicial de fábrica si la radio G5 se utiliza en América del Norte (EE. UU. o Canadá). En América del Norte, las estaciones de amplitud modulada (AM) se encuentran espaciadas por 10 KHz. -
Page 47: Control Del Volumen
GUÍA DE FUNCIONADMIENTO DE G5 CONTROL DEL VOLUMEN Con la radio G5 encendida o apagada, utilice los botones +-/VOL o el teclado numérico para ajustar el volumen a los niveles 0-31. El número del nivel aparecerá en el visualizador. Para ajustar el volu- men con el teclado numérico, ingrese el nivel de volumen deseado y... -
Page 48: Optimización De La Recepción De Onda Corta
USO DEL SELECTOR DX/LOCAL El selector DX/LOCAL que se encuentra en la parte izquierda de la radio G5 ajusta la sensibilidad. Utilice DX como configuración predeterminada para lograr un máximo de sensibilidad de señales. Si las estaciones de radio potentes parecen estar distorcionadas, entonces utilice la configuración local LO. -
Page 49: Sintonización De Las Estaciones
La sintonización de búsqueda automática se inicia pulsando los botones tanto de aumento como de disminución de frecuencia ( ) durante 2 segundos. La radio G5 posee 3 modos de búsqueda automática seleccionables: STOP, ATS o bien D-5. El modo de configuración de fábrica es STOP. - Page 50 GUÍA DE FUNCIONADMIENTO DE G5 SINTONIZACIÓN DE BÚSQUEDA AUTOMÁTICA continuado siguiente estación encontrada. D-5: La búsqueda automática se detiene por 5 segundos en cada estación encontrada que sigue, luego sigue buscando. ATS: (Almacenaje de Sintonización Automática): La función de búsqueda automática almacena de forma automática las estaciones locales de FM más fuertes.
- Page 51 GUÍA DE FUNCIONADMIENTO DE G5 SINTONIZACIÓN DE SSB (BLU - Banda Lateral Única) continuado laterales superiores e inferiores. Para una mejor claridad de señal de banda lateral única (SSB), se aconseja colocar el selector DX/LOCAL en la posición LOCAL. USO DE LA FUNCIÓN DE MEMORIA DE ATS El Almacenaje de Sintonización Automática (ATS) almacena...
- Page 52 PROGRAMACIÓN DEL RELOJ Y DEL DÍA DE LA SEMANA El reloj de G5 posee un formato de 24-horas. En el procedimiento de ajuste del reloj más adelante, y mientras la luz de los dígitos de las horas o minutos en 2 ó 4 pasos parpadea, pulse uno de los botones 1-7 para seleccionar el día de la semana.
- Page 53 PROGRAMACIÓN DEL RELOJ Y DEL DÍA DE LA SEMANA continuado 1. Con la radio G5 apagada, pulse en forma rápida y corta el botón TIME ZONE. ‘Tzone’ aparece en el visualizador. 2. Utilice la perilla de sintonización para seleccionar la zona horaria deseada.
- Page 54 ALARMAS Para que una alarma encienda la radio, ésta debe estar activada. Para activar la alarma a utilizar, apague la radio G5 y pulse el botón de la alarma adecuada, F1-4. Esto ocasiona que el símbolo de acti- vación del temporizador aparezca en la esquina izquierda superior del visualizador, activando la alarma seleccionada.
-
Page 55: Verificación De La Capacidad De La Memoria
MEMORIA continuado 1. Encienda la radio G5. 2. Realice la sintonización en la estación deseada. 3. Pulse el botón PAGE/TIME para colocar la radio G5 en el modo MEMO. 4. Para seleccionar la página de memoria deseada (00-99) utilice los botones o mantenga pulsado el botón STORE y utilice la... -
Page 56: Etiquetado De Páginas De Memoria
GUÍA DE FUNCIONADMIENTO DE G5 CÓMO BORRAR UNA MEMORIA SELECCIONADA 1. Pulse el botón PAGE/MEMO para ingresar al modo MEMO, y aparecerá MEMO en el visualizador. 2. Seleccione la página de memoria deseada con los botones 3. Mientras mantenga pulsado el botón ERASE (BORRAR), pulse el botón F1-7 que usted desea borrar. -
Page 57: Verificación De Páginas Y Memorias
GUÍA DE FUNCIONADMIENTO DE G5 ETIQUETADO DE PÁGINAS DE MEMORIA continuado 2. Utilice los botones para seleccionar la página de memoria deseada. 3. Pulse el botón EDIT (7) hasta que ‘_’ aparezca en la pantalla (durante unos 3 segundos). 4. Utilice la perilla de sintonización para seleccionar el número o la letra que usted escoja. -
Page 58: Selector Music/Wide Y News/Narrow
Pulse el mismo botón durante 15 segundos y la luz se apagará. CONECTOR DE LA ANTENA EXTERNA El conector de la antena externa se utiliza para conectar la radio G5 en antenas de onda corta de rendimiento avanzado usando una línea de alimentación de cable coaxial de 50 ó... - Page 59 Este conector proporciona un estándar de la industria, fuente de salida de audio a un nivel fijo para enrutar de forma segura el audio de la radio G5 en el conector de línea de entrada de un sistema estéreo o dispositivo de grabación. Siga las instrucciones de la línea de entrada de su dispositivo externo.
-
Page 60: Botón Reset
0:00. USO DE LA FUNCIÓN DE BLOQUEO Con la radio G5 apagada, y al presionar una vez el botón de bloqueo, se evitará que la radio se encienda de forma inesperada. -
Page 61: Registro De Garantía
GUÍA DE FUNCIONADMIENTO DE G5 REGISTRO DE GARANTÍA Para asegurar la cobertura completa de la garantía o adquirir actualizaciones del producto, debe registrar su producto tan pronto posible después de la compra o recibo del producto. Usted puede utilizar una de las siguientes opciones para registrar su producto: 1. - Page 62 GUÍA DE FUNCIONADMIENTO DE G5 SERVICIO PARA SU PRODUCTO continuado país dentro de Europa (véase la lista adjunta) para la localización y resolución del problema. Si requiere un servicio adicional, el equipo técnico lo instruirá de como proceder considerando si la radio aún posee garantía o si necesita servicio técnico para un producto que...
- Page 63 GUÍA DE FUNCIONADMIENTO DE G5...
- Page 64 Grundig Radio Line By Etón Corporation Corporate Headquarters 1015 Corporation Way Palo Alto, California 94303 USA tel +1 650-903-3866 tel +1 800-872-2228 fax +1 650-903-3867 Etón Europe/Lextronix Germany Rosenstrasse 2 D-10178 Berlin, Germany tel +49 [0]30 243102142 Etón Canada 1 Yonge Street, Suite 1801 Toronto, Ontario M5E 1W7 Canada tel +1 416-214-6885 v. 06-13-07 Designed by Etón Corporation and assembled in China. I © Copyright 2007 Etón Corporation. All rights reserved.