Table of Contents
Advertisement
Advertisement
Table of Contents

Related Manuals for Hisense Sero 7 Pro


Summary of Contents for Hisense Sero 7 Pro
- Page 1 User Manual...
-
Page 2: Table Of Contents
Content Getting Started ......................3 Overview ..................................... 3 Accessories ..................................4 Home Screen ..................................5 Buttons ....................................7 Making Connections ....................9 Battery ....................................9 Micro-USB ..................................10 Mini-HDMI ..................................11 Micro SD ................................... 11 Headphone ..................................11 Wi-Fi..................................... 12 VPN ...................................... - Page 3 Play Movies & TV ................................39 Gmail ....................................41 Google+ ................................... 44 Maps ....................................50 Appendix A ........................57 Specifications ................................57 Trouble Shooting ................................ 57 Multimedia Compatibility ............................. 58 Appendix B ........................59 Important Safety Instructions ..........................59 Certification and Compliance ..........................60 Appendix C ........................63 Legal Terms ..................................
-
Page 4: Getting Started
Getting Started Read this chapter to learn about Sero 7 features, how to use the controls, and more. Overview Micro SD port Headphone port Micro-USB port Microphone Mini-HDMI port Front Camera Rear Camera Rear Flash Power Button Volume Up/Down Buttons GPS Antenna NFC Antenna Speakers... -
Page 5: Accessories
Item Function Power Button Press & hold to turn on/off; Press it to put/wake the unit in/from sleep mode. Volume Up/Down Buttons Press to adjust the volume. Headphone port Headphone connections for personal listening. Micro SD port Plug microSD card (up to 32G). Micro-USB port Connect to wall outlet with Micro-USB cable and power adapter for charging. -
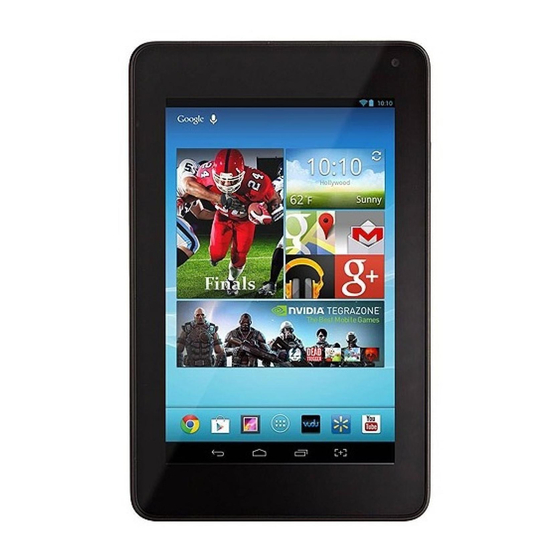
Page 6: Home Screen
Home Screen Notification Bar Status Bar Google Search Weather & Time VUDU Movie Recommendation App Recommendation NVIDIA TegraZone Game Recommendation App Icons Navigation Buttons All Apps Back Home Recent Apps Screenshots To move between Home screens, slide left or right. Weather &... - Page 7 Quick Settings Tap to display settings for commonly performed tasks, including setting display brightness, accessing the system/Wi-Fi/Bluetooth settings, locking and unlocking screen rotation, displaying the percentage of battery, turning on or off the airplane mode/power saving mode, and so on. BRIGHTNESS SETTINGS OWNER...
-
Page 8: Buttons
Google Now on page 21 Buttons Power Button Turn Sero 7 On Press & hold the Power button until the Hisense logo displays. Turn Sero 7 Off In waken mode, press & hold the Power button until a message displays, tap Power off >... - Page 9 Press settings button to stretch the volume bar, then you can adjust the notifications’ volume. Tip: You can go to Settings > Device > Sound > Volumes to adjust the alarms’ volume. Silent Mode On Press the Volume Up/Down button to turn off Silent mode, then you can press the Volume button or to increase or decrease the volume.
-
Page 10: Making Connections
Making Connections Read this chapter to learn how to connect to an external device and establish data transmission . Battery The Sero 7 has an internal Lithium-ion Polymer rechargeable battery. For important safety instructions about the battery and charging the Sero 7, see Important Safety Instructions on page 59 The Battery Icon The battery icon in the upper-right corner of the status bar shows the battery level or charging status. -
Page 11: Micro-Usb
If you don’t need it, turn off automatic syncing for all apps: Settings > Accounts > [Google account- name]. This means you need to sync manually to collect messages, email, and other recent information, and won’t receive notifications when updates occur. If you know you won’t be near a mobile or Wi-Fi network for a while, switch to Airplane mode: press &... -
Page 12: Mini-Hdmi
Connect to a Keyboard, a Mouse & Other Devices You can connect a keyboard, a mouse or other input devices to your Sero 7 via USB and use it just as you would with a PC. Tip: To set the Pointer speed, go to Settings >... -
Page 13: Wi-Fi
Wi-Fi You can connect to a wireless access point, or hotspot to use Wi-Fi. Some hotspots are open and you can simply connect to them. Others implement security features that require other steps to set up. NOTES • To extend the life of your battery between charges, turn off Wi-Fi when you’re not using it. •... -
Page 14: Vpn
Advanced Wi-Fi Settings To set the Advanced Wi-Fi, go to Settings > Wireless & networks > Wi-Fi > Menu icon > Advanced Network notification - By default, when Wi-Fi is on, you receive notification in the Status bar when your device detects an open Wi-Fi network. Uncheck this option to turn off notification. Keep Wi-Fi on during sleep - To select whether to put the Sero 7 in sleep mode when it’s connected to Wi-Fi. -
Page 15: Bluetooth
Tip: When you’re connected to a VPN, a Status icon and notification are displayed continuously. To disconnect, tap the notification for the VPN connection. Edit a VPN From the VPN screen, press & hold the name of the VPN profile. In the dialog that opens, tap Edit profile. -
Page 16: Nfc
Send Files Make sure Bluetooth is turned on. > Bluetooth icon Press & hold the file you want send, tap share icon Tap the device you want send to, then the Sero 7 will send the file. Tip: You can see the sending status in Notification Tray. Receive Files Make sure Bluetooth is turned on and visible. -
Page 17: Gps
My Location may be able to acquire your position through an internal GPS connection. From Home screen, select Settings > Personal > Location access and check GPS satellites. When you open Maps, it will search for GPS satellites automatically if you’ve enabled GPS on the Sero 7. A blinking satellite icon in the Notification Bar indicates Maps is searching for GPS satellites, while a steady satellite icon... -
Page 18: Basics
Basics Read this chapter to learn about the Sero 7 basic features. Setup Guide Turning Your Sero 7 On for the First Time To start, turn on your Sero 7 by pressing and holding Power button for a few seconds. After boot animation follow the on-screen instructions to set up your Sero 7. - Page 19 Slide or Drag Touch your finger to the screen and slide it to another location on the screen. Press & hold on an object and slide it to another location on the screen. Zoom Place two fingers about an inch apart on the screen. Slide them together to “Zoom out“.
-
Page 20: Power Control
connected to such networks, you may be required to delay downloading until your Sero 7 is connected to a Wi-Fi network, when the download will resume automatically. You can view and manage these queued files in the Downloads app as well. From the Download app: Tap an item to open it. -
Page 21: Typing
Typing You can enter text using the on-screen keyboard. Some apps open it automatically. In others, you open it by tapping where you want to type. To change your Sero 7’s keyboard and input methods, go to Settings > Personal > Language & input. -
Page 22: Google Now
NOTE To improve processing of your Voice Actions, Google may record a few seconds of ambient background noise in temporary memory at any time. This recording remains on the device only briefly and is not sent to Google. Google Now Google Now gives you just the right information at just the right time - before you even ask. - Page 23 The settings screen appears, which allows you to make changes as well as turn a specific card On or Off. When you turn off a card, it won’t appear when you launch Google Now. Dismiss Cards When you’re finished with a card, just slide it left or right to dismiss it from the Google Now screen. NOTE The card appears again when a new update is available.
-
Page 24: Voice Search & Voice Actions
What you want What to type or say Examples Convert measurements [original measurement] in [new 30 degrees Celsius in Fahrenheit measurement] Movie showtimes Movie Movie Movie [location] Movie Chicago [movie name] The Horse’s Mouth Word definition Define [word] Define campanile Weather forecast Weather Weather... - Page 25 Tap the Microphone icon in the Google Chrome omnibox. Tap the Microphone icon on the Home screen or Google Now screen and speak. Tap the search bar on the Home screen and say “Google”. When you’re viewing the Google Now screen, you don’t have to touch anything. Just say “Google. ” NOTE To detect when you say “Google”...
-
Page 26: Sharing
Followed by Examples “Note to self” Message text “Note to self: remember the milk” “Set alarm” “Time” or “for” & time, such as “Set alarm for 7:45 p.m., label, switch “10:45 a.m. ” the laundry” or “20 minutes from now, ” “Label” &... - Page 27 Slide - The slide provides no protection, but lets you get to the Home screen quickly, or open the Camera and take pictures immediately. Face Unlock - Lets you unlock your Sero 7 by using facial recognition. This is the least secure lock option.
-
Page 28: Settings
Settings Settings lets you configure the Sero 7, set app options, add accounts, and change other preferences. See other chapters for information about settings for the built-in apps. For example, for Wi-Fi settings, Wi-Fi on page 12 Wireless & Networks Data Usage Data usage refers to the amount of data uploaded or downloaded by your Sero 7 during a given period. - Page 29 You rarely need to manage the way apps use RAM. But you can monitor apps’ RAM usage and stop them if they misbehave. Apps You’ll see three tabs at the top of the screen, each displaying a list of apps or their components: Downloaded - Displays apps you’ve downloaded on Google Play or other sources.
-
Page 30: Google Account
Google Account Why Use a Google Account? A Google Account lets you organize and access your personal information from any computer or mobile device: Google Play - Google Play brings together all your favorite content in one place: movies, books, music, magazines, apps, and more. -
Page 31: Syncing
Syncing Configure Sync Options You can configure synchronization options for any of your apps. You can also decide what kinds of data to synchronize for each account. For some accounts, syncing is two-way; changes that you make to the information on your Sero 7 are made to the copy of that information on the web. -
Page 32: Featured Apps
Featured Apps Introducing the featured apps of Sero 7. Walmart The Walmart app helps you find and buy quality products at unbeatable prices whether you’re at home, in their stores or anywhere in between. You’ll also be able to stay up-to-date on app-only exclusive shopping events. -
Page 33: Vudu
Home Page You can browse the products, view your messages, access the instant savings, use scanner and search tool from Home page. Tips: These options can be found in menu. You can also tap Cart icon from Home page to make purchases, view prices, edit cart or simply browse-all shipping list. -
Page 34: Tegrazone
Title Function My VUDU You can browse the movies and TV that you have bought or rented, you can also view your wishlist. Search Search movies in VUDU. Subpage Tap the logo from any subpage to return to Home page. Title Function Overview... -
Page 35: Apps
Apps Introducing the common Apps of Sero 7. Gallery Gallery is used to view pictures and play videos that you’ve taken, downloaded, or copied. You can perform basic editing tasks on pictures and set them as your wallpaper or contact photo. You can also share your pictures and videos with friends. -
Page 36: Camera
Tap the arrow beside the Gallery icon at the upper left corner to back to Album. Tap the Share icon and choose a sharing method from the list to share the picture. Tap Menu icon and tap Slideshow to play the pictures. You can delete or edit the picture. You can also set the selected picture as wallpaper or contact photo. -
Page 37: Play Music
Camera Settings Tap the icon at the lower-right corner or press & hold the camera screen to open camera menu: Icon Tap it to Switch front camera and rear camera. Select the flash mode from on, auto and off. Adjust exposure level. Select the White Balance mode from cloudy, sunlight, auto, fluorescent and incandescent. -
Page 38: Play Books
Create and Manage Playlists Follow the instructions below to create or add a song to a playlist: Tap the icon to the right of an album, artist, song or genre, and tap Add to playlist. You can also add the currently playing song from the Now Playing screen by tapping the list icon to the right of the song title and tapping the icon >... - Page 39 Back to library: Tap the Google Play Books icon in the top-left corner of your book to go back to your library. Flowing Text & Original Pages Books are available in two viewing modes. In Flowing text mode, the text of the book is wrapped according to Sero 7’s screen size, which allows you to read most books clearly even on a screen that is smaller than the original physical book.
-
Page 40: Play Movies & Tv
Highlighting and taking notes. • To highlight a word or phrase in your book - Select that text, then tap that icon to show the color options and select the highlight color you’d like. • To remove a highlight you’ve made - Tap on the highlight and tap the icon. - Page 41 At the bottom of the screen are suggested movies. Tapping any of them will take you directly to the Google Play Store. TV Shows - Under the TV Shows tab you’ll see sections for the shows you’ve purchased, as well as suggested shows that may be of interest.
-
Page 42: Gmail
Gmail When you set up your Sero 7 with a Gmail account, the Gmail app is ready to go. If you haven’t set up a Gmail account yet, or to set up another Gmail account, add accounts in Settings > Accounts > Add account. - Page 43 Working With Attachments When a message has an attachment, Gmail displays information about that attachment at the top of the message. Depending on the kind of attachment, the applications you have installed, and your settings, Gmail may also display a thumbnail image and one or more of the buttons to preview, view or play, view the information, or save the attachment.
- Page 44 Reply to or Forward a Message You can continue a conversation by replying to or forwarding one of its messages. When reading a message, you can reply to or forward it from the message header. Tap the Reply icon , the Reply All icon , or the Forward icon The new message opens in a new screen where you can add or remove addresses, edit the subject, and add or remove text or attachments.
-
Page 45: Google
Account Settings Each account has independent settings. Priority Inbox - Check to make Priority Inbox your default inbox, so it opens when you start Gmail with new messages (instead of Inbox), and you only receive notifications for new messages that are part of important conversations. - Page 46 • If you’d like to create a new Google+ account, tap Add account, then tap New to sign up for a new Google account. Set up your Google+ Profile. NOTE You won’t see this step if you’ve already set up your profile on your computer or at an earlier time.
- Page 47 Reshare a Post Open a post and tap the Share arrow icon , then add comments and choose which circles or people to share with. Tap icon to share the post. Post Comments Join the conversation by commenting on a post. Just tap the Add a comment box at the bottom of the post you’d like to comment on.
- Page 48 Once enabled, photos taken with Sero 7’s camera will be uploaded to your private album on Google+. Instant upload won’t work when you’re signed out of Google+. View Photos To view your photos, including your Instant Upload album, visit your profile: From the Google+ menu, go to Photos.
- Page 49 To add a comment or photo: • Tap the add comment icon to share a comment to other Event guests. • Tap the add photo icon to upload a photo from Sero 7, or take a new photo with your Camera. The Menu icon will allow you to: •...
- Page 50 If you’d like to turn off ringing notifications, tap the bell icon To browse a list of your Circles and contacts, tap the icon. When you’re ready to video chat, tap the START HONGOUT at the bottom of the screen. The Hangout will start immediately, all you have to do is wait for people to accept the invitation and join.
-
Page 51: Maps
Message Receipts Message receipts appear next to messages in a conversation to show if a message has been received, read, or sent. The following message receipts appear for one-on-one conversations: Icon Description The message is being sent. The message has been delivered. The message has been read. - Page 52 To enable Location Services, go to Settings > Personal > Location access from Home screen. Select the location options that you want to use: Enable Google Location Services. Enable Wireless networks to allow Sero 7 to determine your approximate location by using Wi-Fi. Enable GPS services to allow Sero 7 to determine your location to street-level accuracy.
- Page 53 Tap the My Location icon in the header. It will make a compass rose icon appear in the top right corner of the screen, and tap the compass rose icon to enter compass mode, where the map will orient itself in the direction you’re currently facing. Tap again to return to the overhead view.
- Page 54 Menu icon > Layers, a dialog opens with a list of layers including: Shortcuts to any recent searches. Tap the layer you’d like to view, or tap a checked layer to hide it. Tap to access My Maps, Wikipedia information. Tap Clear map to clear the map of all layers.
- Page 55 Find Friends Indoors If you use Latitude to share your location with friends, you can use the same Latitude features for indoor locations. Latitude makes it easy to find friends while you’re out shopping, dining or traveling. Open the Map and zoom in to an available indoor map. Nearby Latitude friends will appear overlaid on the map.
- Page 56 On the page that opens, tap the Street View icon . Navigate Within Street View Use your finger to pan the map. Drag the Pegman icon in the lower-left corner to a point in the image in order to zoom directly to that point.
- Page 57 Get Directions To get directions to a specific location in Google Maps: From Maps screen, tap Directions icon , or tap a specific location, search result, friend, or place from the map, then tap Directions icon Select your start and end points. By default, your start address will use the My Location feature to get directions from your current location.
-
Page 58: Appendix A
-4°F to 113°F (-20°C to 45°C) 1 : Because the system will occupy part of the memory space, the available user space will be less than 8GB. 2 : The rechargeable battery in Sero 7 should be replaced only by Hisense Service. Trouble Shooting When something appears wrong with your Sero 7 refer to following. -
Page 59: Multimedia Compatibility
Touch screen response is slow or incorrect If the Sero 7’s touch screen response is incorrect, please try the following: Remove any protective film of the touch screen. The protective film may prevent the device recognition input. Make sure that your fingers dry and clean before you tap the touch screen. Restart the Sero 7 to clear any temporary software bugs. -
Page 60: Appendix B
Appendix B Important Safety Instructions The lightning flash with arrow head symbol, WARNING within an equilateral triangle is intended to alert the user that parts inside the product RISK OF ELECTRIC SHOCK DO NOT OPEN constitute a risk of electric shock to persons. WARNING: TO REDUCE THE RISK OF ELECTRIC SHOCK, DO The exclamation point within an equilateral... -
Page 61: Certification And Compliance
Sero 7 functions as a cooling surface that transfers heat from inside the unit to the cooler air outside. The rechargeable battery in Sero 7 should be replaced only by Hisense Service. A warning that batteries (battery pack or batteries installed) shall not be exposed to excessive heat such as sunshine, fire or the like. - Page 62 Sero 7 is designed and manufactured to comply with the limits for exposure to RF energy set by the Federal Communications Commission (FCC) of the United State. The exposure standard employs a unit of measurement known as the specific absorption rate, or SAR. The SAR limit applicable to Sero 7 set by the FCC is 1.6 watts per kilogram (W/kg).
- Page 63 Disposal and Recycling Information The symbol above means that according to local laws and regulations your product should be disposed of separately from household waste. When this product reaches its end of life, take it to a collection point designated by local authorities. Some collection points accept products for free.
-
Page 64: Appendix C
You understand and agree that, to the extent permitted by law, Hisense shall in no event be liable for any direct, indirect, incidental, special or consequential loss or damages, attorney fees, expenses, or any other loss or damages arising out of, or in connection with, your unauthorized access to third party content based on your selection of a country location or otherwise. - Page 65 Hisense may impose limits on the use of, or access to, certain services or content in any case and without notice or liability. Hisense is neither responsible nor liable for customer service related to the third party content and services.
- Page 66 Such registration, creation of a user account and payment of a fee may be completed on a webpage run by us (or an affiliate of Hisense) or a third party (including a payment gateway provider).
- Page 67 Therefore, you understand and agree that you are using the Services and Content at your own risk and Hisense shall have no liability to you for any offensive Services or Content. For purposes of clarity none of your behavioral or personal information provided for the HISMART@ Services is used in any Communications.
- Page 68 These Terms and Conditions must be read subject to these statutory provisions. If these statutory provisions apply, to the extent to which Hisense is able to do so, its liability under those provisions will be limited, at is sole and exclusive option, in the case of services to (a) the supplying of the services again;...
- Page 69 If you notify Hisense that you do not want us to use any of your information in the ways described in this policy, we will honor your request. However, if you then later provide additional personal information to this site or otherwise respond to one of Hisense’s online inquiries, we will assume that...
-
Page 70: Additional Support
“as is” without any warranty of any kind. The use of the Hisense product and the Web Services is at the user’s risk. By using the Web Services through the use of the Hisense product, you acknowledge and agree to be bound by all of the legal terms outlined in this Privacy Policy as well as by all applicable laws and regulations. -
Page 71: Copyright And Trademark Notices
CONSUMER should keep a separate backup copy of any contents of the product before delivering the product to a HISENSE SERVICE CENTER for warranty service, as some or all of the contents may be deleted or reformatted during the course of warranty service. - Page 72 Ver. 13.02...