Table of Contents
Advertisement
Advertisement
Table of Contents

Related Manuals for Mesa/Boogie BASS PRODIGY Four 88


Summary of Contents for Mesa/Boogie BASS PRODIGY Four 88
- Page 1 THE HOME OF TONE ® Owner’s Manual...
- Page 2 Greetings from the Home of Tone ® ...You, smart player and intuitive human, have put your trust in us to be your amplifier company. This is something we do not take lightly. By choosing this instrument to be a part of your musical voice, you have become part of the Mesa family...WELCOME! Our goal is to never let you down.
-
Page 3: Table Of Contents
TABLE OF CONTENTS Precautions Overview _________________________________________________________________________________________ 1-3 Helpful Hints _______________________________________________________________________________________ 4 FRONT PANEL: INSTRUMENT INPUT _________________________________________________________________________________ 5 INPUT SELECT SWITCH ______________________________________________________________________________ 5 CONTROLS: GAIN, BASS ________________________________________________________________________________________ 6 MID _____________________________________________________________________________________________ 6-7 TREBLE ___________________________________________________________________________________________ 7 VOICE ___________________________________________________________________________________________ 7-8 MASTER ___________________________________________________________________________________________ 8 MUTE / PLAY / SILENT RECORD SWITCH ________________________________________________________________ 8 FULL / HALF POWER SWITCH _________________________________________________________________________ 9 PRE / POST: D.I. -
Page 4: Important Safety Instructions
Important Safety Instructions Read these instructions. Keep these instructions. Heed all warnings. Follow all instructions. Do not use this apparatus near water. Clean only with dry cloth. Do not block any ventilation openings. Install in accordance with the manufacturer’s instructions. Do not install near any heat sources such as radiators, heat registers, stoves, or other apparatus (including amplifiers) that produce heat. - Page 5 Important Safety Instructions WARNING: To reduce the risk of fire or electric shock, do not expose this apparatus to rain or moisture. The AC plug is the mains disconnect. The plug should remain accessible after installation. WARNING: EU: permission from the Supply Authority is needed before connection. WARNING: Always make sure proper load is connected before operating the amplifier.
-
Page 6: Operating Instructions
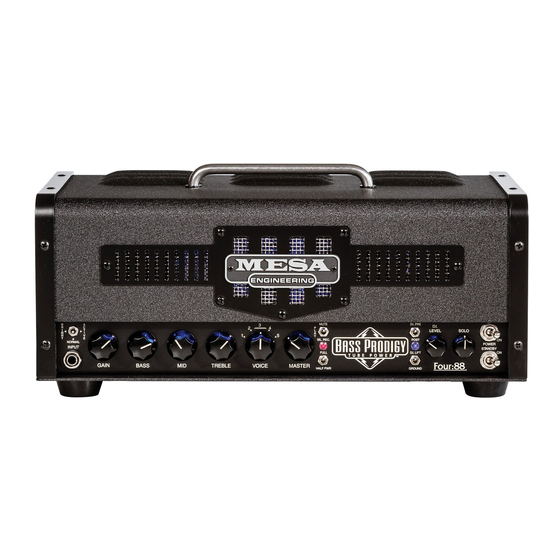
Operating Instructions Congratulations on your choice of the BASS PRODIGY Four:88 and welcome to the MESA/Boogie Family! First, we would like to ® thank you for choosing us as your amplifier company and trusting us to help create your musical voice. This is something we never take for granted and you’ll find that we are here and ready to assist you should you ever need help. -
Page 7: Overview
Overview: The PRODIGY begins with BRIGHT, NORMAL and ACTIVE INPUT Select choices feeding an all-new tube preamp that borrows subsections from our CARBINE hybrid architecture. This design allows increased control over a broad spectrum of frequencies and incorporates active BASS and TREBLE controls with increased shaping power - while retaining the sweet, musical blend of our traditional passive MID control. - Page 8 Overview: (Continued) To handle virtually any speaker cabinet scenario, the PRODIGY is fitted with 3 SPEAKER OUTPUTS capable of handling a variety of impedance/cabinet loads. One 8 OHM and two 4 OHM Outputs ensure that you can always find an impedance-correct match regardless of your cabinet choices.
-
Page 9: Helpful Hints
HELPFUL HINTS IMPORTANT! The SPEAKER OUTPUT Jack’s AUTO-MUTE function is triggered anytime there is no Speaker Cabinet (Load) plugged into one of the Speaker Jacks. The amp “knows” if a cabinet is not plugged into a speaker jack and mutes to protect itself from damage. -
Page 10: Front Panel
FRONT PANEL: (Controls & Features) INPUT: This jack is the instrument INPUT and it feeds the first tube stage in the tube preamp of the PRODIGY. Both passive as well as active instruments are provided for with a specific setting on the 3-position INPUT SELECT switch. NORMAL INPUT GAIN... -
Page 11: Gain, Bass
THE CONTROLS GAIN This control determines the overall character of the sound along with input gain and sensitivity. The lower regions of the control (below 12:00) offers the cleanest sounds and greater headroom with a scooped, brighter personality. The upper harmonics come through more prominently in this area of the control making the top end sound more transparent and crisp. -
Page 12: Treble
THE CONTROLS (Continued) Another useful property of the Passive MID when used above 12:00 is that it starts to impart a furry, tube growl as it is increased and actually pushes things toward the threshold of clip at higher settings… especially in the #3 “Flat” VOICE Position. Use this to your advantage when searching for aggressive Rock sounds with an edge or R&B Tones that have just a hint of tube saturation. -
Page 13: Voice
3. Voice Feature Bypassed – “Flat” with Tone controls set at 12:00. 4. Gentle Midrange scoop (centered around 600Hz) and low end boost with increased high end. Good choice for articulate Rock styles with Fingers or Pick. Tracks your playing with articulation and enhanced definition. 5. -
Page 14: Full / Half Power Switch
THE CONTROLS (Continued) MULTI-WATT ™ Switchable Power: FULL / HALF PWR As you might have guessed, this switch allows you to select be- tween two distinct ranges of power, enabling you to better tailor the output response of the PRODIGY to the preamp sounds you have dialed up and/or the venue you’re playing in. -
Page 15: Lift / Ground, D.i. Level
NOTE: The D.I. OUTPUT will have signal present when in the PRE selection even when STANDBY is used to mute the signal to the power section (STANDBY position) as this is the direct signal straight from your instrument before it goes through the amplifier. NOTE: POST does not capture and include the power section of your amplifier. -
Page 16: Power Switch
THE CONTROLS (Continued) POWER This switch controls the incoming AC Line power to the PRODIGY. Make sure you are connecting the PRODIGY to a grounded outlet with the proper voltage rating present (120V / 60Hz AC for US Models). Never Alter your power cable! This will void your warranty and put you at risk of damaging your amplifier and increasing your risk of electrical shock. - Page 17 REST AREA PAGE 12...
-
Page 18: Rear Panel
MUTE D.I. PRE D.I. LEVEL SOLO SIL. REC. POST NORMAL POWER INPUT STANDBY FULL D.I. LIFT Four:88 REAR PANEL CONTROLS GAIN BASS TREBLE VOICE MASTER MUTE HALF PWR GROUND ™ SIL. REC. NORMAL CAUTION: Unplug power before INPUT HOME OF TONE TUBE GUIDE 4:88 ®... -
Page 19: Power Cable, External Switching
GAIN BASS TREBLE VOICE MASTER HALF PWR POWER CABLE The IEC Removable AC cord that is supplied with the PRODIGY makes set-ups and tear-downs after the gig a snap. Make sure the AC cord is firmly in its socket (receptacle) before powering up the amplifier. Also, make sure the AC wall outlet you are connecting to is a reliable source of 120 volt AC power. -
Page 20: Tuner
REAR PANEL CONTROLS (Continued) wired in SERIES with the signal. This means that the entire signal goes through the LOOP. The SEND jack will feed the signal out of the preamp without interrupting it. The RETURN jack will break the path and interrupt the signal. When nothing is plugged in to the SEND and RETURN jacks the EFFECTS LOOP is effectively bypassed and the signal is unaffected by any loop circuitry. -
Page 21: Footswitch Jack
Four:88 GROUND ™ FOOTSWITCH (OPTIONAL) An optional PRODIGY Footswitch is available that provides remote control of the VOICE, SOLO, FX and MUTE/TUNE features. It also features a ¼” TUNER OUT jack on the left side that provides for connection of a tuner at the location of the Footswitch. -
Page 22: Speaker Outputs
REAR PANEL CONTROLS (Continued) MULTI-WATT™ and SPEAKER OUTPUT CHOICES NOTE: When switching between HALF and FULL POWER of the PRODIGY’s MULTI-WATT™ options, the impedance changes slightly at the SPEAKER OUTPUT jacks. While you can’t really damage the amplifier with an impedance mismatch (other than a 2 OHM load –... -
Page 23: D.i. Output
Four:88 ™ D.I. OUTPUT This 3-pin male XLR handles the interface connection between the D.I. OUTPUT (Direct Out) of the PRODIGY to Live Consoles or Recording Devices. Depending on the setting of the Front Panel D.I. SELECT mini toggle, the D.I. OUTPUT cap- tures either the unaffected, direct sound of your instrument when PRE is selected –... -
Page 24: Factory Sample Settings
FACTORY SAMPLE SETTINGS SAMPLE #1: Warm R&B MUTE D.I. PRE D.I. LEVEL SOLO SIL. REC. POST NORMAL POWER INPUT STANDBY FULL D.I. LIFT Four:88 GAIN BASS TREBLE VOICE MASTER HALF PWR GROUND ™ SAMPLE #2: Motown Round MUTE D.I. PRE D.I. -
Page 25: Personal Settings
PERSONAL SETTINGS SHEET PLAY D.I. PRE D.I. LEVEL SOLO MUTE POST VINTAGE POWER INPUT STANDBY FULL D.I. LIFT Four:88 GAIN BASS TREBLE VOICE MASTER HALF PWR GROUND ™ PLAY D.I. PRE D.I. LEVEL SOLO MUTE POST VINTAGE POWER INPUT STANDBY FULL D.I. -
Page 26: Biasing The Kt-88 Power Tubes
BIASING THE KT-88 POWER TUBES – by Designer Randall Smith First and foremost: Bias adjustment is only required when replacing power tubes. Checking bias as routine maintenance or if a tube problem is suspected is quick and easy but shouldn’t often be necessary. And since those big KT-88s in your amplifier are only running about half their maximum rated dissipation, they should last for years. - Page 27 Owners - it is not necessary to remove the Bottom Cover on your PRODIGY to set the BIAS when replacing Power Tubes. Located on top of the chassis is a 2-position mini-toggle switch, along side a precision Trim Pot and an LED. The BIAS ADJUST circuit al- lows for precise setting of the Bias for the Technician using a Current Meter - or - a “near perfect”...
-
Page 28: Speaker Impedance Matching And Hookup Guide
SPEAKER IMPEDANCE MATCHING & HOOK-UP GUIDE: IMPEDANCE: Wiring up speakers to provide the most effective load and making sure that all of them are in phase will help in creating the best sound possible. This is not too difficult, as long as you understand a few things about loading and how to connect your speakers to provide an optimal resistive load. - Page 29 PARALLEL: When wiring in parallel, the resistance of the speakers decreases. Two 8 ohm speakers wired in ( hooked-up ) Parallel results in a 4 ohm load. It’s easy to calculate the effect of a resistive load when all the speakers are all the same resistance. It is really not suggested to wire different resistive load values in Parallel ( 8 and 4, 16 and 8 etc.
- Page 30 WIRING SCHEMES...Amplifier to Speaker Cabinets Partial back view of amplifier Partial back view of amplifier 8 OHM 4 OHM 4 OHM 8 OHM 4 OHM 4 OHM 8 Ohm Cabinet Partial back view of some Mesa amp 8 OHM 4 OHM 4 OHM 4 Ohm Cabinet 8 Ohm Cabinet...
- Page 31 WIRING SCHEMES...Amplifier to Speaker Cabinets Partial back view of amplifier Partial back view of amplifier 4 OHM 4 OHM 8 OHM 8 OHM 4 OHM 4 OHM 8 Ohm Cabinet 16 Ohm Cabinet 8 Ohm Cabinet 8 Ohm Cabinet SAFE MISMATCH CORRECT MATCH Partial back view of amplifier Partial back view of amplifier...
- Page 32 WIRING SCHEMES...Amplifier to Speaker Cabinets Partial back view of amplifier 16 Ohm 4 OHM 4 OHM 8 OHM SERIES BOX 8 Ohm 8 Ohm 8 Ohm Cabinet 8 Ohm Cabinet 8 Ohm Cabinet SAFE MISMATCH Partial back view of amp Partial back view of amplifier CORRECT MATCH 8 OHM...
- Page 33 WIRING SCHEMES...Amplifier to Speaker Cabinets Partial back view of amplifier 16 Ohm 4 OHM 4 OHM 8 OHM SERIES BOX 8 Ohm 8 Ohm 8 Ohm Cabinet 8 Ohm Cabinet 16 Ohm Cabinet SAFE MISMATCH Partial back view of amplifier 8 OHM 4 OHM 4 OHM...
-
Page 34: Tube Noise And Microphonics
TUBE NOISE & MICROPHONICS: You may occasionally experience some form of tube noise or microphonics. Certainly no cause for alarm, this quirky behavior comes with the territory and the Tone. Much like changing a light bulb, you don’t need a technician to cure these types of minor user serviceable annoyances and in fact, you’ll be amazed at how easy it is to cure tube problems...by simply swapping out a pre-amp or power tube! First may we suggest that you set the amplifier up on something so that you can get to the tubes comfortably without having to bend... - Page 35 Sometimes making the diagnosis is more trouble than it’s worth and it’s faster and easier to merely replace the small pre-amp tubes ONE AT A TIME with a replacement known to be good. But MAKE SURE you keep returning the tubes to their original socket until you hit the one that cures the problem.
- Page 36 NOTES PAGE 31...
-
Page 37: Tube Replacement Chart
PAGE 32... -
Page 38: Parts Sheet
PAGE 33... - Page 39 ® ™ ®...
- Page 40 ™ ® 09/20/13...