Table of Contents
Advertisement
Advertisement
Table of Contents
Troubleshooting

Related Manuals for ZyXEL Communications SBG3300-N series


Summary of Contents for ZyXEL Communications SBG3300-N series
- Page 1 SBG3300-N Series Wireless N VDSL2 Combo WAN Small Business Security Gateway Version 1.00 Edition 3, 1/2014 Quick Start Guide User’s Guide Default Login Details LAN IP Address http://192.168.1.1 User Name admin Password 1234 www.zyxel.com Copyright © 2014 ZyXEL Communications Corporation...
- Page 2 Related Documentation • Quick Start Guide The Quick Start Guide shows how to connect the Device and access the Web Configurator wizards. It contains information on setting up your network and configuring for Internet access. SBG3300-N Series User’s Guide...
-
Page 3: Table Of Contents
ARP Table ..........................245 Routing Table ...........................247 IGMP Status ..........................249 xDSL Statistics .........................251 User Account ..........................255 Remote Management .......................259 TR-069 Client ...........................261 SNMP ............................263 Time ............................265 E-mail Notification ........................269 Logs Setting ..........................271 Firmware and WWAN Package Upgrade .................275 SBG3300-N Series User’s Guide... - Page 4 Contents Overview Configuration ..........................279 Diagnostic ..........................283 Troubleshooting ........................289 SBG3300-N Series User’s Guide...
-
Page 5: Table Of Contents
2.2 Web Configurator Layout .....................25 2.2.1 Title Bar ........................25 2.2.2 Main Window ......................26 2.2.3 Navigation Panel ......................26 Chapter 3 Quick Start..........................31 3.1 Overview ..........................31 3.2 Quick Start Setup .........................31 Part II: Technical Reference..............35 Chapter 4 Status Screens ........................37 SBG3300-N Series User’s Guide... - Page 6 6.5 The WPS Screen .........................84 6.6 The WMM Screen ........................85 6.7 The Others Screen .......................86 6.8 The Channel Status Screen ....................88 6.9 The Scheduling Screen ......................88 6.9.1 Add Schedule ......................89 6.10 Technical Reference ......................90 6.10.1 Wireless Network Overview ..................90 SBG3300-N Series User’s Guide...
- Page 7 8.4 The RIP Screen ........................129 Chapter 9 Quality of Service (QoS)....................... 131 9.1 Overview ...........................131 9.1.1 What You Can Do in this Chapter ................131 9.2 What You Need to Know ....................132 9.3 The Quality of Service General Screen ................133 SBG3300-N Series User’s Guide...
- Page 8 11.1.2 What You Need To Know ..................166 11.2 The DNS Entry Screen .....................166 11.2.1 Add/Edit DNS Entry ....................167 11.3 The Dynamic DNS Screen ....................167 Chapter 12 Interface Group/VLAN ......................169 12.1 Overview ..........................169 12.2 The Interface Group/VLAN Screen ..................169 SBG3300-N Series User’s Guide...
- Page 9 16.2 The User Access Control Screen ..................191 16.2.1 Add/Edit a User Access Control Rule ..............192 Chapter 17 Scheduler Rules........................195 17.1 Overview ..........................195 17.2 The Scheduler Rules Screen ...................195 17.2.1 Add/Edit a Schedule ....................196 Chapter 18 Certificates ..........................197 18.1 Overview ..........................197 SBG3300-N Series User’s Guide...
- Page 10 20.2 What You Can Do in this Chapter ..................225 20.3 PPTP VPN Setup ......................226 20.4 The PPTP VPN Monitor Screen ..................227 20.5 PPTP VPN Troubleshooting Tips ..................227 Chapter 21 L2TP VPN..........................231 21.1 Overview ..........................231 21.1.1 What You Can Do in this Chapter ................231 SBG3300-N Series User’s Guide...
- Page 11 26.1 Overview ..........................249 26.2 The IGMP Group Status Screen ..................249 Chapter 27 xDSL Statistics........................251 27.1 The xDSL Statistics Screen ....................251 Chapter 28 User Account ........................255 28.1 Overview .........................255 28.2 The User Account Screen ....................255 SBG3300-N Series User’s Guide...
- Page 12 34.2.1 Example E-mail Log ....................272 Chapter 35 Firmware and WWAN Package Upgrade ................275 35.1 Overview ..........................275 35.2 The Firmware Screen .......................275 Chapter 36 Configuration ........................279 36.1 Overview ..........................279 36.2 The Configuration Screen ....................279 36.3 The Reboot Screen ......................281 SBG3300-N Series User’s Guide...
- Page 13 38.2 Device Access and Login ....................290 38.3 Internet Access ........................292 38.4 Wireless Internet Access ....................293 38.5 USB Device Connection ....................294 38.6 UPnP ..........................294 Appendix A Customer Support .................... 297 Appendix B Legal Information....................303 Index ............................309 SBG3300-N Series User’s Guide...
- Page 14 Table of Contents SBG3300-N Series User’s Guide...
-
Page 15: User's Guide
User’s Guide... -
Page 17: Introducing The Device
Introducing the Device 1.1 Overview The SBG3300-N Series is a wireless VDSL router and Gigabit Ethernet gateway. It has one DSL port and Gigabit Ethernet for super-fast Internet access over analog (POTS) telephone lines. The Device supports both Packet Transfer Mode (PTM) and Asynchronous Transfer Mode (ATM). It is backward compatible with ADSL, ADSL2 and ADSL2+ in case VDSL is not available. -
Page 18: Applications For The Device
Computers can connect to the Device’s LAN ports (or wirelessly). Figure 1 Device’s Internet Access Application: ADSL/VDSL WLAN Bridging IPoE PPPoE ADSL / VDSL Figure 2 Device’s Internet Access Application: ADSL WLAN Bridging PPPoE IPoE PPPoA IPoA ADSL SBG3300-N Series User’s Guide... -
Page 19: Device's Usb Support
File Sharing Use the USB port (built-in USB 2.0) to share files on USB memory sticks or USB hard drives (B). Use FTP to access the files on the USB device. Figure 4 USB File Sharing Application SBG3300-N Series User’s Guide... -
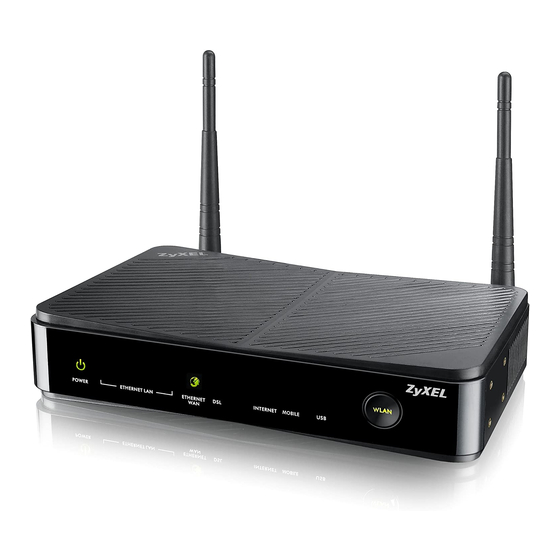
Page 20: Leds (Lights)
The DSL port is connected to a DSL jack or the Ethernet WAN port is connected to an Ethernet port but the Device cannot access the Internet. There is an Internet connection problem. There is no Internet connection or the gateway is in bridged mode. SBG3300-N Series User’s Guide... -
Page 21: The Reset Button
1.7 Wireless Access The Device is a wireless Access Point (AP) for wireless clients, such as notebooks, smartphones, or tablets. It allows them to connect to the Internet without having to rely on inconvenient Ethernet cables. SBG3300-N Series User’s Guide... -
Page 22: Using The Wlan Button
If the wireless network is turned off, press the WLAN button at the front of the Device for one second. Once the WLAN LED turns green, the wireless network is active. Use the Network Setting > Wireless > General screen to enable or disable this button. SBG3300-N Series User’s Guide... -
Page 23: The Web Configurator
If you have changed the password, enter your password and click Login. Figure 7 Password Screen SBG3300-N Series User’s Guide... - Page 24 The Status page appears, where you can view the Device’s interface and system information. Click the Quick Start Wizard button on top of the page to configure the Device’s time zone, basic Internet access, and wireless settings. See Chapter 3 on page 31 for more information. Figure 9 Status SBG3300-N Series User’s Guide...
-
Page 25: Web Configurator Layout
Table 2 Web Configurator Icons in the Title Bar ICON DESCRIPTION Quick Start: Click this icon to open screens where you can configure the Device’s time zone Internet access, and wireless settings. Logout: Click this icon to log out of the web configurator. SBG3300-N Series User’s Guide... -
Page 26: Main Window
DSL PhyR functions. 802.1x Use this screen to view and configure the IEEE 802.1x settings on the Device. multi-WAN Use this screen to configure the multiple WAN load balance and failover rules to distribute traffic among different interfaces. SBG3300-N Series User’s Guide... - Page 27 Use this screen to allow a static hostname alias for a dynamic IP address. Interface Use this screen to create a new interface group, which is a new LAN Group/VLAN bridge interface (subnet). USB Service Use this screen to enable file sharing via the Device. SBG3300-N Series User’s Guide...
- Page 28 Use this screen to manage user accounts, which includes configuring the username, password, retry times, file sharing, captive portal, and customizing the login message. Remote MGMT Use this screen to enable specific traffic directions for network services. SBG3300-N Series User’s Guide...
- Page 29 Use this screen to configure CFM (Connectivity Fault Management) MD (maintenance domain) and MA (maintenance association), perform connectivity tests and view test reports. OAM Ping Use this screen to view information to help you identify problems with the DSL connection. SBG3300-N Series User’s Guide...
- Page 30 Chapter 2 The Web Configurator SBG3300-N Series User’s Guide...
-
Page 31: Quick Start
The Quick Start Wizard appears automatically after login. Or you can click the Click Start icon in the top right corner of the web configurator to open the quick start screens. Select the time zone of the Device’s location and click Next. Figure 12 Time Zone SBG3300-N Series User’s Guide... - Page 32 Select your current WAN interface to configure its settings. Figure 13 WAN Interface Selection Enter your Internet connection information in this screen. The screen and fields to enter may vary depending on your current connection type. Click Next. Click Next. Figure 14 Internet Connection SBG3300-N Series User’s Guide...
- Page 33 Turn the wireless LAN on or off. If you keep it on, record the security settings so you can configure your wireless clients to connect to the Device. Click Save. Figure 15 Internet Connection Your Device saves your settings and attempts to connect to the Internet. SBG3300-N Series User’s Guide...
- Page 34 Chapter 3 Quick Start SBG3300-N Series User’s Guide...
-
Page 35: Technical Reference
Technical Reference... -
Page 37: Status Screens
Device, system resources, and interfaces (LAN, WAN, and WLAN). 4.2 The Status Screen Use this screen to view the status of the Device. Click Status to open this screen. Figure 16 Status Screen SBG3300-N Series User’s Guide... - Page 38 (Maintenance > Reboot), or when you reset it. Current This field displays the current date and time in the Device. You can change this in Date/Time Maintenance> Time Setting. System Resource SBG3300-N Series User’s Guide...
- Page 39 This field displays the identification name for the IPSec SA. Application This field displays the scenario type for the IPSec SA. Scenario Remote This field displays the remote gateway Address used in the SA. Gateway Address SBG3300-N Series User’s Guide...
- Page 40 Chapter 4 Status Screens SBG3300-N Series User’s Guide...
-
Page 41: Broadband
• Use the Broadband screen to view, remove or add a WAN interface. You can also configure the WAN settings on the Device for Internet access (Section 5.2 on page 45). • Use the 3G WAN screen to configure a 3G WAN connection (Section 5.3 on page 55). SBG3300-N Series User’s Guide... -
Page 42: What You Need To Know
(fixed) or dynamically assigned by the ISP each time the Device tries to access the Internet. If your ISP assigns you a static WAN IP address, they should also assign you the subnet mask and DNS server IP address(es). SBG3300-N Series User’s Guide... - Page 43 IPv6 Prefix and Prefix Length Similar to an IPv4 subnet mask, IPv6 uses an address prefix to represent the network address. An IPv6 prefix length specifies how many most significant bits (start from the left) in the address SBG3300-N Series User’s Guide...
- Page 44 Transition Router (AFTR in the graphic) to connect to the IPv4 Internet. The local network can also use IPv6 services. The VDSL Router uses it’s configured IPv6 WAN IP to route IPv6 traffic to the IPv6 Internet. SBG3300-N Series User’s Guide...
-
Page 45: Before You Begin
This is the service name of the connection. Type This shows whether it is an ATM, PTM, or Ethernet connection. Mode This shows whether the connection is in routing or bridge mode. Encapsulation This is the method of encapsulation used by this connection. SBG3300-N Series User’s Guide... - Page 46 This shows whether Multicast Listener Discovery (MLD) is activated or not for this connection. MLD is not available when the connection uses the bridging service. Modify Click the Edit icon to configure the WAN connection. Click the Delete icon to remove the WAN connection. SBG3300-N Series User’s Guide...
-
Page 47: Add/Edit Internet Connection
Figure 22 Routing Mode The following table describes the labels in this screen. Table 7 Routing Mode LABEL DESCRIPTION General Active Select this to activate the WAN configuration settings. Name Specify a descriptive name for this connection. SBG3300-N Series User’s Guide... - Page 48 EoA supports ENET ENCAP (IPoE), PPPoE and RFC1483/2684 bridging encapsulation methods. PPPoA (PPP over ATM) allows just one PPPoA connection over a PVC. IPoA (IP over ATM) allows just one RFC 1483 routing connection over a PVC. SBG3300-N Series User’s Guide...
- Page 49 This value specifies the time in minutes that elapses before the router automatically disconnects from the PPPoE server. This field is not configurable if you select PPP Auto Connect. PPPoE Service Enter the name of your PPPoE service here. Name SBG3300-N Series User’s Guide...
- Page 50 Enter the first DNS server address assigned by the ISP. DNS Server 2 Enter the second DNS server address assigned by the ISP. IPv6 Address This is available only when you select IPv6/IPv4 DualStack or IPv6 Only in the IPv6/ IPv4 Mode field. SBG3300-N Series User’s Guide...
- Page 51 Enable Dual Stack Lite to let local computers use IPv4 through an ISP’s IPv6 network. See Dual Stack Lite on page 44 for more information. Enable DS- Enable Dual Stack Lite to let local computers use IPv4 through an ISP’s IPv6 network. Lite SBG3300-N Series User’s Guide...
-
Page 52: Bridge Mode
Select Bridge as the encapsulation mode. The screen varies depending on the interface type you select. If you select ADSL/VDSL over PTM as the interface type, the following screen appears. Figure 23 Bridge Mode (ADSL/VDSL over PTM) SBG3300-N Series User’s Guide... - Page 53 Click Apply to save your changes. Cancel Click Cancel to exit this screen without saving. If you select ADSL over ATM as the interface type, the following screen appears. Figure 24 Bridge Mode (ADSL over ATM) SBG3300-N Series User’s Guide...
- Page 54 Divide the DSL line rate (bps) by 424 (the size of an ATM cell) to find the Peak Cell Rate (PCR). This is the maximum rate at which the sender can send cells. Type the PCR here.This field is not available when you select UBR Without PCR. SBG3300-N Series User’s Guide...
-
Page 55: The 3G Wan Screen
Use this screen to configure your 3G settings. Click Network Setting > Broadband > 3G WAN. Note: The actual data rate you obtain varies depending on the 3G USB dongle you use, the signal strength to the service provider’s base station, and so on. SBG3300-N Series User’s Guide... - Page 56 Chapter 5 Broadband Figure 25 Network Setting > Broadband > 3G WAN SBG3300-N Series User’s Guide...
- Page 57 Enter the first DNS server address assigned by the ISP. server Secondary DNS Enter the second DNS server address assigned by the ISP. server Apply Click Apply to save your changes back to the Device. Cancel Click Cancel to return to the previous configuration. SBG3300-N Series User’s Guide...
-
Page 58: The Add New 3G Dongle Screen
This is the target device class of the 3G dongle. Message This shows the input message content of the 3G dongle. Content Modify Click the Edit icon to modify the information of a 3G dongle. Click the Delete icon to remove it. SBG3300-N Series User’s Guide... -
Page 59: Add 3G Dongle Information
Use the Advanced screen to enable or disable PTM over ADSL, Annex M, and DSL PhyR functions. The Device supports the PhyR retransmission scheme. PhyR is a retransmission scheme designed to provide protection against noise on the DSL line. It improves voice, video and data transmission resilience by utilizing a retransmission buffer. SBG3300-N Series User’s Guide... -
Page 60: The 802.1X Screen
5.6 The 802.1x Screen You can view and configure the 802.1x authentication settings in the 802.1x screen. Click Network Setting > Broadband > 802.1x to display the following screen. Figure 29 Network Setting > Broadband > 802.1x SBG3300-N Series User’s Guide... -
Page 61: Edit 802.1X Settings
This field allows you to activate/deactivate the authentication. Select this to enable the authentication. Clear this to disable this authentication without having to delete the entry. Interface Select the interface that uses the authentication. EAP Identity Enter the EAP identity of the authentication. SBG3300-N Series User’s Guide... -
Page 62: The Multi-Wan Screen
This shows whether the rule is Active or Passive. Weight This shows the weight of the rule. Modify Click the Edit icon to configure the multi-WAN rule. Click the Delete icon to remove the multi-WAN rule. SBG3300-N Series User’s Guide... -
Page 63: Add/Edit Multi-Wan
Device stops routing to the gateway. The Device resumes routing to the gateway the first time the gateway passes the connectivity check. SBG3300-N Series User’s Guide... -
Page 64: How To Configure Multi-Wan For Load Balancing And Failover
Device are in active mode with a weight of 1, except for the 3G WAN connection which is set to passive mode. Click the Delete icon next to the VDSL WAN connection as it is not needed in this example. SBG3300-N Series User’s Guide... -
Page 65: Technical Reference
Edit screen only includes WAN connections which currently exist on the Device but are not currently configured in multi-WAN. 5.8 Technical Reference The following section contains additional technical information about the Device features described in this chapter. SBG3300-N Series User’s Guide... - Page 66 CBR traffic is generally time-sensitive (doesn't tolerate delay). CBR is used for connections that continuously require a specific amount of bandwidth. A PCR is specified and if traffic exceeds this rate, cells may be dropped. Examples of connections that need CBR would be high-resolution video and voice. SBG3300-N Series User’s Guide...
- Page 67 - they are not confined to the switch on which they were created. The VLANs can be created statically by hand or dynamically through GVRP. The VLAN ID associates a frame with a specific VLAN and provides the information that switches need to process the frame SBG3300-N Series User’s Guide...
- Page 68 If your ISP gives you DNS server addresses, manually enter them in the DNS server fields. If your ISP dynamically assigns the DNS server IP addresses (along with the Device’s WAN IP address), set the DNS server fields to get the DNS server address from the ISP. SBG3300-N Series User’s Guide...
- Page 69 IPv6 prefix length specifies how many most significant bits (start from the left) in the address compose the network address. The prefix length is written as “/x” where x is a number. For example, 2001:db8:1a2b:15::1a2f:0/32 means that the first 32 bits (2001:db8) is the subnet prefix. SBG3300-N Series User’s Guide...
- Page 70 Chapter 5 Broadband SBG3300-N Series User’s Guide...
-
Page 71: Wireless
• Use the Channel Status screen to scan wireless LAN channel noises and view the results (Section 6.8 on page 88). • Use the Scheduling screens to schedule times to turn your wireless LAN on or off on certain days and at certain times. SBG3300-N Series User’s Guide... -
Page 72: What You Need To Know
Device’s SSID, channel or security settings, you will lose your wireless connection when you press Apply to confirm. You must then change the wireless settings of your computer to match the Device’s new settings. SBG3300-N Series User’s Guide... - Page 73 If you are having problems with wireless interference, changing the channel may help. Try to use a channel that is as many channels away from any channels used by neighboring APs as possible. The channel number which the Device is currently using then displays next to this field. SBG3300-N Series User’s Guide...
- Page 74 Or you can select No Security to allow any client to associate this network without any data encryption or authentication. See the following sections for more details about this field. Apply Click Apply to save your changes. Cancel Click Cancel to restore your previously saved settings. SBG3300-N Series User’s Guide...
-
Page 75: No Security
RADIUS server. If your wireless devices support nothing stronger than WEP, use the highest encryption level available. Your Device allows you to configure up to four 64-bit or 128-bit WEP keys but only one key can be enabled at any one time. SBG3300-N Series User’s Guide... - Page 76 Click more... to show more fields in this section. Click less to hide them. WEP Encryption Select 64-bits or 128-bits. This dictates the length of the security key that the network is going to use. SBG3300-N Series User’s Guide...
-
Page 77: More Secure (Wpa(2)-Psk)
WPA-PSK This field appears when you choose WPA-PSK2 as the Security Mode. Compatible Check this field to allow wireless devices using WPA-PSK security mode to connect to your Device. The Device supports WPA-PSK and WPA2-PSK simultaneously. SBG3300-N Series User’s Guide... -
Page 78: Wpa(2) Authentication
The following table describes the labels in this screen. Table 22 Wireless > General: More Secure: WPA(2) LABEL DESCRIPTION Security Level Select More Secure to enable WPA(2)-PSK data encryption. Security Mode Choose WPA or WPA2 from the drop-down list box. Authentication Server SBG3300-N Series User’s Guide... -
Page 79: The More Ap Screen
This screen allows you to enable and configure multiple Basic Service Sets (BSSs) on the Device. Click Network Setting > Wireless > More AP. The following screen displays. Figure 38 Network Setting > Wireless > More AP SBG3300-N Series User’s Guide... - Page 80 Internet but cannot directly access the LAN. When guest WLAN is not enabled (N/A) the wireless clients can access the Internet and directly access the LAN. Modify Click the Edit icon to configure the SSID profile. SBG3300-N Series User’s Guide...
-
Page 81: Edit More Ap
Specify how many wireless clients can connect to the Device at one time. Hide SSID Select this check box to hide the SSID in the outgoing beacon frame so a station cannot obtain the SSID through scanning using a site survey tool. SBG3300-N Series User’s Guide... - Page 82 Or you can select No Security to allow any client to associate this network without any data encryption or authentication. Section 6.2.1 on page 75 for more details about this field. Apply Click Apply to save your changes. Cancel Click Cancel to exit this screen without saving. SBG3300-N Series User’s Guide...
-
Page 83: Mac Authentication
This is the MAC addresses of the wireless devices that are allowed or denied access to the Device. Modify Click the Delete icon to delete the entry. Apply Click Apply to save your changes. Cancel Click Cancel to exit this screen without saving. SBG3300-N Series User’s Guide... -
Page 84: The Wps Screen
The following table describes the labels in this screen. Table 26 Network Setting > Wireless > WPS LABEL DESCRIPTION Select Enable to activate WPS on the Device. Method 1 Use this section to set up a WPS wireless network using Push Button Configuration (PBC). SBG3300-N Series User’s Guide... -
Page 85: The Wmm Screen
Use this screen to enable Wi-Fi MultiMedia (WMM) and WMM Power Save in wireless networks for multimedia applications. Click Network Setting > Wireless > WMM. The following screen displays. Figure 42 Network Setting > Wireless > WMM SBG3300-N Series User’s Guide... -
Page 86: The Others Screen
Data with its frame size larger than this value will perform the RTS (Request To Send)/CTS Threshold (Clear To Send) handshake. Enter a value between 0 and 2347. Fragmentation This is the maximum data fragment size that can be sent. Enter a value between 256 and Threshold 2346. SBG3300-N Series User’s Guide... - Page 87 Section 6.10.7 on page 96 for more information. This field is configurable only when you set 802.11 Mode to 802.11b. Apply Click Apply to save your changes. Cancel Click Cancel to restore your previously saved settings. SBG3300-N Series User’s Guide...
-
Page 88: The Channel Status Screen
LAN channels. You can view the results in the Channel Scan Result section. Figure 44 Network Setting > Wireless > Channel Status 6.9 The Scheduling Screen Use this screen to schedule times to turn your wireless LAN on or off on certain days and at certain times. SBG3300-N Series User’s Guide... -
Page 89: Add Schedule
The following table describes the fields in this screen. Table 30 More AP: Edit LABEL DESCRIPTION Rule Name Specify a descriptive name to identify the scheduling rule. Select the days of the week to which to apply the schedule. SBG3300-N Series User’s Guide... -
Page 90: Technical Reference
• An “infrastructure” type of network has one or more access points and one or more wireless clients. The wireless clients connect to the access points. • An “ad-hoc” type of network is one in which there is no access point. Wireless clients connect to one another in order to exchange information. SBG3300-N Series User’s Guide... - Page 91 When you create a network, you must select a channel to use. Since the available unlicensed spectrum varies from one country to another, the number of available channels also varies. SBG3300-N Series User’s Guide...
-
Page 92: Additional Wireless Terms
A good way to come up with effective security keys, passwords and so on is to use obscure information that you personally will easily remember, and to enter it in a way that appears random SBG3300-N Series User’s Guide... - Page 93 Some wireless devices, such as scanners, can detect wireless networks but cannot use wireless networks. These kinds of wireless devices might not have MAC addresses. Hexadecimal characters are 0, 1, 2, 3, 4, 5, 6, 7, 8, 9, A, B, C, D, E, and F. SBG3300-N Series User’s Guide...
-
Page 94: Signal Problems
Problems with absorption occur when physical objects (such as thick walls) are between the two radios, muffling the signal. SBG3300-N Series User’s Guide... -
Page 95: Bss
• You must use different keys for different BSSs. If two wireless devices have different BSSIDs (they are in different BSSs), but have the same keys, they may hear each other’s communications (but not communicate with each other). SBG3300-N Series User’s Guide... -
Page 96: Preamble Type
Look for a WPS button on each device. If the device does not have one, log into its configuration utility and locate the button (see the device’s User’s Guide for how to do this - for the Device, see Section 6.6 on page 85). SBG3300-N Series User’s Guide... - Page 97 On a computer connected to the wireless client, try to connect to the Internet. If you can connect, WPS was successful. If you cannot connect, check the list of associated wireless clients in the AP’s configuration utility. If you see the wireless client in the list, WPS was successful. SBG3300-N Series User’s Guide...
-
Page 98: How Wps Works
WPA-PSK or WPA2-PSK pre-shared key to the enrollee. Whether WPA-PSK or WPA2-PSK is used depends on the standards supported by the devices. If the registrar is already part of a network, it sends the existing information. If not, it generates the SSID and WPA(2)-PSK randomly. SBG3300-N Series User’s Guide... - Page 99 This section shows how security settings are distributed in an example WPS setup. The following figure shows an example network. In step 1, both AP1 and Client 1 are unconfigured. When WPS is activated on both, they perform the handshake. In this example, AP1 SBG3300-N Series User’s Guide...
- Page 100 (it already has security information for the network). AP1 supplies the existing security information to Client 2. Figure 52 WPS: Example Network Step 2 REGISTRAR EXISTING CONNECTION CLIENT 1 ENROLLEE CLIENT 2 SBG3300-N Series User’s Guide...
- Page 101 (if the device supports this feature). Then, you can enter the key into the non-WPS device and join the network as normal (the non-WPS device must also support WPA-PSK or WPA2-PSK). SBG3300-N Series User’s Guide...
- Page 102 Check the MAC addresses of your wireless clients (usually printed on a label on the bottom of the device). If there is an unknown MAC address you can remove it or reset the AP. SBG3300-N Series User’s Guide...
-
Page 103: Lan
• Use the Additional Subnet screen to configure IP alias and public static IP (Section 7.5 on page 111). • Use the 5th Ethernet Port screen to configure the Ethernet WAN port as a LAN port (Section 7.8 on page 121). SBG3300-N Series User’s Guide... -
Page 104: What You Need To Know
UPnP devices and enable exchange of simple product and service descriptions. NAT traversal allows the following: • Dynamic port mapping • Learning public IP addresses SBG3300-N Series User’s Guide... -
Page 105: Before You Begin
Enter the IP subnet mask into the IP Subnet Mask field. Unless instructed otherwise it is best to leave this alone, the configurator will automatically compute a subnet mask based upon the IP address you entered. SBG3300-N Series User’s Guide... - Page 106 IP Address you enter, so do not change this field unless you are instructed to do so. IGMP Snooping Status Select the Enable IGMP Snooping check box to allows the Device to passively learn multicast group. SBG3300-N Series User’s Guide...
- Page 107 Enter the first and second DNS (Domain Name System) server IP address the Device passes to the DHCP clients. DNS Server 2 LAN IPv6 Mode Setup IPv6 State Select Enable to activate the IPv6 mode and configure IPv6 settings on the Device. LAN IPv6 Address Setup SBG3300-N Series User’s Guide...
- Page 108 Select None if you do not want to configure IPv6 DNS servers. IPv6 Address Values IPv6 Start If DHCPv6 is enabled, specify the first IPv6 address in the pool of addresses that can be Address assigned to DHCPv6 clients. SBG3300-N Series User’s Guide...
-
Page 109: The Static Dhcp Screen
Click the Edit icon to have the IP address field editable and change it. Click the Delete icon to delete a static DHCP entry. A window displays asking you to confirm that you want to delete the selected entry. SBG3300-N Series User’s Guide... -
Page 110: The Upnp Screen
IP address, convey its capabilities and learn about other devices on the network. In turn, a device can leave a network smoothly and automatically when it is no longer in use. page 104 for more information on UPnP. SBG3300-N Series User’s Guide... -
Page 111: Installing Upnp In Windows Example
This section shows how to install UPnP in Windows Me and Windows XP. Installing UPnP in Windows Me Follow the steps below to install the UPnP in Windows Me. Click Start and Control Panel. Double-click Add/Remove Programs. SBG3300-N Series User’s Guide... - Page 112 Click on the Windows Setup tab and select Communication in the Components selection box. Click Details. Add/Remove Programs: Windows Setup: Communication In the Communications window, select the Universal Plug and Play check box in the Components selection box. Add/Remove Programs: Windows Setup: Communication: Components SBG3300-N Series User’s Guide...
- Page 113 In the Network Connections window, click Advanced in the main menu and select Optional Networking Components …. Network Connections The Windows Optional Networking Components Wizard window displays. Select Networking Service in the Components selection box and click Details. Windows Optional Networking Components Wizard SBG3300-N Series User’s Guide...
-
Page 114: Using Upnp In Windows Xp Example
Make sure the computer is connected to a LAN port of the Device. Turn on your computer and the Device. Auto-discover Your UPnP-enabled Network Device Click Start and Control Panel. Double-click Network Connections. An icon displays under Internet Gateway. SBG3300-N Series User’s Guide... - Page 115 Chapter 7 LAN Right-click the icon and select Properties. Network Connections In the Internet Connection Properties window, click Settings to see the port mappings there were automatically created. Internet Connection Properties SBG3300-N Series User’s Guide...
- Page 116 When the UPnP-enabled device is disconnected from your computer, all port mappings will be deleted automatically. Select Show icon in notification area when connected option and click OK. An icon displays in the system tray. System Tray Icon SBG3300-N Series User’s Guide...
- Page 117 Device first. This comes helpful if you do not know the IP address of the Device. Follow the steps below to access the web configurator. Click Start and then Control Panel. Double-click Network Connections. SBG3300-N Series User’s Guide...
- Page 118 Network Connections An icon with the description for each UPnP-enabled device displays under Local Network. Right-click on the icon for your Device and select Invoke. The web configurator login screen displays. Network Connections: My Network Places SBG3300-N Series User’s Guide...
- Page 119 Chapter 7 LAN Right-click on the icon for your Device and select Properties. A properties window displays with basic information about the Device. Network Connections: My Network Places: Properties: Example SBG3300-N Series User’s Guide...
-
Page 120: The Additional Subnet Screen
Select the checkbox to enable the Public LAN feature. Your ISP must support Public LAN and Static IP. IP Address Enter the public IP address provided by your ISP. IP Subnet Mask Enter the public IP subnet mask provided by your ISP. SBG3300-N Series User’s Guide... -
Page 121: The 5Th Ethernet Port Screen
Click Apply to save your changes back to the Device. Cancel Click Cancel to exit this screen without saving. 7.9 Technical Reference This section provides some technical background information about the topics covered in this chapter. SBG3300-N Series User’s Guide... -
Page 122: Lans, Wans And The Device
• The ISP tells you the DNS server addresses, usually in the form of an information sheet, when you sign up. If your ISP gives you DNS server addresses, enter them in the DNS Server fields in the DHCP Setup screen. SBG3300-N Series User’s Guide... -
Page 123: Lan Tcp/Ip
However, the Internet Assigned Numbers Authority (IANA) has reserved the following three blocks of IP addresses specifically for private networks: • 10.0.0.0 — 10.255.255.255 • 172.16.0.0 — 172.31.255.255 • 192.168.0.0 — 192.168.255.255 SBG3300-N Series User’s Guide... - Page 124 Note: Regardless of your particular situation, do not create an arbitrary IP address; always follow the guidelines above. For more information on address assignment, please refer to RFC 1597, “Address Allocation for Private Internets” and RFC 1466, “Guidelines for Management of IP Address Space”. SBG3300-N Series User’s Guide...
-
Page 125: Routing
• Use the Policy Forwarding screen to configure policy routing on the Device. (Section 8.3 on page 127). • Use the RIP screen to set up RIP settings on the Device. (Section 8.4 on page 129). SBG3300-N Series User’s Guide... -
Page 126: The Routing Screen
Click the Edit icon to edit the static route on the Device. Click the Delete icon to remove a static route from the Device. A window displays asking you to confirm that you want to delete the route. SBG3300-N Series User’s Guide... -
Page 127: Add/Edit Static Route
Policy forwarding allows the Device to override the default routing behavior and alter the packet forwarding based on the policy defined by the network administrator. Policy-based routing is applied to outgoing packets, prior to the normal routing. SBG3300-N Series User’s Guide... - Page 128 This is the destination MAC address. Modify Click the Edit icon to edit this policy. Click the Delete icon to remove a policy from the Device. A window displays asking you to confirm that you want to delete the policy. SBG3300-N Series User’s Guide...
-
Page 129: Add/Edit Policy Forwarding
Click Apply to save your changes. Cancel Click Cancel to exit this screen without saving. 8.4 The RIP Screen Routing Information Protocol (RIP, RFC 1058 and RFC 1389) allows a device to exchange routing information with other routers. SBG3300-N Series User’s Guide... - Page 130 Select Active to have the Device advertise its route information and also listen for routing updates from neighboring routers. Enabled Select the check box to activate the settings. Apply Click Apply to save your changes. Cancel Click Cancel to exit this screen without saving. SBG3300-N Series User’s Guide...
-
Page 131: Quality Of Service (Qos)
136). • The Policer Setup screen lets you add, edit or delete QoS policers (Section 9.5 on page 136). • The Monitor screen lets you view the Device's QoS-related packet statistics (Section 9.7 on page 143). SBG3300-N Series User’s Guide... -
Page 132: What You Need To Know
(or queues). Your Device uses the Token Bucket algorithm to allow a certain amount of large bursts while keeping a limit at the average rate. Traffic Rate Traffic Rate Time Time (Before Traffic Shaping) (After Traffic Shaping) SBG3300-N Series User’s Guide... -
Page 133: The Quality Of Service General Screen
Click Network Setting > QoS > General to open the screen as shown next. Use this screen to enable or disable QoS and set the upstream bandwidth. See Section 9.1 on page for more information. Figure 67 Network Settings > QoS > General SBG3300-N Series User’s Guide... -
Page 134: The Queue Setup Screen
Apply Click Apply to save your changes. Cancel Click Cancel to restore your previously saved settings. 9.4 The Queue Setup Screen Click Network Setting > QoS > Queue Setup to open the screen as shown next. SBG3300-N Series User’s Guide... - Page 135 This shows the maximum transmission rate allowed for traffic on this queue. Modify Click the Edit icon to edit the queue. Click the Delete icon to delete an existing queue. Note that subsequent rules move up by one when you take this action. SBG3300-N Series User’s Guide...
-
Page 136: Adding A Qos Queue
For example, you can configure a classifier to select traffic from the same protocol port (such as Telnet) to form a flow. SBG3300-N Series User’s Guide... - Page 137 This is the name of the queue in which traffic of this classifier is put. Modify Click the Edit icon to edit the classifier. Click the Delete icon to delete an existing classifier. Note that subsequent rules move up by one when you take this action. SBG3300-N Series User’s Guide...
-
Page 138: Add/Edit Qos Class
Chapter 9 Quality of Service (QoS) 9.5.1 Add/Edit QoS Class Click Add new Classifier in the Class Setup screen or the Edit icon next to a classifier to open the following screen. Figure 71 Class Setup: Add/Edit SBG3300-N Series User’s Guide... - Page 139 For example, if you set the MAC address to 00:13:49:00:00:00 and the mask to ff:ff:ff:00:00:00, a packet with a MAC address of 00:13:49:12:34:56 matches this criteria. Exclude Select this option to exclude the packets that match the specified criteria from this classifier. Others SBG3300-N Series User’s Guide...
- Page 140 If you select Unchange, the Device keep the VLAN ID in the packets. Forward to Select a WAN interface through which traffic of this class will be forwarded out. If you select Interface Unchange, the Device forward traffic of this class according to the default routing table. SBG3300-N Series User’s Guide...
-
Page 141: The Qos Policer Setup Screen
QoS classes. Modify Click the Edit icon to edit the policer. Click the Delete icon to delete an existing policer. Note that subsequent rules move up by one when you take this action. SBG3300-N Series User’s Guide... -
Page 142: Add/Edit A Qos Policer
Specify what the Device does for packets within the committed rate and burst size (green- Action marked packets). • Pass: Send the packets without modification. • DSCP Mark: Change the DSCP mark value of the packets. Enter the DSCP mark value to use. SBG3300-N Series User’s Guide... -
Page 143: The Qos Monitor Screen
This shows how many packets forwarded to this interface are transmitted successfully. Drop Rate This shows how many packets forwarded to this interface are dropped. Queue Monitor This is the index number of the entry. Name This shows the name of the queue. SBG3300-N Series User’s Guide... -
Page 144: Technical Reference
Packets are marked with DiffServ Code Points (DSCPs) indicating the level of service desired. This allows the intermediary DiffServ-compliant network devices to handle the packets differently depending on the code points without the need to SBG3300-N Series User’s Guide... - Page 145 Table 53 Internal Layer2 and Layer3 QoS Mapping LAYER 2 LAYER 3 PRIORITY IEEE 802.1P USER QUEUE PRIORITY TOS (IP IP PACKET DSCP (ETHERNET PRECEDENCE) LENGTH (BYTE) PRIORITY) 000000 000000 >1100 001110 250~1100 001100 001010 001000 SBG3300-N Series User’s Guide...
- Page 146 • Holds it in the queue until enough tokens are available in the bucket. In traffic policing: • Drops it. • Transmits it but adds a DSCP mark. The Device may drop these marked packets if the network is overloaded. SBG3300-N Series User’s Guide...
- Page 147 The trTCM is based on the token bucket filter and has two token buckets (Committed Burst Size (CBS) and Peak Burst Size (PBS)). Tokens are generated and added into the two buckets at the CIR and PIR respectively. SBG3300-N Series User’s Guide...
- Page 148 • If the PBS bucket has enough tokens, the Device checks the CBS bucket. The packet is marked green and can be transmitted if the number of tokens in the CBS bucket is equal to or greater than the size of the packet (in bytes). Otherwise, the packet is marked yellow. SBG3300-N Series User’s Guide...
-
Page 149: Network Address Translation (Nat)
WAN side. In the simplest form, NAT changes the source IP address in a packet received from a subscriber (the inside local address) to another (the inside global address) before forwarding the packet to the SBG3300-N Series User’s Guide... -
Page 150: The Port Forwarding Screen
Let's say you want to assign ports 21-25 to one FTP, Telnet and SMTP server (A in the example), port 80 to another (B in the example) and assign a default server IP address of 192.168.1.35 to a SBG3300-N Series User’s Guide... - Page 151 This is the last external port number that identifies a service. Translation This is the first internal port number that identifies a service. Start Port Translation End This is the last internal port number that identifies a service. Port SBG3300-N Series User’s Guide...
-
Page 152: Add/Edit Port Forwarding
To forward only one port, enter the port number again in the End Port field. To forward a series of ports, enter the start port number here and the end port number in the End Port field. SBG3300-N Series User’s Guide... -
Page 153: The Applications Screen
WAN Interface This field shows the WAN interface through which the service is forwarded. Server IP This field displays the destination IP address for the service. Address Modify Click the Delete icon to delete the rule. SBG3300-N Series User’s Guide... -
Page 154: Add New Application
LAN can use the service in the same manner. This way you do not need to configure a new IP address each time you want a different LAN computer to use the application. SBG3300-N Series User’s Guide... - Page 155 IP address of the LAN computer that sent the traffic to a server on the WAN. This is the first port number that identifies a service. Trigger End This is the last port number that identifies a service. Port Trigger Proto. This is the trigger transport layer protocol. SBG3300-N Series User’s Guide...
-
Page 156: Add/Edit Port Triggering Rule
Type a port number or the starting port number in a range of port numbers. Trigger End Type a port number or the ending port number in a range of port numbers. Port Trigger Protocol Select the transport layer protocol from TCP, UDP, or TCP/UDP. SBG3300-N Series User’s Guide... -
Page 157: The Default Server Screen
Note: If you do not assign a Default Server Address, the Device discards all packets received for ports that are not specified in the NAT Port Forwarding screen. Apply Click Apply to save your changes. Cancel Click Cancel to restore your previously saved settings. SBG3300-N Series User’s Guide... -
Page 158: The Alg Screen
When a rule matches the current packet, the Device takes the corresponding action and the remaining rules are ignored. Click Network Setting > NAT > Address Mapping to display the following screen. Figure 85 Network Setting > NAT > Address Mapping SBG3300-N Series User’s Guide... -
Page 159: Add/Edit Address Mapping Rule
10.7.1 Add/Edit Address Mapping Rule To add or edit an address mapping rule, click Add new rule or the rule’s edit icon in the Address Mapping screen to display the screen shown next. Figure 86 Address Mapping: Add/Edit SBG3300-N Series User’s Guide... -
Page 160: Technical Reference
IP address of a host when the packet is in the local network, while the global address refers to the IP address of the host when the same packet is traveling in the WAN side. SBG3300-N Series User’s Guide... -
Page 161: What Nat Does
With no servers defined, your Device filters out all incoming inquiries, thus preventing intruders from probing your network. For more information on IP address translation, refer to RFC 1631, The IP Network Address Translator (NAT). SBG3300-N Series User’s Guide... -
Page 162: How Nat Works
NAT Table Inside Local Inside Global IP Address IP Address 192.168.1.10 IGA 1 192.168.1.13 192.168.1.11 IGA 2 192.168.1.12 IGA 3 192.168.1.13 IGA 4 192.168.1.12 192.168.1.10 IGA1 Inside Local Inside Global Address (ILA) Address (IGA) 192.168.1.11 192.168.1.10 SBG3300-N Series User’s Guide... -
Page 163: Nat Application
SMTP (Simple Mail Transfer Protocol) DNS (Domain Name System) Finger HTTP (Hyper Text Transfer protocol or WWW, Web) POP3 (Post Office Protocol) NNTP (Network News Transport Protocol) SNMP (Simple Network Management Protocol) SNMP trap PPTP (Point-to-Point Tunneling Protocol) 1723 SBG3300-N Series User’s Guide... - Page 164 (C in the example). You assign the LAN IP addresses and the ISP assigns the WAN IP address. The NAT network appears as a single host on the Internet. Figure 89 Multiple Servers Behind NAT Example A=192.168.1.33 192.168.1.1 B=192.168.1.34 IP address assigned by ISP C=192.168.1.35 D=192.168.1.36 SBG3300-N Series User’s Guide...
-
Page 165: Dynamic Dns Setup
• Use the DNS Entry screen to view, configure, or remove DNS routes (Section 11.2 on page 166). • Use the Dynamic DNS screen to enable DDNS and configure the DDNS settings on the Device (Section 11.3 on page 167). SBG3300-N Series User’s Guide... -
Page 166: What You Need To Know
This indicates the host name or domain name. Also known as the Fully Qualified Domain Name (FQDN). IP Address This indicates the IP address assigned to this computer. Modify Click the Edit icon to edit the rule. Click the Delete icon to delete an existing rule. SBG3300-N Series User’s Guide... -
Page 167: Add/Edit Dns Entry
Click Cancel to exit this screen without saving. 11.3 The Dynamic DNS Screen Use this screen to change your Device’s DDNS. Click Network Setting > DNS > Dynamic DNS. The screen appears as shown. Figure 92 Network Setting > DNS > Dynamic DNS SBG3300-N Series User’s Guide... - Page 168 If you select TZO in the Service Provider field, enter the password you used to register for this service. Apply Click Apply to save your changes. Cancel Click Cancel to exit this screen without saving. SBG3300-N Series User’s Guide...
-
Page 169: Interface Group/Vlan
IEEE 802.1q. Use VLAN to divide the physical network into multiple logical networks. VLAN interfaces receive and send tagged frames. The Device automatically adds or removes the tags as needed. Figure 93 Network Setting > Interface Group/VLAN SBG3300-N Series User’s Guide... -
Page 170: Interface Group Configuration
Click the Add New Interface Group button in the Interface Group screen to open the following screen. Use this screen to create a new interface group. Note: An untagged interface can belong to only one group at a time." Figure 94 Interface Group Configuration SBG3300-N Series User’s Guide... - Page 171 This shows if wildcard on DHCP option 60 is enabled. Support Remove Click the Remove icon to delete this rule from the Device. Apply Click Apply to save your changes back to the Device. Cancel Click Cancel to exit this screen without saving. SBG3300-N Series User’s Guide...
-
Page 172: Interface Grouping Criteria
(MAC address) in the following fields. Select Other to enter any string that identifies the device in the DUID field. DHCP Option Select this and enter vendor specific information of the matched traffic. SBG3300-N Series User’s Guide... - Page 173 Enter the model name of the device. Name Serial Enter the serial number of the device. Number Apply Click Apply to save your changes back to the Device. Cancel Click Cancel to exit this screen without saving. SBG3300-N Series User’s Guide...
- Page 174 Chapter 12 Interface Group/VLAN SBG3300-N Series User’s Guide...
-
Page 175: Usb Service
The Device uses Common Internet File System (CIFS) protocol for its file sharing functions. CIFS compatible computers can access the USB file storage devices connected to the Device. CIFS protocol is supported on Microsoft Windows, Linux Samba and other operating systems (refer to your systems specifications for CIFS compatibility). SBG3300-N Series User’s Guide... -
Page 176: The File Sharing Screen
13.2.1 Before You Begin Make sure the Device is connected to your network and turned on. Connect the USB device to one of the Device’s USB port. Make sure the Device is connected to your network. SBG3300-N Series User’s Guide... - Page 177 File Sharing Select Enable to activate file sharing through the Device. Services Host Name Enter the host name on the share. Apply Click Apply to save your changes. Cancel Click Cancel to restore your previously saved settings. SBG3300-N Series User’s Guide...
- Page 178 Chapter 13 USB Service SBG3300-N Series User’s Guide...
-
Page 179: Firewall
• Use the Access Control screen to view and configure incoming/outgoing filtering rules (Section 14.4 on page 184). • Use the DoS screen to activate protection against Denial of Service (DoS) attacks (Section 14.5 on page 187). SBG3300-N Series User’s Guide... -
Page 180: What You Need To Know
Stateful Packet Inspection (SPI) tracks each connection crossing the firewall and makes sure it is valid. Filtering decisions are based not only on rules but also context. For example, traffic from the WAN may only be allowed to cross the firewall in response to a request from the LAN. SBG3300-N Series User’s Guide... -
Page 181: The Firewall Screen
Click Cancel to restore your previously saved settings. 14.3 The Service Screen You can configure customized services and port numbers in the Service screen. For a comprehensive list of port numbers and services, visit the IANA (Internet Assigned Number Authority) website. SBG3300-N Series User’s Guide... - Page 182 Other and the protocol number displays if the service uses another IP protocol. Modify Click the Edit icon to edit the entry. Click the Delete icon to remove this entry. SBG3300-N Series User’s Guide...
-
Page 183: Add/Edit A Service
For other IP protocol rules this shows the protocol number. Modify Click the Delete icon to remove the rule. Service Name Enter a unique name (up to 32 printable English keyboard characters, including spaces) for your customized port. SBG3300-N Series User’s Guide... -
Page 184: The Access Control Screen
Click this to go to add a filter rule for incoming or outgoing IP traffic. rule This is the index number of the entry. The icon is lit up when the ACL rule is enabled and grayed out when the rule is disabled. SBG3300-N Series User’s Guide... -
Page 185: Add/Edit An Acl Rule
Click the Move To icon to change the order of the rule. Enter the number in the # field. 14.4.1 Add/Edit an ACL Rule Click Add new ACL rule or the Edit icon next to an existing ACL rule in the Access Control screen. The following screen displays. Figure 103 Access Control: Add/Edit SBG3300-N Series User’s Guide... - Page 186 Enter a single port number or the range of port numbers of the destination. Policy Use the drop-down list box to select whether to discard (DROP), deny and send an ICMP destination-unreachable message to the sender of (REJECT) or allow the passage of (ACCEPT) packets that match this rule. SBG3300-N Series User’s Guide...
-
Page 187: The Dos Screen
DoS Protection Select Enable to enable protection against DoS attacks. Blocking Deny Ping Select Enable to block ping request packets. Response Apply Click Apply to save your changes. Cancel Click Cancel to exit this screen without saving. SBG3300-N Series User’s Guide... - Page 188 Chapter 14 Firewall SBG3300-N Series User’s Guide...
-
Page 189: Mac Filter
15.2 The MAC Filter Screen Use this screen to allow wireless and LAN clients access to the Device. Click Security > MAC Filter. The screen appears as shown. Figure 105 Security > MAC Filter SBG3300-N Series User’s Guide... - Page 190 Device in these address fields. Enter the MAC addresses in a valid MAC address format, that is, six hexadecimal character pairs, for example, 12:34:56:78:9a:bc. Apply Click Apply to save your changes. Cancel Click Cancel to restore your previously saved settings. SBG3300-N Series User’s Guide...
-
Page 191: User Access Control
This shows the name of the rule. Network User This shows the MAC address of the LAN user’s computer to which this rule applies. (MAC) Internet Access This shows the day(s) and time on which User Access control is enabled. Schedule SBG3300-N Series User’s Guide... -
Page 192: Add/Edit A User Access Control Rule
Use this screen to configure a restricted access schedule and/or URL filtering settings to block the users on your network from accessing certain web sites. Figure 107 User Access Control Rule: Add/Edit SBG3300-N Series User’s Guide... - Page 193 Click Add to show a screen to enter the URL of web site or URL keyword to which the Device URL Keyword blocks access. Click Delete to remove it. Apply Click this button to save your settings back to the Device. Cancel Click Cancel to restore your previously saved settings. SBG3300-N Series User’s Guide...
- Page 194 Chapter 16 User Access Control SBG3300-N Series User’s Guide...
-
Page 195: Scheduler Rules
This shows the description of this rule. Modify Click the Edit icon to edit the schedule. Click the Delete icon to delete a scheduler rule. Note: You cannot delete a scheduler rule once it is applied to a certain feature. SBG3300-N Series User’s Guide... -
Page 196: Add/Edit A Schedule
Enter the time period of each day, in 24-hour format, during which User Access control will Range be enforced. Description Enter a description for this scheduler rule. Apply Click Apply to save your changes. Cancel Click Cancel to exit this screen without saving. SBG3300-N Series User’s Guide... -
Page 197: Certificates
You can use the Device to generate certification requests that contain identifying information and public keys and then send the certification requests to a certification authority. SBG3300-N Series User’s Guide... -
Page 198: The Local Certificates Screen
For a certification request, click Load Signed to import the signed certificate. Click the Remove icon to delete the certificate (or certification request). You cannot delete a certificate that one or more features is configured to use. SBG3300-N Series User’s Guide... -
Page 199: Create Certificate Request
After you click Apply, the following screen displays to notify you that you need to get the certificate request signed by a Certificate Authority. If you already have, click Load_Signed to import the signed certificate into the Device. Otherwise click Back to return to the Local Certificates screen. SBG3300-N Series User’s Guide... -
Page 200: Load Signed Certificate
Certificates screen click the certificate request’s Load Signed icon to import the signed certificate into the Device. Note: You must remove any spaces from the certificate’s filename before you can import Figure 113 Load Signed Certificate SBG3300-N Series User’s Guide... -
Page 201: The Trusted Ca Screen
Click the View icon to open a screen with an in-depth list of information about the certificate (or certification request). Click the Remove button to delete the certificate (or certification request). You cannot delete a certificate that one or more features is configured to use. SBG3300-N Series User’s Guide... -
Page 202: View Trusted Ca Certificate
You can copy and paste the certificate into an e-mail to send to friends or colleagues or you can copy and paste the certificate into a text editor and save the file on a management computer for later distribution (via floppy disk for example). Back Click Back to return to the previous screen. SBG3300-N Series User’s Guide... -
Page 203: Import Trusted Ca Certificate
CA will be displayed in the Network Setting > Broadband > 802.1x: Authentication Edit screen. Certificate Copy and paste the certificate into the text box to store it on the Device. Click OK to save your changes. Cancel Click Cancel to exit this screen without saving. SBG3300-N Series User’s Guide... - Page 204 Chapter 18 Certificates SBG3300-N Series User’s Guide...
-
Page 205: Ipsec Vpn
• Use the Monitor screen to display and manage active IPSec VPN connections (Section 19.5 on page 215). • Use the Radius screen to manage the list of RADIUS servers the Device can use in authenticating users (Section 19.6 on page 215). SBG3300-N Series User’s Guide... -
Page 206: What You Need To Know
The following figure helps explain the main fields in the web configurator. Figure 119 IPSec Fields Summary Remote Network Local Network Remote IPSec Router VPN Tunnel Remote IP Address Local IP Address Local and remote IP addresses must be static. SBG3300-N Series User’s Guide... -
Page 207: Add/Edit Vpn Rule
You can click the Add New Entry button or a policy’s Edit icon in the IPSec VPN > Setup screen to either add or edit a VPN policy. Note: The Device uses the system default gateway interface’s WAN IP address as its WAN IP address to set up a VPN tunnel. SBG3300-N Series User’s Guide... -
Page 208: The Vpn Connection Add/Edit Screen
Figure 121 VPN > IPSec VPN > Setup > Edit The following table describes the labels in this screen. Table 91 VPN > IPSec VPN > Setup > Edit LABEL DESCRIPTION General Enable Select the checkbox to activate this VPN policy. SBG3300-N Series User’s Guide... - Page 209 Key Exchange Mode When this field is set to Manual, the specified IPsec VPN tunnel will be considered as connected at any time. You cannot disconnect the specified IPsec VPN tunnel in the IPsec Monitor screen. SBG3300-N Series User’s Guide...
- Page 210 Local/Remote ID Content field. When you select FQDN or User-FQDN in the Local/Remote ID Type field, type a domain name or e-mail address by which to identify this Device in the Local/Remote ID Content field. SBG3300-N Series User’s Guide...
- Page 211 SHA1 and MD5. SHA1 is generally considered stronger than MD5, but it is also slower. Click this to add phase 1 Encryption and Authentication. Modify Select an entry and click the delete icon to remove it. SBG3300-N Series User’s Guide...
- Page 212 If you select ESP, you must select an Encryption algorithm and Authentication algorithm. Both AH and ESP increase processing requirements and latency (delay). The Device and remote IPSec router must use the same active protocol. SBG3300-N Series User’s Guide...
- Page 213 IP address. Select Range to enter a range of IP addresses in the Local/Remote IP Address Start and Local/Remote IP Address End fields. Select Subnet to specify IP addresses on a network by their subnet mask. SBG3300-N Series User’s Guide...
-
Page 214: The Default_L2Tp_Vpn Ipsec Vpn Rule
3600 Negotiation Mode Main Tunnel Mode Encryption / 3DES / SHA1 Encryption Authentication 3DES / MD5 3DES AES256 / SHA1 AES256 Authentication SHA1 Key Group Perfect Forward Secrecy (PFS) Dead Peer Detection Encapsulation Transport (DPD) XAUTH SBG3300-N Series User’s Guide... -
Page 215: The Ipsec Vpn Monitor Screen
Use the Radius screen to manage the list of RADIUS servers the Device can use in authenticating users. In the Web Configurator, click VPN > IPSec VPN > Radius. Figure 123 VPN > IPSec VPN > Radius SBG3300-N Series User’s Guide... -
Page 216: Technical Reference
Apply Click Apply to save your changes back to the Device. Cancel Click Cancel to restore your previous settings. 19.7 Technical Reference This section provides some technical background information about the topics covered in this chapter. SBG3300-N Series User’s Guide... -
Page 217: Ipsec Architecture
The Authentication Algorithms, HMAC-MD5 (RFC 2403) and HMAC-SHA-1 (RFC 2404, provide an authentication mechanism for the AH and ESP protocols. Key Management Key management allows you to determine whether to use IKE (ISAKMP) or manual key configuration in order to set up a VPN. SBG3300-N Series User’s Guide... -
Page 218: Encapsulation
• Outside header: The outside IP header contains the destination IP address of the VPN gateway. • Inside header: The inside IP header contains the destination IP address of the final system behind the VPN gateway. The security protocol appears after the outer IP header and before the inside IP header. SBG3300-N Series User’s Guide... -
Page 219: Ike Phases
SA the next time someone attempts to send traffic. 19.7.4 Negotiation Mode The phase 1 Negotiation Mode you select determines how the Security Association (SA) will be established for each connection through IKE negotiations. SBG3300-N Series User’s Guide... -
Page 220: Ipsec And Nat
NAT device between the IPSec endpoints rewrites the source or destination address. As a result, the VPN device at the receiving end finds a mismatch between the hash value and the data and assumes that the data has been maliciously altered. SBG3300-N Series User’s Guide... -
Page 221: Id Type And Content
219), the ID type and content are encrypted to provide identity protection. In this case the Device can only distinguish between different incoming SAs that connect from remote IPSec routers that have dynamic WAN IP addresses. The Device can SBG3300-N Series User’s Guide... -
Page 222: Pre-Shared Key
A pre-shared key identifies a communicating party during a phase 1 IKE negotiation (see Section 19.7.3 on page 219 for more on IKE phases). It is called “pre-shared” because you have to share it with another party before you can communicate with them over a secure connection. SBG3300-N Series User’s Guide... -
Page 223: Diffie-Hellman (Dh) Key Groups
768-bit, 1024-bit 1536-bit, 2048-bit, and 3072-bit Diffie-Hellman groups are supported. Upon completion of the Diffie-Hellman exchange, the two peers have a shared secret, but the IKE SA is not authenticated. For authentication, use pre-shared keys. SBG3300-N Series User’s Guide... - Page 224 Chapter 19 IPSec VPN SBG3300-N Series User’s Guide...
-
Page 225: Pptp Vpn
20.2 What You Can Do in this Chapter • Use the Setup screen to configure the PPTP VPN settings in the Device (Section 20.3 on page 226). • Use the Monitor screen to view settings for PPTP clients (Section 20.4 on page 227). SBG3300-N Series User’s Guide... -
Page 226: Pptp Vpn Setup
Select how the Device authenticates a remote user before allowing access to the PPTP Method VPN tunnel. The authentication method has the Device check a user’s user name and password against the Device’s local database, which is configured in the Maintenance > User Account screen. SBG3300-N Series User’s Guide... -
Page 227: The Pptp Vpn Monitor Screen
A PPTP client device (such as a PC, smart phone, tablet) cannot connect to the Device. TIP: This could be due to one of the following reasons: a. The client device is not connected to the Internet successfully. SBG3300-N Series User’s Guide... - Page 228 The Device’s WAN interface on which the PPTP connection is established is disconnected. A PPTP client is connected successfully but cannot access the local host or server behind the Device. Tip: This may be caused by one of the followings: a. The local host or server is disconnected. SBG3300-N Series User’s Guide...
- Page 229 An Android device cannot connect to the Device’s PPTP VPN. Tip: Devices running an Android OS older than version 4.1 have issues with PPTP/MPPE encryption. Avoid using devices that run an Android OS older than version 4.1 for PPTP VPN connection. SBG3300-N Series User’s Guide...
- Page 230 Chapter 20 PPTP VPN SBG3300-N Series User’s Guide...
-
Page 231: L2Tp Vpn
• Use the Monitor screen to view settings for L2TP clients (Chapter 21 on page 233). Note: You need to configure the Default_L2TPVPN VPN rule in the VPN > IPSec > IPSec Setup screen. See Chapter 19 on page 205 for information on IPSec VPN. SBG3300-N Series User’s Guide... -
Page 232: L2Tp Vpn Screen
Account screen. Keep Alive Timer The Device sends a Hello message after waiting this long without receiving any traffic from the remote user. The Device disconnects the VPN tunnel if the remote user does not respond. SBG3300-N Series User’s Guide... -
Page 233: The L2Tp Vpn Monitor Screen
A L2TP client device (such as a PC, smart phone, tablet) cannot connect to the Device. TIP: This could be due to one of the following reasons: a. The client device is not connected to the Internet successfully. Action: Check the client device’s Internet connection. SBG3300-N Series User’s Guide... - Page 234 Reconfigure the pre-shared key on the client Windows device and retry the connection. An L2TP client device cannot reconnect after it is disconnected. Tip: If a client reconnects right after it is disconnected, the reconnection may fail. Wait 60 seconds before reconnecting. SBG3300-N Series User’s Guide...
- Page 235 IPSec proposals provided by a built-in L2TP client in the popular operating systems during IPSec phase 1 negotiation. The first proposal that can be supported by the phase 1 setting in the Default_L2TPVPN IPSec VPN rule will be accepted by the SBG3300-N Series User’s Guide...
- Page 236 ESP/3DES/SHA1 ESP/3DES/SHA1 ESP/3DES/MD5 ESP/3DES/MD5 ESP/DES/SHA1 ESP/DES/MD5 AH/-/SHA1 and ESP/3DES/SHA1 ESP/3DES/SHA1 ESP/3DES/- AH/-/MD5 and AH/-/SHA1 and ESP/DES/SHA1 ESP/3DES/- ESP/AES/- AH/-/SHA1 and AH/-/SHA1 and ESP/-/SHA1 ESP/3DES/SHA1 ESP/3DES/- AH/-/MD5 and AH/-/SHA1 and AH/-/SHA1 ESP/3DES/MD5 ESP/3DES/SHA1 ESP/DES/MD5 ESP/-/SHA1 ESP/DES/SHA1 AH/-/SHA1 SBG3300-N Series User’s Guide...
-
Page 237: Log
SEVERITY Emergency: The system is unusable. Alert: Action must be taken immediately. Critical: The system condition is critical. Error: There is an error condition on the system. Warning: There is a warning condition on the system. SBG3300-N Series User’s Guide... -
Page 238: The System Log Screen
Level This field displays the severity level of the logs that the device is to send to this syslog server. Messages This field states the reason for the log. SBG3300-N Series User’s Guide... -
Page 239: The Security Log Screen
Level This field displays the severity level of the logs that the device is to send to this syslog server. Messages This field states the reason for the log. SBG3300-N Series User’s Guide... - Page 240 Chapter 22 Log SBG3300-N Series User’s Guide...
-
Page 241: Network Status
Click System Monitor > Network Status to open the WAN screen. The figure in this screen shows the number of bytes received and sent on the Device. Figure 136 System Monitor > Network Status > WAN SBG3300-N Series User’s Guide... -
Page 242: The Lan Status Screen
Click System Monitor > Network Status > LAN to open the following screen. The figure in this screen shows the interface that is currently connected on the Device. Figure 137 System Monitor > Network Status > LAN SBG3300-N Series User’s Guide... - Page 243 Data This indicates the number of received packets on this interface. Error This indicates the number of frames with errors received on this interface. Drop This indicates the number of received packets dropped on this interface. SBG3300-N Series User’s Guide...
- Page 244 Chapter 23 Network Status SBG3300-N Series User’s Guide...
-
Page 245: Arp Table
The following table describes the labels in this screen. Table 111 System Monitor > ARP Table LABEL DESCRIPTION This is the ARP table entry number. IP Address This is the learned IP address of a device connected to a port. SBG3300-N Series User’s Guide... - Page 246 This is the MAC address of the device with the listed IP address. Device This is the type of interface used by the device. You can click on the device type to go to its configuration screen. SBG3300-N Series User’s Guide...
-
Page 247: Routing Table
M-Modified (redirect): The route is modified from a routing daemon or redirect. Metric The metric represents the "cost of transmission". A router determines the best route for transmission by choosing a path with the lowest "cost". The smaller the number, the lower the "cost". SBG3300-N Series User’s Guide... - Page 248 This indicates the name of the interface through which the route is forwarded. br0 indicates the LAN interface. ptm0 indicates the WAN interface using IPoE or in bridge mode. ppp0 indicates the WAN interface using PPPoE. SBG3300-N Series User’s Guide...
-
Page 249: Igmp Status
EXCLUDE means that the IP addresses in the Source List are not allowed to receive the multicast group’s traffic but other IP addresses can. Source List This is the list of IP addresses that are allowed or not allowed to receive the multicast group’s traffic depending on the filter mode. SBG3300-N Series User’s Guide... - Page 250 Chapter 26 IGMP Status SBG3300-N Series User’s Guide...
-
Page 251: Xdsl Statistics
HAPTER xDSL Statistics 27.1 The xDSL Statistics Screen Use this screen to view detailed DSL statistics. Click System Monitor > xDSL Statistics to open the following screen. Figure 141 System Monitor > xDSL Statistics SBG3300-N Series User’s Guide... - Page 252 Attainable Net These are the highest theoretically possible transfer rates at which the port could send and Data Rate receive payload data without transport layer protocol headers and traffic. xDSL Counters SBG3300-N Series User’s Guide...
- Page 253 30% or more errored blocks or at least one defect. This is a subset of ES. This is the number of UnAvailable Seconds. This is the number of Loss Of Signal seconds. This is the number of Loss Of Frame seconds. This is the number of Loss of Margin seconds. SBG3300-N Series User’s Guide...
- Page 254 Chapter 27 xDSL Statistics SBG3300-N Series User’s Guide...
-
Page 255: User Account
This field indicates how many times a user can re-enter his/her account information before the Device locks the user out. Idle Timeout This field indicates the number of minutes that the system can idle before being logged out. SBG3300-N Series User’s Guide... -
Page 256: Add/Edit A Users Account
Use this screen to add or edit a users account. Click Add new user in the User Account screen or the Edit icon next to the user account you want to edit. The screen shown next appears. Figure 143 Users Configuration: Add/Edit SBG3300-N Series User’s Guide... - Page 257 Enter the shared root directory. File Sharing Select if you want the files in the shared directory to be writable or not. Writable Apply Click Apply to save your changes. Cancel Click Cancel to exit this screen without saving. SBG3300-N Series User’s Guide...
- Page 258 Chapter 28 User Account SBG3300-N Series User’s Guide...
-
Page 259: Remote Management
Use this screen to configure through which interfaces, which services can access the Device. You can also specify the port numbers the services must use to connect to the Device. Click Maintenance > Remote MGMT to open the following screen. Figure 144 Maintenance > Remote MGMT SBG3300-N Series User’s Guide... - Page 260 Select a certificate the HTTPS server (the Device) uses to authenticate itself to the HTTPS Certificate client. You must have certificates already configured in the Certificates screen. Apply Click Apply to save your changes back to the Device. Cancel Click Cancel to restore your previously saved settings. SBG3300-N Series User’s Guide...
-
Page 261: Client
ACS and specify the ACS IP address or domain name and username and password. Click Maintenance > TR-069 Client to open the following screen. Use this screen to configure your Device to be managed by an ACS. Figure 145 Maintenance > TR-069 Client SBG3300-N Series User’s Guide... - Page 262 You can choose a local certificate used by TR-069 client. The local certificate should be used by TR-069 imported in the Security > Certificates > Local Certificates screen. client Apply Click Apply to save your changes. Cancel Click Cancel to exit this screen without saving. SBG3300-N Series User’s Guide...
-
Page 263: Snmp
SNMP allows a manager and agents to communicate for the purpose of accessing these objects. SNMP itself is a simple request/response protocol based on the manager/agent model. The manager issues a request and the agent returns responses using the following protocol operations: SBG3300-N Series User’s Guide... - Page 264 Enter the name of the person in charge of the Device. Trap Destination Type the IP address of the station to send your SNMP traps to. Apply Click Apply to save your changes back to the Device. Cancel Click Cancel to restore your previously saved settings. SBG3300-N Series User’s Guide...
-
Page 265: Time
32.2 The Time Screen To change your Device’s time and date, click Maintenance > Time. The screen appears as shown. Use this screen to configure the Device’s time based on your local time zone. Figure 148 Maintenance > Time SBG3300-N Series User’s Guide... - Page 266 Sunday, and the month to October. The time you select in the o'clock field depends on your time zone. In Germany for instance, you would select 2 in the Hour field because Germany's time zone is one hour ahead of GMT or UTC (GMT+1). SBG3300-N Series User’s Guide...
- Page 267 Chapter 32 Time Table 120 Maintenance > Time (continued) LABEL DESCRIPTION Apply Click Apply to save your changes. Cancel Click Cancel to exit this screen without saving. SBG3300-N Series User’s Guide...
- Page 268 Chapter 32 Time SBG3300-N Series User’s Guide...
-
Page 269: E-Mail Notification
This field displays the password of the sender’s mail account. Email Address This field displays the e-mail address that you want to be in the from/sender line of the e-mail that the Device sends. Remove Click this button to delete the selected entries. SBG3300-N Series User’s Guide... -
Page 270: Email Notification Edit
If you activate SSL/TLS authentication, the e-mail address must be able to be authenticated by the mail server as well. Apply Click this button to save your changes and return to the previous screen. Cancel Click this button to begin configuring this screen afresh. SBG3300-N Series User’s Guide... -
Page 271: Logs Setting
You can configure where the Device sends logs and which logs and/or immediate alerts the Device records in the Logs Setting screen. 34.2 The Log Setting Screen To change your Device’s log settings, click Maintenance > Logs Setting. The screen appears as shown. Figure 151 Maintenance > Logs Setting SBG3300-N Series User’s Guide... -
Page 272: Example E-Mail Log
34.2.1 Example E-mail Log An "End of Log" message displays for each mail in which a complete log has been sent. The following is an example of a log sent by e-mail. • You may edit the subject title. SBG3300-N Series User’s Guide... - Page 273 |<1,02> 127|Apr 7 00 |From:192.168.1.131 To:192.168.1.255 |match |forward | 10:05:17 |UDP src port:00520 dest port:00520 |<1,02> 128|Apr 7 00 |From:192.168.1.1 To:192.168.1.255 |match |forward | 10:05:30 |UDP src port:00520 dest port:00520 |<1,02> End of Firewall Log SBG3300-N Series User’s Guide...
- Page 274 Chapter 34 Logs Setting SBG3300-N Series User’s Guide...
-
Page 275: Firmware And Wwan Package Upgrade
HTTP (Hypertext Transfer Protocol) and may take up to two minutes. After a successful upload, the system will reboot. Do NOT turn off the Device while firmware upload is in progress! Figure 153 Maintenance > Firmware Upgrade SBG3300-N Series User’s Guide... - Page 276 The Device automatically restarts in this time causing a temporary network disconnect. In some operating systems, you may see the following icon on your desktop. Figure 155 Network Temporarily Disconnected After two minutes, log in again and check your new firmware version in the Status screen. SBG3300-N Series User’s Guide...
- Page 277 Chapter 35 Firmware and WWAN Package Upgrade If the upload was not successful, the following screen will appear. Click OK to go back to the Firmware Upgrade screen. Figure 156 Error Message SBG3300-N Series User’s Guide...
- Page 278 Chapter 35 Firmware and WWAN Package Upgrade SBG3300-N Series User’s Guide...
-
Page 279: Chapter 36 Configuration
The backup configuration file will be useful in case you need to return to your previous settings. Click Backup to save the Device’s current configuration to your computer. SBG3300-N Series User’s Guide... - Page 280 IP address (192.168.1.1). If the upload was not successful, the following screen will appear. Click OK to go back to the Configuration screen. Figure 159 Configuration Upload Error SBG3300-N Series User’s Guide...
-
Page 281: The Reboot Screen
System restart allows you to reboot the Device remotely without turning the power off. You may need to do this if the Device hangs, for example. Click Maintenance > Reboot. Click Reboot to have the Device reboot. This does not affect the Device's configuration. Figure 162 Maintenance > Reboot SBG3300-N Series User’s Guide... - Page 282 Chapter 36 Configuration SBG3300-N Series User’s Guide...
-
Page 283: Chapter 37 Diagnostic
If an MEP port does not respond to the source MEP, this may indicate a fault. Administrators can take further action to check and resume services from the fault according to the line connectivity status report. SBG3300-N Series User’s Guide... -
Page 284: Ping & Traceroute & Nslookup
Click this button to perform the traceroute function. This determines the path a packet takes to the specified computer. Nslookup Click this button to perform a DNS lookup on the IP address of a computer you enter. SBG3300-N Series User’s Guide... - Page 285 Click this button to have the selected MEP send the LBM (Loop Back Message) to a specified remote end point. Send Linktrace Click this button to have the selected MEP send the LTMs (Link Trace Messages) to a specified remote end point. SBG3300-N Series User’s Guide...
-
Page 286: Oam Ping Test
Segment loopback tests allow you to verify integrity of a PVC to the nearest neighboring ATM device. End-to-end loopback tests allow you to verify integrity of an end-to-end PVC. Note: The DSLAM to which the Device is connected must also support ATM F4 and/or F5 to use this test. SBG3300-N Series User’s Guide... - Page 287 F4 end-end Press this to perform an OAM F4 end-to-end loopback test. F5 segment Press this to perform an OAM F5 segment loopback test. F5 end-end Press this to perform an OAM F5 end-to-end loopback test. SBG3300-N Series User’s Guide...
- Page 288 Chapter 37 Diagnostic SBG3300-N Series User’s Guide...
-
Page 289: Chapter 38 Troubleshooting
Make sure you understand the normal behavior of the LED. See Section 1.5 on page Check the hardware connections. Inspect your cables for damage. Contact the vendor to replace any damaged cables. Turn the Device off and on. SBG3300-N Series User’s Guide... -
Page 290: Device Access And Login
Make sure your Internet browser does not block pop-up windows and has JavaScripts and Java enabled. If it is possible to log in from another interface, check the service control settings for HTTP and HTTPS (Maintenance > Remote MGMT). SBG3300-N Series User’s Guide... - Page 291 I cannot use FTP to upload / download the configuration file. / I cannot use FTP to upload new firmware. See the troubleshooting suggestions for I cannot see or access the Login screen in the web configurator. Ignore the suggestions about your browser. SBG3300-N Series User’s Guide...
-
Page 292: Internet Access
I cannot access the Internet anymore. I had access to the Internet (with the Device), but my Internet connection is not available anymore. Your session with the Device may have expired. Try logging into the Device again. SBG3300-N Series User’s Guide... -
Page 293: Wireless Internet Access
An SSID is a name that uniquely identifies a wireless network. The AP and all the clients within a wireless network must use the same SSID. What wireless security modes does my Device support? Wireless security is vital to your network. It protects communications between wireless stations, access points and the wired network. SBG3300-N Series User’s Guide... -
Page 294: Usb Device Connection
When using UPnP and the Device reboots, my computer cannot detect UPnP and refresh My Network Places > Local Network. Disconnect the Ethernet cable from the Device’s LAN port or from your computer. Re-connect the Ethernet cable. SBG3300-N Series User’s Guide... - Page 295 The Local Area Connection icon for UPnP disappears in the screen. Restart your computer. I cannot open special applications such as white board, file transfer and video when I use the MSN messenger. Wait more than three minutes. Restart the applications. SBG3300-N Series User’s Guide...
- Page 296 Chapter 38 Troubleshooting SBG3300-N Series User’s Guide...
-
Page 297: Appendix A Customer Support
• Brief description of the problem and the steps you took to solve it. Corporate Headquarters (Worldwide) Taiwan • ZyXEL Communications Corporation • http://www.zyxel.com Asia China • ZyXEL Communications (Shanghai) Corp. ZyXEL Communications (Beijing) Corp. ZyXEL Communications (Tianjin) Corp. • http://www.zyxel.cn India • ZyXEL Technology India Pvt Ltd • http://www.zyxel.in Kazakhstan •... - Page 298 • ZyXEL Singapore Pte Ltd. • http://www.zyxel.com.sg Taiwan • ZyXEL Communications Corporation • http://www.zyxel.com Thailand • ZyXEL Thailand Co., Ltd • http://www.zyxel.co.th Vietnam • ZyXEL Communications Corporation-Vietnam Office • http://www.zyxel.com/vn/vi Europe Austria • ZyXEL Deutschland GmbH • http://www.zyxel.de Belarus • ZyXEL BY • http://www.zyxel.by...
- Page 299 Appendix A Customer Support Belgium • ZyXEL Communications B.V. • http://www.zyxel.com/be/nl/ Bulgaria • ZyXEL България • http://www.zyxel.com/bg/bg/ Czech • ZyXEL Communications Czech s.r.o • http://www.zyxel.cz Denmark • ZyXEL Communications A/S • http://www.zyxel.dk Estonia • ZyXEL Estonia • http://www.zyxel.com/ee/et/ Finland • ZyXEL Communications •...
- Page 300 • ZyXEL Communications Poland • http://www.zyxel.pl Romania • ZyXEL Romania • http://www.zyxel.com/ro/ro Russia • ZyXEL Russia • http://www.zyxel.ru Slovakia • ZyXEL Communications Czech s.r.o. organizacna zlozka • http://www.zyxel.sk Spain • ZyXEL Spain • http://www.zyxel.es Sweden • ZyXEL Communications • http://www.zyxel.se Switzerland •...
- Page 301 Ecuador • ZyXEL Communication Corporation • http://www.zyxel.com/ec/es/ Middle East Egypt • ZyXEL Communication Corporation • http://www.zyxel.com/homepage.shtml Middle East • ZyXEL Communication Corporation • http://www.zyxel.com/homepage.shtml North America • ZyXEL Communications, Inc. - North America Headquarters • http://www.us.zyxel.com/ SBG3300-N Series User’s Guide...
- Page 302 Appendix A Customer Support Oceania Australia • ZyXEL Communications Corporation • http://www.zyxel.com/au/en/ Africa South Africa • Nology (Pty) Ltd. • http://www.zyxel.co.za SBG3300-N Series User’s Guide...
-
Page 303: Appendix B Legal Information
ZyXEL Communications Corporation. Published by ZyXEL Communications Corporation. All rights reserved. Disclaimer ZyXEL does not assume any liability arising out of the application or use of any products, or software described herein. - Page 304 To obtain the source code covered under those Licenses, please contact your vendor or ZyXEL Technical Support at support@zyxel.com.tw. Regulatory Information European Union The following information applies if you use the product within the European Union. SBG3300-N Series User’s Guide...
- Page 305 Prin prezenta, ZyXEL declară că acest echipament este în conformitate cu cerinţele esenţiale şi alte prevederi relevante ale Directivei 1999/5/EC. National Restrictions This product may be used in all EU countries (and other countries following the EU directive 1999/5/EC) without any limitation except for the countries mentioned below: SBG3300-N Series User’s Guide...
- Page 306 The outdoor usage of the 2.4 GHz band requires an authorization from the Electronic Communications Office. Please check http://www.esd.lv for more details. 2.4 GHz frekvenèu joslas izmantoðanai ârpus telpâm nepiecieðama atïauja no Elektronisko sakaru direkcijas. Vairâk informâcijas: http://www.esd.lv. SBG3300-N Series User’s Guide...
- Page 307 • Do NOT obstruct the device ventilation slots, as insufficient airflow may harm your device. • Use only No. 26 AWG (American Wire Gauge) or larger telecommunication line cord. • Antenna Warning! This device meets ETSI and FCC certification requirements when using the included antenna(s). Only use the included antenna(s). SBG3300-N Series User’s Guide...
- Page 308 Your product is marked with this symbol, which is known as the WEEE mark. WEEE stands for Waste Electronics and Electrical Equipment. It means that used electrical and electronic products should not be mixed with general waste. Used electrical and electronic equipment should be treated separately. SBG3300-N Series User’s Guide...
-
Page 309: Index
61, 127, 167, 256 Broadband Connectivity Check Messages, see CCMs broadcast copyright example CoS technologies creating certificates CTS threshold 86, 92 Canonical Format Indicator See CFI CCMs data fragment threshold 86, 92 certificate DDoS SBG3300-N Series User’s Guide... - Page 310 DYNDNS wildcard Guide Quick Start ECHO e-mail HTTP log example Encapsulation PPP over Ethernet encapsulation 42, 218 ID type and content encryption IEEE 802.1Q Extended Service Set IDentification 74, 81 IGMP multicast group list version IKE phases SBG3300-N Series User’s Guide...
- Page 311 L2TP VPN multicast Multiple BSS, see MBSSID client list DHCP 104, 122 104, 122 IP address 104, 105, 123 MAC address status 149, 151, 160, 161 subnet mask 104, 105, 123 applications LAND attack IP alias SBG3300-N Series User’s Guide...
- Page 312 Point-to-Point Tunneling Protocol RFC 1058. See RIP. POP3 RFC 1389. See RIP. port forwarding RFC 3164 ports PPP over Ethernet, see PPPoE router features PPPoE 42, 66 Routing Information Protocol. See RIP Benefits RPPCs SBG3300-N Series User’s Guide...
- Page 313 Two Rate Three Color Marker, see trTCM activation MBSSID static route 125, 269 configuration 61, 127, 167, 256 example static VLAN unicast status Universal Plug and Play, see UPnP firmware version upgrading firmware UPnP cautions wireless LAN SBG3300-N Series User’s Guide...
- Page 314 22, 96 status Wide Area Network, see WAN warranty note web configurator login passwords 23, 24 WEP Encryption 76, 77 WEP encryption WEP key wireless LAN 71, 90 authentication 92, 93 SBG3300-N Series User’s Guide...
- Page 315 Index SBG3300-N Series User’s Guide...