Magellan eXplorist 310 User Manual
Hide thumbs
Also See for eXplorist 310:
- User manual (86 pages) ,
- User manual (39 pages) ,
- User manual (39 pages)
Table of Contents
Advertisement
Advertisement
Table of Contents

Related Manuals for Magellan eXplorist 310


Summary of Contents for Magellan eXplorist 310
-
Page 1: User Manual
Magellan eXplorist User Manual ® ® www.CARiD.com... -
Page 2: Using The Magellan Explorist
Using the Magellan eXplorist The Magellan eXplorist GPS receiver is designed to be easy enough for the casual ‘explorer’ as well as having all of the advance features the ‘enthusiast’ requires. This chapter provides information on the basics of using the Magellan eXplorist GPS receiver. -
Page 3: Powering The Magellan Explorist
40% and the backlight timer to 1 minute provides a good user experience as well as extends the battery life. The Magellan eXplorist can be customized to extend the battery life of the AA batteries installed. There are With the receiver on and the Map screen four functions, (Backlight Timer, Brightness, Active displayed, press the BACK button. -
Page 4: Main Menu
Using the Magellan eXplorist Select Brightness & Volume. Main Menu Select the Brightness slider to set the desired The Main Menu provides access to the Map screen, backlight brightness. waypoint tools, track tools, geocaches, route tools, address book, POI and media tools. The Main Menu... -
Page 5: The Back Button
Using the Magellan eXplorist The BACK Button The BACK button is used to access the previously viewed screen unless you are viewing the Map screen and then it is used to access the Main Menu. Entering Text and Numeric Data Entering text and numbers is done by the use of a displayed keyboard. -
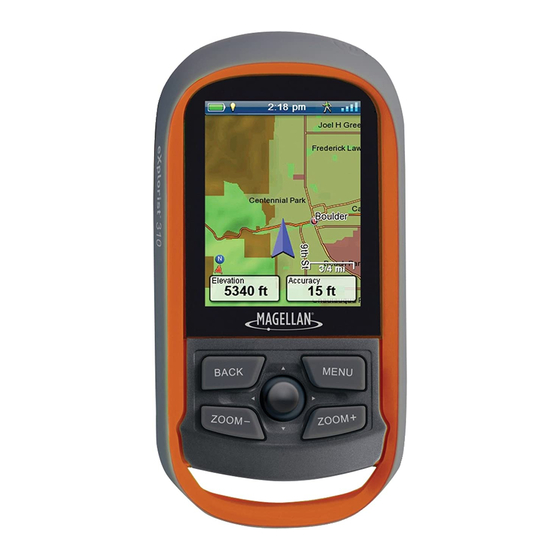
Page 6: Map Screen Overview
The Map screen will be the screen you most commonly use and a good understanding of its workings will enhance your experience with the Magellan eXplorist. The Map screen can be displayed in two modes, Navigate and Pan. In Navigate Mode your current location is displayed along with a graphical indication of where you’ve travelled (track) and information about where you are going (route). -
Page 7: Navigation Lines
Magellan eXplorist Map Screen Navigation Lines Viewing Track Summary Press the MENU button while viewing the Map Navigation lines are displayed on the map providing screen. you with route destination indicators and active track. Select Track Summary. Active Track. Displays a history A summary of the current track is displayed. -
Page 8: Pan Mode
Pan Mode Maps Additional maps for the eXplorist may be available Accessing Pan Mode from the Magellan Store at www.magellangps.com. Use the joystick to move the cursor while Once the map has been purchased and installed you viewing the Map screen. -
Page 9: Dashboard Screens
Dashboard Screens The Dashboard provides a secondary screen that can be used to assist you in your travels. There are nine screens, most of them customizable, that you can select from. Accessing the Dashboard Road Screen Displaying the Dashboard Screen While viewing the Map screen, press BACK. -
Page 10: Satellite Status Screen
Magellan eXplorist Dashboard Satellite Status Screen Dashboard Screen The Dashboard Screen displays a small compass and The Satellite Status screen displays a graphical up to eight customizable data fields. The data fields representation of the satellites overhead in relation displayed are customizable (see Customizing the to you current location (the center of the circle) The Data Fields). -
Page 11: Customizing Data Fields
Magellan eXplorist Dashboard Customizing Data Fields Setting the Number of Fields Displayed Access the Dashboard screen you want to change the number of displayed fields. Press MENU. Select Edit # of Fields. (Not available on the Satellite Status screen.) The current number of fields being displayed is shown with an arrow above and below it. -
Page 12: The Waypoint List
Waypoints Waypoints are fixed locations with a specified longitude and latitude that can be saved to your receiver. Waypoints can mark a destination, a point along the way to a destination, or a point of reference. In the eXplorist receiver you can edit saved waypoints with unique names and descriptive icons to help you identify the waypoint from a list or on the map. -
Page 13: Waypoints And The Map Screen
Magellan eXplorist Waypoints Go to a Waypoint from the Waypoint Edit the waypoint as needed. Description Select the Disk icon. Access the Waypoint list. Select Save as Waypoint. Select the name of the waypoint to be routed Confirm the save. -
Page 14: Installing Geocaches (Send To Gps)
A typical cache is a small, waterproof container containing a logbook and “treasure”. The Magellan eXplorist receiver is designed to connect with millions of passionate adventure seekers at www. geocaching.com. Geocaching.com is the premier website for organizing the world’s geocaches. Whether you want to learn about geocaching, hide or seek a cache, log your experiences, or find out about a local geocaching event, Geocaching.com is your one-stop shop for all things geocaching! No need to worry about... - Page 15 The ‘GPX eXchange File button is greyed out for non-premium users. Select the “Send to GPS” button. Select the Magellan tab in the “Send to GPS” window. The Send to GPS function first detects if you have the Magellan Communicator installed. If not, the message “Magellan Communicator...
-
Page 16: The Magellan Communicator
You can install the plug-in by using the (The location of where the file is saved will steps above or by going to the Magellan web site as depend on your browser and how you have it set up to save files.) explained here. -
Page 17: Geocache List
Magellan eXplorist Geocache Waypoints Geocache List Go to a Geocache on the Geocache List Access the Geocache list. Accessing the Geocache List Select the Geocache you want to go to Press the BACK button while viewing the Map Press MENU. -
Page 18: Adding A Geocache
Magellan eXplorist Geocache Waypoints Adding a Geocache Go to a Geocache from the Geocache Description Saving Your Current Location as a Geocache Access the Geocache list. Waypoint Select the name of the geocache to be routed Access the Geocache list. -
Page 19: Points Of Interest (Poi)
Points of Interest (POI) The Magellan eXplorist has preloaded points of interest waypoints that provide a wide array of locations that you may seek. These POIs are waypoints for many commonly needed destinations. The POIs are installed along with the maps used in the eXplorist. The basemap contains some basic POIs and turning on a detailed map will provide a robust source of POIs. - Page 20 Magellan eXplorist Points of Interest Waypoints Finding a POI Using Search by Name Press BACK from the Map screen. Select the POI icon. Press MENU. Select Search by Name..Use the keyboard to enter the first few characters in the name of the POI you are searching for and select the green checkmark.
-
Page 21: Explorist Tools
Tools The Magellan eXplorist has a Tools Menu that gives you access to tools that you may find useful while using the receiver. Additionally, the Tools Menu provides access to the Settings Menu (see the chapter on Settings for details) which gives you the means to customize the eXplorist for your navigation requirements. -
Page 22: Screen Capture
Magellan eXplorist Tools Confirm that the receiver is no longer in the Best Fishing & Hunting Times Demo mode. This tool displays the best hunting and fishing times for your current location. Screen Capture Using Best Fishing & Hunting Times Activating Screen Capture Access the Tools Menu. -
Page 23: The Settings Menu
Settings The Magellan eXplorist has a Settings Menu that allows you to customize how the eXplorist displays information, run diagnostic tests and other useful functions that will enhance your navigating experience. The Settings Menu Adjusting Volume Access the Settings Menu. -
Page 24: Map Options
Magellan eXplorist Settings Select the Battery Type drop-down menu and Map Options select the type of battery that are being used. Setting Map View (2D or 3D) Date and Time Access the Settings Menu. Selecting the Date Format Select the Map Options button. - Page 25 Magellan eXplorist Settings Select the Origin Destination Line drop-down Toggling POI Waypoints (On/Off) menu and select if the line will be displayed on Access the Settings Menu. the map when a route is active. Select the Map Options button. Toggling Track Lines (On/Off) Select the POI drop-down menu and select if Access the Settings Menu.
-
Page 26: Defining The Arrival Alarm
Magellan eXplorist Settings Defining the Arrival Alarm Setting Elevation Units of Measure Access the Settings Menu. Access the Settings Menu. Select the Map Options button. Select the Alarms button. Select the Elevation drop-down menu and Select the Arrival Distance drop-down menu select the desired units of measure. - Page 27 Magellan eXplorist Settings Background Select the Primary Coordinate Accuracy drop- down menu and select the desired accuracy. This defines what graphic will be used as the Setting Primary Coordinate Datum background for the receiver Assigning Background Graphic Access the Settings Menu.
- Page 28 Select the Altimeter drop-down menu and Running the Keypad Test select the desired source. Access the Settings Menu. Memory Select Diagnostics. Select the Keypad Test button. This setting is used to view memory usage and provides access to memory tools. Language Clear Memory from Device Selecting Language...