
Related Manuals for AEG Electrolux ARCTIS 75240 GA

Summary of Contents for AEG Electrolux ARCTIS 75240 GA
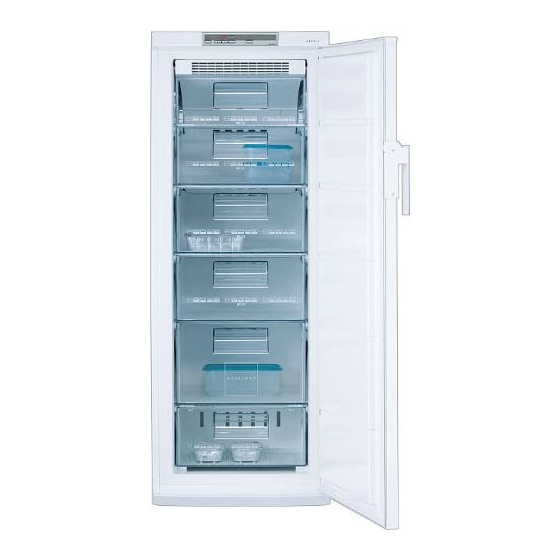
- Page 1 ARCTIS 75240 GA Benutzerinformation Gefrierschrank Istruzioni per l’uso Congelatore Notice d’utilisation Congélateur User manual Freezer...
- Page 2 Verehrter Kunde! Vielen Dank, dass Sie sich für eines unserer Qualitätsprodukte entschieden haben. Dieses Gerät bietet Ihnen eine perfekte Synthese aus funktionellem Design und wegweisender Spitzentechnologie. Überzeugen Sie sich selbst von dem Entwicklungsvorsprung unserer Produkte, die bei Leistungsfähigkeit und Bedienung eine absolute Spitzenposition einnehmen.
-
Page 3: Table Of Contents
Inhalt Sicherheit ..........4 Entsorgung . -
Page 4: Sicherheit
Sicherheit Die Sicherheit unserer Kältegeräte entspricht den anerkannten Regeln der Technik und dem Gerätesicherheitsgesetz. Dennoch sehen wir uns veranlaßt, Sie mit folgenden Sicherheitshinweisen vertraut zu machen: Bestimmungsgemäße Verwendung • Das Kältegerät ist für die Verwendung im Haushalt bestimmt. Es eignet sich zum Einfrieren und Tiefkühllagern von Lebensmitteln sowie zur Eisbereitung. - Page 5 • Das Gerät darf von Kindern und Personen, deren physische, sensorische oder geistige Fähigkeiten sowie Mangel an Erfahrung und Kenntnissen einen sicheren Gebrauch des Gerätes ausschließen, nur unter Aufsicht oder nach entsprechender Einweisung durch eine Person benutzt werden, die sicherstellt, dass sie sich den Gefahren des Gebrauchs bewusst sind. Kinder sind zu beaufsichtigen, sodass sie nicht am Gerät spielen können.
-
Page 6: Entsorgung
Entsorgung Information zur Geräteverpackung Alle verwendeten Werkstoffe sind umweltverträglich! Sie können gefahrlos deponiert oder in der Müllverbrennungsanlage verbrannt werden! Zu den Werkstoffen: Die Kunststoffe können auch wiederverwertet werden und sind folgendermaßen gekennzeichnet: >PE< für Polyäthylen, z. B. bei der äußeren Hülle und den Beuteln im Innern. >PS<... -
Page 7: Transportschutz Entfernen
Transportschutz entfernen Das Gerät sowie Teile der Innenausstattung sind für den Transport geschützt. • Alle Klebebänder sowie Polsterteile aus dem Geräteinnenraum entfernen. Aufstellen Aufstellort Das Gerät soll in einem gut belüfteten und trockenen Raum stehen. Die Umgebungstemperatur wirkt sich auf den Stromverbrauch und die einwandfreie Funktion des Gerätes aus. -
Page 8: Ihr Gerät Braucht Luft
Ihr Gerät braucht Luft Aus Gründen der Sicherheit muß eine Mindestbelüftung gewährleistet sein, wie aus der Abb. hervorgeht: Achtung: Lüftungs-Öffnungen müssen immer saubergehalten werden. Damit Luft zirkulieren kann, Lüftungsöffnungen niemals abdecken oder verstellen. Hintere Abstandstücke Das Gerät ist mit 2 Distanzstücke ausgestattet, die wie in der Abbildung gezeigt montiert werden müssen. - Page 9 Vorgehensweise Die folgenden Handlungsschritte sollten unter Mithilfe einer zweiten Person zum Anhalten der Türe durchgeführt werden. Legen Sie das Gerät auf die Geräterückseite. Sockelblende nach vorn abziehen. Schrauben herausdrehen und die unteren Scharniere (A) der Tür entfernen. Tür abnehmen. Stift des unteren Scharnieres (f) abschrauben gegenübeliegender Seite...
-
Page 10: Elektrischer Anschluß
Dabei auf parallelen Verlauf der Türkanten zueinander und zum Geräterahmen achten. Gerät in Position bringen, ausrichten und ans Stromnetz anschließen. Falls Sie den Türanschlagwechsel nicht selbst durchführen möchten, verständigen Sie bitte den Kundendienst. Der Kundendienst führt dann den Türanschlagwechsel auf Ihre Kosten aus. Achtung: Vergewissern Sie sich nach Ausführung des Türanschlagwechsel, daß... -
Page 11: Bedienungs- Und Kontrolleinrichtung
Bedienungs- und Kontrolleinrichtung ON/OFF Taste Taste zur Temperatureinstellung (+) Temperaturanzeige Taste zur Temperatureinstellung (-) Anzeige für eingeschaltete FROSTMATIC Funktion (gelb) FROSTMATIC Taste Warnanzeige (rot) Taste ALARM OFF Tasten zur Temperatureinstellung Die Temperatureinstellung erfolgt durch die Tasten B und D. Die Tasten stehen in Verbindung mit der Temperaturanzeige. •... -
Page 12: Temperatur Einstellen
erreicht ist. Ein Warnton ist zu hören. Auf eine der Tasten B oder D drücken. Die Temperatur-Anzeige schaltet um und zeigt blinkend die momentan eingestellte SOLL-Temperatur an. Gewünschte Temperatur durch Drücken der Tasten C und E einstellen (siehe Abschnitt "Tasten zur Temperatureinstellung"). Die Temperaturanzeige zeigt sofort die geänderte Einstellung an. -
Page 13: Taste Alarm Off
Zum Verstellen auf wärmere Temperaturen die Taste „+“ (WÄRMER) drücken. Zum Verstellen auf kältere Temperaturen die Taste „-“ (KÄLTER) drücken. Die Temperaturanzeige zeigt sofort die geänderte Einstellung an. Mit jedem Tastendruck wird die Temperatur um 1 °C weitergestellt. Folgende SOLL-Temperatureinstellungen sind möglich: •... -
Page 14: Eiswürfel Bereiten
Achtung: Bei Erwärmung im Gefrierraum muß der Zustand des Gefriergutes überprüft werden. Gerät abschalten Zum Abschalten die Taste ON/OFF ca. 5 Sekunden gedrückt halten. In der Temperaturanzeige erfolgt ein sogenannter “Count down”, dabei wird rückwärts von “3” nach “1” gezählt. Mit Erreichen der “1” schaltet das Gerät ab. -
Page 15: Einfrieren Und Tiefkühllagern
Einfrieren und Tiefkühllagern Im Gefrierschrank können Sie Tiefkühlkost lagern und frische Lebens-mittel einfrieren. Achtung! • Vor dem Einfrieren von Lebensmitteln muß die Temperatur im Gefrierraum -18 °C oder kälter sein. • Bitte das auf dem Typschild angegebene Gefriervermögen beachten. Das Gefriervermögen ist die maximale Menge an frischer Ware, die innerhalb von 24 Stunden eingefroren werden kann. - Page 16 Die verpackten Lebensmittel in die Schubladen legen. Einzufrierende Lebensmittel in die oberen Schubladen legen. Nicht gefrorene Ware darf bereits gefrorene Ware nicht berühren, die gefrorene Ware kann sonst antauen. Tiefkühlgut möglichst nach Art getrennt in die Schubladen legen. Dadurch haben Sie bessere Übersicht, vermeiden langes Türöffnen und sparen deshalb Strom.
-
Page 17: Gefrierkalender
Gefrierkalender • Die Symbole zeigen unterschiedliche Arten von Tiefkühlgut. • Die Zahlen geben für die jeweilige Art von Tiefkühlgut die Lagerzeit in Monaten an. Ob der obere oder der untere Wert der angegebenen Lagerzeiten gültig ist, hängt von der Qualität der Lebensmittel und deren Vorbehandlung vor dem Einfrieren ab. -
Page 18: Gerät Abschalten
Anschließend mit klarem Wasser nachwischen und trockenreiben. Staubablagerungen am Verflüssiger erhöhen den Energieverbrauch. Deshalb einmal im Jahr den Verflüssiger an der Geräterückseite mit einer weichen Bürste oder mit dem Staubsauger vorsichtig reinigen. Nachdem alles trocken ist, die FROSTMATIC-Taste einschalten. Nach zwei bis drei Stunden Lebensmittel wieder einlagern. -
Page 19: Was Tun, Wenn
Was tun, wenn ... Abhilfe bei Störungen Möglicherweise handelt es sich bei einer Störung nur um einen kleinen Fehler, den Sie anhand nachfolgender Hinweise selbst beheben können. Führen Sie keine weiteren Arbeiten selbst aus, wenn nachstehende Informationen im konkreten Fall nicht weiterhelfen. Warnung! Reparaturen am Kältegerät dürfen nur von Fachkräften durchgeführt werden. -
Page 20: Bestimmungen, Normen, Richtlinien
Störung Mögliche Ursache Abhilfe An den undichten Stellen Tür- dichtung vorsichtig mit einem Haartrockner erwärmen (nicht Starke Reifbildung im Gerät, Türdichtung ist undicht (evtl. wärmer als ca. 50 °C). Gleichzeitig die erwärmte evtl. auch an der Türdichtung. nach Türanschlagwechsel). Türdicht-ung von Hand so in Form ziehen, daß... - Page 21 Gentile Cliente, Grazie per aver scelto i nostri prodotti di alta qualità. Con questa apparecchiatura sperimenterete la perfetta combinazione fra il design funzionale e la tecnologia d'avanguardia. Le nostre apparecchiature sono state progettate per avere le migliori prestazioni e il massimo controllo raggiungendo i più alti standard di eccellenza.
- Page 22 Indice Sicurezza..........23 Smaltimento .
-
Page 23: Sicurezza
Sicurezza La sicurezza dei nostri apparecchi é conforme ai regolamenti approvati della tecnica ed alla legge di sicurezza degli apparecchi. Nonostante ciò, riteniamo di doverVi facilitare la presa di confidenza con le seguenti avvertenze: Impiego conforme alla scopo previsto • L’apparecchio é stato stabilito per l’uso domestico. È adatto per congelare e conservare prodotti alimentari surgelati nonché... - Page 24 bloccaggio. Mediante ciò si evita che si possano chiudere dentro dei bambini che giocano (pericolo di soffocamento!) oppure che possano trovarsi in altre situazioni pericolose per la vita. • Questo apparecchio non deve essere utilizzato da persone (e bambini) con ridotte capacità fisiche, sensoriali o mentali o prive dell'esperienza e delle nozioni necessarie, salvo i casi in cui agiscano sotto sorveglianza o siano stati opportunamente istruiti sull'uso di tale apparecchio da persone responsabili per la loro sicurezza.
-
Page 25: Smaltimento
Smaltimento Informazione sull’imballaggio dell’apparecchio Tutti i materiali di produzione impiegati sono tollerabili per l’ambiente! Questi possono essere depositati senza pericoli oppure smaltiti nell’impianto bruciatore di rifiuti urbani! Riguardo i materiali di produzione: I materiali sintetici possono essere anche riciclati e sono contrassegnati nel seguente modo: >PE<... -
Page 26: Rimuovere La Sicura Del Trasporto
Rimuovere la sicura del trasporto L’apparecchio nonché gli accessori interni sono protetti per il trasporto • Rimuovere dall’interno dell’apparecchio tutti i nastri adesivi nonchè i pezzi di imbottitura. Installazione Luogo d’installazione L’apparecchio deve essere collocato in un luogo ben aerato ed asciutto. La temperatura ambientale ha un notevole effetto sul consumo di corrente. -
Page 27: Aerazione
Aerazione L’aerazione avviene tramite le fessure di passaggio dell’aria situate nello zoccolo sotto, mentre lo scarico avviene attraverso il pannello posteriore verso l’alto. Per far si che l’aria possa circolare, non chiudere oppure variare in nessun caso queste fessure di aerazione. Attenzione! Nel caso l’apparecchio dovesse essere collocato p.es. -
Page 28: Reversibilità Della Porta
Reversibilità della porta La reversibilità della porta può essere cambiata da destra (condizioni di consegna) verso sinistra, nel caso il luogo di installazione ne richiedesse la necessità. Avvertimento! Durante la reversibilità, l’aparecchio non deve essere collegato alla rete elettrica. Estrarre innanzitutto la spina dalla rete Procedere come segue Per eseguire le operazioni seguenti, proponiamo di chiedere l'aiuto di... -
Page 29: Collegamento Elettrico
Svitare la maniglia. Rimontarla sul lato opposto dopo aver forato i tappini con un punteruolo. Coprire i fori lasciati liberi con i tappini (H) contenuti nel sacchetto della documentazione. Rimettere l'apparecchiatura al suo posto, livellarla e aspettare al meno un’ora prima di collegarla In caso non si voglia eseguire le operazioni sopra elencate, contattare il servizio assistenza più... -
Page 30: Pannello Di Controllo
Pannello di controllo Tasto “ON/OFF” Tasto per la regolazione della temperatura (+) Indicatore della temperatura Tasto per la regolazione della temperatura (-) Indicatore per la funzione FROSTMATIC (giallo) Tasto FROSTMATIC Indicatore di allarme (rosso) Tasto ALARM La regolazione della temperatura avviene con i tasti B ed D. I tasti sono collegati con l’indicatore della temperatura. -
Page 31: Messa In Servizio E Regolazione Della Temperatura
Indicatore della temperatura L’indicatore della temperatura puo’ dare molteplici informazioni. Con funzionamento normale viene indicata la temperatura, che e’ presente momentaneamente nel vano congelatore (temperatura reale). Durante la regolazione della temperatura viene indicata, lampeggiante, la temperatura del vano congelatore inserita al momento. Messa in funzione - regolazione temperatura Unserire Ia presa nella spina. -
Page 32: Regolazione Della Temperatura
• Al momento di commutare da “Raffreddamento” a “Congelamento” nell'indicatore di temperatura comparira’ “CF” (Cooling-Freezing), un segnale acustico confermera’ la commutazione e l'indicatore di temperatura mostrera’ cifre lampeggianti (temperatura di set in modo congelamento -18 °C). Con i tasti per l'impostazione della temperatura può... -
Page 33: Spegnimento Dell'apparecchiatura
Raffreddamento "Standard" Mediante la selezione della temperatura NOMINALE in un campo attorno ai +5 °C l’apparecchio si puo’ utilizzare come normale frigorifero. Raffreddamento di bevande Mediante una selezione della temperatura NOMINALE fino a +16 °C l’apparecchio può essere utilizzato come ottimo frigorifero per bevande Tasto Frostmatic (F) La funzione FROSTMATIC accellera il congelamento di alimenti freschi e contemporaneamente protegge gli alimenti gia’... -
Page 34: Congelazione E Conservazione
Congelazione e conservazione Il vostro congelatore é adatto sia per la conservazione dei surgelati che per la congelazione di cibi freschi. Attenzione • La temperatura nello scomparto congelatore dev’essere di -18°C o inferiore prima di introdurre i cibi per la congelazione. •... -
Page 35: Calendario Di Congelamento
Porre nei cassetti i cibi avvolti. Porre i cibi da congelare nei due scomparti superiori. I cibi freschi non devono venire a contatto con gli alimenti gia’ congelati, per evitare il loro scongelamento. Dopo aver raggiunto la temperatura ottimale spegnere la congelazione rapida, premendo il tasto (F). -
Page 36: Cubetti Ghiaccio
Cubetti di ghiaccio Riempire a 3/4 la bacinella ghiaccio con acqua fredda e riporla nel cassetto congelatore. Per togliere i cubetti é sufficiente torcere la bacinella o metterla brevemente sotto l’acqua corrente. Massa eutettica L’apparecchio ha all’interno due masse eutettiche. Per la congelazione della massa eutettica si prega di leggere “Prima della messa in servizio”... -
Page 37: Pulizia
Pulizia Avvertimento! • Durante la pulizia, l’apparecchio non deve essere collegato alla rete elettrica. Pericolo di scosse elettriche! Prima di eseguire i lavori di pulizia, é necessario disinserire l’apparecchio, estrarre la spina oppure disinserire rispett. svitare il fusibile. • Non pulire mai l’apparecchio con delle idropulitrici a vapore. L’umidità potrebbe penetrare negli elementi di costruzione elettrici, pericolo di scosse di corrente! Il vapore bollente può... -
Page 38: Spegnimento Dell'apparecchio
Spegnimento dell’apparecchio Se l’apparecchiatura dovesse rimanere spenta per un lungo periodo: Svuotare l’apparecchiatura. Spegnere l’apparecchiatura premere il tasto A. Togliere la spina dalla presa di corrente oppure disinserire la valvola di sicurezza. Pulire l’apparecchiatura (vedi paragrafo “pulizia”). Lasciare aperte le porte per evitare la formazione di odori sgradevoli. Consigli per il risparmio energetico •... -
Page 39: Che Cosa Fare, Se
Che cosa fare, se ... Interventi in caso di anomalie Probabilmente si tratta di un guasto di lieve entità che potrete eliminare da soli seguendo le seguenti istruzioni. Non effettuare nessun’altra operazione qualore le informazioni qui riportate non fossero di alcun aiuto per il caso concreto. - Page 40 Anomalia Possibile causa Intervento L’apparecchiatura fa troppo La temperatura é regolata su Regolare la manopola su una freddo. un valore troppo freddo. posizione più calda La temperatura non é Vedi paragrafo “Messa in correttamente regolata. funzione” La porta é rimasta aperta a Aprire la porta solo per lo lungo.
-
Page 41: Servizio Di Assistenza
Servizio di assistenza Rivolgersi al Vostro rivenditore specializzato oppure presso il nostro servizio di assistenza nel caso gli interventi suggeriti nella precedente tabella non risolvano il problema. Gli indirizzi e/o numeri telefonici sono riportati nel libretto “Condizioni di garanzia / indirizzi del centro di assistenza” allegato. Una preparazione mirata dei pezzi di ricambio può... - Page 42 à proximité pour une utilisation optimale. Pensez également à la transmettre au prochain utilisateur. Nous vous souhaitons beaucoup de plaisir avec votre appareil A.E.G. Electrolux. Les symboles suivants sont utilisés dans cette notice d’utilisation Informations importantes concernant votre sécurité personnelle et consignes pour éviter tout endommagement de l'appareil...
- Page 43 Sommaire Sécurité ..........44 Elimination.
-
Page 44: Sécurité
Sécurité La sécurité de nos appareils est conforme aux règles reconnues de la technique et à la loi sur la sécurité des appareils. Nous nous voyons cependant obligés de vous familiariser avec les conseils de sécurité suivants Utilisation conforme à la destination •... - Page 45 d’alimentation, enlever ou détruire les fermetures à coulisse ou à verrou éventuellement présentes. Vous évitez de la sorte que des enfants qui jouent puissent s’enfermer dans l’appareil (Danger de suffocation !) ou ne se mettent dans d’autres types de situation de danger mortel. •Cet appareil n'est pas destiné...
-
Page 46: Elimination
Elimination Information sur l’emballage de l’appareil Tous les matériaux utilisés sont non polluants ! Ils peuvent être déposés sans danger à une décharge ou incinérés ! Matériaux : Les matières plastiques peuvent également être recyclées et sont repérées de la manière suivante: >PE<... -
Page 47: Installation
Installation Emplacement Placez de préférence votre appareil loin d’une source de chaleur (chauffage, cuisson ou rayons solaires trop intenses). Veillez à ce que l’air circule librement tout autour de l’appareil. Si toutefois, vous désirez placer l’appareil dans une niche ou directement sous un élément, il est indispensable de laisser un espace de 100 mm entre le dessus de l’appareil et un élément... -
Page 48: Fixation Des Entretoises Arriére
Fixation des entretoises arrière Vous trouverez deux entretoises jointes à l'appareil qui doivent être installées comme indiqué sur la figure. Procédez comme indiqué sur les figures. Branchement électrique Votre appareil ne peut être branché qu'en 230 V monophasé. Vérifiez que le compteur électrique peut supporter l'intensité absorbée par votre appareil compte tenu des autres appareils déjà... -
Page 49: Réversibilité De La Porte
Réversibilité de la porte La porte de cet appareil est réversible: son sens d’ouverture peut être modifié en fonction du souhait de l’utilisateur. Attention ! Avant de procéder à la réversibilité de la porte, débranchez l’appareil. Pour changer le sens d'ouverture de la porte : Nous vous conseillons de faire appel à... -
Page 50: Avant La Mise En Service
Replacez l'appareil dans sa position initiale et mettez-le de niveau et d'aplomb. Attendez au moins 1 heure avant de le rebrancher. Si ne voulez pas faire les operations vous pouvez contacter le Service Après- Vente en payant.. La réversibilité de la porte une fois effectuée, contrôlez que le joint magnétique adhère à... -
Page 51: Mise En Service Et Réglage De La Température
Touches de réglage de la température Le réglage de la température se fait à l’aide des touches «+» et «-» . Les touches sont en relation avec l’indicateur de température. • Lorsqu’on appuie sur une des deux touches «+» (MOINS FROID) ou «-» (PLUS FROID), l’indicateur de température passe de l’affichage de la température REELLE (l'indicateur de température s'allume) à... -
Page 52: Sélection Du Mode "Congélation Ou Réfrigération
Avant d’entreposer des aliments à congeler ou surgelés, attendez que la temperature du compartiment congélateur ait atteint -18°C et que le voyant rouge alarme s’éteigne . Le signal sonore s’éteint quand la température demandée est atteinte. Appuyez sur la touche arret alarme (H) pour arrêter le signal sonore. Si le voyant rouge alarme reste allumé... - Page 53 Réglage de la température Appuyez sur une des touches «+» (PLUS CHAUD) ou «-» (PLUS FROID). L’indicateur de température change d’affichage et indique par un cli- gnotement la température de CONSIGNE momentanément réglée. Si vous souhaitez une température plus chaude, appuyez sur la touche «+» (PLUS CHAUD).
-
Page 54: Mettre L'appareil Hors Service
Frostmatic Cette fonction FROSTMATIC accélère la congélation des denrées fraîches et protège en même temps les marchandises déjà entreposées d’un réchauffement indésirable. En appuyant sur la touche FROSTMATIC, on enclenche la fonction FROSTMATIC. Le voyant jaune s’allume. Si la fonction FROSTMATIC n’est pas interrompue manuellement, la congélation rapide est enclenchée pour une période d’environ de 48 heures, avec retour automatique en régime conservation à... - Page 55 •24 heures (*) avant d’introduire les denrées fraîches si l’appareil est déjà en régime de conservation, et si vous utilisez la capacité maximale de congélation. Le pouvoir de congélation est indiqué sur la plaque signalétique de votre appareil. Maintenez le régime de congélation pendant 24 heures(*) après avoir introduit les produits à...
-
Page 56: Fabrication Des Glaçons
Prévoyez un temps réduit au minimum pour leur transport du magasin d’alimentation à votre domicile. Utilisez des sacs isothermes (dans la mesure du possible). Repérez la date de fabrication du produit, et respectez la durée de conservation indiquée par le fabricant. Evitez d’ouvrir trop souvent la porte du compartiment congélateur et ne la laissez ouverte que le temps nécessaire. -
Page 57: Calendrier De Congélation
• d’augmenteur l’autonomie de votre appareil en cas de coupure de courant, • de transporter des produits congelés ou surgelés, • de maintenir le froid au niveau le plus bas dans une glacière de pique nique, • de maintenir le froid dans les produits surgelés ou congelés durant la période de dégivrage. -
Page 58: Mettre L'appareil Hors Service
Nettoyage intérieur Il est recommandé de nettoyer votre appareil très régulièrement. A l’occasion d’un dégivrage, lavez le compartiment et le joint de porte à l’aide d’une éponge et d’un détergent doux. Rincez et séchez soigneusement. Nettoyage extérieur De nombreux détergents spécifiques pour les surfaces de cuisine contiennent des agents chimiques pouvant corroder/endommager les parties en plastique de cet appareil. -
Page 59: Conseils D'économie D'énergie
Conseils d’économie d’énergie • Ne pas installer l’appareil à proximité de cuisinières, radiateurs ou autres sources de chaleur. En cas de température ambiante élevée, le compresseur tourne plus souvent et plus longtemps. • Veiller à une ventilation suffisante du socle de l’appareil. Ne jamais recouvrir les ouvertures de ventilation. - Page 60 Symptômes Solutions Vérifiez que: • la prise est effectivement branchée, L’appareil ne fonctionne pas • les fusibles sont en bon état et n’ont pas disjoncté, La température à l’intérieur de l’appareil est Vérifiez que: trop froide • la température est correctement réglée Vérifiez que: •...
-
Page 61: Réglements, Normes, Directives
Règlements, normes, directives L’appareil frigorifique est destiné à un usage domestique et a été fabriqué en respect des normes s’appliquant à ce type d’appareils. La fabrication tient en particulier compte des mesures prévues par la loi allemande sur la sécurité des appareils (GSG), le règlement préventif contre les accidents pour les installations frigorifiques (VBG 20) et les dispositions de l’union des électrotechniciens allemands (VDE). - Page 62 Dear Customer Thank you for choosing one of our high-quality products. With this appliance you will experience the perfect combination of functional design and cutting edge technology. Convince yourself that our appliances are engineered to deliver the best performance and control - indeed we are setting the highest standards of excellence.
- Page 63 Contents Safety ..........64 Disposal .
-
Page 64: Safety
Safety The safety aspects of our refrigerators/freezers comply with accepted technical standards and the German Appliance Safety Law. Nevertheless, we consider it our obligation to make you aware of the following safety information: Intended use • The refrigerator is intended for use in the home. It is suitable for the freezing and storing of frozen food, as well as for making ice. - Page 65 the fridge when playing (there is risk of suffocation!)or get themselves into other dangerous situations. • This appliance is not intended for use by persons (including children) with reduced physical, sensory or mental capabilities, or lack of experience and knowledge, unless they have been given supervision or instruction concerning use of the appliance by a person responsible for their safety.
-
Page 66: Disposal
Disposal Appliance Packaging Information All materials are environmentally sound! They can be dumped or burned at an incinerating plant without danger! About the materials: The plastics can be recycled and are identified as follows: >PE< for polyethylene, e.g. the outer covering and the bags in the interior. >PS<... -
Page 67: Remove Transport Safeguard
Remove transport safeguard The appliance and the interior fittings are protected for transport. • Pull off the adhesive tape on the left and right side of the door. • Remove all adhesive tape and packing pieces from the interior of the appliance. -
Page 68: Your Appliance Needs Air
Your appliance needs air safety reasons, minimum ventilationmust be as shown Fig. Attention: keep ventilation openings clear of obstruction; Rear spacers Inside the applaince you find two spacers which must be fitted. Slacken the screws and insert the spacer under the screw head, then re-tighten the screws.. -
Page 69: Electrical Connection
Unscrew the pin of the upper hinge (d) and refit it on the opposite side. Insert the door in the upper hinge and refit the upper hinges (A). Pay attention that the border of the doors are parallel to the top border, otherwise adjust the position of the lower hinge of the door (A). -
Page 70: Prior To Initial Start-Up
If the socket is not accessible once the appliance is built in, the electrical installation must include suitable means of isolating the appliance from the mains (e.g. fuse, cut-out, current trip or similar with a minimum contact separation of 3 mm). Attention: The mains connection cable may only be replaced by a skilled electrician. -
Page 71: Temperature Setting Buttons
Temperature setting buttons The temperature is adjusted using the „B“ and „D“ buttons. These buttons are connected to the temperature display. • The temperature display is switched over from the display of the ACTUAL temperature (Temperature display is illuminated) to the display of the DESIRED temperature (Temperature display flashes) by pressing one of the two buttons, „B“... -
Page 72: Temperature Adjustment
Attention! If you are using the appliance as a freezing unit: Please wait prior to putting the foodstuff to be frozen, until the freezer interior temperature has attained -18 °C. Attention! If you are using this appliance as a cooling unit, after it has been used as a freezing unit: Please wait until the temperature has reached 0 °C before putting the foodstuff to be cooled in the appliance. -
Page 73: Temperature Display
Temperature display The temperature display can indicate several pieces of information. • During normal operation, the temperature currently present in the freezer (ACTUAL temperature) is displayed. • When the temperature is being adjusted a flashing display indicates the freezer temperature currently set (DESIRED temperature). Starting Up - Setting the Temperature Plug the mains plug into the mains socket. -
Page 74: Alarm Off Button
Alarm OFF button In the event of an abnormal temperature rise inside the freezer (e.g. power cut) warning light (H) will start to flash and a buzzer will sound. After the temperature has returned to normal, the warning light (H) will continue to flash, although the buzzer has stopped. -
Page 75: Freezing And Storing Frozen Food
Freezing and storing frozen food You can use your freezer for freezing fresh food yourself. Important! • The temperature in the freezer compartment must be –18 °C or colder before freezing food. • Please observe the freezing capacity given on the rating plate. The freezing capacity is the maximum quantity of fresh food that can be frozen within a period of 24 hours. -
Page 76: Preparation Of Ice Cubes
begin to defrost. Press the fast freeze button 24 hours before introducing fresh food for freezing of fresh food. The yellow light comes on. Place frozen foods in the drawers sorted by type, as far as possible. Preparation of Ice Cubes Fill the ice cube tray 3/4 full with cold water, place it in the freezer compartment and leave to freeze. -
Page 77: Cleaning And Care
Cleaning and Care For hygienic reasons the appliance interior, including interior accessories, should be cleaned regularly. Warning! • The appliance may not be connected to the mains during cleaning. Danger of electrical shock! Before cleaning switch the appliance offand rem ve the plug from the mains, or switch off or turn out the circuit breaker or fuse. -
Page 78: Switching Off The Appliance
Switching off the appliance If the appliance is not going to be used for an extended period: Remove all deep-frozen packages as well as ice trays. Switch off the appliance by holding down the ON/OFF button. Remove the mains plug or switch off or turn out the circuit breaker or fuse. Clean thoroughly (see section: “Cleaning and Care”). -
Page 79: What To Do If
What to do if ... Correcting Malfunctions A malfunction may be caused by only a minor fault that you can rectify yourself using the following instructions. Do not perform any other work on the appliance if the following information does not provide assistance in your specific case. -
Page 80: Regulation, Standard And Guidesline
Malfunction Possible Cause Remedy Carefully warm the leaking sections of the door seal with Door seal is not air tight a hair dryer (not hotter than Heavy build up of frost, (possibly after changing over approx. 50 °C). At the same possibly also on the door seal. - Page 84 2223 427-74-00-26032008 Änderungen vorbehalten Con riserva di modifiche Sous réserve de modifications Subject to change without notice...