
Related Manuals for AEG NM 1600


Summary of Contents for AEG NM 1600
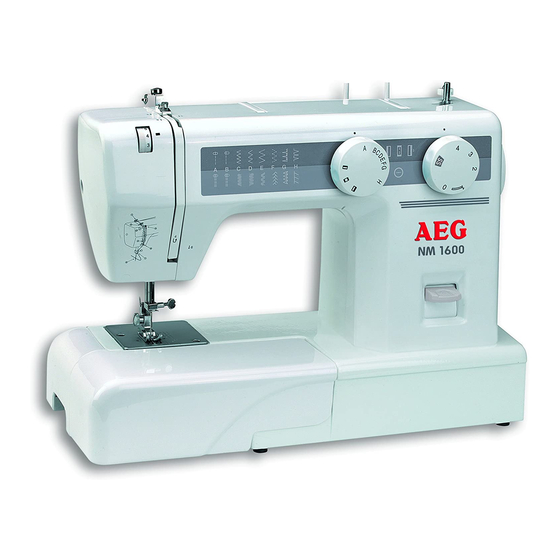
- Page 1 Bedienungsanl.1800/1600 GB 30.08.2004 17:44 Uhr Seite 2 Instruction Manual Instruction Manual Sewing Machine NM 1600/1800 Sewing Machine NM 1600/1800...
-
Page 2: Table Of Contents
Bedienungsanl.1800/1600 GB 30.08.2004 17:44 Uhr Seite 3 Contents Page Contents Page Important introduction Important instructions Name of Parts Accessory Power supply Change the electric light bulb Change the needle Selection of the right needle Remove and attach presser foot Adjust the threading tension Adjust the lower threading tension Reverse stitch Stitch selection dial... -
Page 3: Seite
Bedienungsanl.1800/1600 GB 30.08.2004 17:44 Uhr Seite 4 Impor tant intr oduction Impor tant intr oduction Before using the machine please read the following instructions carefully. Take enough time to read it. By doing that, you’ll get a general idea of functioning and of the function of the machine what will help you to work more easily and successfully. -
Page 4: Important Instructions
Bedienungsanl.1800/1600 GB 30.08.2004 17:44 Uhr Seite 5 Important instructions! Important instructions! Before using the sewing machine, the following instructions should always be followed: 1. Operate the machine with the adequate caution - because of the needle going up and down – and keep an eye at the sewing place while working! 2. -
Page 5: Name Of Parts
Bedienungsanl.1800/1600 GB 30.08.2004 17:44 Uhr Seite 6 Name of parts Name of parts 1 Bobbin case cover 12 Stitch selection button 2 Needle plate 13 Stitch length selection button 3 Presser foot 14 Cover 15 Thread retainer stopper 4 Needle 16 Sewing spool 5 Thread cover 17 Balance wheel... -
Page 6: Accessory
Bedienungsanl.1800/1600 GB 30.08.2004 17:45 Uhr Seite 7 Accessory Accessory screw driver ripper felt plate needles oilcan shuttles sew on button foot buttonhole foot hem foot zipper foot blind stitch foot Power supply Power supply Put the coupling plug into the sewing machine. -
Page 7: Change The Needle
Bedienungsanl.1800/1600 GB 30.08.2004 17:45 Uhr Seite 8 Change the needle Change the needle Turn the balance wheel into your direction until the needle is in the highest position. Loosen the needle screw and remove the needle from the fixture (see figure). After that, put the new needle into the fixture –... -
Page 8: Remove And Attach Presser Foot
Bedienungsanl.1800/1600 GB 30.08.2004 17:45 Uhr Seite 9 Remove and attach pr esser foot Remove and attach pr esser foot Remove: Turn the hand wheel as wide as you can into your direction until the needle reaches its hig- hest position. By lifting the presser foot lever you lift the presser foot (1). -
Page 9: Reverse Stitch
Bedienungsanl.1800/1600 GB 30.08.2004 17:45 Uhr Seite 10 Stitch length selection dial Stitch length selection dial To change the stitch length you can Stich length selection turn the selection dial so that the button number of the desired stitch length is at the mark. The numbers stand for the approximate stitch length in mm. -
Page 10: Remove The Bobbin Case
Bedienungsanl.1800/1600 GB 30.08.2004 17:45 Uhr Seite 11 Remove the bobbin case Remove the bobbin case Set up the presser foot, turn the hand wheel into your direction until the thread take-up lever is on its position (figure 1). Open the bobbin cover (figure 2). After that, open the bobbin case and take the case out of the machine (figure 3). -
Page 11: Wind The Bobbin
Bedienungsanl.1800/1600 GB 30.08.2004 17:45 Uhr Seite 12 ind the bobbin ind the bobbin Release the hand wheel release by tur- ning the release plate into your direction. Guide the thread from the thread reel through the thread retainer (figure 2). Now, put the end of the thread through the hole in the bobbin (figure 3). -
Page 12: Thread The Upper Threading
Bedienungsanl.1800/1600 GB 30.08.2004 17:45 Uhr Seite 13 Thread the upper threading Thread the upper threading Put the thread reel on the reel holder so that the thread comes backwards from the reel. Hold onto the reel with your right hand and lead the thread downwards through the two tension plates from top to bot- tom. -
Page 13: Straight Sewing And Zigzag Sewing
Bedienungsanl.1800/1600 GB 30.08.2004 17:45 Uhr Seite 14 Straight sewing and zigzag sewing Straight sewing and zigzag sewing Presser foot: zigzag foot (figure) Stitch selection: 2 for straight sewing 3-10 for zigzag sewing Stitch length selection dial: 0.3 – 4 Start sewing Start sewing Make sure that both threads are under the pres- ser foot. -
Page 14: Tricot Stitch
Bedienungsanl.1800/1600 GB 30.08.2004 17:45 Uhr Seite 15 ricot stitch ricot stitch This stitch is especially suitable for darning tears. It is also used to strengthen stretching materials and to sew on applications. Presser foot: zigzag foot Stitch selection: 8 Stitch length: 0.3 – 4 itchcraft and herringbone stitch itchcraft and herringbone stitch You can sew stretching materials using this very... -
Page 15: Make A Buttonhole
Bedienungsanl.1800/1600 GB 30.08.2004 17:45 Uhr Seite 16 Make a button hole Make a button hole Presser foot: button hole foot Stitch selection: “A” “B’’ ‘’C’’ Stitch length: 0.3 – 1 1. Pull the button hole sole completely forward and start with the symbol: Now, you sew forward the left button hole caterpillar according to the desired length (see 1). -
Page 16: Hem
Bedienungsanl.1800/1600 GB 30.08.2004 17:45 Uhr Seite 17 Presser foot: Hem foot Stitch selection: “1” Stitch length: 1-4 1. Replace the normal foot by a hem foot. 2. Turn up the selvage about 3 mm as shown on the right side. 3. -
Page 17: Blind Hem Sewing
Bedienungsanl.1800/1600 GB 30.08.2004 17:45 Uhr Seite 18 Blind hem sewing Blind hem sewing Presser foot: blind hem foot Stitch selection: “9” Stitch length: 1-3 1. Fold the material according to the desired material width (figure 1). 2. On the right side, when you fold back the hem, there has to remain a selvage with the width of 4 mm (figure 2). -
Page 18: Clean The Bobbin Case
Bedienungsanl.1800/1600 GB 30.08.2004 17:45 Uhr Seite 19 Clean the bobbin case Clean the bobbin case 1. Put the needle in the highest position, otherwise, it is not possible to remove the shutter. Remove the bobbin case. 2. Turn the snap lever out and remove the retaining ring. -
Page 19: Oil The Machine
Bedienungsanl.1800/1600 GB 30.08.2004 17:45 Uhr Seite 20 Oil the machine Oil the machine Remove the upper arm cover and open the bulb cover. Warning: Pay attention to the locked cover! The parts that have to be oiled are marked with arrows. Before oiling, you should clean these parts. - Page 20 Our devices are provided with the CE sign and are safety and GS tested. We are always available for further information. Please contact: VERITAS BETEILIGUNGSGESELLSCHAFT P.O. Box 291347 • D- 47833 Krefeld • Germany ® Trademark-License AEG by Licentia Patent-Verwaltungs-GmbH...