GE CFE29TSDSS Owner's Manual And Installation Instructions
Bottom freezer refrigerators
Hide thumbs
Also See for CFE29TSDSS:
- Owner's manual & installation instructions (48 pages) ,
- Dimensions and installation information (2 pages) ,
- Energy manual (1 page)
Table of Contents
Advertisement
GEAppliances.com
. . . . . . . . . . . . 2-4
Operating Instructions
Features . . . . . . . . . . . . . . . . . . . . . . . . . .5, 6
Controls . . . . . . . . . . . . . . . . . . . . . . . . . .7, 8
Odor Remover . . . . . . . . . . . . . . . . . . . . . . 9
Dispenser . . . . . . . . . . . . . . . . . . . . . . . . . .10
Hot Water . . . . . . . . . . . . . . . . . . . . . . . . .11
Water Filter . . . . . . . . . . . . . . . . . . . . . . . .12
Fresh Food Storage Options . . . . .13,14
Climate Zone & Temperature
Controlled Drawer . . . . . . . . . . . . . . .15,16
Automatic Ice maker . . . . . . . . . . . . . . .18
Care and Cleaning . . . . . . . . . . . . . . . . 19
Replacing the Lights . . . . . . . . . . . . . . . .20
Installation Instructions
Preparing to Install the
Refrigerator . . . . . . . . . . . . . . . . . . . . 21, 22
Installing the Anti-Tip Bracket . . . 29, 30
Installing the Refrigerator . . . . . . . 23-33
Installing the Water Line . . . . . . . . 34-35
Troubleshooting Tips
Normal Operating Conditions . . . . . . .37
Service - Truth or Myth . . . . . . . . . 40, 41
Consumer Support
Warranty for U.S. Customers . . . . . . . .42
State of California Water Treatment
Warranty . . . . . . . . . . . . . . . . . . . . . . . . . .43
Performance Data Sheet . . . . . . . . . . .44
RPWF Water Filter Cartridge Limited
Device Certificate . . . . . . . . . . . . . . . . . .45
Consumer Support . . . . . . . . Back Cover
Write the model and serial
numbers here:
Model # ____________________
Serial # ____________________
Find these numbers on a label
on the left side, near the middle
of the refrigerator compartment.
"CFE" refers to the model CFE29TSDSS -
"CYE" refers to the model CYE23TSDSS -
. . . . . . 38, 39
239D3389P003 Pub No. 49-60678 12-12 GE
Owner's Manual and
Installation Instructions
GE Café™ models
Standard Depth Model
Counter Depth Model
Advertisement
Table of Contents

Related Manuals for GE CFE29TSDSS


Summary of Contents for GE CFE29TSDSS
-
Page 1: Table Of Contents
Odor Remover ..... . 9 “CFE” refers to the model CFE29TSDSS - Dispenser ......10 Standard Depth Model Hot Water . -
Page 2: Safety Instructions
IMPORTANT SAFETY INFORMATION. READ ALL INSTRUCTIONS BEFORE USING. SAFETY IMPORTANT SAFETY INFORMATION READ ALL INSTRUCTIONS BEFORE USING GE Appliances website For more information on your refrigerator’s operation, visit GEAppliances.com www. REFRIGERATOR SAFETY INFORMATION This is the safety alert symbol. This symbol alerts you to potential hazards that can kill or hurt you and others. All safety messages will follow the safety alert symbol and the word “DANGER”, “WARNING”, or “CAUTION”. -
Page 3: Important Safety Information
IMPORTANT SAFETY INFORMATION. READ ALL INSTRUCTIONS BEFORE USING. GEAppliances.com SAFETY (CONT.) INSTALLATION Explosion Hazard. Keep flammable materials and vapors, such as gasoline, away from refrigerator. Failure to do so can result in fire, explosion, or death. Tip Over Hazard. Built-in style models (model PYE, CYE, and PWE) are top heavy, especially with any doors open. These models must be secured with the anti-tip floor bracket to prevent tipping forward, which could result in death or serious injury. -
Page 4: Proper Disposal Of Your Old Refrigerator
IMPORTANT SAFETY INFORMATION. READ ALL INSTRUCTIONS BEFORE USING. SAFETY (CONT.) HOT WATER DISPENSER Scalding Hazard. The hot water dispenser is capable of heating water to a temperature of approximately 185°F (85°C). Water temperatures above 125°F (52°C) can cause severe burns or death from scalding. Children, the disabled, and the elderly are at highest risk of being scalded. -
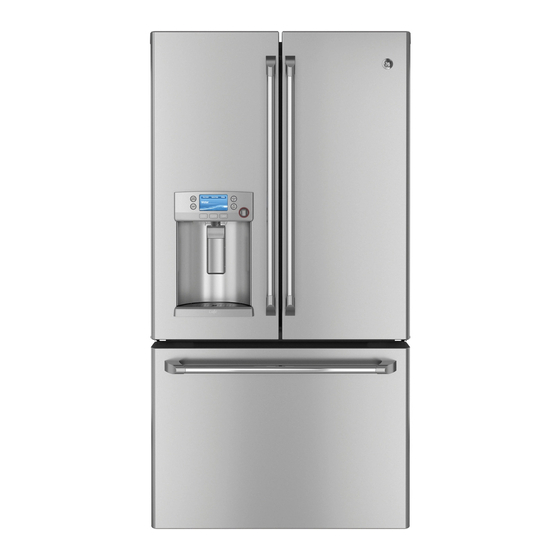
Page 5: Features
About the features. GEAppliances.com Space-saving ice maker QuickSpace™ shelf Ice maker and bin are located on the door creating more usable Functions as a normal full-sized shelf when needed and easily slides storage space. back to store tall items below. Showcase LED lighting Spillproof shelves LED lighting is positioned throughout the interior to spotlight areas... - Page 6 About the features . Door ice bin 1. Open left fresh food door. Latch 2. Pull down latch to release bin door. 3. Using handhold lift ice bucket up and out to clear locators in bottom of bin. 4. To replace the ice bucket, set it on the Ice bucket guide brackets and push until the ice bucket seats properly.
- Page 7 About the controls with temperature settings. GEAppliances.com CYE/CFE Control Style Changing the Temperature To turn OFF cooling system, access SETTINGS from the HOME screen. Page over and tap COOLING SYSTEM ON. To Change the Refrigerator Temperature: Press DONE to return to HOME screen. Access By: Temperature Button Temperature To turn ON cooling system, access SETTINGS from the HOME...
-
Page 8: Controls
About the controls features. NOTE: The refrigerator is shipped with protective film covering the temperature controls. If this film was not removed during installation, remove it now. The temperature controls are preset in the factory at 37°F for the refrigerator compartment and 0°F for the freezer compartment. -
Page 9: Odor Remover
Install/Replace Odor Filter Odor Filter The Odor Filter is located in the upper left corner of the fresh food compartment. GE recommends replacement of the odor filter every 6 months or when odor becomes objectionable. A reminder will appear on the main screen after 6 months to change the filter. -
Page 10: Dispenser
About the dispenser. Water & Ice Dispenser (See about the controls with Temperature settings & about the Control features) Dispenser Tray If no water is dispensed when the refrigerator is first installed, To remove Dispenser Tray there may be air in the water line system. Press the dispenser Pull Dispenser Tray out until it stops. -
Page 11: Hot Water
About Hot Water. GEAppliances.com To Use Hot Water Dispenser Important Facts about HOT WATER Scalding Hazard. 170, 185, or Custom). The water coming from the dispenser is very hot and can cause scalds or burns. Read all warnings prior to use. (See page 4.) beeping sound) hold container with left hand centered in the recess under the spout. -
Page 12: Water Filter
About the GE® RPWF water filter cartridge. A newly installed filter cartridge will cause water to spurt from the dispenser. Refer to 239D4126P002 Pub# 31-45497... -
Page 13: Fresh Food Storage Options
About the fresh food storage options. GEAppliances.com Rearranging the Shelves Shelves in the refrigerator compartment are adjustable. To remove: Remove all items from the shelf. Tilt the shelf up at the front. Lift the shelf up at the back and bring the shelf out. - Page 14 About the fresh food storage options. Non-Adjustable Dairy Bin To remove: Lift the dairy bin straight up, To replace: Engage the bin in the molded door then pull out. supports and push down. The bin will lock in place. See page 33. Adjustable Bins on the Door Drop down tray Adjustable bins can easily be carried from...
-
Page 15: Controlled Drawer
About the climate zone and temperature controlled drawer. GEAppliances.com ClimateZone Keep fruits and vegetables organized in separate compartments for easy access. Excess water that may accumulate in the bottom of the drawers or under the drawers should be wiped dry. Temperature Controlled Drawer The Temperature Controlled Drawer is a full-width drawer with adjustable temperature... - Page 16 About the climate zone and temperature controlled drawer. How to Remove and Replace the Adjustable Deli/Produce Drawer To remove: To replace: Pull the drawer out to the stop position. Pull left and right slides until fully extended. Lift the front of the drawer up and out. Place drawer back in first and rotate drawer front down to seat on slide.
-
Page 17: About The Freezer
About the freezer. GEAppliances.com Freezer Basket and Drawer Basket. Drawer Utility Bin Non-Adjustable Bin in the Freezer To remove: push in plastic tab on either left or right side To replace: slide bin into location until it locks into place. Basket Removal To remove, CFE only: To remove, CYE only:... -
Page 18: Automatic Ice Maker
About the automatic ice maker. A newly installed refrigerator may take 12 to 24 hours to begin making ice. Automatic Ice maker You may hear a buzzing sound each time the (on some models) ice maker fills with water. The ice maker will produce seven cubes Ice maker Throw away the first few batches of ice to allow per cycle approximately 100–130 cubes... -
Page 19: Care And Cleaning
Care and cleaning of the refrigerator. GEAppliances.com Cleaning the Outside The stainless steel panels, door handles and trim. Silver-accented plastic parts. Do not use appliance wax, polish, bleach, or other products Wash parts with soap or other mild detergents. Wipe clean with containing chlorine on stainless steel. -
Page 20: Replacing The Lights
An authorized technician will need to replace the LED light. If this assembly needs to be replaced, call GE Service at 1.800.432.2737 in the United States or 1.800.561.3344 in Canada.