Table of Contents
Advertisement
Quick Links
Advertisement
Table of Contents

Related Manuals for Lenovo G40-30


Summary of Contents for Lenovo G40-30
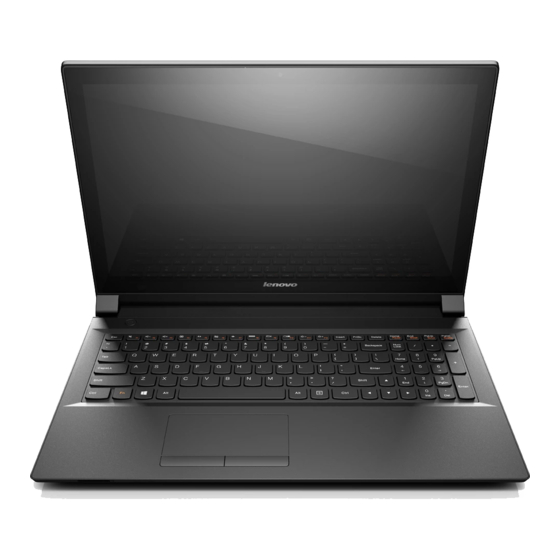
- Page 1 Lenovo G40-30/G40-45/ G40-70/G40-70m/ Z40-70/Z40-75 Hardware Maintenance Manual...
- Page 2 • This manual applies to the following models: Lenovo G40-30/G40-45/G40-70/G40-70m/Z40-70/Z40-75. The illustrations used in this manual are for Lenovo G40-70 unless otherwise stated. First Edition (Apr. 2014) © Copyright Lenovo 2014. All rights reserved. LIMITED AND RESTRICTED RIGHTS NOTICE: If data or software is delivered pursuant a General Services Administration “GSA” contract, use, reproduction, or disclosure is subject to restrictions set forth in Contract No.
-
Page 3: Table Of Contents
Screen blank state ..........25 Putting the computer to sleep or shutting it down ..............25 Putting your computer to sleep ......25 Shutting down the computer ......25 Lenovo G40-30/G40-45/G40-70/G40-70m/ Z40-70/Z40-75 ..........26 Specifications ..........26 Status indicators ........... 29 Hotkeys............30 FRU replacement notices ......31 Screw notices ..........31... -
Page 4: About This Manual
About this manual This manual contains service and reference information for the following Lenovo product: Lenovo G40-30/G40-45/G40-70/G40-70m/Z40-70/Z40-75 Use this manual to troubleshoot problems. The manual is divided into the following sections: • The common sections provide general information, guidelines, and safety information required for servicing computers. -
Page 5: Safety Information
Safety information Safety information This chapter presents the following safety information that you need to get familiar with before you service a Lenovo G40-30/G40-45/G40-70/G40-70m/ Z40-70/Z40-75 computer: • “General safety” on page 2 • “Electrical safety” on page 3 • “Safety inspection guide” on page 5 •... -
Page 6: General Safety
G40-30/G40-45/G40-70/G40-70m/Z40-70/Z40-75 Hardware Maintenance Manual General safety Follow these rules below to ensure general safety: • Observe a good housekeeping in the area where the machines are put during and after the maintenance. • When lifting any heavy object: 1. Make sure that you can stand safely without slipping. -
Page 7: Electrical Safety
Safety information Electrical safety Observe the following rules when working on electrical equipments. Important: Use only approved tools and test equipments. Some hand tools have handles covered with a soft material that does not insulate you when working with live electrical currents. Many customers have rubber floor mats near their machines that contain small conductive fibers to decrease electrostatic discharges. Do not use such kind of mat to protect yourself from electrical shock. • Find the room emergency power-off (EPO) switch, disconnecting switch or electrical outlet. - Page 8 G40-30/G40-45/G40-70/G40-70m/Z40-70/Z40-75 Hardware Maintenance Manual • Always look carefully for possible hazards in your work area. Examples of these hazards are moist floors, nongrounded power extension cables, power surges, and missing safety grounds. • Do not touch live electrical circuits with the reflective surface of a plastic dental mirror.
-
Page 9: Safety Inspection Guide
4. Check for cracked or bulging batteries. 5. Remove the cover. 6. Check for any obvious non-Lenovo alterations. Use good judgment as to the safety of any non-Lenovo alterations. 7. Check inside the unit for any obvious unsafe conditions, such as metal filings, contamination, water or other liquids, or signs of fire or smoke damage. -
Page 10: Handling Devices That Are Sensitive To Electrostatic Discharge
G40-30/G40-45/G40-70/G40-70m/Z40-70/Z40-75 Hardware Maintenance Manual Handling devices that are sensitive to electrostatic discharge Any computer part containing transistors or integrated circuits (ICs) should be considered sensitive to electrostatic discharge (ESD). ESD damage can occur when there is a difference in charge between objects. Protect against ESD damage by equalizing the charge so that the machine, the part, the work mat, and the person handling the part are all at the same charge. -
Page 11: Safety Notices: Multilingual Translations
Safety information Safety notices: multilingual translations The safety notices in this section are provided in English, French, German, Hebrew, Italian, Japanese, and Spanish. Safety notice 1 Before the computer is powered on after FRU replacement, make sure all screws, springs, and other small parts are in place and are not left loose inside the computer. Verify this by shaking the computer and listening for rattling sounds. - Page 12 G40-30/G40-45/G40-70/G40-70m/Z40-70/Z40-75 Hardware Maintenance Manual Safety notice 2 DANGER Some standby batteries contain a small amount of nickel and cadmium. Do not disassemble a standby battery, recharge it, throw it into fire or water, or short- circuit it. Dispose of the battery as required by local ordinances or regulations. Use only the battery in the appropriate parts listing. Use of an incorrect battery can result in ignition or explosion of the battery. Certaines batteries de secours contiennent du nickel et du cadmium. Ne les démontez pas, ne les rechargez pas, ne les exposez ni au feu ni à l’eau. Ne les mettez pas en court-circuit. Pour les mettre au rebut, conformez-vous à la...
- Page 13 Safety information Safety notice 3 DANGER The battery pack contains small amounts of nickel. Do not disassemble it, throw it into fire or water, or short-circuit it. Dispose of the battery pack as required by local ordinances or regulations. Use only the battery in the appropriate parts listing when replacing the battery pack. Use of an incorrect battery can result in ignition or explosion of the battery. La batterie contient du nickel. Ne la démontez pas, ne l’exposez ni au feu ni à l’eau. Ne la mettez pas en court-circuit. Pour la mettre au rebut, conformez-vous à la réglementation en vigueur. Lorsque vous remplacez la batterie, veillez à n’utiliser que les modèles cités dans la liste de pièces détachées adéquate. En effet, une batterie inappropriée risque de prendre feu ou d’exploser. Akkus enthalten geringe Mengen von Nickel. Sie dürfen nicht zerlegt, wiederaufgeladen, kurzgeschlossen, oder Feuer oder Wasser ausgesetzt werden. Bei der Entsorgung die örtlichen Bestimmungen für Sondermüll beachten. Beim Ersetzen der Batterie nur Batterien des Typs verwenden, der in der Ersatzteilliste aufgeführt ist. Der Einsatz falscher Batterien kann zu Entzündung oder Explosion führen. La batteria contiene piccole quantità di nichel. Non smontarla, gettarla nel fuoco o nell’acqua né cortocircuitarla. Smaltirla secondo la normativa in vigore (DPR 915/82, successive disposizioni e disposizioni locali). Quando si sostituisce la batteria, utilizzare soltanto i tipi inseriti nell’appropriato Catalogo parti. L’impiego di una batteria non adatta potrebbe determinare l’incendio o l’esplosione della batteria stessa. Las baterías contienen pequeñas cantidades de níquel. No las desmonte, ni recargue, ni las eche al fuego o al agua ni las cortocircuite. Deséchelas tal como dispone la normativa local. Utilice sólo baterías que se encuentren en la lista de piezas al sustituir la batería. La utilización de una batería no apropiada puede...
- Page 14 G40-30/G40-45/G40-70/G40-70m/Z40-70/Z40-75 Hardware Maintenance Manual Safety notice 4 DANGER The lithium battery can cause a fire, an explosion, or a severe burn. Do not recharge it, remove its polarized connector, disassemble it, heat it above 100°C (212°F), incinerate it, or expose its cell contents to water. Dispose of the battery as required by local ordinances or regulations. Use only the battery in the appropriate parts listing. Use of an incorrect battery can result in ignition or explosion of the battery. La pile de sauvegarde contient du lithium. Elle présente des risques d’incendie, d’explosion ou de brûlures graves. Ne la rechargez pas, ne retirez pas son connecteur polarisé et ne la démontez pas. Ne l’exposez pas à une temperature...
- Page 15 Safety information Safety notice 5 If the LCD breaks and the fluid from inside the LCD gets into your eyes or on your hands, immediately wash the affected areas with water at least for 15 minutes. Seek medical care if any symptoms caused by the fluid are present after washing. Si le panneau d’affichage à cristaux liquides se brise et que vous recevez dans les yeux ou sur les mains une partie du fluide, rincez-les abondamment pendant au moins quinze minutes. Consultez un médecin si des symptômes persistent après le lavage. Die Leuchtstoffröhre im LCD-Bildschirm enthält Quecksilber. Bei der Entsorgung die örtlichen Bestimmungen für Sondermüll beachten. Der LCD-Bildschirm besteht aus Glas und kann zerbrechen, wenn er unsachgemäß behandelt wird oder der Computer auf den Boden fällt. Wenn der Bildschirm beschädigt ist und die darin befindliche Flüssigkeit in Kontakt mit Haut und Augen gerät, sollten die betroffenen Stellen mindestens 15 Minuten mit Wasser abgespült und bei Beschwerden anschließend ein Arzt aufgesucht werden.
- Page 16 G40-30/G40-45/G40-70/G40-70m/Z40-70/Z40-75 Hardware Maintenance Manual Safety notice 6 DANGER To avoid shock, do not remove the plastic cover that protects the lower part of the inverter card. Afin d’éviter tout risque de choc électrique, ne retirez pas le cache en plastique protégeant la partie inférieure de la carte d’alimentation. Aus Sicherheitsgründen die Kunststoffabdeckung, die den unteren Teil der Spannungswandlerplatine umgibt, nicht entfernen. Per evitare scosse elettriche, non rimuovere la copertura in plastica che avvolge la parte inferiore della scheda invertitore. Para evitar descargas, no quite la cubierta de plástico que rodea la parte baja de la tarjeta invertida. Safety notice 7 DANGER Though the main batteries have low voltage, a shorted or grounded battery can produce enough current to burn personnel or combustible materials. Bien que le voltage des batteries principales soit peu élevé, le court-circuit ou la mise à la masse d’une batterie peut produire suffisamment de courant pour brûler des matériaux combustibles ou causer des brûlures corporelles graves. Obwohl Hauptbatterien eine niedrige Spannung haben, können sie doch bei Kurzschluß oder Erdung genug Strom abgeben, um brennbare Materialien zu...
- Page 17 Safety information Safety notice 8 DANGER Before removing any FRU, turn off the computer, unplug all power cords from electrical outlets, remove the battery pack, and then disconnect any interconnecting cables. Avant de retirer une unité remplaçable en clientèle, mettez le système hors tension, débranchez tous les cordons d’alimentation des socles de prise de courant, retirez la batterie et déconnectez tous les cordons d’interface. Die Stromzufuhr muß abgeschaltet, alle Stromkabel aus der Steckdose gezogen, der Akku entfernt und alle Verbindungskabel abgenommen sein, bevor eine FRU entfernt wird. Prima di rimuovere qualsiasi FRU, spegnere il sistema, scollegare dalle prese elettriche tutti i cavi di alimentazione, rimuovere la batteria e poi scollegare i cavi di interconnessione. Antes de quitar una FRU, apague el sistema, desenchufe todos los cables de las tomas de corriente eléctrica, quite la batería y, a continuación, desconecte cualquier cable de conexión entre dispositivos.
-
Page 18: Laser Compliance Statement
G40-30/G40-45/G40-70/G40-70m/Z40-70/Z40-75 Hardware Maintenance Manual Laser compliance statement Some models of Lenovo computer are equipped from the factory with an optical storage device such as a CD-ROM drive or a DVD-ROM drive. Such devices are also sold separately as options. If one of these drives is installed, it is certified in the U.S. - Page 19 Safety information A CD-ROM drive, a DVD-ROM drive, or any other storage device installed may contain an embedded Class 3A or Class 3B laser diode. Note the following: DANGER Emits visible and invisible laser radiation when open. Do not stare into the beam, do not view directly with optical instruments, and avoid direct exposure to the beam. Radiação por raio laser ao abrir. Não olhe fixo no feixe de luz, não olhe diretamente por meio de instrumentos óticos e evite exposição direta com o feixe de luz.
-
Page 20: Important Service Information
To download software fixes, drivers, and BIOS, follow the steps below: 1. Go to http://support.lenovo.com. 2. Enter the serial number or select a product or use Lenovo smart downloading. 3. Select the BIOS/Driver/Applications and download. -
Page 21: Strategy For Replacing A Hard Disk Drive
Important service information Use the following strategy to prevent unnecessary expense for replacing and servicing FRUs: • If you are instructed to replace an FRU, but the replacement does not solve the problem, reinstall the original FRU before you continue. •... -
Page 22: Important Information About Replacing Rohs Compliant Frus
FRU part numbers. Lenovo plans to transit to RoHS compliance well before the implementation date and expects its suppliers to be ready to support Lenovo’s requirements and schedule in the EU. Products sold in 2005 and 2006 will contain some RoHS compliant FRUs. -
Page 23: General Checkout
General checkout General checkout This chapter presents the following information: • “What to do first” on page 20 • “Power system checkout” on page 21 Before you go to the checkout, make sure to read the following important notes: Important notes: • Only certified trained personnel can service the computer. -
Page 24: What To Do First
G40-30/G40-45/G40-70/G40-70m/Z40-70/Z40-75 Hardware Maintenance Manual What to do first When you do return an FRU, you must include the following information in the parts exchange form or parts return form that you attach to it: 1. Name and phone number of servicer 2. -
Page 25: Power System Checkout
3. If the voltage is not correct, replace the AC adapter. 4. If the voltage is acceptable, do the following: • Replace the system board. • If the problem persists, go to “Lenovo G40-30/G40-45/G40-70/G40-70m/ Z40-70/Z40-75” on page 26. Note: Noise from the AC adapter does not always indicate a defect. -
Page 26: Checking The Battery Pack
G40-30/G40-45/G40-70/G40-70m/Z40-70/Z40-75 Hardware Maintenance Manual Perform operational charging. If the battery status indicator or icon does not light on, remove the battery pack and let it return to room temperature. Reinstall the battery pack. If the charge indicator or icon is still off, replace the battery pack. -
Page 27: Related Service Information
OneKey Recovery System. In order to save application files and the initial backed up files of the system, the hard disk in a Lenovo computer includes a hidden partition when it is shipped. If you need to restore the system to the point of your first boot up, just enter Lenovo OneKey Recovery System and run System Recovery. -
Page 28: Passwords
G40-30/G40-45/G40-70/G40-70m/Z40-70/Z40-75 Hardware Maintenance Manual Passwords As many as three passwords may be needed for any Lenovo computer: the power-on password (POP), the hard disk password (HDP), and the administrator password. If any of these passwords has been set, a prompt for it appears on the screen whenever the computer is turned on. -
Page 29: Power Management
Related service information Power management Note: Power management modes are not supported for APM operating system. To reduce power consumption, the computer has three power management modes: screen blank, sleep (standby), and hibernation. Screen blank state If the time set on the “Turn off monitor” timer in the operating system expires, the LCD backlight turns off. -
Page 30: Lenovo G40-30/G40-45/G40-70/G40-70M/Z40-70/Z40-75
• “FRU replacement notices” on page 31 • “Removing and replacing an FRU” on page 32 • “Locations” on page 66 • “Parts list” on page 68 Specifications The following table lists the specifications of the Lenovo G40-30/G40-45/ G40-70/G40-70m/Z40-70/Z40-75: Table 1. Specifications Feature Description Processor •... - Page 31 Lenovo G40-30/G40-45/G40-70/G40-70m/Z40-70/Z40-75 Table 1. Specifications (continued) Feature Description • G40-45 GPU: GPP (General Purpose Port), PCIe 2.0, 5GT/s WLAN: PCIe 1.0, 2.5GT/s RAM: DDR3L, 1600MT/s MAX 1 DIMM DDR3L, 1333MT/s MAX 2 DIMM DMI x 4, N/A NO SUPPORT FDI x 2, N/A NO SUPPORT LCD: eDP 1.2, 5.4GT/s...
- Page 32 G40-30/G40-45/G40-70/G40-70m/Z40-70/Z40-75 Hardware Maintenance Manual Table 1. Specifications (continued) Feature Description Graphic memory • Integrated/AMD Jel LE chip Display • 14.0" 16:9, 1,366 × 768 pixels Standard • DDR3L-1,600 MHz SODIMM × 2 (max 16 GB) memory CMOS RAM • 256 Bytes Hard disk drive •...
-
Page 33: Status Indicators
Lenovo G40-30/G40-45/G40-70/G40-70m/Z40-70/Z40-75 Status indicators The system status indicators below show the computer status: Table 2. Status indicators Indicator Charge Indicator Meaning status status On (solid white) The computer is powered on. Blinking The computer is in sleep mode. Power The computer is powered off. -
Page 34: Hotkeys
G40-30/G40-45/G40-70/G40-70m/Z40-70/Z40-75 Hardware Maintenance Manual Hotkeys You can access certain system settings quickly by pressing the appropriate hotkeys. Table 3. Hotkeys Mutes/unmutes the sound. Decreases the volume level. Increases the volume level. Closes the currently active window. Refreshes the desktop or the currently active window. -
Page 35: Fru Replacement Notices
This section presents notices related to removing and replacing parts. Read this section carefully before replacing any FRU. Screw notices Loose screws can cause a reliability problem. In the Lenovo computer, this problem is addressed with special nylon-coated screws that have the following characteristics: •... -
Page 36: Removing And Replacing An Fru
G40-30/G40-45/G40-70/G40-70m/Z40-70/Z40-75 Hardware Maintenance Manual Removing and replacing an FRU This section presents exploded figures with the instructions to indicate how to remove and replace the FRU. Make sure to observe the following general rules: 1. Do not attempt to service any computer unless you have been trained and certified. -
Page 37: 1010 Battery Pack
Lenovo G40-30/G40-45/G40-70/G40-70m/Z40-70/Z40-75 1010 Battery pack DANGER Only use the battery specified in the parts list for your computer. Any other battery could ignite or explode. Figure 1. Removal steps of battery pack Unlock the manual latch 1. Slide the spring-loaded latch to the unlocked position 2 to eject the battery pack. Lift up the inner edge of the battery pack, pivoting it on the outer edge 3. -
Page 38: 1020 Base Cover
G40-30/G40-45/G40-70/G40-70m/Z40-70/Z40-75 Hardware Maintenance Manual 1020 Base cover For access, remove this FRU: • “1010 Battery pack” on page 33 Figure 2. Removal steps of base cover Remove the screws 1. Then remove the base cover 2. Step Screw (quantity) Color Torque M2 ×... - Page 39 Lenovo G40-30/G40-45/G40-70/G40-70m/Z40-70/Z40-75 Note: Applying labels to the base cover The new base cover FRU is shipped with a kit containing labels of several kinds. When you replace the base cover, you need to apply the following label: The following labels need to be peeled off from the old base cover and put on the new base cover.
-
Page 40: 1030 Optical Drive
G40-30/G40-45/G40-70/G40-70m/Z40-70/Z40-75 Hardware Maintenance Manual 1030 Optical drive For access, remove this FRU: • “1010 Battery pack” on page 33 • “1020 Base cover” on page 34 Figure 3. Removal steps of optical drive Remove the screw 1. Pull the optical drive out in the direction shown by arrow 2. -
Page 41: 1040 Hard Disk Drive
Lenovo G40-30/G40-45/G40-70/G40-70m/Z40-70/Z40-75 1040 Hard disk drive For access, remove these FRUs in order: • “1010 Battery pack” on page 33 • “1020 Base cover” on page 34 Attention: • Do not drop the hard disk drive or apply any physical shock to it. The hard disk drive is sensitive to physical shock. Improper handling can cause damage and permanent loss of data. • Before removing the drive, suggest the customer to backup all the information on it if possible. • Never remove the drive while the system is operating or in suspend mode. Figure 4. Removal steps of hard disk drive Remove the screws 1. - Page 42 G40-30/G40-45/G40-70/G40-70m/Z40-70/Z40-75 Hardware Maintenance Manual Figure 4. Removal steps of hard disk drive (continued) Remove the screws 3 and detach the metal frame from the hard disk drive. Step Screw (quantity) Color Torque M2 × 3.5 mm, flat-head, nylok-coated (4) Black 1.5 ~ 2.0 kgf*cm...
-
Page 43: 1050 Pci Express Mini Card For Wireless Lan
Lenovo G40-30/G40-45/G40-70/G40-70m/Z40-70/Z40-75 1050 PCI Express Mini Card for wireless LAN For access, remove these FRUs in order: • “1010 Battery pack” on page 33 • “1020 Base cover” on page 34 Figure 5. Removal steps of PCI Express Mini Card for wireless LAN Disconnect the two wireless LAN cables (black, grey) 1, and then remove the screw 2. - Page 44 G40-30/G40-45/G40-70/G40-70m/Z40-70/Z40-75 Hardware Maintenance Manual Figure 5. Removal steps of PCI Express Mini Card for wireless LAN (continued) Remove the card in the direction shown by arrow 3. When installing: • In models with a wireless LAN card that has two antenna connectors, plug the black cable (1st) (MAIN) into the jack labeled MAIN, and the grey cable (2nd) (AUX) into the jack labeled AUX on the card.
-
Page 45: 1060 Dimm
Lenovo G40-30/G40-45/G40-70/G40-70m/Z40-70/Z40-75 1060 DIMM For access, remove these FRUs in order: • “1010 Battery pack” on page 33 • “1020 Base cover” on page 34 Figure 6. Removal steps of DIMM Release the two latches on both edges of the socket at the same time in the directions shown by arrows 1, and then unplug the DIMM in the direction shown by arrow 2. -
Page 46: 1070 Fan Assembly
G40-30/G40-45/G40-70/G40-70m/Z40-70/Z40-75 Hardware Maintenance Manual 1070 Fan assembly For access, remove these FRUs in order: • “1010 Battery pack” on page 33 • “1020 Base cover” on page 34 Figure 7. Removal steps of fan assembly Unplug the fan connector in the direction shown by arrow 1. Then remove the screws 2. - Page 47 Lenovo G40-30/G40-45/G40-70/G40-70m/Z40-70/Z40-75 Figure 7. Removal steps of fan assembly (continued) Remove the fan 3.
-
Page 48: 1080 Keyboard
G40-30/G40-45/G40-70/G40-70m/Z40-70/Z40-75 Hardware Maintenance Manual 1080 Keyboard For access, remove these FRUs in order: • “1010 Battery pack” on page 33 • “1020 Base cover” on page 34 • “1070 Fan assembly” on page 42 Figure 8. Removal steps of keyboard Remove the screws 1. - Page 49 Lenovo G40-30/G40-45/G40-70/G40-70m/Z40-70/Z40-75 Figure 8. Removal steps of keyboard (continued) Insert the screwdriver into the bottom hole 2. Then pull the keyboard out of the keyboard bezel 3.
- Page 50 G40-30/G40-45/G40-70/G40-70m/Z40-70/Z40-75 Hardware Maintenance Manual Figure 8. Removal steps of keyboard (continued) Lift the keyboard slightly 4. Detach the connectors in the directions shown by arrows 5 and 6. Then remove the keyboard. When installing: Make sure that the FPC connector is attached firmly.
-
Page 51: 1090 Keyboard Bezel
Lenovo G40-30/G40-45/G40-70/G40-70m/Z40-70/Z40-75 1090 Keyboard bezel For access, remove these FRUs in order: • “1010 Battery pack” on page 33 • “1020 Base cover” on page 34 • “1030 Optical drive” on page 36 • “1040 Hard disk drive” on page 37 •... - Page 52 G40-30/G40-45/G40-70/G40-70m/Z40-70/Z40-75 Hardware Maintenance Manual Figure 9. Removal steps of keyboard bezel (continued) Disconnect the touchpad cable connector and the power board connector in the directions shown by arrows 2 and 3. Remove the keyboard bezel in the direction shown by arrow 4.
- Page 53 Lenovo G40-30/G40-45/G40-70/G40-70m/Z40-70/Z40-75 Figure 9. Removal steps of keyboard bezel (continued) Remove the screw 5. Step Screw (quantity) Color Torque M2 × 3.5 mm, flat-head, nylok-coated (1) Black 1.5 ~ 2.0 kgf*cm Power BD to C Carefully remove the power board in the direction shown by arrow 6.
-
Page 54: 1100 Usb&Audio Board
G40-30/G40-45/G40-70/G40-70m/Z40-70/Z40-75 Hardware Maintenance Manual 1100 USB&audio board For access, remove these FRUs in order: • “1010 Battery pack” on page 33 • “1020 Base cover” on page 34 • “1030 Optical drive” on page 36 • “1040 Hard disk drive” on page 37 •... - Page 55 Lenovo G40-30/G40-45/G40-70/G40-70m/Z40-70/Z40-75 Figure 10. Removal steps of USB&audio board (continued) Remove the USB&audio board 4.
-
Page 56: 1110 System Board
G40-30/G40-45/G40-70/G40-70m/Z40-70/Z40-75 Hardware Maintenance Manual 1110 System board Important notices for handling the system board: When handling the system board, bear the following in mind. • Be careful not to drop the system board on a bench top that has a hard surface, such as metal, wood, or composite. • Avoid rough handling of any kind. • During the whole process, make sure not to drop or stack the system board. • If you put a system board down, make sure to put it only on a padded surface such as an ESD mat or conductive corrugated material. For access, remove these FRUs in order: • “1010 Battery pack” on page 33 • “1020 Base cover” on page 34 •... - Page 57 Lenovo G40-30/G40-45/G40-70/G40-70m/Z40-70/Z40-75 Figure 11. Removal steps of system board (continued) Unplug the speaker connector in the direction shown by arrow 3. Remove the screws 4 and 5. Step Screw (quantity) Color Torque M2 × 3.5 mm, flat-head, nylok-coated (1) Black 1.5 ~ 2.0 kgf*cm MB to D M2 ×...
- Page 58 G40-30/G40-45/G40-70/G40-70m/Z40-70/Z40-75 Hardware Maintenance Manual Figure 11. Removal steps of system board (continued) Remove the system board in the direction shown by arrow 6.
-
Page 59: 1120 Heat Sink Assembly
Color Torque M2 × 3.5 mm, flat-head, nylok-coated (7) Black 1.5 ~ 2.0 kgf*cm (G40-30/G40-45/G40-70) CPU BKT to MB, GPU BKT to MB M2 × 3.5 mm, flat-head, nylok-coated (6) Black 1.5 ~ 2.0 kgf*cm (G40-70m/Z40-70/Z40-75) CPU BKT to MB, GPU BKT to MB Lift the heat sink assembly in the direction shown by arrow 2. -
Page 60: 1130 Speakers And Dc-In Cable
G40-30/G40-45/G40-70/G40-70m/Z40-70/Z40-75 Hardware Maintenance Manual 1130 Speakers and DC-in cable For access, remove these FRUs in order: • “1010 Battery pack” on page 33 • “1020 Base cover” on page 34 • “1030 Optical drive” on page 36 • “1040 Hard disk drive” on page 37 •... - Page 61 Lenovo G40-30/G40-45/G40-70/G40-70m/Z40-70/Z40-75 Figure 13. Removal steps of speakers and DC-in cable (continued) Remove the DC-in cable in the direction shown by arrow 2.
-
Page 62: 1140 Lcd Unit
G40-30/G40-45/G40-70/G40-70m/Z40-70/Z40-75 Hardware Maintenance Manual 1140 LCD unit For access, remove these FRUs in order: • “1010 Battery pack” on page 33 • “1020 Base cover” on page 34 • “1030 Optical drive” on page 36 • “1040 Hard disk drive” on page 37 •... - Page 63 Lenovo G40-30/G40-45/G40-70/G40-70m/Z40-70/Z40-75 Figure 14. Removal steps of LCD unit (continued) Remove the LCD unit in the direction shown by arrow 2.
-
Page 64: 1150 Lcd Front Bezel, Lcd Panel, And Hinges
G40-30/G40-45/G40-70/G40-70m/Z40-70/Z40-75 Hardware Maintenance Manual 1150 LCD front bezel, LCD panel, and hinges For access, remove these FRUs in order: • “1010 Battery pack” on page 33 • “1020 Base cover” on page 34 • “1030 Optical drive” on page 36 •... - Page 65 Lenovo G40-30/G40-45/G40-70/G40-70m/Z40-70/Z40-75 Figure 15. Removal steps of LCD front bezel, LCD panel, and hinges (continued) Remove the screws 2. Step Screw (quantity) Color Torque M2 × 3.5 mm, flat-head, nylok-coated (4) Black 1.5 ~ 2.0 kgf*cm LCD Module to Hinge & A Lift the LCD panel slightly 3.
- Page 66 G40-30/G40-45/G40-70/G40-70m/Z40-70/Z40-75 Hardware Maintenance Manual Figure 15. Removal steps of LCD front bezel, LCD panel, and hinges (continued) Remove the screws 5. Then release the hinges in the direction shown by arrows 6. Step Screw (quantity) Color Torque M2 × 3.5 mm, flat-head, nylok-coated (4) Black 1.5 ~ 2.0 kgf*cm...
-
Page 67: 1160 Camera
Lenovo G40-30/G40-45/G40-70/G40-70m/Z40-70/Z40-75 1160 Camera For access, remove these FRUs in order: • “1010 Battery pack” on page 33 • “1020 Base cover” on page 34 • “1030 Optical drive” on page 36 • “1040 Hard disk drive” on page 37 •... - Page 68 G40-30/G40-45/G40-70/G40-70m/Z40-70/Z40-75 Hardware Maintenance Manual Figure 16. Removal steps of camera (continued) Remove the camera in the direction shown by arrow 2. Note: The integrated camera is stuck on the top center of the LCD cover. When installing: Stick the integrated camera to the top center of the LCD...
-
Page 69: 1170 Lcd Cable And Antenna Assembly
Lenovo G40-30/G40-45/G40-70/G40-70m/Z40-70/Z40-75 1170 LCD cable and antenna assembly For access, remove these FRUs in order: • “1010 Battery pack” on page 33 • “1020 Base cover” on page 34 • “1030 Optical drive” on page 36 • “1040 Hard disk drive” on page 37 •... -
Page 70: Locations
G40-30/G40-45/G40-70/G40-70m/Z40-70/Z40-75 Hardware Maintenance Manual Locations Front view and right-side view 1 Integrated camera 2 Built-in microphone Note: Select models may have two microphones, please refer to the actual product. 3 Wireless LAN antennas 4 Computer display 5 Power button 6 Touchpad 7 System status indicators Note: For the description of each indicator, see “Status indicators”... -
Page 71: Bottom And Left-Side View
Lenovo G40-30/G40-45/G40-70/G40-70m/Z40-70/Z40-75 Bottom and Left-side view 1 Speaker 2 USB port 3 HDMI port 4 RJ-45 port 5 VGA port 6 Fan louvers 7 Novo button 8 AC power adapter jack... -
Page 72: Parts List
G40-30/G40-45/G40-70/G40-70m/Z40-70/Z40-75 Hardware Maintenance Manual Parts list This section presents the following service parts: • “Overall” on page 69 • “LCD FRUs” on page 77 • “Keyboard” on page 79 • “Miscellaneous parts” on page 81 • “AC adapters” on page 82 •... -
Page 73: Overall
Lenovo G40-30/G40-45/G40-70/G40-70m/Z40-70/Z40-75 Overall... - Page 74 90005904 Z40-70/G40-70m/Z40-75) Power Board L G40-45 W/Cable (G40-45) 5C50F77269 ACLU9 MB N3520 1G 1000M (G40-30) 90007376 ACLU9 MB W8P N3520 1G 1000M (G40-30) 90007400 ACLU9 MB W8S N3520 1G 1000M (G40-30) 90007388 ACLU9 MB N3520 1G 100M (G40-30) 90007377 ACLU9 MB W8P N3520 1G 100M (G40-30)
- Page 75 Lenovo G40-30/G40-45/G40-70/G40-70m/Z40-70/Z40-75 Table 4. Parts list—Overall (continued) No. FRU FRU no. CRU ID. L G40-45 DIS A6-6310 1G (G40-45) 5B20F77252 L G40-45 W8S UMA A6-6310 (G40-45) 5B20F77246 L G40-45 W8S DIS A6-6310 2G (G40-45) 5B20F77277 L G40-45 W8S DIS A6-6310 1G (G40-45)
- Page 76 G40-30/G40-45/G40-70/G40-70m/Z40-70/Z40-75 Hardware Maintenance Manual Table 4. Parts list—Overall (continued) No. FRU FRU no. CRU ID. ACLU1 MB W8P I3-4100U 2G 100M (G40-70) 90006452 ACLU1 MB W8S I3-4100U 2G 100M (G40-70) 90006453 ACLU1 MB I3-4100U 2G 1000M (G40-70) 90006448 ACLU1 MB W8P I3-4100U 2G 1000M (G40-70)
- Page 77 Lenovo G40-30/G40-45/G40-70/G40-70m/Z40-70/Z40-75 Table 4. Parts list—Overall (continued) No. FRU FRU no. CRU ID. ACLU1 MB UMA I3-4010U 100M (G40-70) 90006472 ACLU1 MB W8P UMA I3-4010U 100M (G40-70) 90006473 ACLU1 MB W8S UMA I3-4010U 100M (G40-70) 90006474 ACLU1 MB UMA I3-4010U 1000M (G40-70)
- Page 78 G40-30/G40-45/G40-70/G40-70m/Z40-70/Z40-75 Hardware Maintenance Manual Table 4. Parts list—Overall (continued) No. FRU FRU no. CRU ID. ACLUA MB DIS I3-4100 GT 2G (Z40-70) 90007156 ACLUA MB DIS I3-4010 GT 2G (Z40-70) 90007157 ACLUA MB DIS I3-4005 GT 2G (Z40-70) 90007158 ACLUA MB DIS 3558 GT 2G (Z40-70)
- Page 79 90205115 ACLUG Heatsink DIS (Z40-70/G40-70m) 90205317 ACLU1 Fan 90205116 USB&Audio Board L G40-45 W/Cable (G40-45) 5C50F77260 ACLU1 USB&Audio Board W/Cable (G40-30/G40-70/ 90005905 Z40-70/G40-70m/Z40-75) ACLU1 Speaker L+R (G40-70) 90205227 HDD, ST320LT012 6G 7mm 5.4K 320G HDD 16200384 HDD, WD3200LPCX-24C6HT0 6G 7mm 5.4K 320G HDD 16200551 HDD, HTS545032A7E660 6G 7mm 5.4K 320G HDD...
- Page 80 G40-30/G40-45/G40-70/G40-70m/Z40-70/Z40-75 Hardware Maintenance Manual Table 4. Parts list—Overall (continued) No. FRU FRU no. CRU ID. RAM, SK HMT41GS6BFR8A-PB/RD 8GB DDR3L 1600 11202707 WirelessLan_Non_Intel, Ltn NFA335 1x1BN+BT4.0 20200558 PCIE M.2 WLAN WirelessLan_Non_Intel, Cbt BCM43142 20200557 1x1BN+BT4.0 PCIE M.2 WLAN WirelessLan_Non_Intel, Cbt RTL8723BE 20200570 1x1BN+BT4.0 PCIE M.2 WLAN...
-
Page 81: Lcd Frus
Lenovo G40-30/G40-45/G40-70/G40-70m/Z40-70/Z40-75 LCD FRUs In Lenovo G40-30/G40-45/G40-70/G40-70m/Z40-70/Z40-75, there are following types of LCDs. - Page 82 90205228 ACLU1 Camera Board 1M (G40-30/G40-45/G40-70) 90005906 ACLU1 Camera Board 0.3M (G40-30/G40-45/G40-70) 90005907 ACLUG Camera Board 720P (Z40-70/G40-70m/Z40-75) 90006949 ACLU9 LCD Cover DIS RED (G40-30/G40-45) 90205540 ACLU9 LCD Cover DIS SV (G40-30/G40-45) 90205542 ACLU1 LCD Cover Black DIS 90205103 ACLU1 LCD Cover Black UMA (Z40-70/G40-70)
-
Page 83: Keyboard
Lenovo G40-30/G40-45/G40-70/G40-70m/Z40-70/Z40-75 Keyboard Table 6. Parts list—Keyboard Language CRU ID. English 25214510 U.K. English 25214511 Italian 25214512 Spanish 25214513 Turkish 25214514 Thai 25214515 Portuguese 25214516 Latin 25214517 Canadian English&French 25214518 Korean 25214519 Traditional Chinese 25214520 Russian 25214521 French 25214522 German... - Page 84 G40-30/G40-45/G40-70/G40-70m/Z40-70/Z40-75 Hardware Maintenance Manual Table 6. Parts list—Keyboard (continued) Language CRU ID. Arabic 25214554 Brazilian 25214555 Dutch 25214557 Greek 25214558 Hebrew 25214559 Hungarian 25214560 Four Nordic countries 25214561 Sunrex Belgian 25214562 Icelandic 25214563 Slovenian 25214564 Swiss 25214565 International English 25214566...
-
Page 85: Miscellaneous Parts
• ( a ) ACLU1 HDD Bracket L+R (G40-70/G40-70m/Z40-70) 90205110 • ( b ) ACLU1 ODD Bracket 90205111 • ( c ) ACLU1 ODD Bezel Tray-in (G40-30/G40-45/G40-70) 90205109 • ( c ) ACLUG ODD Bezel Black M (Z40-70/G40-70m/Z40-75) 90205315 • ( c ) ACLUG ODD Bezel White H (Z40-70/G40-70m) 90205316 •... -
Page 86: Ac Adapters
G40-30/G40-45/G40-70/G40-70m/Z40-70/Z40-75 Hardware Maintenance Manual AC adapters Table 8. Parts list—3-pin AC adapters CRU ID. Delta ADLX45NDC3A 20V2.25A adapter 36200245 Liteon ADLX45NLC3A 20V2.25A adapter 36200246 Chicony ADLX45NCC3A 20V2.25A adapter 36200247 Delta ADLX45NDC3A 20V2.25A adap(CMN) 36200602 Liteon ADLX45NLC3A 20V2.25A adap(CMN) 36200606 Chicony ADLX45NCC3A 20V2.25A adap(CMN) 36200610 Delta ADLX65NDC3A 20V3.25A adapter... -
Page 87: Power Cords
Lenovo G40-30/G40-45/G40-70/G40-70m/Z40-70/Z40-75 Power cords A Lenovo power cord for a specific country or region is usually available only in that country or region: Table 10. Parts list—power cords Region CRU ID. CCC 3PIN 145000600 • LINETEK PC323+RVV300/300+LS15 1m Argentina 3PIN 145000599 •... - Page 88 G40-30/G40-45/G40-70/G40-70m/Z40-70/Z40-75 Hardware Maintenance Manual Table 10. Parts list—power cords (continued) Region CRU ID. Switzerland 3PIN 145000565 • Longwell LP-37+H03VV-F+LS-18 1m Brazil 3PIN 145000564 • Longwell LP-46+H03VV-F+LS-18 1m Israel 3PIN 145000563 • Longwell LP-41+H03VV-F+LS-18 1m UL 3PIN 145000562 • Longwell LP-30B+SPT-2 18AWG+LS-18 1m...
- Page 89 Lenovo G40-30/G40-45/G40-70/G40-70m/Z40-70/Z40-75 Table 10. Parts list—power cords (continued) Region CRU ID. Japan 3PIN 145000530 • VOLEX VAC5S+VCTF+M755 1m Argentina 3PIN 145000528 • VOLEX VA2073+H03VV-F+VAC5S 1m Brazil 3PIN 145000527 • VOLEX CH10S3+H03VV-F+VAC5S 1m Israel 3PIN 145000526 • VOLEX SI16S3+H03VV-F+VAC5S 1m CE 3PIN 145000525 •...
-
Page 90: Notices
The result obtained in other operating environments may vary. Lenovo may use or distribute any of the information you supply in any way it believes appropriate without incurring any obligation to you. -
Page 91: Trademarks
Actual results may vary. Users of this document should verify the applicable data for their specific environment. Trademarks The following terms are trademarks or registered trademarks of Lenovo in the United States, other countries, or both. Lenovo OneKey Microsoft and Windows are trademarks of Microsoft Corporation in the United States, other countries, or both.